Tascam 12 Owner's Manual
Multitrack recording console
Hide thumbs
Also See for 12:
- Owner's manual (68 pages) ,
- Manual (16 pages) ,
- Owner's manual addendum (5 pages)

Related Manuals for Tascam 12


Summary of Contents for Tascam 12
- Page 1 042100812 Model 12 Multitrack Recording Console OWNER’S MANUAL MODE D’EMPLOI MANUAL DEL USUARIO...
- Page 2 TASCAM is a registered trademark of TEAC Corporation. o SDXC Logo is a trademark of SD-3C, LLC. o The Bluetooth® word mark and logo are the property of Bluetooth SIG, Inc. and are used by TEAC Corporation with permission.
-
Page 3: Important Safety Instructions
Declaration of Conformity Do not block any ventilation openings. Install in accordance with the manufacturer’s instructions. Model Number: Model 12 Do not install near any heat sources such as radiators, heat Trade Name: TASCAM registers, stoves, or other apparatus (including amplifiers) Responsible party: TEAC AMERICA, INC. - Page 4 For China “仅适用于海拔2000m以下地区安全使用” “仅适用于非熱帯气候条件下安全使用” “環境保護使用年限” 产品有毒有害物质或元素的名称及含量 机种: Model 12 有毒有害物质或元素 铅 汞 镉 六价铬 多溴联苯 多溴二苯醚 品名 (Pb)
-
Page 5: Wireless Equipment Precautions
2014/53/EU., and the other Directives, and Commission Regulations. The full text of the EU declaration of conformity is available at the following internet address: Please contact us by e-mail. http://tascam.eu/en/kontakt.html EU Importer: TEAC Europe GmbH Bahnstrasse 12, 65205 Wiesbaden-Erbenheim, Germany TASCAM Model 12... - Page 6 TASCAM Model 12...
-
Page 7: Instructions De Sécurité Importantes
été renversé sur l’appareil ou si des objets sont tombés dedans, si l’appareil a été exposé à la pluie ou à l’humidité, s’il ne fonctionne pas normalement, ou s’il est tombé. TASCAM Model 12... - Page 8 Pour des informations plus détaillées sur la mise au rebut des vieux équipements électriques/ électroniques et piles/accumulateurs hors d’usage, veuillez contacter votre mairie, le service d’ordures ménagères ou le magasin dans lequel vous avez acquis l’équipement. TASCAM Model 12...
-
Page 9: Précautions Concernant Les Appareils Sans Fil
Commission. Le texte intégral de la déclaration de conformité pour l’UE est disponible à l’adresse internet suivante (veuillez nous contacter par e-mail). https://www.tascam.eu/en/kontakt.html Importateur pour l’UE : TEAC EUROPE GmbH. Bahnstrasse 12, 65205 Wiesbaden-Erbenheim, Allemagne TASCAM Model 12... - Page 10 TASCAM Model 12...
-
Page 11: Instrucciones Importantes De Seguridad
No utilice este aparato cerca del agua. Limpie este aparato solo con un trapo seco. Declaración de conformidad No bloquee ninguna de las aberturas de ventilación. Modelo: Model 12 Instale este aparato de acuerdo con las instrucciones del Fabricante: TASCAM fabricante. - Page 12 Ayuntamiento, empresa de limpieza o recogida de basuras o con el comercio en el que adquirió este aparato. TASCAM Model 12...
-
Page 13: Precauciones De Aparatos Inalámbricos
El texto completo de la declaración de conformidad para la EU está disponible en la siguiente página web. En caso de dudas,póngase en contacto con nosotros vía email. https://www.tascam.eu/en/kontakt.html Importador para la UE: TEAC Europe GmbH Bahnstrasse 12, 65205 Wiesbaden-Erbenheim, Germany TASCAM Model 12... - Page 14 TASCAM Model 12...
-
Page 15: Table Of Contents
About SD cards..................18 Editing song names ................37 Precautions for use .................18 Editing text ..................37 SD card write protection ..............18 Loading songs created on different TASCAM Model series products ....................38 Note about formatting ..............18 Bluetooth® ....................19 5 - Basic recording ..............39 Profiles ....................19... - Page 16 11 - Using a computer to transfer data ......... 63 Connecting with a Computer ............63 Disconnecting ..................64 Loading WAV files from a computer ..........64 12 - USB audio interface functions ........65 Installing the dedicated software ...........65 Installing the Windows dedicated software ......65 Installing the Mac dedicated software ........66 Working with Gatekeeper ............66...
-
Page 17: Introduction
11–12) o USB audio interface functions built-in ATTENTION i 12 tracks (10 input channels and MAIN MIX L/R bus) can Always use the included AC adapter (PS-M1524A) and AC be input to the computer adapter power cord with this unit. Never use the included AC adapter or AC power cord with any other device. -
Page 18: Precautions For Placement And Use
Places with significant vibrations this product from the TEAC Global Site (http://teac-global.com) Next to a window or in another location exposed to direct to find the list or contact the TASCAM customer support service. sunlight Near heaters or other extremely hot places... -
Page 19: Bluetooth
Site: supports Bluetooth (Bluetooth device). http://teac-global.com/ In the TASCAM Downloads section, select the desired language ATTENTION to open the Downloads website page for that language. The Bluetooth function of this unit is not guaranteed to enable connection or operation with all Bluetooth devices. -
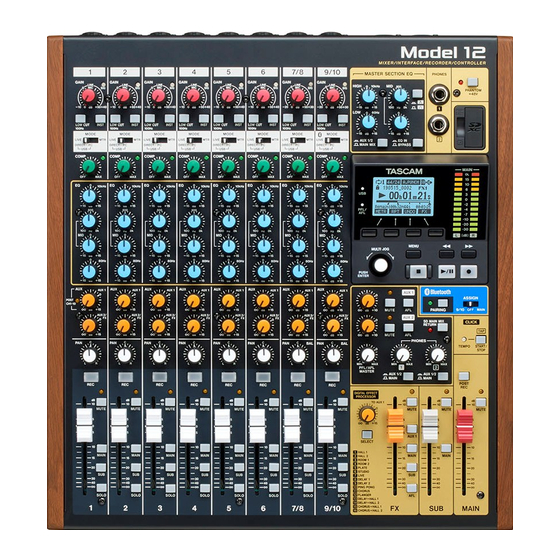
Page 20: Names And Functions Of Parts
Use the GAIN knobs to adjust the input levels of each equipment. channel. its SIG indicator will light green when a signal is input (-40dBu or higher: MIC input). If a SIG indicator stays lit red continuously, lower the GAIN knob (+7dBu or higher: MIC input). TASCAM Model 12... -
Page 21: Input Channel Mixing Section-2
When a PAN knob is turned all the way to the right (R), that channel signal is sent only to the right MAIN MIX L/R bus. It is not sent to the left bus. TASCAM Model 12... -
Page 22: Equalizer Section
When this switch is EQ IN, the equalizer will affect the output signals set with the AUX 1/2/MAIN MIX switch. When set to BYPASS, the equalizer will not be applied regardless of the AUX 1/2/MAIN MIX switch setting. TASCAM Model 12... -
Page 23: Monitoring Section
PHONES knob. Failure to do so could result in a sudden loud noise that could harm hearing, for example. # AUX 1/2 /MAIN switch Turn these switches on to monitor signals from the AUX 1 and AUX 2/FX buses. TASCAM Model 12... -
Page 24: Analog Output Adjustment Section
MAIN MIX L/R bus i SOLO L/R bus i AUX1 bus i SUB L/R bus ( TO AUX 1 knob Use these to adjust the levels of signals sent from the built-in effects to the AUX1 bus. TASCAM Model 12... -
Page 25: Rear Panel
Use these standard TRS jacks to connect external devices F DC IN 15V connector (effects). Connect the included AC adapter (PS-M1524A) here. (see i TRS (Tip: SEND, Ring: RETURN, Sleeve: GND) “Connecting the power” on page 31) TASCAM Model 12... -
Page 26: Home Screen
Set the F4 button function on the KEY FUNCTION screen. (see “Using mark functions” on page 49) and (see “Function Indicator Meaning button setting” on page 52) Stopped at the beginning of the file Paused Recording Playback TASCAM Model 12... -
Page 27: Meters Screen
Player and iTunes, is sent to channels 1-2. MTR RETURN Screen This shows the playback signal levels of songs recorded on SD cards. Channels that have recording data in the song Channels that do not have recording data in the song TASCAM Model 12... -
Page 28: Menu Structure
Make USB audio settings page 69 INITIALIZE Restore factory default settings page 61 MEDIA FORMAT Format the SD card page 61 NOTE The settings for all menu items are retained even when the unit is turned off. TASCAM Model 12... -
Page 29: Basic Menu Screen Operations
Repeat steps 3 to 8 as necessary to set other items. Press the F1 button to return to the MENU Screen. Press the MENU button to open the MENU Screen. NOTE Press the F1 button to return to the Home Screen. TASCAM Model 12... -
Page 30: Preparation
3 - Preparation Connecting the power supply and other equipment This is an example of Model 12 connections. Precautions before making connections o Carefully read the operation manuals of the devices to be connected and then connect them correctly. o Before making connections, turn this unit and all equipment to be connected off (standby). -
Page 31: Connecting The Power
3 - Preparation Connecting the power Connecting smartphones/portable audio players Use the included AC adapter (TASCAM PS-M1524A) to connect a power supply to the unit as shown below. Use the MUSIC/TALK jack to connect a smartphone or portable audio player. -
Page 32: Connecting With Bluetooth Devices
Press the SD card in gently to make it to come up. Select “Model 12” (this unit) on the other Bluetooth device. Pull the SD card out. When pairing succeeds, the PAIRING indicator will stop blinking and remain lit, and connection with the other device will be complete. -
Page 33: Turning The Power On And Off
When setting the time, the time display will be stopped. i By setting the TYPE item to “DATE” on the SONG NAME Screen, the date and time set here can be used for song names. (see “Setting the song name format” on page 60) TASCAM Model 12... -
Page 34: Adjusting The Display
Press the MULTI JOG dial to move the cursor to the DIMMER item. Adjust the display brightness. Options: HIGH (default), LOW Press the MULTI JOG dial to confirm the setting. Press the F1 button to return to the SYSTEM Screen. TASCAM Model 12... -
Page 35: Managing Songs
Loads the selected song. When the selected song is the current song, SAVE will appear and information about it will be saved. INFORMATION View information about the selected song. CLR ALL MARKS Clear all marks in the song. TASCAM Model 12... -
Page 36: Loading Songs
The current song cannot be deleted. To delete the current song, load another song first. The song name, sampling frequency, bit rate, size, date and time last written will be shown. After checking, press the F1 button to return to the SONG Screen. TASCAM Model 12... -
Page 37: Protecting/Unprotecting Songs
Leaving a single space open: Turn the MULTI JOG dial to select a blank space at the left end of any row, and press the MULTI JOG dial. Canceling edits: Press the F1 button. Confirming the changes: Press the F4 button. TASCAM Model 12... -
Page 38: Loading Songs Created On Different Tascam Model Series Products
MAIN MIX L/R tracks will be loaded as MAIN MIX L/R tracks. “Menu operation procedures” on page 29) The song will not be converted. Example: Loading a song from a Model 24 to a Model 12 Source song Song after loading Tracks 1–10... -
Page 39: Basic Recording
When phantom power is turned on, the PHANTOM +48V indicator lights and a pop-up message appears on the display to confirm turning it on. Press the MULTI JOG dial to provide phantom power to the MIC/ LINE (BAL)/INST (1-6, 7/8 and 9/10) XLR connectors. TASCAM Model 12... -
Page 40: Sig Indicators And Level Meters
Recording The channel 1-6, 7/8-9/10 SIG indicators and level meters shown This unit can simultaneously record up to 12 tracks, including 10 on the Meter Screen can be used to check the levels of this unit’s channel inputs and the MAIN MIX L/R bus. -
Page 41: Undoing Operations
” appears on the Home Screen, press the F3 button. The following confirmation pop-up message will appear. Press the F4 button to restore the previous operation and return to the state before undoing. NOTE To cancel redoing, press the F1 button. TASCAM Model 12... -
Page 42: Using The Library
The built-in effect cannot be used (because the AUX 2 jack is in use). NOTE When the built-in effect is off, the icon appears on the Home Screen. Press the F1 button to return to the Home Screen. TASCAM Model 12... -
Page 43: Recorder Functions
When the Home Screen is open and the recorder is stopped, press the MULTI JOG dial to enable direct locate By connecting the recommended TASCAM RC-1F footswitch mode. A cursor will appear at the location to be changed in (sold separately) to the FOOTSWITCH jack on the top of the unit, the recorder counter. -
Page 44: Automatic Punch In/Out Function
When the punch out point is reached, both track playback and input source signals will be monitored. The 0 button will become unlit. i Playback will automatically stop two seconds after the punch out point. The 7/9 button will blink. Rehearsal can be repeated. TASCAM Model 12... -
Page 45: Using Automatic Punching In And Out
When the punch out point is reached, both track playback and input source signals will be monitored. The 0 button will become unlit. i Playback will automatically stop two seconds after the punch out point. The 7/9 button will blink. TASCAM Model 12... -
Page 46: Track Editing
To cancel clearing tracks, press the F1 IMPORT screen. In this case, the file will be imported button. and the bit length will be changed to match the i Undoing is possible only for the last cleared track. current song. TASCAM Model 12... -
Page 47: Swapping Tracks
TRACK SWAP Screen. Turn the MULTI JOG dial to select a track. Options: 1 (default), 2, 3, 4, 5, 6, 7, 8, 7/8, 9, 10, 9/10, 11, 12, 11/12 Press the MULTI JOG dial to move the cursor to the B item. -
Page 48: Stereo Mix Export Function
When conversion completes, the MENU Screen will reopen. NOTE Converted files can be played using this unit’s SD PLAY mode. For details about playback with the SD PLAY mode, see “Playing WAV files on SD cards (SD PLAY mode)” on page TASCAM Model 12... -
Page 49: Mark Functions
Repeat steps 1 - 3 to clear multiple marks. i To clear all marks in the current song, select the CLR ALL MARKS item from the menu list shown on the SONG Screen. (see “Clearing all marks” on page 36) TASCAM Model 12... -
Page 50: Other Functions
Click is output during count in and COUNT IN+REC recording Click is output during recording Click is output during recording REC&PLAY and playback Press the MULTI JOG dial to confirm the setting. The CLICK OUT Screen reopens. TASCAM Model 12... -
Page 51: Making Metronome Settings
Turn the MULTI JOG dial to set the CLICK jack output level. Options: 0–50 (default: 30) Press the MULTI JOG dial to confirm the setting. The settings screen reopens. TASCAM Model 12... -
Page 52: Setting The Count In Function
Option Meaning Set the time signature to 4/4, 3/4, etc. Regardless of the signature setting, The setting range is from 1/1 to 12/8. (Default: 4/4) 2 BEAT two quarter notes are output. No beat is accented. Regardless of the signature setting, 3 BEAT three quarter notes are output. -
Page 53: Midi Functions
MIDI time code is not transmitted. MIDI time code is transmitted. NOTE The MIDI time code frame type sent by this unit is 30 frames per second (non-drop). Press the MULTI JOG dial to confirm the setting. The MIDI Screen reopens. TASCAM Model 12... -
Page 54: Mixer Functions
Press the MULTI JOG dial to confirm the setting. The MTR/USB SEND POINT Screen reopens. MTR/USB SEND POINT screen settings The audio sent by computor depends on the Model 12 MODE switch settings and the MTR/USB SEND POINT screen settings. MTR/USB SEND POINT COMP... -
Page 55: Setting The Phase Of Each Channel
Screen, and open the MIXER Screen. (see “Menu operation Press the MULTI JOG dial to confirm the setting. procedures” on page 29) The MIXER Screen reopens. Select AUX1 SEND on the MIXER Screen, and open the AUX1 SEND Screen. TASCAM Model 12... -
Page 56: Footswitch Functions
VAMP out Select the MODE item, and open the MODE Screen. point. o Press during VAMP playback to turn VAMP playback off. Press the MULTI JOG dial to confirm the assigned function. The FOOTSW screen reopens. TASCAM Model 12... -
Page 57: Setting The Footswitch Polarity
Options: NORMALLY OPEN (default), NORMALLY CLOSED Editing Screen. Confirm that the icon appears on the VAMP Editing NOTE Screen. When using a TASCAM RC-1F, set the POLARITY switch to “N.OPEN”. NOTE Press the F4 button to turn the VAMP playback function on/off. -
Page 58: Moving Between Vamp Points
VAMP in point. When the song playback position reaches VAMP-2, VAMP playback will start automatically. VAMP playback of VAMP-2 will continue until the F4 button is pressed again. Conduct the same operations for following pairs of VAMP in/out points. TASCAM Model 12... -
Page 59: Disabling The Vamp Playback Function
Press the F4 button to end VAMP playback at VAMP-1 and continue playing the song. The VAMP playback function turns off ( ), and VAMP playback will not occur even if another VAMP in point is reached. TASCAM Model 12... -
Page 60: 10 - Settings And Information
The SONG Screen shows the use status of the “MTR” folder. For details about how to set characters, see “Editing text” on page 37. TOTAL SONG This shows the total number of songs in the “MTR” folder. TASCAM Model 12... -
Page 61: Restoring Factory Default Settings
(including malfunction and age). When the recorder is stopped, select MEDIA FORMAT on the SYSTEM Screen, and open the MEDIA FORMAT Screen. (see “Menu operation procedures” on page 29) QUICK: Execute quick formatting. ERASE (Recommendation): Erase and format the card. TASCAM Model 12... -
Page 62: Playing Wav Files On Sd Cards (Sd Play Mode)
Press the F1 button to return to the MENU Screen. i Press the F2 button to move up one level. NOTE Only WAV files can be played back. Unsupported files will not be shown. TASCAM Model 12... -
Page 63: 11 - Using A Computer To Transfer Data
The USB cable can be connected either before or after turning Backed up data can be restored to other Model 12 units. Since this unit on. this allows you to freely move files between Model 12 units, you... -
Page 64: Disconnecting
USB port. (see “Connecting with a Computer” on page 63) Click the “Model 12” drive on the computer to show the “MTR”, “MUSIC” and “UTILITY” folders. Drag and drop files on the computer that you want to transfer to the unit to the “MUSIC”... -
Page 65: 12 - Usb Audio Interface Functions
12 - USB audio interface functions Read the contents of the License Agreement, and select “I Installing the dedicated software accept the agreement” if you agree to the terms. Then, click the “Next >” button. To use this unit as a USB audio interface with a Windows computer, dedicated software must be installed on the computer. -
Page 66: Installing The Mac Dedicated Software
12 - USB audio interface functions Next, click the “Install” button to start installation. Installing the Mac dedicated software NOTE i Install the Mac dedicated software on the computer before connecting the unit to it with the USB cable. i Depending on the Gatekeeper setting, a warning message might appear during installation. -
Page 67: Uninstalling The Dedicated Software
Open the Settings Panel in the following manner. Windows Changing the Gatekeeper setting o From the “Start” menu select “TASCAM Model Mixer” under “TASCAM” The Gatekeeper setting can be changed using the “Allow applications downloaded from:” item on the “General” page of the “Security &... -
Page 68: Settings Panel Overview
If the Control Panel is set to be viewed as icons, a “Sound” icon will appear. 2 Buffer Size (Windows only) On the “Playback” page, right-click “Model 12”, and click “Set You can adjust the size of the buffer used to handle the as Default Device” in the pop-up menu that appears. -
Page 69: Simultaneous Asio/Wdm Playback
Model 12 unit settings Example: Windows (WDM) at 48000 Hz, ASIO at 44100 Hz Set the MODEL 12 USB audio mode to STEREO MIX. (see “USB audio mode” on page 69) Only sound from a DAW and other ASIO sources are output. - Page 70 12 - USB audio interface functions Set the output device to “Speakers (Model 12)”. Open the Playback tab, and select “Speakers (Model 12)”. Set the input device to “Microphone (Model 12)”. Click “Sound Control Panel” to open the Sound window.
-
Page 71: 13 - Midi Implementation Chart
MTC full message when MIDI TIME CODE is ON When MIDI TIME CODE is ON When MIDI CLOCK/SPP is ON Mode 1: OMNI ON, POLY Mode 2: OMNI ON, MONO –: YES Mode 3: OMNI OFF, POLY Mode 4: OMNI OFF, MONO —: NO TASCAM Model 12... -
Page 72: 14 - Messages
14 - Messages The following is a list of messages that appear in pop-up windows. Refer to this list if one of these pop-up messages appears on the Model 12 and you want to check the meaning or determine a proper response. - Page 73 If any of these errors occurs, turn the unit off and restart it. Player Error If these error messages continue to appear frequently, please contact the store where you purchased this UNDO not available unit or TASCAM customer support. Writing Failed Sys Rom Err System Err XX (XX is a number.)
-
Page 74: 15 - Troubleshooting
Turn OFF and restart the Model 12. o Are that channel faders raised to suitable levels? o pp Remove the “Model 12” pairing record from the other o Is the MAIN fader raised to a suitable level? Bluetooth device, and try pairing the unit with that Bluetooth o Is a monitoring system correctly connected to the PHONES device again. -
Page 75: 16 - Specifications
WAV (BWF): 44.1/48kHz, 16/24-bit MAIN OUTPUT L/R jacks Recordable Channel Connectors: XLR-3-32 (1: GND, 2: HOT, 3: COLD) Max. 12 channels (10ch + 2 stereo mix) Maximum output level: +22 dBu Nominal output level: +4 dBu Inputs and outputs Output impedance: 200 Ω... -
Page 76: Computer System Requirements
MIC w MAIN OUT: 74 dB 2 GHz or faster dual core processor MIC w INSERT OUT: 54 dB Memory MIC w SUB OUT: 74 dB MIC w AUX OUT: 75 dB 2 GB or more USB/SD w MAIN OUT: 24 dB TASCAM Model 12... -
Page 77: Bluetooth
Operating temperature range 5 - 35°C (41 - 95°F) o Illustrations in this manual might differ in part from the actual product. o pp Specifications and external appearance might be changed without notification to improve the product. TASCAM Model 12... - Page 78 Écoute de contrôle (monitoring) ...........103 Utilisation du site mondial TEAC ............. 82 Voyants SIG et indicateurs de niveau ..........104 À propos du service d'assistance clientèle TASCAM ....82 Enregistrement ..................104 Annulation d’opérations ..............105 2 – Nomenclature et fonctions des parties ......83 Annulation de l’opération précédente ........105...
- Page 79 Branchement à un ordinateur ............127 Déconnexion..................128 Chargement de fichiers WAV depuis un ordinateur ....128 12 – Fonctions d’interface audio USB ........129 Installation des logiciels dédiés .............129 Installation des logiciels dédiés pour Windows ....129 Installation du logiciel dédié pour Mac ........130 Travailler avec le Gatekeeper .............130...
-
Page 80: Introduction
Mode d'emploi (ce document) incluant la garantie ....x 1 o Enregistrement et lecture multipiste avec enregistrement sur ATTENTION 12 pistes (canaux d’entrée 1–6, 7/8, 9/10 et canaux 11-12 du Utilisez toujours l’adaptateur secteur (PS-M1524A TASCAM) bus MAIN MIX L/R) fourni avec cette unité. -
Page 81: Précautions Concernant L'emplacement Et L'emploi
TEAC Lieux sujets à des vibrations importantes (http://teac-global.com) pour obtenir cette liste, sinon contactez le service clientèle TASCAM. Près d'une fenêtre ou à un autre endroit exposé directement au soleil Près de chauffages ou dans des lieux extrêmement chauds Précautions d'emploi... -
Page 82: Bluetooth
Pour bénéficier d’une assistance après l'achat, recherchez dans Pour un transfert audio par Bluetooth, l’appareil Bluetooth doit la liste des distributeurs TASCAM fournie sur le site mondial prendre en charge le profil A2DP. TEAC (http:// teac-global.com/) la société ou le représentant Même si deux appareils Bluetooth prennent en charge les... -
Page 83: Nomenclature Et Fonctions Des Parties
Le voyant SIG s’allume en vert lorsqu’un signal est reçu équipements. (−40 dBu ou supérieur: entrée MIC). Si un voyant SIG reste allumé en permanence en rouge, réduisez le volume avec le bouton GAIN (+7 dBu ou supérieur: entrée MIC). TASCAM Model 12... -
Page 84: Section 2 De Mixage Des Canaux D'entrée
MAIN MIX L/R. Il n'est pas envoyé au côté droit. i Quand un bouton PAN est tourné à fond à droite (R), le signal de ce canal n'est envoyé qu'au côté droit du bus MAIN MIX L/R. Il n'est pas envoyé au côté gauche. TASCAM Model 12... -
Page 85: Section Égaliseur
Commutateur EQ IN/BYPASS En position EQ IN, l’égaliseur agit sur les signaux de sortie choisis avec le sélecteur AUX 1/2/MAIN MIX. En position BYPASS, l’égaliseur n’agit pas quel que soit le choix fait avec le sélecteur AUX 1/2/MAIN MIX. TASCAM Model 12... -
Page 86: Section D'écoute De Contrôle (Monitoring)
PHONES. Ne pas le faire pourrait entraîner la production d’un bruit fort et soudain risquant par exemple d’endommager votre audition. # Commutateurs AUX 1/2 /MAIN Enclenchez ces commutateurs pour écouter les signaux des bus AUX 1 et AUX 2/FX. TASCAM Model 12... -
Page 87: Section De Réglage Des Sorties Analogiques
Bus MAIN MIX L/R i Bus SOLO L/R i Bus AUX1 i Bus SUB L/R ( Bouton TO AUX 1 Servent à régler le niveau des signaux envoyés par les effets intégrés aux bus de retour AUX1. TASCAM Model 12... -
Page 88: Face Arrière
Ces prises jacks 6,35 mm 3 points (TRS) standard servent à F Connecteur DC IN 15V connecter des appareils externes (effets). Branchez ici l’adaptateur secteur fourni (PS-M1524A TASCAM) (voir « Branchement de l’alimentation » en page 94). i Jack TRS 3 points (pointe = départ, bague = retour et... -
Page 89: Écran D'accueil
113) et (voir « Assignation de la touche de 7 Statut du transport fonction » en page 116). Cette icône affiche le statut de fonctionnement de l'enregistreur. Indicateur Signification Arrêt au début du fichier En pause Enregistrement Lecture TASCAM Model 12... -
Page 90: Écran Des Indicateurs De Niveau
MAIN MIX L/R. 4 Repère d’indicateur de niveau Fournit un repère pour le réglage du niveau. Ce repère correspond au niveau −12 dB. 5 Fonctions des touches de fonction Écran PC RETURN Affichent les fonctions assignées aux touches de fonction en Affiche les niveaux des signaux produits par un ordinateur lors écran des indicateurs de niveau. -
Page 91: Structure Du Menu
133 INITIALIZE Restaurer les réglages d’usine par défaut voir page 125 MEDIA FORMAT Formater la carte SD voir page 125 NOTE Les réglages de tous les paramètres de menu sont conservés même après extinction de l'unité. TASCAM Model 12... -
Page 92: Opérations De Base En Écran Menu
Répétez les étapes à si nécessaire pour régler d'autres Pressez la touche MENU pour ouvrir l'écran MENU. paramètres. Pressez la touche F1 pour revenir à l'écran MENU. NOTE Pressez la touche F1 pour revenir à l'écran d'accueil. TASCAM Model 12... -
Page 93: Préparation
3 – Préparation Branchement de l’alimentation électrique et d’autres équipements Voici un exemple de branchements du Model 12. Précautions avant de faire les branchements o Lisez attentivement les modes d'emploi des appareils à brancher et branchez-les correctement. o Avant de faire les branchements, éteignez cette unité et tous les équipements à connecter (mode veille ou standby). -
Page 94: Branchement De L'alimentation
3 – Préparation Branchement de l’alimentation Branchement d'appareils électroniques et autres équipements audio Utilisez l’adaptateur secteur fourni (TASCAM PS-M1524A) pour raccorder l’unité au secteur comme illustré ci-dessous. Utilisez les entrées suivantes pour brancher des appareils électroniques et autres équipements audio. -
Page 95: Branchement D'un Ordinateur
Les cartes SD ont un loquet de protection empêchant d'y écrire mode d'appairage s’il a été abandonné. de nouvelles données. Sélectionnez le « Model 12 » (cette unité) sur l'autre appareil Bluetooth. Une fois l'appairage réussit, le voyant PAIRING cesse de clignoter et reste fixement allumé, ce qui indique la réussite de la connexion à... -
Page 96: Mise Sous/Hors Tension
En réglant le paramètre TYPE sur « DATE » en écran SONG NAME (nom du morceau), la date et l'heure réglées ici peuvent être utilisées pour nommer les morceaux (voir « Réglage du format de nom de fichier » en page 124). TASCAM Model 12... -
Page 97: Réglage De L'écran
Pressez la molette MULTI JOG pour amener le curseur sur le paramètre DIMMER (luminosité). Réglez la luminosité de l'écran. Options : HIGH (haute, par défaut), LOW (basse) Pressez la molette MULTI JOG pour valider le réglage. Pressez la touche F1 pour revenir à l'écran SYSTEM. TASCAM Model 12... -
Page 98: Gestion Des Morceaux
Pressez la touche F3 pour afficher la taille en écran SONG. o Pressez la touche F4 pour ouvrir l'écran NEW (nouveau) dans lequel vous pouvez créer un nouveau morceau (voir « Création d’un nouveau morceau » en page 99). TASCAM Model 12... -
Page 99: Création D'un Nouveau Morceau
Sélectionnez INFORMATION et pressez la molette MULTI JOG. L'écran INFORMATION s’ouvrira. Le nom, la fréquence d'échantillonnage, la résolution en bits, la taille et la date et heure de dernière écriture du morceau s’afficheront. Après vérification pressez la touche F1 pour revenir en écran SONG. TASCAM Model 12... -
Page 100: Suppression De Tous Les Marqueurs
Les morceaux supprimées ne peuvent pas être restaurés. NOTE i Pour interrompre une suppression de morceau, pressez au contraire la touche F1 . i Le morceau actuel ne peut pas être supprimé. Pour supprimer le morceau actuellement chargé, chargez d'abord un autre morceau. TASCAM Model 12... -
Page 101: Modification Des Noms De Morceau
Ouvrez l'écran SONG alors que l'enregistreur est à l’arrêt (voir « Procédures d’utilisation du menu » en page 92). Les morceaux créés sur des produits TASCAM de la série Model ayant un nombre de canaux différent peuvent être chargés dans Sélectionnez le morceau dont vous désirez changer le cette unité. - Page 102 Ces pistes ne sont pas chargées. Elle est chargée en tant que piste Piste 23 (MAIN MIX L) 11 (MAIN MIX L). Elle est chargée en tant que piste Piste 24 (MAIN MIX R) 12 (MAIN MIX R). TASCAM Model 12...
-
Page 103: Enregistrement De Base
+48V s’allume et un message local s’affiche à l’écran pour système d'écoute. demander confirmation de sa mise en service. Pressez la molette MULTI JOG pour fournir une alimentation fantôme aux prises XLR MIC/LINE (BAL)/INST (1-6, 7/8 et 9/10). TASCAM Model 12... -
Page 104: Voyants Sig Et Indicateurs De Niveau
Enregistrement Les voyants SIG et les indicateurs de niveau des canaux 1-6, 7/8- Cette unité peut enregistrer simultanément jusqu'à 12 pistes, 9/10 affichés en écran des indicateurs de niveau permettent de composées de 10 entrées de canal et du bus MAIN L/R. -
Page 105: Annulation D'opérations
écran d'accueil, pressez la touche F3 . Le message de confirmation suivant apparaîtra. Pressez la touche F4 pour restaurer l’opération précédemment annulée et revenir à l’état d’avant l’annulation. NOTE Pour au contraire interrompre le rétablissement de l’opération, pressez la touche F1 . TASCAM Model 12... -
Page 106: Utilisation De La Bibliothèque
L’effet intégré est désactivé. L’effet intégré ne peut pas être employé (parce que la prise AUX 2 est utilisée). NOTE Lorsque l’effet intégré est désactivé, l’icône apparaît en écran d’accueil. Pressez la touche F1 pour revenir à l'écran d'accueil. TASCAM Model 12... -
Page 107: Fonctions De L'enregistreur
à l'emplacement pouvant être changé réenregistrement partiel (punch in/out) dans le compteur temporel de l'enregistreur. En branchant la pédale commutateur RC-1F TASCAM recommandée (vendue séparément) à la prise FOOTSWITCH sur le dessus de l'unité, vous pouvez vous en servir pour le punch in/out. -
Page 108: Fonction De Réenregistrement Partiel (Punch In/Out) Automatique
8 pour l’arrêter. i En ne définissant que le point de punch out, vous pouvez lancer l'enregistrement en pressant la touche 0 et celui-ci s’arrêtera automatiquement au point de punch out. TASCAM Model 12... -
Page 109: Emploi Du Réenregistrement Partiel Automatique
Quand le point de punch out est atteint, vous entendez à nouveau les signaux lus sur les pistes et ceux venant des sources d'entrée. La touche 0 s'éteint. i La lecture s'arrête automatiquement deux secondes après le point de punch out. La touche 7/9 clignote. TASCAM Model 12... -
Page 110: Édition De Piste
Une fois les pistes effacées, l’écran TRACK CLEAR réapparaît. NOTE i Pour interrompre une suppression de pistes, pressez au contraire la touche F1 . i L’annulation n’est possible que pour la dernière piste effacée. TASCAM Model 12... -
Page 111: Interversion De Pistes
Sélectionnez la piste à importer et pressez la touche F4 Cela peut servir de fonction de report élémentaire en pour l’importer. intervertissant les signaux enregistrés sur les pistes 11/12 (la sortie des pistes MAIN OUTPUT) avec d’autres pistes, puis en effaçant les autres pistes. -
Page 112: Mixage
Les fichiers convertis peuvent être lus en utilisant le mode SD PLAY de cette unité. Pour plus de détails sur la lecture en mode SD PLAY, voir « Lecture de fichiers WAV sur cartes SD (mode SD PLAY) » en page 126. TASCAM Model 12... -
Page 113: Fonctions Des Marqueurs
Pour effacer tous les marqueurs du morceau actuel, sélectionnez l’option CLR ALL MARKS (supprimer tous les marqueurs) dans le menu affiché en écran SONG (morceau) (voir « Suppression de tous les marqueurs » en page 100). TASCAM Model 12... -
Page 114: Autres Fonctions
Le clic est produit durant le précompte COUNT IN+REC et l’enregistrement. Le clic est produit durant l’enregistrement. Le clic est produit durant REC&PLAY l’enregistrement et la lecture. Pressez la molett MULTI JOG pour valider le réglage. L’écran CLICK OUT s’affiche à nouveau. TASCAM Model 12... -
Page 115: Réglages Du Métronome
CLICK. NOTE Options : 0 – 50 (par défaut : 30) Pressez la touche F4 pour activer/désactiver le son de Pressez la molett MULTI JOG pour valider le réglage. clic durant le réglage du tempo. L’écran des réglages réapparaît. TASCAM Model 12... -
Page 116: Réglage De La Fonction De Précompte
Signification Règle le format de mesure sur 4/4, 3/4, etc. Quel que soit le chiffrage de la mesure, La plage de réglage va de 1/1 à 12/8 (par défaut : 4/4). une mesure de blanches puis une mesure 2+4 BEAT de noires sont produites. Aucun temps n’est accentué. -
Page 117: Fonctions Midi
Il envoie des messages complets lors du calage sur un point. Quand l’enregistreur est à l’arrêt, sélectionnez MIDI TIMECODE en écran MIDI et ouvrez l’écran MIDI TIMECODE (voir « Procédures d’utilisation du menu » en page 92). TASCAM Model 12... -
Page 118: Fonctions De La Table De Mixage (Mixer)
L’écran MTR/USB SEND POINT s’affiche à nouveau. Réglages de l’écran MTR/USB SEND POINT Le signal audio envoyé à l’ordinateur dépend des réglages des sélecteurs MODE du Model 12 et de l’écran MTR/USB SEND POINT (point d’enregistrement multipiste/USB des signaux de chaque canal). -
Page 119: Réglage De La Phase De Chaque Canal
écran MENU, et ouvrez l’écran MIXER (voir canaux. « Procédures d’utilisation du menu » en page 92). Pressez la molett MULTI JOG pour valider le réglage. L’écran MIXER s’affiche à nouveau. Sélectionnez AUX1 SEND (départ AUX 1) en écran MIXER, et ouvrez l’écran AUX1 SEND. TASCAM Model 12... -
Page 120: Fonctions De La Pédale Commutateur
VAMP. o Pressez-la durant la lecture VAMP Sélectionnez le paramètre MODE et ouvrez l’écran MODE. pour désactiver la lecture VAMP. Pressez la molette MULTI JOG pour valider l’assignation de la fonction. L’écran FOOTSW réapparaît. TASCAM Model 12... -
Page 121: Réglage De La Polarité De La Pédale
92) Options : NORMALLY OPEN (par défaut), NORMALLY CLOSED NOTE Si vous utilisez une RC-1F TASCAM, réglez le commutateur POLARITY (polarité) sur N. OPEN. Sélectionnez I/O EDIT (édition des points de début/fin) en écran VAMP, et ouvrez l’écran d’édition de VAMP. -
Page 122: Déplacement Entre Les Points De Vamp
Sur un point de fin de VAMP (OUT), pressez la touche F3 pour l’effacer. NOTE Pressez en même temps les touches F2 et F3 pour supprimer à la fois les points de début et de fin de VAMP pour l’emplacement actuel. TASCAM Model 12... -
Page 123: Désactivation De La Fonction De Lecture Vamp
Chargez un morceau dans lequel des points de début/fin de VAMP ont déjà été fixés. Quand l’enregistreur est à l’arrêt, sélectionnez VAMP en écran MENU, et ouvrez l’écran VAMP. Sélectionnez VAMP PLAY (lecture VAMP) en écran VAMP, et ouvrez l’écran de lecture VAMP. TASCAM Model 12... -
Page 124: 10 - Réglages Et Informations
L'écran SONG affiche l'état du dossier « MTR » (enregistrement multipiste). Pour des détails sur la façon de saisir le texte, voir « Édition de texte » en page 101. TOTAL SONG Affiche le nombre total de morceaux dans le dossier « MTR ». TASCAM Model 12... -
Page 125: Restauration Des Réglages D'usine
Quand l’enregistreur est à l’arrêt, sélectionnez MEDIA FORMAT (formatage du support) en écran SYSTEM et ouvrez l’écran MEDIA FORMAT (voir « Procédures d’utilisation du menu » en page 92). QUICK : effectue un formatage rapide. ERASE (recommandé) : efface et formate la carte. TASCAM Model 12... -
Page 126: Lecture De Fichiers Wav Sur Cartes Sd (Mode Sd Play)
Pressez la touche F1 pour revenir à l'écran MENU. i Pressez la touche F2 pour remonter d'un niveau dans les dossiers. NOTE Seuls des fichiers WAV peuvent être lus. Les fichiers non pris en charge ne s’afficheront pas. TASCAM Model 12... -
Page 127: 11 - Transfert De Données Avec Un Ordinateur
Les données sauvegardées peuvent être rechargées dans d'autres unités Model 12. Comme cela vous permet de ATTENTION librement transférer des fichiers d’un Model 12 à un autre, vous i Si vous utilisez cette unité comme support de stockage pouvez facilement effectuer un enregistrement ou un mixage externe avec un ordinateur, les fonctions d’enregistreur... -
Page 128: Déconnexion
Le dossier « UTILITY » sert par exemple à la mise à jour du « MUSIC », un seul niveau supplémentaire pouvant être utilisé système de l'unité. par cette unité. Le Model 12 ne peut pas reconnaître les sous- Pressez la touche F1 pour revenir à l'écran des dossiers ni les fichiers situés au-delà... -
Page 129: 12 - Fonctions D'interface Audio Usb
12 – Fonctions d’interface audio USB Lisez le contenu du contrat de licence (License Agreement) Installation des logiciels dédiés puis sélectionnez « I accept the agreement » (J’accepte le contrat) si vous en acceptez les termes. Pour utiliser cette unité comme interface audio USB avec un Puis cliquez sur le bouton « Next > »... -
Page 130: Installation Du Logiciel Dédié Pour Mac
12 – Fonctions d’interface audio USB Cliquez sur le bouton « Read License » (Lire la licence) et Installation du logiciel dédié pour Mac prenez connaissance du contrat de licence du logiciel. Si vous êtes d’accord avec le contenu de la licence, cliquez sur NOTE « Agree »... -
Page 131: Désinstallation Des Logiciels Dédiés
Ouvrez l’écran « Désinstaller ou modifier un programme » en suivant les procédures du système d’exploitation utilisé (Windows 10/Windows 8.1/Windows 7). Sélectionnez « TASCAM Model_Mixer x.xx » dans la liste et double-cliquez dessus. Ensuite, suivez les instructions qui apparaissent à l’écran. Désinstallation du logiciel dédié pour Supprimez « TASCAM Model_Mixer »... -
Page 132: Ouverture Du Panneau De Réglages (Settings Panel)
Augmenter la taille de la mémoire tampon stabilisera le fonctionnement et supprimera les effets négatifs sur les o Dans le Launchpad, cliquez sur « TASCAM Model Mixer ». signaux audio, mais le retard d'envoi des signaux audio à o Au moyen du Finder, ouvrez le dossier Applications et cliquez l'ordinateur augmentera. -
Page 133: Lecture Simultanée Asio/Wdm
Ouvrez le lecteur Windows Media et lancez la lecture pour Option Signification faire entrer dans les canaux 1 et 2 du Model 12 le son lu par l’ordinateur (sélecteurs MODE : PC). Les entrées des canaux 1–6, 7/8 et 9/10 MULTI INPUT et la sortie du bus MAIN MIX L/R sont (par défaut) - Page 134 à droite de l’écran du bureau, en sélectionnant « Ouvrir les paramètres de son ». Réglez le périphérique de sortie sur « Speakers (Model 12) ». Cliquez sur « Propriétés » de « Speakers (Model 12) » pour Réglez le périphérique d’entrée sur « Microphone (Model 12) ».
-
Page 135: 13 - Tableau D'équipement Midi
: quand MIDI CLOCK/SPP est réglé sur ON. Mode 1 : OMNI ON, POLY Mode 2 : OMNI ON, MONO – : OUI Mode 3 : OMNI OFF, POLY Mode 4 : OMNI OFF, MONO — : NON TASCAM Model 12... -
Page 136: 14 - Messages
14 – Messages Ci-dessous se trouve une liste des messages pouvant apparaître dans des fenêtres. Référez-vous à cette liste si un de ces messages apparaît sur le Model 12 et si vous souhaitez en connaître la signification ou choisir une réponse appropriée. - Page 137 Si une de ces erreurs survient, éteignez l'unité et rallumez-la. Player Error Si le message d'erreur continue de s'afficher, veuillez contacter le magasin dans lequel vous avez UNDO not available acheté cette unité ou un service après-vente TASCAM. Writing Failed Sys Rom Err System Err XX (XX est un nombre.)
-
Page 138: 15 - Guide De Dépannage
Éteignez et rallumez le Model 12. Les niveaux de source d'entrée sont-ils trop élevés ? o Effacez l’appairage du Model 12 avec l'autre appareil Bluetooth o Les réglages d’égaliseur (EQ) sont-ils trop élevés ? et essayez de le refaire (voir « Connexion à des appareils Bluetooth »... - Page 139 « Options d’alimentation » sur « Performances élevées » dans le panneau de configuration de l’ordinateur (Windows). o Utilisez le câble USB le plus court possible. o Utilisez un port USB intégré à l'ordinateur car le port USB de l'ordinateur affecte la connexion USB. TASCAM Model 12...
-
Page 140: 16 - Caractéristiques Techniques
Prises MAIN OUTPUT L/R Canaux enregistrables Connecteurs : XLR-3-32 (1 : masse, 2 : point chaud, 3 : point froid) Max. 12 canaux (10 canaux + 2 de mixage stéréo) Niveau de sortie maximal : +22 dBu Niveau de sortie nominal : +4 dBu Entrées et sorties Impédance de sortie : 200 Ω... -
Page 141: Configurations Informatiques Requises
MIC w Sortie MAIN : 74 dB MIC w Départ INSERT : 54 dB Processeur/cadence d'horloge MIC w Sortie SUB : 74 dB Processeur Dual Core 2 GHz ou plus rapide MIC w Sortie AUX : 75 dB USB/SD w Sortie MAIN : 24 dB Mémoire 2 Go ou plus TASCAM Model 12... -
Page 142: Bluetooth
4.3 kg Plage de température de fonctionnement 5 °C – 35 °C o Les illustrations de ce mode d'emploi peuvent partiellement différer du produit réel. o Caractéristiques et aspect externe peuvent être changés sans préavis en vue d'améliorer le produit. TASCAM Model 12... - Page 143 Monitorización ..................167 Uso de la web global TEAC ..............147 Indicadores SIG y medidores de nivel .........168 Acerca del servicio de atención al usuario de TASCAM ..147 Grabación ....................168 Anulación de operaciones (UNDO) ..........169 2 – Nombres y funciones de las partes .......148 Anulación de la operación anterior .........169...
- Page 144 Conexión con un ordenador ............191 Desconexión ..................192 Carga de ficheros WAV desde un ordenador ......192 12 – Funciones de interface audio USB ......193 Instalación del software específico ..........193 Instalación del software específico de Windows ....193 Instalación del software específico Mac ........194 Uso del Gatekeeper ...............194...
-
Page 145: Introducción
El hacerlo podría dar lugar a un incendio o descarga eléctrica. i Puede dar entrada al ordenador a 12 pistas (10 canales de entrada y bus MAIN MIX L/R) i Pueden ser asignadas 10 salidas de pista y de ordenador Acerca de este manual a las entradas de canal (canales 1–6, 7/8, 9/10) -
Page 146: Precauciones Relativas A La Ubicación Y Uso
Use esta unidad para formatear las tarjetas SD que vaya a usar en ella. Se pueden producir errores al grabar en esta unidad en una tarjeta SD formateada en un ordenador u otro dispositivo. TASCAM Model 12... -
Page 147: Bluetooth
Bluetooth. usuario de TASCAM Perfiles La garantía y el soporte técnico de los productos TASCAM solo Esta unidad admite los siguientes perfiles Bluetooth. se garantiza en el país/región de la compra original. En caso de que necesite soporte técnico tras la compra, busque o A2DP (perfil de distribución audio avanzado) -
Page 148: Nombres Y Funciones De Las Partes
Los indicadores SIG se iluminarán en verde para indicar la presencia de una señal (-40dBu o superior: entrada MIC). Si un indicador SIG queda iluminado continuamente en rojo, reduzca el valor del mando GAIN (+7dBu o superior: entrada MIC). TASCAM Model 12... -
Page 149: Sección De Mezcla De Canales De Entrada-2
L/R izquierdo. No será enviada señal de ese canal al bus derecho. i De la misma forma, cuando gire un mando PAN completamente a la derecha (R), la señal de ese canal será enviada solo al bus MAIN MIX L/R derecho y no al izquierdo. TASCAM Model 12... -
Page 150: Sección De Ecualizador
Cuando este interruptor esté en EQ IN, el ecualizador afectará a las señales de salida ajustadas con el interruptor AUX 1/2/ MAIN MIX. Cuando esté en BYPASS, el ecualizador no será aplicado independientemente del ajuste del interruptor AUX 1/2/MAIN MIX. TASCAM Model 12... -
Page 151: Sección De Monitorización
# Interruptores AUX 1/2 /MAIN Active estos interruptores para monitorizar las señales de los buses AUX 1 y AUX 2/FX. TASCAM Model 12... -
Page 152: Sección De Ajuste De Salida Analógica
Bus MAIN MIX L/R i Bus SOLO L/R i Bus AUX1 i Bus SUB L/R ( Mandos TO MON 1 Úselos para ajustar el nivel de las señales enviadas desde los efectos internos a los buses AUX1. TASCAM Model 12... -
Page 153: Panel Trasero
TRS (Punta: envío, Anillo: retorno, Lateral: masa) instrumento, ajuste el interruptor INST a activo (pulsado). F Conector DC IN 15V Conecte aquí el adaptador de corriente incluido (TASCAM PS- M1524A). (Vea “Conexión a la corriente” en pág. 159) TASCAM Model 12... -
Page 154: Pantalla Inicial
(Vea “Uso de las funciones de marcas” en pág. 177) y (Vea 7 Estado de transporte “Ajuste de la función del botón” en pág. 180) Este icono le muestra el estado operativo de la grabadora. Indicador Significado Parado al principio del fichero En pausa Grabación Reproducción TASCAM Model 12... -
Page 155: Pantalla De Medidores
4 Guía del medidor de nivel Esto le ofrece una guía para el ajuste de los niveles. Esta guía Pantalla PC RETURN aparece en el nivel -12 dB. 5 Funciones de los botones de función Esto muestra el nivel de las señales emitidas desde un ordenador cuando use la unidad como un interface audio USB. -
Page 156: Estructura Del Menú
Permite ajustes de USB audio vea pág. 197 INITIALIZE Restaura los valores por defecto vea pág. 189 MEDIA FORMAT Formatea la tarjeta SD vea pág. 189 NOTA Los ajustes de todos los elementos de menú quedan memorizados cuando apague la unidad. TASCAM Model 12... -
Page 157: Operaciones Básicas De Pantalla Menu
Pulse el botón F1 para volver a la pantalla MENU. Pulse el botón MENU para acceder a la pantalla MENU. NOTA Pulse el botón F1 para volver a la pantalla inicial. TASCAM Model 12... -
Page 158: Preparativos
3 – Preparativos Conexión de la fuente de alimentación y otros aparatos Aquí puede ver un ejemplo de las conexiones del Model 12. Precauciones a tener en cuenta antes de las conexiones o Lea completamente el manual de instrucciones de los dispositivos que vaya a conectar y conéctelos correctamente. -
Page 159: Conexión A La Corriente
Conexión a la corriente Conexión de dispositivos electrónicos y otros equipos audio Utilice el adaptador de corriente incluido (TASCAM PS-M1524A) para conectar esta unidad a la corriente como le mostramos abajo. Use las entradas siguientes para conectar dispositivos electrónicos y otros equipos audio. -
Page 160: Conexión De Un Ordenador
Las tarjetas SD disponen de pestañas de protección de desactivado. grabación que evitan que pueda registrar nuevos datos en ellas. Elija “Model 12” (esta unidad) en el otro dispositivo Bluetooth. Cuando la sincronización haya sido correcta, el piloto PAIRING dejará de parpadear y quedará iluminado fijo y la conexión con el otro dispositivo estará... -
Page 161: Encendido Y Apagado
Ajustando el elemento TYPE a “DATE” en la pantalla SONG NAME, podrá usar la fecha y hora ajustadas aquí para los nombres de las canciones. (Vea “Ajuste del formato de nombre de canción” en pág. 188) TASCAM Model 12... -
Page 162: Ajuste De La Pantalla
Pulse el dial MULTI JOG para desplazar el cursor hasta el elemento DIMMER. Ajuste el brillo de la pantalla. Opciones: HIGH (por defecto), LOW Pulse el dial MULTI JOG para confirmar el ajuste. Pulse el botón F1 para volver a la pantalla SYSTEM. TASCAM Model 12... -
Page 163: Gestión De Canciones
SAVE para que pueda almacenar la información de esa canción. i Al crear nuevas canciones, el tempo será ajustado a 120 y el INFORMATION tipo de ritmo a 4/4. (Vea “Ajustes del metrónomo” en pág. 179) Le muestra información de la canción elegida. TASCAM Model 12... -
Page 164: Carga De Canciones
Pulse el botón F4 para confirmar el borrado de las marcas. Una vez que el borrado de marcas haya terminado, volverá a aparecer la pantalla SONG. ATENCIÓN Las marcas eliminadas no pueden ser restauradas. TASCAM Model 12... -
Page 165: Borrado De Canciones
Si trata de ejecutar una operación prohibida (edición, grabación, borrado) sobre una canción protegida, aparecerá el mensaje “Song is protected. ” en un desplegable. TASCAM Model 12... -
Page 166: Carga De Canciones Creadas En Diferentes Productos Tascam De La Serie Model
Ejemplo: Carga de una canción desde un Model 12 en un Model 24 Canción origen Canción después de la carga... -
Page 167: Conceptos Básicos De Grabación
PHANTOM +48V se iluminará y aparecerá un mensaje desplegable en la pantalla para confirmarle que está activa. Pulse el dial MULTI JOG para activar la alimentación fantasma a las tomas XLR MIC/LINE (BAL)/INST (1-6, 7/8 y 9/10). TASCAM Model 12... -
Page 168: Indicadores Sig Y Medidores De Nivel
Indicadores SIG y medidores de Grabación nivel Esta unidad puede grabar simultáneamente hasta 12 pistas, incluyendo los 10 canales de entrada y el bus MAIN MIX L/R. Los indicadores SIG y los medidores de nivel de los canales 1-6, En las operaciones de grabación siguientes asumimos que han... -
Page 169: Anulación De Operaciones (Undo)
” en la pantalla inicial, pulse el botón F3 “ Aparecerá el siguiente mensaje de confirmación. Pulse F4 para restaurar la operación anterior y volver al estado previo a deshacer la operación. NOTA Para cancelar esta recuperación, pulse el botón F1 TASCAM Model 12... -
Page 170: Uso De La Biblioteca
El efecto interno no puede ser usado (debido a que está siendo usada la toma AUX 2). NOTA Cuando el efecto interno esté desactivado, aparecerá el icono en la pantalla inicial. Pulse F1 para volver a la pantalla inicial. TASCAM Model 12... -
Page 171: Funciones De Grabadora
Uso del pedal para el pinchado/ de la grabadora. despinchado Con la conexión del pedal recomendado TASCAM RC-1F (opcional) a la toma FOOTSWITCH del panel superior de esta unidad, podrá usar dicho pedal para el pinchado/despinchado. Para usar un pedal para el pinchado/despinchado deberá ajustar previamente la asignación de función del pedal a “PUNCH I/O”. -
Page 172: Función De Pinchado/Despinchado Automático
0 y seguir grabando hasta que después del punto de despinchado. El botón 7/9 la unidad deje de hacerlo al llegar al punto de despinchado parpadeará. automático. Puede repetir este ensayo las veces que quiera. TASCAM Model 12... -
Page 173: Uso Del Pinchado Y Despinchado Automático
Cuando la unidad llegue al punto de despinchado, serán monitorizados tanto la reproducción de pista como la fuente de entrada. El botón 0 se apagará. i La reproducción se detendrá un par de segundos después del punto de despinchado. El botón 7/9 parpadeará. TASCAM Model 12... -
Page 174: Edición De Pista
TRACK IMPORT. En este caso, el fichero será importado i Sólo es posible deshacer el último borrado de pista. y la longitud de bits será modificada para hacerla coincidir con la de la canción activa. TASCAM Model 12... -
Page 175: Intercambio De Pistas
Puede usar esto como una función básica de intercambio o volcado para intercambiar las señales grabadas en las pistas 11/12 (la salida de los conectores MAIN OUTPUT) a otras pistas y así vaciar el resto de pistas. TASCAM Model 12... -
Page 176: Función Stereo Mix Export
MAIN MIX L/R. En ese caso aparecerá el siguiente mensaje. i Durante la conversión, pulse el botón F1 para cancelar el proceso. Quedará un fichero con la parte que haya sido convertida hasta que canceló el proceso. TASCAM Model 12... -
Page 177: Funciones De Marcas
Para borrar todas las marcas de la canción activa, elija el elemento CLR ALL MARKS del listado de menú que aparece en la pantalla SONG. (Vea “Borrado de todas las marcas” en pág. 164) TASCAM Model 12... -
Page 178: Otras Funciones
El sonido clic es emitido durante la grabación El sonido clic es emitido durante la REC&PLAY grabación y reproducción Pulse el dial MULTI JOG para confirmar el ajuste. Aparecerá la pantalla CLICK OUT. TASCAM Model 12... -
Page 179: Ajustes Del Metrónomo
Pulse el botón F4 para activar/desactivar el sonido de toma CLICK. claqueta durante el ajuste del tempo. Opciones: 0–50 (por defecto: 30) Pulse el dial MULTI JOG para confirmar el ajuste. Volverá a aparecer la pantalla de ajustes. TASCAM Model 12... -
Page 180: Ajuste De La Función De Claqueta
Significado Ajusta el tipo de ritmo o compás a 4/4, 3/4, etc. Independientemente del ajuste El rango de ajuste va de 1/1 a 12/8. (por defecto: 4/4) de tipo de ritmo, será emitido un 2+4 BEAT compás de blancas seguido por un compás de negras. -
Page 181: Funciones Midi
Enviará mensajes completos durante la localización. Con la grabadora parada, elija MIDI TIMECODE en la pantalla MIDI para acceder a la pantalla MIDI TIMECODE. (Vea “Operaciones de menú” en pág. 157) TASCAM Model 12... -
Page 182: Funciones De Mezclador
Aparecerá la pantalla MTR/USB SEND POINT. Ajustes de pantalla MTR/USB SEND POINT La señal audio enviada al ordenador depende de los ajustes del interruptor MODE del Model 12 y de los ajustes de la pantalla MTR/USB SEND POINT. MTR/USB SEND POINT... -
Page 183: Ajuste De La Fase De Cada Canal
NORMAL (par défaut) Fase normal del ajuste por el fader de canal. INVERT Fase invertida Pulse el dial MULTI JOG para confirmar el ajuste. Aparecerá la pantalla MIXER. Pulse el dial MULTI JOG para confirmar el ajuste. Aparecerá la pantalla PHASE. TASCAM Model 12... -
Page 184: Ajuste De La Función Solista Para Todos Los Canales
Con la grabadora parada, elija FOOTSW en la pantalla Pulse el dial MULTI JOG para confirmar la función asignada. SYSTEM para acceder a la pantalla FOOTSW. (Vea Volverá a aparecer la pantalla FOOTSW. “Operaciones básicas de pantalla MENU” en pág. 157) TASCAM Model 12... -
Page 185: Ajuste De La Polaridad Del Pedal
Opciones: NORMALLY OPEN (por defecto), pág. 157) NORMALLY CLOSED NOTA Cuando use un TASCAM RC-1F, ajuste el interruptor POLARITY a N. OPEN. Elija I/O EDIT en la pantalla VAMP y acceda a la pantalla de edición VAMP. Compruebe que aparece el icono en la pantalla de edición VAMP. -
Page 186: Desplazamiento Entre Puntos Vamp
Modo automático activo para la (por defecto) acceda a la pantalla VAMP. función de reproducción VAMP Elija el elemento I/O ALL CLR en la pantalla VAMP y pulse el Modo automático desactivado dial MULTI JOG. para la función VAMP TASCAM Model 12... -
Page 187: Desactivación De La Función De Reproducción Vamp
Pulse el botón F4 para activar/desactivar la reproducción VAMP. Aspecto del indicador Significado Modo manual activo para la función de reproducción VAMP Modo manual desactivado para (por defecto) la función VAMP Pulse el botón 7/9 para reproducir la canción. TASCAM Model 12... -
Page 188: 10 - Ajustes E Información
La pantalla SONG le muestra el estado de uso de la carpeta “MTR”. Para más detalles acerca de cómo ajustar los caracteres, vea “Edición de texto” en pág. 165. TOTAL SONG Le muesta el número total de canciones en la carpeta “MTR”. TASCAM Model 12... -
Page 189: Restauración A Los Valores De Fábrica
Con la grabadora parada, elija MEDIA FORMAT en la pantalla SYSTEM para acceder a la pantalla MEDIA FORMAT. (Vea “Operaciones básicas de pantalla MENU” en pág. 157) QUICK: Ejecución de un formateo rápido. ERASE (Recomendado): Borrado y formateo de la tarjeta. TASCAM Model 12... -
Page 190: Reproducción De Ficheros Wav En Tarjetas Sd (Modo Sd Play)
Pulse F1 para volver a la pantalla MENU. i Pulse F2 para subir un nivel. NOTA Solo pueden ser reproducidos ficheros WAV. Los ficheros en formatos no admitidos no serán visualizados. TASCAM Model 12... -
Page 191: 11 -Uso De Un Ordenador Para Transferir Datos
Los datos de la copia de seguridad pueden ser restaurados en ATENCIÓN otras unidades Model 12. Dado que esto le permite trasladar i Si está usando esta unidad como un soporte de ficheros fácilmente entre distintos Model 12 puede realizar almacenamiento externo con un ordenador, las funciones de grabaciones o mezclas adicionales en distintas ubicaciones. -
Page 192: Desconexión
Use un cable USB (tipo-A a tipo-C) para conectar el ordenador con el puerto USB de esta unidad. (Vea “Conexión con un ordenador” en pág. 191) Haga clic en el disco “Model 12” que aparece en el ordenador para visualizar las carpetas “MTR”, MUSIC y “UTILITY”. -
Page 193: 12 - Funciones De Interface Audio Usb
12 – Funciones de interface audio USB Lea el contenido del Acuerdo de licencia y elija “Estoy de Instalación del software específico acuerdo” si está de acuerdo con los términos del mismo. Después, haga clic en el botón “Siguiente >”. -
Page 194: Instalación Del Software Específico Mac
12 – Funciones de interface audio USB Haga clic en el botón “Read License” y compruebe el Instalación del software específico Mac contenido del Acuerdo de Licencia de Software. Si está de acuerdo con el contenido de esta licencia, haga clic en NOTA “Agree”. -
Page 195: Desinstalación Del Software Específico
En ese caso, haga clic en el botón “Open”. Acceso a Settings Panel Acceda a la pantalla Settings Panel de la siguiente forma. Windows o Desde el menú “Inicio” elija “TASCAM Model Mixer” dentro de Cambio del ajuste Gatekeeper “TASCAM”. La configuración del Gatekeeper puede ser modificada usando el elemento “Allow applications downloaded from:”... -
Page 196: Resumen Del Settings Panel
12 – Funciones de interface audio USB Resumen del Settings Panel Función de notificación Si el ordenador que esté usando está conectado a Internet, es posible que aparezcan notificaciones cuando ejecute el Settings Panel. Settings Panel para Windows NOTA Coloque una marca en el recuadro “No volver a ver este mensaje”... -
Page 197: Ajuste De Las Propiedades De Sonido
USB 1–12. para emitir el sonido de reproducción del ordenador a los La salida del bus MAIN MIX L/R es canales 1 y 2 del Model 12. (interruptores MODE: PC) STEREO MIX enviada a los canales USB 1–2. -
Page 198: Procesos De Ajuste Para El Uso Con Obs Studio Y Otras Apps De Streaming
12 – Funciones de interface audio USB Haga clic en “Propiedades” de “Model 12” para acceder a la Procesos de ajuste para el uso con OBS pantalla de Propiedades del micrófono. Studio y otras apps de streaming Vaya a la pestaña Avanzado, y ajuste el Formato predeterminado. - Page 199 En el paso , ajuste el modo audio USB a MULTI INPUT. i En el paso , ajuste las Propiedades del micrófono a 12 canales. TASCAM Model 12...
-
Page 200: 13 - Tabla De Implementación Midi
: Con MIDI TIME CODE en ON : Con MIDI CLOCK/SPP en ON Modo 1: OMNI ON, POLY Modo 2: OMNI ON, MONO –: SÍ Modo 3: OMNI OFF, POLY Modo 4: OMNI OFF, MONO —: NO TASCAM Model 12... -
Page 201: 14 - Mensajes
14 – Mensajes A Continuación puede ver un listado de los mensajes que pueden aparecer en pantallas desplegables. Consulte este listado si aparece uno de estos mensajes en el Model 12 y quiere saber su significado o cómo actuar. Mensaje... - Page 202 Si el mismo mensaje de error sigue apareciendo con frecuencia, póngase en contacto con el UNDO not available comercio en el que adquirió esta unidad o con el departamento de atención al cliente de TASCAM. Writing Failed Sys Rom Err System Err XX (XX es un número).
-
Page 203: 15 - Resolución De Problemas
Apague y vuelva a encender el Model 12. El sonido que quiero grabar distorsiona o Elimine el registro de sincronización “Model 12” del otro o ¿Están ajustados los mandos GAIN demasiado altos? dispositivo Bluetooth y pruebe a realizar de nuevo la ¿Están los niveles de las fuentes de entrada muy altos? - Page 204 Además, ajuste las “Opciones de alimentación” en el Panel de control a “Alto rendimiento” (Windows). o Use el cable USB más corto posible. o Use un puerto USB propio del ordenador, porque puede afectar a la conexión USB. TASCAM Model 12...
-
Page 205: 16 - Especificaciones Técnicas
WAV (BWF): 44.1/48kHz, 16/24 bits Conectores MAIN OUTPUT Canales grabables Conectores: XLR-3-32 (1: masa, 2: activo, 3: pasivo) Máximo 12 canales (10 canales + 2 mezcla stereo) Nivel de salida máxima: 200 dBu Nivel de salida nominal: +4 dBu Entradas y salidas Impedancia de salida: 100 Ω... -
Page 206: Requisitos Del Sistema Informático
SECTION EQ en sus posiciones centrales) MIC w MAIN OUT: 74 dB 2 GB o superior MIC w INSERT OUT: 54 dB MIC w SUB OUT: 74 dB MIC w AUX OUT: 75 dB USB/SD w MAIN OUT: 24 dB TASCAM Model 12... -
Page 207: Bluetooth
Otras Alimentación Adaptador específico (TASCAM PS-M1524A) Voltaje de entrada: 100–240 V ~ AC, 50/60 Hz Voltaje de salida: 15 V DC Amperaje: 2.4 A Consumo... -
Page 208: Dimensional Drawings / Dessins Avec Cotes / Esquema De Dimensiones
Dimensional drawings / Dessins avec cotes / Esquema de dimensiones 343mm 79.1mm 31.5mm TASCAM Model 12... -
Page 209: Block Diagram / Schéma Fonctionnel
Block diagram / Schéma fonctionnel / Diagrama de bloques TASCAM Model 12... -
Page 210: Level Diagram / Schéma Des Niveaux
Level diagram / Schéma des niveaux / Diagrama de niveles TASCAM Model 12... - Page 211 Your unit must be serviced by an authorized TASCAM service station in Ce produit est sujet aux réglementations concernant la garantie légale the United States. (This warranty is not enforceable outside the U.S.) If WHAT IS COVERED AND WHAT IS NOT COVERED dans le pays d’achat.
- Page 212 Meridien House, Ground Floor,69 - 71, Clarendon Road, Watford, Hertfordshire, WD17 1DS, United Kingdom TEAC EUROPE GmbH https://www.tascam.en/de/ Phone: +49-611-71580 Bahnstrasse 12, 65205 Wiesbaden-Erbenheim, Germany TEAC SALES & TRADING(SHENZHEN) CO., LTD https://tascam.cn/cn/ Phone: +86-755-88311561~2 Room 817, Xinian Center A, Tairan Nine Road West, Shennan Road, Futian District, Shenzhen, Guangdong Province 518040, China Printed in China 1020.MA-3091C...
Need help?
Do you have a question about the 12 and is the answer not in the manual?
Questions and answers