Advertisement
Quick Links
Advertisement

Related Manuals for CRUSSIS BAFANG


Summary of Contents for CRUSSIS BAFANG
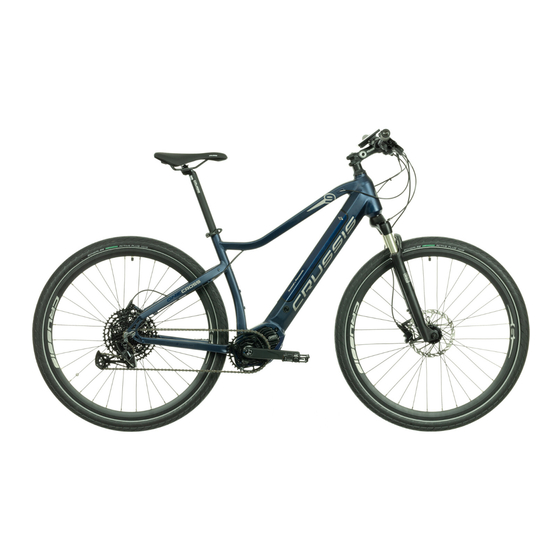
- Page 1 Electric bicycle user manual Enjoy your e-ride!
-
Page 2: Why You Should Read This Manual
Congratulations on your purchase of a new electric bicycle (e-bike). It makes us proud that you have chosen our brand CRUSSIS and we wish you happy and safe time spend with our product. This manual contains important safety, performance and maintenance information. Read the manual before taking your first ride on your new e-bike and keep the manual handy for future reference. - Page 3 DESCRIPTION OF E-BIKE COMPONENTS INSPECTION AND MAINTENANCE: For your safety and enjoyment, and to insure a long life for your e-bike inspect and maintain your e-bike regularly. Use the table below for guidance. It is very important that you check certain systems and components before each and every ride.
-
Page 4: Care And Cleaning
Component or Condition Inspect Inspect Clean Adjust/Tight Repair/Rep before every periodically* and/or lace if ride lubricate necessary Tire pressure Tire wear/damage Brake pad adjustment Wheel quick release adjustment Head/tail/brake lights Controls and displays Seat post quick release adjustment Brake pad wear Brake cable tension/wear Spoke tension Wheel true... -
Page 5: Operational Instructions
Please read and understand these instructions completely before operating your e-bike to prevent serious injury to yourself and others, and to prevent damage to the e-bike. Forks: There is a wide variety of suspension forks used across the CRUSSIS e-bike range but they all have common does and don’ts. - Page 6 Adjusting the suspension fork: The major difference between suspension forks used across the CRUSSIS e-bike range is the spring. There are two types of springs used in suspension forks Coil spring and Air spring. Coil spring: In order to adjust the suspension fork (if possible) simply turn the coil spring preload dial ( + for firm and - for soft).
- Page 7 Lock-out: Most of the forks fitted to CRUSSIS e-bikes are equipped with Lock-out option directly on the suspension fork or as a remote lock-out on the handlebars. Lock-out on the fork WARNING! Do not ride your e-bike with the fork locked-out while off-road, you may lose...
- Page 8 It is possible to choose from a number of assist modes in the display settings menu. 100% of the motor power output can be divided into 3, 5 or 9 assist modes. The standard setting is 5 modes of motor assistance. 0 without motor assistance (display records distance travelled) Do not use assist mode 4 and 5 on a long or extremely steep climbs! Combination of heavy load and low speed cause overheating of the motor which may lead to malfunction or damage of the...
- Page 9 THE BATTERY: This battery model is a chargeable Lithium ion battery. It is highly recommended that the battery will be charged in full, prior to use. WARNING! Storing battery in extreme hot/cold temperature must be avoided. As this will bring about a decrease in battery quality.
- Page 10 EMPHASIS FOR BATTERY CHARGING: The battery must be charged with the provided charger only, any other form of charger is forbidden and dangerous! The battery must be charged only when it is in off mode (and not emitting voltage). The battery may be charged while assembled to the e-bike as well as when it is unassembled. While the battery is in charging, the charger red indicator light is turned on, as the light turns into green the battery is fully charged.
- Page 11 FACTORS INFLUENCING THE E-BIKE RANGE: 1. Rolling resistance of the tires. CRUSSIS e-bikes are fitted with low rolling resistance tires, however it is crucial to keep the tires inflated properly according to manufacturer pressure charts.
- Page 12 OPERATING THE E-BIKE’S CONTROL PANEL (LCD color display): Control panel Bafang with high contrast LCD display gives you all the important information even under direct sunlight. The user interface is easy to read and intuitive to use with remote control panel giving you great feedback.
-
Page 13: On/Off Button
10. Pedal/walk assist mode: Press the + or - button briefly to change the level of assistance (1-3, 1-5, 1-9, depending on the bike model). Press and hold the - button to activate the walk assist mode. The display shows the mode symbol. *For the e-bike model 9.6, it is necessary to use the - button to select the walk assist symbol and then hold the - button to activate the Walking Assistant. - Page 14 Pedal assist mode selection: To adjust the pedal assist simply press the + or – button and select the level of pedal assist. The lowest level is 0, the highest level is 5. The default setting after the display is turned on is level 1.
- Page 15 To activate the walk-assist mode press and hold the (-) button, the bike travels on its own at a speed of about 6 km/h and when starting or pushing. To deactivate the walk-assist mode simply release the (-) button. You can choose the speed at which your bike will travel by changing the gear.
-
Page 16: User Settings Menu
USER SETTINGS MENU Display setting Setting Setting wheel circumference... - Page 17 Entering the user settings menu: After the electric system has been switched on and the display is lit, press the MODE button (i) twice in a row and access the user menu settings. The interface contains - Display settings - Information - Exit Setting: Simply press on the + or –...
- Page 18 (3) Auto OFF setting In the Display settings menu press + or - button and select the Auto OFF menu. Press the Mode button (i) briefly to confirm the option and access the menu. Press + or - and select from options /9 / 8 / 7 / 6 / 5 / 4 / 3 / 2 / 1 minute.
- Page 19 (7) Trip reset menu (TRIP, MAX, AVG) In the Display settings menu press + or – button and select the Trip reset menu. Press the MODE button (i) briefly to confirm the option and access the menu. Press + or - and select between YES or NO.
- Page 20 Password change: After you set your password, another Reset Password option is added to the Password menu. Briefly press the + or - button and select the Change password menu. Press the MODE button (i) briefly and confirm the option, enter the current password in the interface. If an incorrect password is entered 10 times, the display will shut itself OFF.
- Page 21 (10) Set Clock In the Display settings menu press + or – button and select the Set Clock menu. Press the Mode button (i) briefly to confirm the option and access the menu. The time is displayed in 24-hour format. The cursor remains at the first digit of the clock. Briefly press + or - button and select 0-2, confirm the selection by pressing on the MODE button (i).
- Page 22 (4) Error code In the Information menu press + or – button and select the Error code menu. Press the MODE button (i) briefly to confirm the option and access the menu. The last 10 errors are shown. E-CODE 1 displays information about the last error. E-CODE 10 will not be displayed until the tenth error occurs.
- Page 23 Model DP C18 – e-bike line 5.6 Specifications: Display size: 3“ Weight: 185g Dimensions: 82x94x75mm Handlebar mounting bracket diameter: 22,2/ 25,4/ 31,8mm Voltage: 36/ 43/ 48V Operating temperature: -20°C/ +°45°C Level of protection: IP65 Description of the DP C18 LCD display: A –...
- Page 24 Controller description: A - button + B - button – C - display light/backlight button D - ON/OFF button E - MODE button (TRIP, TOTAL, MAXS, AVG, RANGE, C) Operating the e-bike’s electric system: ON/OFF Button: Turn on the power by pressing the button of the battery, Pressing on the central ON/OFF button of the displays remote control for approximately 2...
- Page 25 Turn on the lighting and backlight of the display: Press and hold the button for approximately 2 seconds to turn on the display lighting and backlight. To turn off the display lighting and backlight, use the same method. When the display is turned on in a dark environment, both the display backlight and the lights are automatically turned on.
- Page 26 Adjustable parameters: Erasing the data such as TRIP, MAXS, AVG, tC. Setting unit km/mil (S7). Adjusting the automatic display backlight (bL0), display brightness (bLI). Setting the display automatic switch off function (OFF). Maintenance warning (nnA). Non-adjustable parameters: Wheel circumference (LUd). Max speed limit (SPL). Battery information (B01).
- Page 27 Setting the brightness of the display (bLI): Press on the + or – button to select from options 1-5, where 1 is the dimmest and 5 is the brightest of the display brightness setting. Press on the MODE button (i) to confirm the option and proceed to the next parameter.
- Page 28 Information only for reading – cannot be adjusted. Press on the MODE button (i) and proceed to the next parameter. Battery information (B01): The battery does not support battery information. Press on the MODE button (i) and proceed to the next parameter. Error code history (E00 –...
- Page 29 Error code Error description Solution High Voltage protection Have the battery Voltage checked Hall probe error inside the motor Have the rotor of the motor checked Engine Phase Error Have the power cord and motor checked The motor temperature has reached the Stop and wait until the motor cools down (if the error persists visit the service) operating max Motor temperature sensor error...
- Page 30 CRUSSIS electrobikes s.r.o. K Březince 227, 182 00 Praha 8 Czech Republic www.crussis.cz...
Need help?
Do you have a question about the BAFANG and is the answer not in the manual?
Questions and answers