Table of Contents
Advertisement
Quick Links
Advertisement
Table of Contents

Related Manuals for Ryobi RCV36


Summary of Contents for Ryobi RCV36
- Page 1 ORIGINAL INSTRUCTIONS Cordless Cultivator RCV36...
-
Page 2: Intended Use
■ Never use the product while tired, ill, or IMPORTANT! under the influence of alcohol, drugs, or It is essential that you read the instructions medication. in this manual before assembling, operating, and maintaining the product. PREPARATION Subject to technical modification. ■... - Page 3 BATTERY TOOL USE AND CARE ■ Do not use the product near drop-offs, ditches, excessively steep slopes, or ■ Recharge only with the charger specified embankments. Poor footing could cause a by the manufacturer. A charger that is slip-and-fall accident. suitable for one type of battery pack may ■...
-
Page 4: Operating Tips
to move or cut, the product may raise its CAUTION: The product may bounce height as the tines try to pass over the upward or jump forward if the tines strike extremely hard packed soil, frozen ground, or obstruction. Turn off the product, and allow buried obstacles, such as large stones, roots, the tines to cease all movement before and stumps. -
Page 5: Transporting Lithium Batteries
TRANSPORTING LITHIUM BATTERIES ■ After each use, clean the body and handles of the product with a soft, dry cloth, and Transport the battery pack in accordance with local and national provisions and regulations. clean the debris from the tines with a stiff Follow all special requirements on packaging brush. -
Page 6: Symbols In This Manual
Wear hearing protection. Remove battery pack before starting any work on the product. Guaranteed sound power level Keep feet and hands away from rotating tines. Waste electrical products should not be disposed of with household waste. Please recycle where facilities exist. Check with your local authority or retailer for recycling advice. - Page 7 WHAT’S IN THE BOX...
-
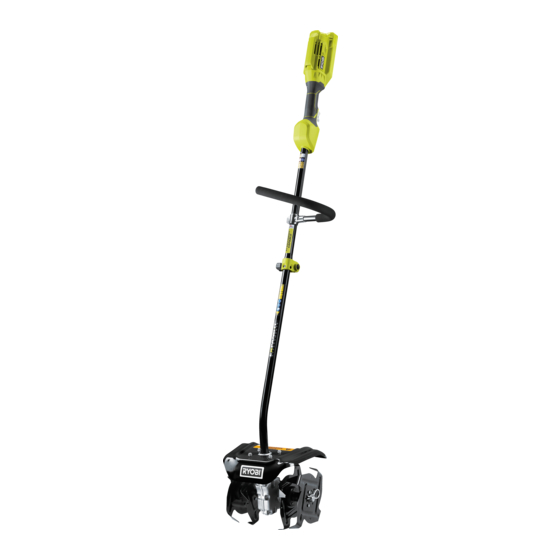
Page 8: Know Your Product
KNOW YOUR PRODUCT 1. Handle 7. Metal cover 2. Switch trigger 8. Gear box 3. Trigger lock out 9. Hitch pin 4. J handle 10. Inner tine 5. Coupler 11. Outer tine 6. Cultivator shaft... - Page 9 GETTING STARTED GETTING STARTED GETTING STARTED GETTING STARTED Install the bolts and nuts onto the metal cover, and tighten Wear full eye and ear protection, substantial footwear, and Push the lock button, and slide out the hanger cap from the Install the metal cover.
- Page 11 OVERVIEW Four-tine operation Two-tine operation p.11 p.13 Cleaning the tines Storing the cultivator p.15 p.17...
-
Page 12: Operation
OPERATION FOUR-TINE OPERATION WARNING: Keep hands and feet away from the rotating tines at all times. CAUTION: The product must be adequately controlled by using two-handed operation at all times. 1. Install the battery pack. 2. Press and hold the trigger lock out, and squeeze the switch trigger to turn on the product. - Page 13 OPERATION 3. Pull and push the cultivator while it is digging in the soil’s surface. NOTE: Use a forward and backward motion when using the product. WARNING: Never operate the product on rocky surfaces.
- Page 14 OPERATION TWO-TINE OPERATION WARNING: Keep hands and feet away from the rotating tines at all times. CAUTION: The product must be adequately controlled by using two-handed operation at all times. 1. Remove the battery pack. 2. Remove the hitch pin, tine A, and felt washer.
- Page 15 OPERATION 5. Press and hold the trigger lock out, and squeeze the switch trigger to turn on the product. 6. Pull and push the cultivator while it is digging in the soil’s surface. NOTE: Use a forward and backward motion when using the product.
- Page 16 MAINTENANCE CLEANING THE TINES 1. Remove the battery pack. 2. Clean the product with a soft, dry cloth, and clean the debris from the tines with a stiff brush. WARNING: Do not use water to clean the tines. 3. Remove the hitch pin, tine A, and felt washer.
- Page 17 MAINTENANCE 4. Remove the hitch pin, tine D, and felt washer. 5. Clean the product with a soft, dry cloth, and clean the debris from the tines with a stiff brush. WARNING: Do not use water to clean the tines.
- Page 18 STORAGE STORING THE CULTIVATOR NOTE: Clean and remove all foreign materials from the product before storing. 1. Turn off the product. 2. Remove the battery pack. 3. Loosen the knob, press the lock button, and remove the cultivator shaft.
- Page 19 STORAGE 4. Install the hanger cap. 5. Store the product in a cool, dry, and well-ventilated place that is inaccessible to children and well away from sources of ignition.
-
Page 20: Product Specifications
Cordless Cultivator measured in accordance with a standardised Model RCV36 test and may be used to compare one tool with Maximum working width 25.4 cm another. They may be used for a preliminary assessment of exposure. - Page 24 Road, Mount Waverley, VIC, 3149, Melbourne, Australia Techtronic Industries N.Z. Limited RYOBI is a trade mark of Ryobi Limited, Unit C, 70 Business Parade South, and is used under license. Highbrook, Auckland 2013, New Zealand © 2020 Techtronic Cordless GP.
Need help?
Do you have a question about the RCV36 and is the answer not in the manual?
Questions and answers