NUUO NVRmini 2 User Manual
Hide thumbs
Also See for NVRmini 2:
- Quick start manual (43 pages) ,
- User manual (168 pages) ,
- User manual (166 pages)

Related Manuals for NUUO NVRmini 2


Summary of Contents for NUUO NVRmini 2
- Page 1 Th e I n t e l l i g e n t Su r v e i l l a n ce So l u t i o n N VRm i n i 2 User Manual Ver. 2.0.0.140829.00...
-
Page 2: Table Of Contents
Ta b l e o f Co n t e n t s I nst allat ion ..................... 8 I nst allat ion Process ................8 LED St at us Definit ions ..............16 Set t ings ....................18 Cam era Set up .................. 18 2.1.1 Add Cam eras by Cam era Search ......... - Page 3 2.5.4 Net work Service Set up ............ 55 2.5.5 CMS Service Set up ............57 Managem ent ..................57 2.6.1 View t he List of Users ............57 2.6.2 Creat e New Users ............. 58 2.6.3 Modify User I nform at ion ..........59 2.6.4 Change a User ’s Password ..........
- Page 4 3.3.1 Add New Tag Filt er ............83 3.3.2 Edit Tag Filt er ..............86 3.3.3 Delet e Tag Filt er ..............86 3.3.4 I m port / Ex port Tag Filt er ..........87 POS Display Font ................87 3.4.1 Live View ................
- Page 5 5.1.1 Live View Cont rol Panel ..........104 5.1.2 Live View Set t ing..............107 5.1.3 General Set t ing ..............107 5.1.4 St ream Profile Set t ing ............108 5.1.5 OSD ( On- screen display ) Set t ing ........109 5.1.6 Monit or Display Set t ing ..........110 5.1.7 Not ification .................
- Page 6 7.1.5 Recorded Video Enhancem ent ........134 7.1.6 Save a Video ..............135 7.1.7 Save an I m age ..............136 7.1.8 Print an I m age ..............137 7.1.9 Backup t he Recorded Video ..........138 Rem ot e Play back Sy st em Applicat ion ........140 7.2.1 Play back Sy st em Applicat ion Cont rol Panel .....140 7.2.2...
- Page 7 13.5 Rest ore All Default Configurat ion .........161 13.6 I nst all Act iv eX ................161 13.7 Cannot Log in t o t he Unit wit h I nt ernet Ex plorer ...162 Appendix – RAI D Sy st em ................163 I nt roduct ion t o RAI D ................163 RAI D 0 –...
- Page 8 GN U Ge n e r a l Pu b l i c Li ce n s e This product includes copyright ed t hird- part y soft ware licensed under t he t erm s of t he GNU General Public License.
-
Page 9: I Nst Allat Ion
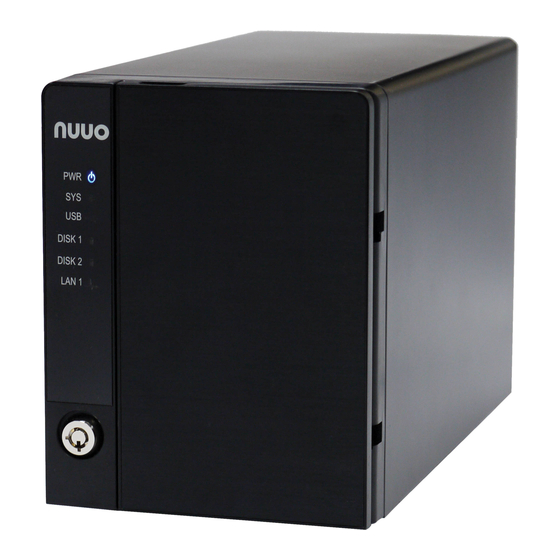
1 . I n st a l l a t i o n 1 .1 I n st a l l a t i o n Pr o ce ss St e p 1 : U n p a ck t h e U n i t This pack age cont ains t he following it em s: The unit Quick St art Guide... - Page 10 4 b a y u n i t f r o n t / r e a r v i e w Reset Syst em St at us ; eSATA St at us eSATA Conn. Et her net 1 & 2 Act ivit y 1&...
- Page 11 . Aft er t he procedure, y ou can begin using it . Go t o St art > NUUO NVRm ini 2 > NUUO I nst all Wizard. This program will show t he default language set t ing and init iat ion m ode.
- Page 12 Ex p r e s s M o d e : y ou don’t need t o set up t he network set t ings, Dat e/ Tim e and RAI D lev el. A d v a n ce d M o d e : configure all set t ings m anually : net work , license, cam era, Dat e/ Tim e, upgrade not ificat ion, and RAI D lev el “...
- Page 13 Ty pe in t he password, and t hen click t he OK but t on. The default Adm inist rat or password is “ adm in” . Nam e t his serv er and select t he net work t y pe, and t hen click t he but t on.
- Page 14 Add cam eras for t his serv er. There are t wo way s of adding cam eras, select ing t he searched cam eras and m anually configuring t he cam eras. Click t he but t on aft er com plet ing cam era list .
- Page 15 Set up t he t im e zone, dat e, and t im e, and adj ust daylight saving changes if needed. Once daylight saving funct ion is enabled, t he t im e change will act ivat e aut om atically ev ery year based on t he recurrence y ou set .
- Page 16 10. Check “ En a b l e Up g r a d e N o t i f i ca t i o n ” box if y ou want t o receive not ificat ion when t here is a newer FW version. Click t he but t on.
-
Page 17: Led St At Us Definit Ions
For 2 bay unit , only RAI D 0 and 1 are available. 12. Review your set t ings. I f t he set t ings are correct , click t he Fi n is h but t on t o exit t he set t ings procedure and act ivat e t he syst em . Once t he “... - Page 18 Fu n ct i o n LED St a t u s Po w er St a t u s Power- on: blue Power- off: dark Sy st e m St a t u s Healt hy: blue Reset adm in password: blue wit h blinking Unhealt hy or abnorm al t em perat ure st at us or RAI D volum e st at us abnorm al: orange Reset t o default set t ing: orange wit h blinking...
-
Page 19: Set T Ings
2 . Se t t i n g s Aft er set t ing up t he unit , log in t o t he syst em by ent ering it s I P address in t he browser ( I nt ernet Ex plorer 8 and lat er) . When connect ing, choose y our language, ent er t he usernam e and password, and t hen begin using t his sy st em . - Page 20 4. Click t he Se a r ch but t on. 5. The sy st em will list all t he current ly available cam eras. The insert ed cam eras are shown in blue. Click t he icon t o add a cam era int o y our cam era list .
-
Page 21: Add Cam Eras Manually
9. Aft er clicking t he A d d but t on, t he updat ed cam era list will be display ed in t he Ca m e r a Se t t i n g t ab. 2 .1 .2 A d d Ca m e r a s Ma n u a l l y 1. -
Page 22: Modify Cam Era I Nform At Ion
lens/ channels. Pr o t o co l : Dat a t ransm ission prot ocol. Ve n d o r : Cam era v endor nam e. M o d e l : Cam era m odel nam e. To have bet t er com pat ibilit y bet w een cam era and syst em , please m ake sure t he privilege of cam era credent ial is adm in - level. -
Page 23: Set Up Lens Set T Ings
5. Modify t he inform at ion of t his cam era. 6. Click t he Sa v e but t on. Ca m e r a N a m e : The nam e of t he cam era. M u l t i - s t r e a m Se t t i n g s : Enable/ Disable cam era m ult i- st ream . -
Page 24: View Cam Era St At Us
Ca m e r a N a m e : The nam e of t he cam era. Le n s Ty p e : There are t hree t y pes of lens currently, Generic Dewarp, I m m erVision and Viv ot ek ( FE8171V) . Generic Dewarp is a general m et hod, which done by soft ware t echnique, and it ’s suit able for m ost fishey e cam eras. - Page 25 Co n n e ct i o n St a t u s : The st at us of t he connect ion. Click t he Co n n e ct or D i sco n n e ct but t on t o change t he connect ion st at us. St a t u s I co n Connect ion St at us...
-
Page 26: View Cam Era St At Us Det Ails
Recording St at us Schedule Recording – St opped Fr a m e Ra t e : The fram e rate of t his cam era. B i t Ra t e : The t ransm ission bit rat e of t his cam era. Es t i m a t e d Re m a i n i n g Re co r d i n g Ti m e : Est im at ed rem aining recording t im e is dividing t he current free capacity by dy nam ic t ot al bit... -
Page 27: Recording Schedule / Ev Ent Set Up
4. I f select ing A l w a y s Re co r d , t he chosen cam eras will begin t o record im m ediat ely. N o Re c o r d i n g : Turn off t he recording. - Page 28 5. Click t he schedule of t he cam era which needs t o be m odified. 6. Click t he colum n at t he bot t om of t he page. I n s e r t : I nsert new schedules. D e l e t e : Delet e t he select ed schedule.
- Page 29 7. The default set t ing of t he cam era’s recording schedule is from 00: 00 t o 24: 00. I f y ou want t o m odify t he t im e slot , click t he Co n f i g u r e but t on t o m odify t he default set t ings first .
- Page 30 10. Click t he Sa v e but t on. When changing t he m ot ion det ect ion set t ings of a cam era, m ake sure t o disconnect your unit and t hat cam era first . Once you have finished, re- connect ing t hem will updat e t he set t ings in your unit .
-
Page 31: Cam Era Ev Ent S And Responding Actions Set Up
2 .2 .3 Ca m e r a Ev e n t s a n d Re s p o n d i n g A ct i o n s Se t u p 1. Open I nt ernet Ex plorer, Windows Chrom e or Mac Safari and log in t o t he unit . - Page 32 Co n n e ct l o s t : When a connect ion bet ween t he cam era and t his unit is lost , t he system will t rigger an act ion. M o t i o n f r o m Ca m e r a : When video m ot ion is det ect ed, t he cam era t riggers an act ion.
- Page 33 while N/ C m eans norm al close. 5. Click t he A d d but t on t o set up t he responding act ions of t his ev ent . Ou t p u t : When an ev ent occurs, t he sy st em will send an out put signal t o ot her connect ed devices.
-
Page 34: I / O Box I Nput And Responding Act Ion Set Up
2 .2 .4 I / O Bo x I n p u t a n d Re s p o n d i n g A ct io n Se t u p 1. Open I nt ernet Ex plorer, Windows Chrom e or Mac Safari and log in t o t he unit . -
Page 35: Sy St Em Event S And Responding Actions Set Up
7. Click t he Sa v e but t on. 2 .2 .5 Sy st e m Ev e n t s a n d Re s p o n d in g A ct io n s Se t u p 1. -
Page 36: Push Not Ificat Ion
t hrough Em ail aft er finishing t he last file of t his backup schedule. Po w e r - o n n o t i f i ca t i o n : Record t he t im e as power was t urning on. A u t o p o w e r - o f f n o t i f i ca t i o n : I f ov erheat was happened, users will be not ified t hat power is aut o off via Em ail. - Page 37 : All user account s in t his unit . 5. Click t he Sa v e but t on. 6. Sign in t he unit on NUUO m obile client wit h t he user account assigned wit h push not ificat ion service.
-
Page 38: Smtp Server Set Up
I f users don’t want t o r ece i v e not ificat ions anym ore, users can t urn off t his feat ure on NUUO m obile client . There is one possibilit y of de- regist ering failed, t hat is, users have ever logged in t o t he m obile client by t yping bot h LAN I P and WAN I P of t he NVR, but only do de- regist ering on one side. -
Page 39: Add Ev Ent Cont Act S
Se r v e r A d d r e ss : SMTP ( Sim ple Mail Transport Prot ocol) serv er I P address. Po r t : SMTP port . Se n d e r : Sender inform at ion. Su b j e ct : The subj ect of t he m ail. -
Page 40: Set Up Ftp Serv Er
A d d Co n t a ct : Add t his new cont act int o t he cont act list . Re se t : Ret urn t o t he lat est sav ed set t ings of t he cont act list . Sa v e : Sav e t his t im e m odificat ion of t he cont act list . -
Page 41: Rai D & File Set Tings
5. Click t he Sa v e but t on. Make sure t he FTP account wit h privileges of adm inist rat or who is able t o upload, rewrit e, delet e files, and cr eat e new folder. Besides, m ake sure t he FTP server has enough space for aut o backup. - Page 42 4. Choose t he RAI D lev el y ou prefer for y our disk array. 5. Check boxes of disk s and click t he > > but t on t o assign disk drives for t his v olum e. 6.
-
Page 43: View Rai D Volum E St At Us
The RAI D Volum e will be funct ional on anot her unit if a l l disks of t his v olum e are m oved t o t he unit . Aft er set t ing RAI D level, you are not allowed t o change neit her t he RAI D level nor t he num ber of disks cont aining in t his volum e. -
Page 44: View Disk Driv E I Nform At Ion
RA I D N a m e : Nam e of y our RAI D, aut om at ically assigned when it was creat ed. RA I D Le v e l : RAI D 0, 1, 5, or 10, specified when it was creat ed. RA I D St a t u s: Fu n ct i o n a l is norm al. - Page 45 Ve n d o r : Delivers t he m anufact urer of t he disk . M o d e l : Deliv ers t he m odel num ber of t he disk . Ca p a ci t y : Tot al, free, used dat a capacit y of t he disk .
-
Page 46: Modify Rai D Volum E
SMART t est m ay affect t he recording perform ance. You m ay need t o st op recording t o run t he t est . Click on St o p Tes t t o t erm inat e SMART t est . 6. - Page 47 inst ead of m odifying RAI D level. I n t he condit ion of crit ical RAI D st at us, it ’s a warning t o show t hat one of disk s of t his RAI D v olum e m ay be dam aged. Ev en t hough it ’s no im pact on t he recording funct ion, y ou’d bet t er t o replace a new disk t o m ak e sure t he v olum e wit h dat a prot ect ion m echanism .
- Page 48 5. Aft er rem oving t he dam aged disk . Add a free disk t o replace t he dam aged, and click t he M o d i f y but t on. 6. A confirm ation dialog pops up. Check t he Ye s , I w an t t o m o d i f y t h i s v o l u m e box , and click t he Ye s , m o d i f y i t but t on.
-
Page 49: Delet E A Rai D Volum E
2 .3 .5 D e l e t e a RA I D Vo l u m e Open I nt ernet Ex plorer, Windows Chrom e or Mac Safari and log in t o t he unit . Click RA I D & Fi l e Sy s t em / RA I D M a n a g e m e n t . Click t he D e l e t e t ab. -
Page 50: Form At
7. Sy st em will rest art aut om at ically aft er RAI D v olum e is delet ed When you delet e a RAI D Volum e, all t he folders in t he RAI D volum e and all t he dat a saved in t he folders will be delet ed. -
Page 51: Modify T He Ftp Prot Ocol Set T Ings
There are anot her t wo way s t o access t he recorded dat a in t he unit : t hrough Work group or t hrough FTP . 1. Open I nt ernet Ex plorer, Windows Chrom e or Mac Safari and log in t o t he unit . -
Page 52: Aut O Back Up
Se r v i ce s : Whet her users can access t his unit t hrough FTP or not . Co m m a n d Po r t : The port for com m ands bet ween a serv er and a client . Pa s s i v e Po r t s : The dat a t ransm ission port of passive m ode. -
Page 53: Net Work Set Up
D a i l y Ba ck u p Ti m e : The daily scheduled t im e t o st art backup process. Vi d e o St a r t Ti m e : The st art t im e of recorded v ideo of t he previous dat e. Vi d e o En d Ti m e : The end t im e of recorded video of t he previous dat e. - Page 54 Se r v e r N a m e : Nam e your unit . Because of t he int ernal dat a m odificat ions required, it t akes a few seconds t o change t he nam e of your unit . Log in again aft er configurat ion act ivat ed. I n t e r n e t I n t e r f a ce ( W A N ) : The select ion is for 4bay unit t o choose which LAN is connect ed t o t he int ernet , which im plies t hat t here is no...
-
Page 55: Aut O Port - Forwarding
4. Click t he DD N S Se t u p t ab t o enable Dynam ic Dom ain Nam e Serv er funct ion, allowing y ou t o connect unit wit h dynam ic I P address. 2 .5 .3 A u t o Po r t - Fo r w a r d i n g This funct ion is designed for saving t im e in port configurat ion on rout er if users want t o access t he unit ( in LAN) from WAN. -
Page 56: Net Work Service Set Up
6. Aft er select ing one of searched rout ers, click t he icon t o set up port - forwarding t o t his rout er aut om at ically. You will find port s of set t ing, liveview, play back and CMS are list ed. - Page 57 unit . 2. Click N e t w o r k Se t u p / N e t w o r k Se r v ice . 3. Click t he W e b Se r v i ce t ab 4.
-
Page 58: Cms Service Set Up
A l l o w e d / Bl o ck e d Li st Allowed List : Only I P addresses from t he allowed list are allowed t o log Block ed List : I P addresses from t he block ed list will be unable t o log When sett ing Maxim um Connect ions in Live St ream ing Server set t ings, 1 connect ion m eans t hat one user connect s t o one cam era. -
Page 59: Creat E New Users
2 .6 .2 Cr e a t e N e w Us e r s 1. Open I nt ernet Ex plorer, Windows Chrom e or Mac Safari and login t he unit . 2. Click M a n a g e m e n t / Us er M a n a g e m e n t . 3. -
Page 60: Modify User I Nform At Ion
The Adm inist rat or will be t he only user w ho can use all of t he funct ions. There is a default adm inist rat or account in t he syst em , and you cannot creat e neit her anot her “... -
Page 61: Delet E Users
4. Choose t he user. 5. Ent er a new password. 6. Ent er t his new password again. 7. Click t he OK but t on. 2 .6 .5 D e l e t e Us e r s Except for t he adm inist rat or, y ou can delet e any users wit h t he following st eps. -
Page 62: Offline License Act Ivat Ion
1. Open I nt ernet Ex plorer, Windows Chrom e or Mac Safari and log in t o t he unit . 2. Click M a n a g e m e n t / Li ce n s e M a n a g e m e n t . 3. - Page 63 3. Click t he Ex p o r t but t on under t he sect ion of Of f l i n e Act ivat ion t o ex port t he inform at ion of t his unit . 4.
-
Page 64: Online License Transfer
6. I nput t he serial num ber, click t he A ct iv a t e but t on, and sav e t he .dll file o f f l i n e _ l i ce n s e .d l l . 7. -
Page 65: Offline License Transfer
3. Select t he license y ou want t o t ransfer from t he License List below, and click t he Tr a n s f e r but t on. 4. The license will be rem oved from License List if t ransferred successfully. 2 .6 .9 Of f l i n e Li ce n s e Tr a n s f e r I f t he device is set up in I nt ranet ( Local LAN) wit hout I nt ernet connect ion, t here is anot her way t o t ransfer license. -
Page 66: View T He Event Log
5. Tak e it t o ot her PC which is connect ed t o t he I nt ernet . Furt herm ore, t he PC should be inst alled Of f Li n e To o l .e x e which can be found from NVRm ini 2 t oolkit . -
Page 67: Sav E Unit Configurat Ion
There are four kinds of ev ent which will be list ed on t his page. Sy st e m Lo g : The log inform at ion of t he operat ions t o y our unit , such user access inform at ion, as reboot or shut down. -
Page 68: Load Unit Configurat Ion / Default Set T Ings
4. Check t he box of E- M a p Se t t i n g s or POS Se t t i n g s if y ou want t o keep t he configuration. 5. Click t he OK but t on. 6. -
Page 69: Sy St Em
address; for t he lat t er, check t he box of E- M a p Se t t i n g s or POS Se t t i n g s if y ou want t o rest ore t he configurat ion. 4. -
Page 70: Sm Art Fan Cont Rol
Op e r a t i n g Sy s t e m : Em bedded Linux N V R Ve r s i o n : NVR syst em v ersion D e v i ce Pa ck Ve r s i o n : Cam era pack age version : CPU m odel num ber CPU Lo a d i n g... -
Page 71: Ups Set Up
4. Check t he En a b l e or D i sa b l e opt ion. 5. Click t he OK but t on. 2 .7 .4 UPS Se t u p This feat ure enables y ou t o t ell y our unit how long t o run on APC Unint errupt able Power Supply ( UPS) bat t ery power and when t o shut down, aft er power failure. -
Page 72: Upgrade T He Sy St Em
7. Click t he OK but t on. 2 .7 .5 Up g r a d e t h e Sy s t e m 1. Open I nt ernet Ex plorer, Windows Chrom e or Mac Safari and log in t o t he unit . -
Page 73: Sy St Em Dat E And Tim E Set Up
4. Check t he opt ion if y ou agree t o be bound by t he agreem ent . 5. Click t he OK but t on. 2 .7 .7 Sy st e m D a t e a n d Ti m e Se t u p 1. -
Page 74: Rest Art T He Unit
3. Choose t he t im e zone. 4. Configure t he y ear, m ont h, day and t im e m anually, or enable NTP serv er t o sy nchronize t im e aut om atically. When NTP serv er enabled, t he dat e/ t im e set t ings will be gray ed out . -
Page 75: Shut Down T He Unit
3. Check t he Re b o o t opt ion. 4. Click t he OK but t on. 5. A confirm ation dialog pops up. Click t he OK but t on t o reboot t he unit . The rest art procedure runs aut om at ically. - Page 76 1. Open t he lid of t he unit . 2. Press and hold t he power but t on for 2 seconds and release y our hands when t he buzzer is beeping once. 3. Sy st em will begin t he shut down process, which t ak es about 30 seconds t o few m inut es depends on num ber of recording channels and ot her fact ors.
-
Page 77: Pos
3 .1 .1 Sy st e m I n t r o d u ct i o n NUUO POS, a Point of Sales Sy st em s based on NUUO NVR/ DVR/ NVDR/ NVRm ini/ NVRm ini 2 , provides financial t ransact ion’s surv eillance solut ion in one cent ral sy st em . -
Page 78: Hardware I Nst Allat Ion - Scb- C31A
Op e r a t i n g H u m i d i t y 0- 90 % Non- Condensing Ba u d Ra t e 110 bps t o 230.4 k bps D a t a Bi t s 5, 6, 7 or 8 St o p Bi t s 1, 1.5 or 2... -
Page 79: Soft Ware I Nst Allation - Scb- C31A
The LED I ndicat ors: LI NK LED: Et hernet cable connect ion and dat a act iv e. RUN LED: Sy st em is ready ( Blinking) . Serial 1: Transit ing/ Receiving I ndicat or. 3 .1 .3 So f t w a r e I n s t a l l a t i o n – SCB - C3 1 A St ep 1: Use I E- browser t o set up SCB- C31A, t he default I P address is 1 9 2 .1 6 8 .1 .1 St ep 2: Set up I P address and password in Se r v e r page, and click t he Sa v e... -
Page 80: Connection Via Tcp Client
St ep 3: Set up Password if needed. Password is only using t o act ivat e a securit y feat ure on t he serial serv er. Once a password is ent ered it will be required t o access t he m enu and m ak e change of configurat ion when access. -
Page 81: Soft Ware Set Up
NVRmini 2 3 .2 So f t w a r e Se t u p 3 .2 .1 A ct i v a t e POS Li ce n se I f y ou are not t he SCB- C31 user, you need t o act ivat e POS license before... -
Page 82: I Nsert Pos Set T Ing
D a t a So u r ce : List of all t he dat a sources. I nsert : Click t o insert POS and do t he POS set t ings. See I n s e r t POS Se t t i n g for det ails. - Page 83 SCB - C3 1 : The device possesses one POS license, and should be equipped wit h t he cash regist er not working as TCP serv er. SCB - C3 1 A : The difference from SCB- C31 is not possessing one POS license, so user should act ivat e POS license.
-
Page 84: Delet E Pos Device
5. Select Ta g Fi l t e r . See Tag Fi l t e r for det ails. 6. Select t he cam era of A s so ci a t e d Ca m e r a s t o display POS t ransact ion dat a overlay on live video. - Page 85 original and filt ered dat a. Fi l t e r To o l s : Upper/ down but t ons t o arrange t he priorit y of each filt er; rem ov e but t on t o rem ov e t he filt er from list . 3.
- Page 86 Om i t : Neglect t he select ed t ex t which is m eaningless or not im port ant . The t ex t will disappear on t he right window. Su b s t it u t e : Use anot her word( s) t o replace t he select ed t ex t .
-
Page 87: Edit Tag Filt Er
En d : Define t he select ed t ex t as t he sym bol for t ransact ion ending. The filt ered dat a will be separat ed line as below. 7. Filt er Tools Up: Mov e a t ag filt er up; t he upper filt er will be operat ed earlier. Down: Mov e a t ag filt er down;... -
Page 88: I M Port / Ex Port Tag Filt Er
2. Click D e l e t e but t on t o delet e it . 3 .3 .4 I m p o r t / Ex p o r t Ta g Fi l t e r 1. Click I m p o r t / Ex p o r t but t on and select I m port / Ex port URL. 2. -
Page 89: Rem Ot E Liv E Viewer
3 .4 .2 Re m o t e Li v e Vi e w e r 1. St art up > NUUO NVRm ini 2 > Rem ot e Liv e Viewer 2. Click t he Ge n e r a l Se t t i n g but t on t o open Liv e Vi ew Se t t i n g window. -
Page 90: Play Back
4. Click t he OK but t on t o sav e. 3 .4 .3 Pl a y b a ck 1. Open I nt ernet Ex plorer, Windows Chrom e or Mac Safari and log in t o t he unit . -
Page 91: Play Back Sy St Em
3 .4 .4 Pl a y b a ck Sy s t e m 1. St art up > NUUO NVRm ini 2 > Play back Sy st em 2. Click t he Se t t in g but t on t o open Se t t i n g window. -
Page 92: Pos Transact Ion Dat A Search
3 .5 POS Tr a n sa ct i o n D a t a Se a r c h POS Se a r ch t ool is used t o search key word of all t ransact ion dat a. 3 .5 .1 Se a r ch POS Tr a n s a ct i o n D a t a t h r o u g h Pl a y b a ck 1. -
Page 93: Search Pos Transact Ion Dat A T Hrough Play Back
4. Click t he POS Se a r ch but t on t o open POS Se ar ch D i a l o g window. 5. Select a POS device( s) from t he POS list . 6. Set up St art Tim e and End Tim e in D a t a Ti m e Pe r i o d sect ion. 7. -
Page 94: Sy St Em
1. St art up > NUUO NVRm ini 2 > Play back Sy st em . 2. Click t he Op e n Re co r d but t on t o open D a t a Ti m e Se a r ch D i a l o g window. -
Page 95: Select Period By Dat A & Tim E T Hrough Play Back
3 .6 .3 Se l e ct Pe r i o d b y D a t a & Ti m e t h r o u g h Pl a y b a ck Sy s t e m 1. St art up > NUUO NVRm ini 2 > Play back Sy st em . -
Page 96: Backup T Hrough Play Back Sy St Em
3 .7 .2 B a ck u p t h r o u g h Pl a y b a ck Sy st e m St art up > NUUO NVRm ini 2 > Play back Sy st em . - Page 97 Please refer t o st ep 1 t o 14 of t h e cont ent of B ack u p a n d D e l e t e Re co r d s , and check t he Ba ck u p POS Tr a n s a ct i o n opt ion.
-
Page 98: I Nt Roduct Ion
NUUO provides rem ot e I / O solut ion for NVRm ini/ NVRm ini 2 by connect ing SCB- C31 wit h NUUO I / O Box SCB- C24/ 26/ 28. Refer t o t he below archit ect ure, I / O device is connect ed direct ly wit h I / O Box , and input / out put signal delivered in RS485 form at are conv ert ed t o Et hernet t hrough SCB- C31. -
Page 99: Soft Ware I Nst Allation - Scb- C31
RS485 RJ-45 RS485 Reset Switch Power M u l t i p l e I / O Bo x e s ca n b e co n n e ct e d t o a si n g l e SCB - C3 1 . H o w e v e r , se r i e s co n n e ct io n o f I / O b o x e s i s f o r b i d d e n . -
Page 100: Soft Ware I Nst Allation - Scb- C24/ 26/ 28
2. Se r v e r Li s t e n in g Po r t : The default port is 4000, which is not t he port for set t ing page, but for signal t ransm ission. St ep 3: Click t he A p p l y but t on t o activat e configurat ion. Due t o t he st abilit y of dat a t ransm ission, one SCB- C31 can be paired wit h one NVR unit only . - Page 101 I OConfig.exe st art s scanning t he I D from 0 t o 255, and it m ay t ake around a m inut e t o finish scan. 2. When t he I / O Box is discov ered, click on t he it em and change t he I D from t he N e w A d d r e ss field.
-
Page 102: Soft Ware Set Up
4. Refer t o t he H W I n s t a l l a t i o n sect ion t o connect ot her I / O Box and repeat t he st eps 1 t hrough 3 abov e t o configure m ore I / O Boxes. 4 .2 So f t w a r e Se t u p 4 .2 .1 A d d I / O Bo x 1. -
Page 103: Modify I / O Box I Nform At Ion
Po r t : The t ransm ission port of SCB- C31. : The I D of t he I / O box . 4. Click t he Cr e a t e but t on, and t he inform at ion will be updat ed in I / O Box List . -
Page 104: Relat Ive Configurat Ion And Applicat Ion
4. For input pin, y ou can select an associat ed cam era for it , which will be t he com m unicat ion m edia for server and client . ( e.g. when an input was t riggered and pushed a not ificat ion t o m obile, users can play back t he videos of it s associat ed cam era.) 5. -
Page 105: Live View
5 . Li v e v i e w There are t wo way s t o execut e t he live view funct ion: wit h I nt ernet Ex plorer, Windows Chrom e or Mac Safari or wit h t he Re m o t e Li v e Vi ew e r applicat ion. 5 .1 I n t e r n e t Ex p l o r e r 5 .1 .1 Li v e Vi e w Co n t r o l Pan e l Log In/ Log Out... - Page 106 serv er nam e, video current st at us, and bit rat e for a select ed channel. St a r t M e n u > E- M a p : Upload m ap and drag cam era or I / O on it t o t rack device locat ion and alarm st at us wit h inst ant response when an ev ent occurred.
- Page 107 En a b l e M o v e : Adj ust t he current view of cam era which support s PT funct ion by dragging t he but t on on t he display screen. En a b l e D i g i t a l PTZ: Click t he + or –...
-
Page 108: Live View Set T Ing
Co n n e ct A l l / D i s co n n e ct A l l : Click t o connect or disconnect all cam eras. 5 .1 .2 Li v e Vi e w Se t t i n g 1. -
Page 109: St Ream Profile Set T Ing
5. Check t he En a b l e au d i o o n a ct i v e ch a n n e l opt ion t o enable audio st ream ing on act ive channel. This funct ion sy nchronizes wit h right click on cam era t o enable audio. -
Page 110: Osd ( On- Screen Display ) Set T Ing
5. Adj ust t he st ream profile of ev ery cam era wit h st ream profile enabled in t he s e t t i n g p a g e 6. Click a cam era and select it s st ream profile, and click t he Co p y t o … but t on t o apply t his profile t o ot her channels. -
Page 111: Monit Or Display Set T Ing
5. Check t he En a b l e ca m e r a OSD opt ion. 6. Set t he foreground and back ground set t ings of t he OSD. 7. Select which kinds of inform at ion will be displayed on t he screen. 8. -
Page 112: Set Up Joy St Ick Cont Rol
3. Click t he Ge n e r a l Se t t i n g but t on. 4. Click t he N o t i f i ca t i o n t ab. 5. Check Sh o w r e co r d i n g s t a t u s t o show t he cry st al ball wit h recording st at us on m onit or display. - Page 113 Fu n ct i o n : You can choose t he funct ion from t he drop- down m enu for t he but t on of t he j oy st ick . Pa r a m e t e r : Choose t he preset point from t he drop- down m enu.
-
Page 114: Rem Ot E Liv E Viewer Applicat Ion
5 .2 Re m o t e Li v e V i e w e r A p p l i ca t i o n 5 .2 .1 Re m o t e Li v e Vi e w e r A p p l i c a t i o n Co n t r o l Pa n e l Log In/ Log Out (Server / Group) Server and Camera... - Page 115 St a r t M o n i t o r > E- M ap : Upload m ap and drag cam era or I / O on it t o t rack device locat ion and alarm st at us wit h inst ant response when an ev ent occurred.
- Page 116 En a b l e M o v e : Adj ust t he current view of cam era which support s PT funct ion by dragging t he but t on on t he display screen. En a b l e D i g i t a l PTZ: Click t he + or –...
-
Page 117: Unit Connect Ion Set T Ing
5 .2 .2 Un i t Co n n e ct i o n Se t t in g 1. St art up > NUUO NVRm ini 2 > Rem ot e Liv e Viewer. 2. Click t he Ge n e r a l Se t t i n g but t on. -
Page 118: General Set T Ing
5 .2 .3 Ge n e r a l Se t t i n g 1. St art up > NUUO NVRm ini 2 > Rem ot e Liv e Viewer. 2. Click t he Ge n e r a l Se t t i n g but t on. -
Page 119: Cam Era Group Set T Ing
You can put different cam eras int o t he sam e group. 1. St art up > NUUO NVRm ini 2 > Rem ot e Liv e Viewer. 2. Click t he Ge n e r a l Se t t i n g but t on. -
Page 120: Delet E/ Renam E Cam Era Groups
5 .2 .5 D e l e t e / Re n a m e Ca m e r a Gr o u p s 1. St art up > NUUO NVRm ini 2 > Rem ot e Liv e Viewer. -
Page 121: Osd ( On- Screen Display ) Set T Ing
5 .2 .7 OSD ( On - s cr e e n d i sp l a y ) Se t t i n g 1. St art up > NUUO NVRm ini 2 > Rem ot e Liv e Viewer. -
Page 122: Not Ification
5 .2 .9 N o t i f i c a t i o n 1. St art up > NUUO NVRm ini 2 > Rem ot e Liv e Viewer. 2. Click t he Ge n e r a l Se t t i n g but t on. -
Page 123: Set Up Joy St Ick Cont Rol
Se t u p Jo y st i ck Co n t r o l 1. St art up > NUUO NVRm ini 2 > Rem ot e Liv e Viewer. 2. Click t he Ge n e r a l Se t t i n g but t on. -
Page 124: Set Up Rem Ot E Live Viewer
Se t u p Re m o t e Li v e Vi e w e r 1. St art up > NUUO NVRm ini 2 > Rem ot e Liv e Viewer. 2. Click t he unit y ou wish t o access in your rem ot e serv er list . -
Page 125: E- Map
6 . E- M a p There are t wo way s t o execut e t he live view funct ion: by I nt ernet Ex plorer, Windows Chrom e or Mac Safari or by Re m o t e Li v e Vi ew e r applicat ion. Wit h E- m ap, user can easily t rack t he device locat ion and alarm st at us wit h inst ant response when an ev ent occurs. -
Page 126: Add Map
E- m ap. D i g i t a l I n p u t : Select it t o highlight t he device wit h green ring on m ap and show st at us on I nform at ion Window. I f t he Digit al I nput is from I P cam era, t he preview window will display liv e video of t he cam era. -
Page 127: Edit Map
5. Repeat st eps 2 t hrough 4 t o add m ore m aps. 6. Click t he Up l o a d but t on t o act ivat e all t he set t ings. The m axim um file size of each m ap is 500KB. There are 10 layers of m ap, and t he m ap capacit y of each layer is 10 . -
Page 128: Lay Out Adj Ust M Ent
Adjust the Layout 6 .1 .7 La y o u t A d j u s t m e n t A d j u s t t h e La y o u t : Click t he t riangular indicat or t o hide t he Device and Map Tree List / Preview and I nform at ion Window on right and left side of t he window. -
Page 129: Rem Ot E Liv E Viewer Applicat Ion
6 .2 Re m o t e Li v e V i e w e r A p p l i ca t i o n 1. St art up > NUUO NVRm ini 2 > Rem ot e Liv e Viewer. -
Page 130: Play Back
7 . Pl a y b a ck There are t wo way s t o execut e t he playback function: wit h I nt ernet Ex plorer or wit h t he Pl a y b a ck Sy s t em application. 7 .1 I n t e r n e t Ex p l o r e r 7 .1 .1 Pl a y b a ck Co n t r o l Pan e l Browse Mode... - Page 131 Op e n Re co r d : Click t he Op e n Re co r d but t on t o access t he Dat e-Tim e Panel and select t he video records which y ou want t o review. Ge n e r a l Se t t i n g Record Display Calendar View: view t he Record Display Window as a calendar.
-
Page 132: Search T He Recorded Video
m ode, Full- view panoram a m ode, Dual-view panoram a m ode. Ty pe of m odes depends on lens locat ion. 7 .1 .2 Se a r ch t h e Re co r d e d Vi d e o Refresh POS Search Previous/ Next... - Page 133 Sh o w Ev e n t Lo g : Show t he t im e of event det ection in t he t im e t able. Color of event t ype can be defined by preference. 1. From t he Record Display Window at t he t op left of t he Dat e Tim e Panel, select t he dat e you want t o search t he record from .
-
Page 134: Play T He Recorded Video
7 .1 .3 Pl a y t h e Re co r d e d Vi d e o 1. Be sure t hat y ou hav e set t he schedule / recording ev ent first . 2. Open I nt ernet Ex plorer, Windows Chrom e or Mac Safari and log in t o t he unit . -
Page 135: Recorded Video Enhancem Ent
Define det ection zone by dragging t o draw a det ect ion zone. Modify t he sensit ivit y set t ing. Set t he I nt erval. Check t he St o p w h e n f o u n d opt ion. I f uncheck ed, t he search t ool will list all t he ev ent s it found, inst ead of st opping at t he m om ent t he ev ent found . -
Page 136: Save A Video
value of t he im age t o enhance t he im age and m ak e it cleaner. Sh a r p e n : Check t he opt ion t o act ivat e t he funct ion. Mov e t he slider cont rol t o t he right t o sharpen t he im age, t o t he left t o soft en it . -
Page 137: Save An I M Age
Choose t he folder where y ou want t o sav e t he file. 10. I nsert t he file nam e and click t he Sa v e but t on. 11. Choose t he ex port form at . 12. -
Page 138: Print An I M Age
You m ay skip st ep 3 by preset t ing t he folder where you w ant t o save t he im ages and t he form at you want t o save them in. 7 .1 .8 Pr i n t a n I m a g e Print t he current im age of t he video y ou choose. -
Page 139: Backup T He Recorded Video
7 .1 .9 B a ck u p t h e Re co r d ed Vi d e o Different from Save Video, the Backup funct ion will save all t he recorded videos which belong t o t he tim e slot y ou set , inst ead of t he clips. Open I nt ernet Ex plorer and log in t o t he unit . -
Page 141: Rem Ot E Play Back Sy St Em Applicat Ion
. St art up > NUUO NVRm ini 2 > Play back Sy st em . Click t he Ge n e r a l Se t t i n g but t on. -
Page 142: Search T He Recorded Video
I nsert t he nam e of y our unit . I nsert t he I P address of t hat unit . Modify t he port if necessary. I nsert t he user nam e. I nsert t he password. Check t he Sa v e Pa ss w o r d opt ion. -
Page 143: Play T He Recorded Video
1. St art up > NUUO NVRm ini 2 > Play back Sy st em . 2. Click t he Op e n Re co r d but t on. 3. Click t he icon on t he t op of t he Dat e-Tim e Panel t o obt ain t he Rem ot e Play back Sit e Managem ent dialog, and t hen select t he serv er y ou want t o access. -
Page 144: Recorded Video Enhancem Ent
7 .2 .6 Re co r d e d Vi d e o En h a n ce m e n t St art up > NUUO NVRm ini 2 > Play back Sy st em . Click t he Op e n Re co r d but t on. -
Page 145: Save A Video
: Apply t he m odificat ions of t he set t ings. 7 .2 .7 Sa v e a Vi d e o St art up > NUUO NVRm ini 2 > Play back Sy st em . Click t he Op e n Re co r d but t on. -
Page 146: Save An I M Age
7 .2 .8 Sa v e a n I m a g e St art up > NUUO NVRm ini 2 > Play back Sy st em . Click t he Op e n Re co r d but t on. -
Page 147: Back Up T He Recorded Video
, inst ead of t he clips. 1. St art up > NUUO NVRm ini 2 > Play back Sy st em . 2. Click t he Op e n Re co r d but t on t o select dat a. -
Page 148: Back Up And Delet E Records
I n addit ion t o t he way s m ent ioned in t he prev ious chapt ers, y ou can apply t he applicat ion t o back up y our files. St art up > NUUO NVRm ini 2 > Backup Sy st em . Click t he Re m o t e Se r v er Sit e but t on t o set up rem ot e server. - Page 149 I nsert t he user nam e. I nsert t he password. Check t he Sa v e Pa ss w o r d opt ion. Click t he Te s t Se r v e r but t on t o t est t he connect ion bet ween t he local applicat ion and t he rem ot e unit .
-
Page 150: Back Up T He Recorded Video T Hrough Windows Ex Plorer
18. Click t he Ba ck u p but t on. 19. Select t he way and direct ory y ou want t o sav e t he backup dat a. 20. Check t he I n cl u d e Pl ay b a ck a p p l i ca t i o n opt ion, which will add Pl ay b a ck applicat ion int o t he backup folder. -
Page 151: Back Up T He Recorded Video T Hrough Ftp
Put y our backup folder int o t he program folder of NVRm ini 2. ( Default direct ory is “ C: \ Program Files\ NUUO\ NVRm ini2”.) St art up > NUUO NVRm ini 2 > Play back Sy st em . Click t he Op e n Re co r d but t on. - Page 152 Click t he Re m o t e Se r v e r Sit e but t on t o set up rem ot e server. I nsert t he nam e of y our unit . I nsert t he I P address of t hat unit . Modify t he port if necessary.
- Page 153 13. Click t he N e w Pe r i o d but t on t o select t he record dat e. 14. Set t he St art Tim e and End Tim e. ( or highlight t he video records which y ou want t o delet e) 15.
- Page 154 18. Click t he D e l e t e but t on. 19. Confirm t he check dialog.
-
Page 155: Verificat Ion Tool
9 .1 Ex e cu t e V e r i f i ca t i o n To o l 1. St art up > NUUO NVRm ini 2 > Verificat ion Tool. 2. Verificat ion Tool Ov erview... -
Page 156: Verify I M Age / Video
Vi d e o Pr e v i e w : Preview designat e file in v erificat ion list . Select t he but t ons below t o play , pause , and st op t he video file. 9 .2 V e r i f y I m a g e / V i d e o 1. -
Page 157: Ex T Ernal St Orage
1 0 . Ex t e r n a l St o r a g e Tot al recording space of 4 bay unit can be ex panded largely by connect ing DAS t hrough eSATA port . Follow t he direct ions t o enlarge your recording space. 1 0 .1 Cr e a t e a V o l u m e o n D A S The current com pat ible DAS is AXUS FiT Series. - Page 158 Refer t o t he sect ion of Cr e at e a RA I D Vo l u m e t o creat e a v olum e for it .
-
Page 159: Log Out
1 1 . Lo g o u t Click t he Lo g o u t but t on on t he t op of t he page t o log out of t he sy st em . I f t here is no act ion in 10 m inut es, t he syst em will log out aut om at ically t o av oid unaut horized access. -
Page 160: Rem Ot E Pc Sy St Em Requirem Ent S
I nt el Core 2 Duo, 2.6GHz RA M Us e r 1. HTTP Web browser - I nt ernet Ex plorer 8, 9, I n t e r f a ce 10 ( 32 bit ) 2. NUUO client applicat ion program... -
Page 161: Troubleshoot Ing
1 3 . Tr o u b l e sh o o t i n g 1 3 .1 Re p l a ce a Fa i l e d D i sk D r i v e I f a disk driv e fails, t he Disk St at us LED becom es orange. I f t he disk driv e belongs t o a RAI D Volum e, t he Volum e goes Crit ical or Offline, depending on RAI D level. -
Page 162: Rest Ore All Default Configurat Ion
Press and hold t he reset but t on for 8 seconds, release y our hands unt il t he buzzer beeps one t im e and t he Sy st em St at us LED flashes in blue. Sy st em will rest art and t he Adm inist rat or ’s password is now reset t o a d m i n . -
Page 163: Cannot Log In T O T He Unit Wit H I Nt Ernet Ex Plorer
Change t o appropriat e set t ings or t urn off t his ant ivirus soft ware. Please visit NUUO wiki for m ore inform at ion. ht t p: / / support .nuuo.com / m ediawiki/ index .php/ Main_Page... -
Page 164: Appendix - Rai D Sy St Em
A p p e n d i x – RA I D Sy st e m I n t r o d u ct i o n t o RA I D RAI D ( Redundant Array of I ndependent Disk s) allows m ult iple disk drives t o be com bined t oget her int o a RAI D Volum e. -
Page 165: Rai D 1 - Mirror
I f disk drives of different capacit ies are used, t here will also be unused capacit y on t he larger driv es. Because RAI D 0 does not offer Fault Tolerance, m eaning t hat y ou cannot recov er y our dat a aft er a disk driv e failure, we do not recom m end a RAI D 0 Volum e for y our unit . -
Page 166: Rai D 5 - Block St Riping Wit H Dist Ribut Ed Parit Y
RAI D 1 Volum es on t his unit consist of t wo disk driv es. I f y ou want a m irrored RAI D Volum e wit h m ore t han t wo disk driv es, see RA I D 1 0 –... -
Page 167: Choosing A Rai D Lev El
The dat a capacit y RAI D 10 Volum e equals t he capacit y of t he sm allest disk driv e t im es t he num ber of disk driv es, divided by t wo. I n som e cases, RAI D 10 offers double fault t olerance, depending on which disk driv es fail. - Page 168 im proved by spreading t he I / O being lost load across m any channels and Should not be used in m ission drives cr it ical environm ent s No parit y calculat ion overhead is involved RA I D 1 A d v a n t a g e D i s a d v a n t a g e Sim plest RAI D st orage subsyst em...
-
Page 169: Appendix - Cam Era I Nt Egrat Ion
Ca m e r a Su p p o r t Li s t Any inform at ion about cam era int egrat ion, including cam era m odel and it s spec, please refer t o NUUO websit e: ht t p: / / www.nuuo.com / product .php?id= 13... - Page 170 Add: C Block , 18 Sihy u an St . Jhon gj heng Dist rict , Taiw an ( ROC) TEL: + 88 6- 2- 2 36 2- 2 26 0 ht t p: / / w w w .nu uo.com / eHelpdesk .php...
Need help?
Do you have a question about the NVRmini 2 and is the answer not in the manual?
Questions and answers