
Subscribe to Our Youtube Channel
Related Manuals for BERNSTEIN 805S


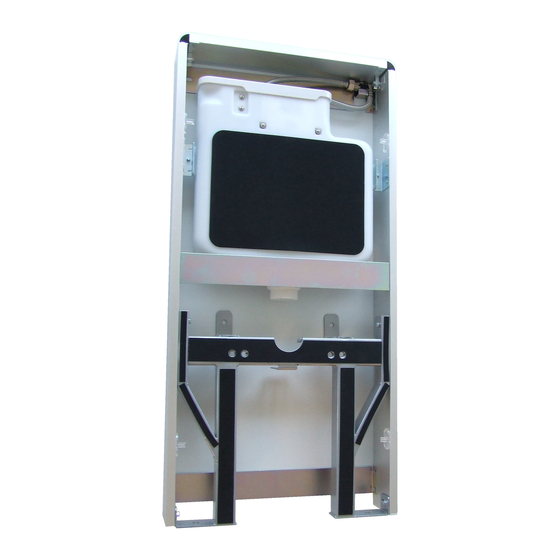
Summary of Contents for BERNSTEIN 805S
- Page 1 CONCEALED SYSTEM 805S for wall-mounted toilets with touchless sensor operation ASSEMBLY INSTRUCTIONS - III / 2019...
- Page 2 Concealed system 805S Item list Item List Names Specification Quantity Item List Names Specification Quantity rubber seal expansion nut SX10 Ø Ø straight flush screw ST6,8 x 67 pipe flush pipe washer 22 x 2,0 Ø eccentric pipe M12 bolt...
- Page 3 Item list aluminum frame glass panel flush valve inlet valve lever cover assembly plastic sensor screw set cistern body half frame drainage eccentric pipe manual button plastic cover assembly...
-
Page 4: Technical Specification
Concealed system 805S TECHNICAL SPECIFICATION Name: CONCEALED SYSTEM 805S for wall-mounted toilets with touchless sensor operation Model: 22257 ambient temperature: 3 – 50° C rated voltage: 6 Volt - 4 x Typ „LR6“ (AA) 1,5 V batteries, not included water supply pressure: 0,3 – 10,5 Bar water supply temperature: 4 –... - Page 5 CISTERN INSTALLATION 1. Insert the drainage pipe into the 2. Remove the upper cover, pull up the braided drainage hole on the wall. tube until it got off the hanger. Hang on template 3. Lean the whole cistern to the wall and align the flush pipe position with the buckle.
- Page 6 Concealed system 805S 4. As indicated by the arrow, mark 4 spots on the wall and 2 spots on the ground accordingly. 5. Open the clip and remove the sanitary module from the wall. ...
- Page 7 6. Drill the holes to the marked spots (Note: the depth of the drill must be larger than the length of expansion nut, the diameter shown as the picture) and press the corresponding expansion nut into the hole. 7.
- Page 8 Concealed system 805S 8. Lock the corresponding size of the screws into the expansion nut in the wall and steel expansion bolt on the floor. 9. The ground screws can be tightened with a ratchet.
- Page 9 ANSCHLUSS DES SANITÄRMODULS 805S: 1. Place the closed shut-off valve in the upper holder. 2. Screw the pressure hose with the angle valve. 3. Open the angle valve. 4. Open the stop valve on the hose to see whether it is in good condition.
- Page 10 Concealed system 805S CONNECTION SENSOR OF SANITARY MODULE 805S 1. Take the sensor electronics unit upwards out of the holder. 2. Open the battery compartment as shown. Insert 4 new type „LR6“ (AA) 1.5V batteries as specified. Please note polarity! Close the housing again.
- Page 11 sensor flush valve electronics unit manual button 4. Connect the sensor electronics unit with the flush valve and the manual button via the corresponding pneumatic hoses. Attach the blue pneumatic hose of the partial flush to the connections with crescent-shaped symbols. blue air hose transparent air hose transparent air hose...
- Page 12 Concealed system 805S 6. Attach the glass panel to the frame of the sanitary module by sliding it softly down so that the glass panel brackets lock 5. Put the hooks into the frame hooks. in the module. (4 x)
- Page 13 8. Connect the top cover cable to the sensor electronics unit. 9. Pay attention to tongue and groove when connecting plug and socket. Screw the union nut clockwise. Upper cover with sensors align line 10. Now place the cover on the module and make sure that the mounting clamps engage securely on the bars.
- Page 14 Concealed system 805S 1. In order to be able to clearly mark the distances of your markings, first glue some masking tape lengthwise onto the connecting pipes. Insert these into the module and mark both flush with the front. Then place the tubes in the ceramic and mark them as well.
- Page 15 WC installation Determine the thickness of ceramic A Insert the drain pipe into the module at the level of the mounting holes. and the flushing pipe into the ceramic. Turn the threaded bolts into the module. Make sure they are no longer than A + 25 mm.
- Page 16 Concealed system 805S Remove the supernatant of the absorbing panel. Finally, carry out a functional test of the full flush and the partial flush.
-
Page 17: Maintenance And Regular Care
MAINTENANCE AND REGULAR CARE Adjusting the filling quantity and cleaning the water stop 1. Lift the top cover and disconnect 2. Close the shut-off valve. the sensor electronics. 4. Take the inlet valve upwards. 3. Disconnect the hose from the shut-off valve. - Page 18 Concealed system 805S 5. Move the float up to increase or decrease the inflow of water. 7. Then you can clean the water stop under running water. 6. To clean the water stop, unhook the clamp and unscrew the union nut.
- Page 19 Adjusting the flush volume and cleaning the seal on the flush valve. blue pneumatic hose of partial flush semicircle symbol transparent pneumatic hose of full flush circle icon 2. Remove the lift-up hold down by squeezing it at the top, then slide it towards the wall and carefully pull it upwards.
- Page 20 Concealed system 805S cover rubber seal washer cover 6. Turn the cover 90 ° counterclockwise to release the lower parts. Then remove cover, washer and rubber seal. Clean the washer under running water. 7. Install the flush valve downwards into the cistern body.
- Page 21 „click“ 8. Push the flush valve down until it audibly clicks into place. Then push the lever‘s two handles together, bring it down and let it snap into the direction of the wall. 9. Connect the cable of the upper cover of the sanitary module to the sensor electronics unit.
-
Page 22: Wartung
Concealed system 805S WARTUNG: 1. Nutzen Sie ausschließlich weiche Tücher und klares Wasser, um das Profil und die Glasfront des Sanitärmoduls zu reinigen. 2. Bitte nutzen Sie keine ätzenden Chemikalien oder Mittel zur Reinigung. 3. Vermeiden Sie die Reinigung mit rauhen Tüchern. Hartnäckige Flecken können Sie mit niedrigkonzentriertem Essig reinigen, spülen Sie im Anschluss mit viel Wasser nach. - Page 23 ERKLÄRUNG Die Bedienungsanleitung dient nur als Referenz. Diese Anleitung kann abweichende Angaben enthalten. Die beschriebenen Produkte können jederzeit aktualisiert werden. Die Zeichnungen in dieser Anleitung dienen nur zur Darstellung und haben keinen Anspruch auf Aktualität. STATEMENT This instructions should only be considered as a standard manual. Modifications applied to updated version of the product might not be mentioned inside this document.
Need help?
Do you have a question about the 805S and is the answer not in the manual?
Questions and answers