Table of Contents
Advertisement
Quick Links
Brake Rods (if supplied / fitted to your model)
• This product is not suitable for children under
three years of age because of small parts which
can present a choking hazard. Some components
have functional sharp points and edges – handle
with care.
• This product is intended for indoor use only.
• The transformer is not a toy. It is a "Transformer
for Toys". Before use, check that the transformer
is the correct voltage for your mains electricity
supply. This product is only to be used with the
recommended transformer. The transformer
should be examined regularly for damage to the
casing, plug pins and cables.
Spare Parts and Service
Spare parts packs can be obtained from Hornby Service Dealers who are also able to offer a repair service.
Hornby Hobbies Limited, Westwood, Margate, Kent CT9 4JX, United Kingdom
4/1284
0507
IMPORTANT
To prevent damage to the model, please take care when removing from packaging.
Before using the model, please read right through the Operating and Maintenance
Instructions in this leaflet.
Safety Notes
In the event of such damage, the set should not be
used until the transformer is replaced with a new
Hornby recommended unit. Never attempt to open
the transformer yourself.
• This product must not be connected to more than the
recommended number of power supplies. The output
terminals of the transformer must not be connected
directly, or indirectly, to the output of any other AC
circuit derived from a transformer or mains power supply.
• Before cleaning any part, disconnect the transformer
from the mains electricity supply.
Do not use liquid for cleaning.
• Please retain these details and the address for future
reference.
4
General
Please read right through these instructions,
particularly the Safety Notes on page 4.
Hornby locomotives are precision built and, if treated
with care, will give many years of good service. This
Hornby locomotive is produced to super detail standard
and therefore incorporate delicate, protruding detail and
many small parts. Care should be taken to avoid
damage when handling the model especially the valve
gear, coupling rods and the small detail parts of the
locomotive body.
This locomotive should not be operated on track
curves of less than 438mm radius, which is Hornby
2nd radius track.
The five-pole electric motor of the locomotive is
designed to be operated from a variable 12 volts,
DC power supply only. This should be obtained by
using a suitable Power Controller operated from the
normal domestic mains electricity supply.
NEVER CONNECT A LOCOMOTIVE DIRECTLY TO
THE MAINS ELECTRICITY SUPPLY.
The locomotive will normally draw a current of between
·2 and ·4 amp depending upon the track configuration and
whether or not gradients are included. There will
be a current surge on starting the locomotive.
Running Hints
If a locomotive ceases to respond normally to the
power controller, or runs badly, check that the
following are in order:
• All electrical connections are correctly made and
the wall power socket is switched "ON".
Printed in China
• The power connecting clip is correctly inserted into
a suitable section of track.
• All track sections are correctly fitted together and
all fishplates (rail-joiners) are fitting tightly onto
adjoining metal rails.
• All locomotive wheels are correctly positioned on
the track rails.
• The tender drawbar pin is making contact with the
contacts on the locomotive drawbar and the upper
contacts of the drawbar are making contact with
the drawbar pin plate of the tender (if applicable).
• The direction control switch on the train controller
is set to operate in one direction or the other, and
not in the central "OFF" position.
Television Suppression
Your Hornby locomotive incorporates radio and television interference suppressors. Should interference be
experienced despite these precautions, it may be due to close proximity of the model railway layout to receivers,
aerials, or their "downlines". In this case, move the layout further away from aerials and receivers.
It is most important that track and wheels be kept absolutely clean.
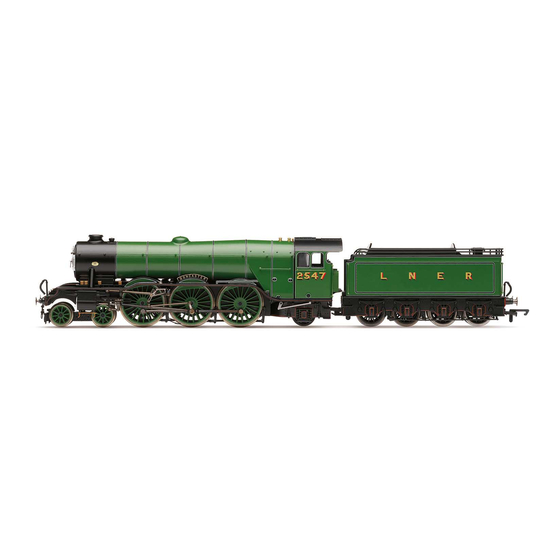
CLASS A1
LOCOMOTIVE & TENDER
Operating and Maintenance Instructions
Your model may be DCC Ready – please see pages 2
and 3 of this leaflet. Please also refer to your specialist
dealer for advice.
Routine Maintenance
Track Cleaning – In normal use, model railway layouts
will eventually accumulate a blackish deposit on the run-
ning surfaces of the rails, and some of this will be trans-
ferred onto the locomotive's pick-up wheels. The 12 volt
DC supply is collected from the track through the wheels
on one side of the locomotive and returned through the
wheels on the other side. If the deposit is allowed to build
up, it will have the following adverse effects:
• The driving wheels will not be able to achieve
maximum traction
• There will be a reduction in the power reaching the
locomotive motor
It is therefore essential that the track and wheels are
kept clean. This can be done by wiping the surfaces
with a clean, non-fluffy cloth. More stubborn deposits
can be removed by using the Hornby Track Cleaning
Rubber, reference R8087, which can be obtained from
Hornby Service Dealers.
Motor – The locomotive is fitted with a sealed, long-
life, 5-pole motor which requires no maintenance.
After a considerable amount of use the motor may
require replacement and this should be carried out by
a Hornby Service Dealer. However, instructions for
motor replacement are given in Section 3 on page 3,
only for owners who are fully experienced in such
tasks and who have soldering facilities. Do not attempt
this work unless you are absolutely confident in being
able to successfully complete it.
Chassis – The locomotive chassis may, from time to time,
pick up fluff, fabric fibres and pet hairs which can become
entangled in the gears and around axles. For this reason,
it is not advisable to run the locomotive on track which
is laid on a carpet. It is important to check regularly and
remove any such debris with the aid of small tweezers.
Lubrication – Although the locomotive was lubricated
during manufacture, the lubricant can sometimes dry
out in storage. Lubrication should be carried out at
approximately 6-monthly intervals, or every 100 hours
of running. Instructions for carrying out lubrication
procedures are given in section 1 on page 2.
Locomotive Bodywork – Locomotive and tender
bodies are overall spray painted and the rest of the
decoration is applied by a printed process, not transfers.
1
12V
Advertisement
Table of Contents

Related Manuals for Hornby CLASS A1


Summary of Contents for Hornby CLASS A1
- Page 1 Spare parts packs can be obtained from Hornby Service Dealers who are also able to offer a repair service. following are in order: tasks and who have soldering facilities.
- Page 2 Lubrication IMPORTANT – Only apply small single drops of light machine oil to the places Apply one drop of oil to each of the valve gear Apply one drop of oil to each of the axle bearings indicated in red. This is best achieved by making a simple oil “dropper” as and connecting rod pivot points indicated in red indicated in red.
Need help?
Do you have a question about the CLASS A1 and is the answer not in the manual?
Questions and answers