
Related Manuals for Grundfos DIT-M


Summary of Contents for Grundfos DIT-M
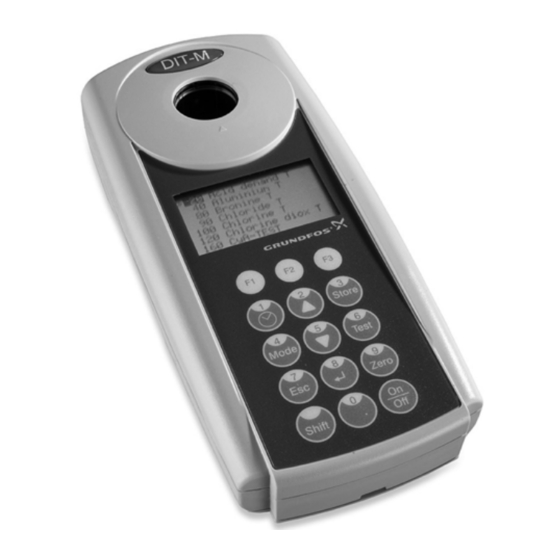
- Page 1 GRUNDFOS INSTRUCTIONS DIT-M Photometer Installation and operating instructions Other languages http://net.grundfos.com/qr/i/95727428 Material safety data sheets http://net.grundfos.com/qr/i/98351242...
-
Page 2: Table Of Contents
1 cleaning brush. must comply with local regulations and accepted codes of good practice. 3.2 Applications The DIT-M is suitable for photometric analysis of up to 14 1. Symbols used in this document parameters in water-treatment monitoring. Fields of application: Warning •... -
Page 3: Avoidance Of Danger
Wavelength ranges: If safe operation cannot be ensured any longer, the DIT-M λ1 = 530 nm (IF Δλ = 5 nm) compact photometer is to be taken out of service and Light source λ2 = 560 nm (IF Δλ... -
Page 4: Saving Data, Important Notes
5.2 Saving data, important notes 6. Operation The batteries save data (stored results and photometer setting). The multilingual plain-text operator prompting of the DIT-M photometer offers high operating convenience. The user can During battery change, the data in the photometer is saved for choose the following languages: German, English, French, two minutes. -
Page 5: Operation Mode
6.1.3 User countdown Method information (F1) Use the [F1] key to switch between the compact and the detailed With this function, the operator is able to define his own list for method selection. countdown. Example 100 Chlorine 0.02-6 mg/l Cl2 Press the ["clock"] key. - Page 6 6.2.6 Ensuring reaction periods, countdown 6.2.8 Storing results To ensure compliance with reaction periods, a time delay is Press the [Store] key while the test result is incorporated, the countdown. displayed. Store Countdown This display appears. 2:00 Code-No.: • Press the key.
- Page 7 6.2.10 Performing additional measurements To perform additional tests using the same method: Press the [Test] key. Test Zero accepted This display appears. prepare Test press TEST Confirm with the [Test] key. Test Press the [Zero] key to perform a new zero setting.
-
Page 8: Photometer Settings, Table Of "Mode" Functions
6.3 Photometer settings, table of "Mode" functions Mode function Description Page User concentration Entering the data necessary to run a user concentration method User polynoms Entering the data necessary to run a user polynomial User methods clear Delete all data of a user polynomial or of a concentration method User calibration Storage of user calibration Countdown... - Page 9 6.3.1 Photometer basic settings 1 Countdown (ensuring reaction periods) Some methods require a reaction period. This reaction period is Selecting a language incorporated in the method as a standard with the countdown Press the [Mode] key. function. It is possible to switch the countdown off for all methods: Mode Press the [Mode] key.
- Page 10 6.3.2 Printing of stored results Printing results of a selected "Code-No" range Printing all results Press the [Mode] key. Mode Press the [Mode] key. Mode Press the [Shift] and [2][2] keys. Shift Press the [Shift] and [2][0] keys. Shift Confirm with the key.
- Page 11 Printing parameters Recall results of a selected time period Press the [Mode] key. Press the [Mode] key. Mode Mode Press the [Shift] and [2][9] keys. Press the [Shift] and [3][1] keys. Shift Shift Confirm with the key. Confirm with the key.
- Page 12 Note: 6.3.4 Calibration To cancel the entry, press the [Esc] key. Fluoride method 170 If you want to display only the results of one code number, Notes: enter the same Code-No twice (as start and end code). 1. The same batch of SPADNS reagent solution must be used If you want to display all results without code number for adjustment and test.
- Page 13 User calibration Store user calibration Procedure: Perform the test as described in the 100 Chlorine T • Prepare a standard reagent of known concentration and use 0.02-6 mg/l Cl2 respective method using a standard reagent 0.90 mg/l free Cl2 this reagent instead of the sample according to the test of known concentration.
- Page 14 6.3.5 Lab function User method list, adaption Reduced operator guidance in Profi-Mode Press the [Mode] key. The following information is always stored in the methods: Mode 1. method 2. range Press the [Shift] and [6][0] keys. Shift 3. date and time 4.
- Page 15 User method list, switch off all methods To select the required unit, press the arrow choose unit: The program structure requires that the method list must have at >> mg/l keys least one active (switched-on) method. For this reason, the mmol/l photometer activates the first method on the list automatically.
- Page 16 Note: • Press the arrow keys to change <User polynoms> y = A+Bx+Cx2+Dx3+ between plus and minus sign. To measure further standard reagents, S2 accepted Ex4+Fx5 S3: + ________ perform as described above. • Enter the data of the coefficient A A: + _______ | ESC | F1 | Store including decimal point, such as [Shift]...
-
Page 17: Data Transfer, Dit-Ir Module
To transmit test results to a PC, the DIT-IR module as well as a Confirm with the key. transfer software is required. The transfer software is comprised in a DIT-IR standard delivery. For more detailed information, read the DIT-IR manual or visit our homepage www.grundfos.com. -
Page 18: Methods
7. Methods 6. Bubbles on the inside wall of the vial result in incorrect measurements. To prevent this, remove the bubbles by 7.1 Important notes swirling the vial before performing the test. 7. Avoid spillage of water in the sample chamber. If water should 7.1.1 Correct use of reagents leak into the instrument housing, it can destroy electronic The reagents must be added in the correct sequence. -
Page 19: Table Of Methods And Reagents
7.2 Table of methods and reagents Combi pack Aluminium No. Aluminium T 0.01 - 0.3 mg/l Al ± 0.04 mg/l 0.01 95727755 1/No. 2, 250 tablets each in mg/l: 0-2.25: ± 0.09 >2.25-4.5: ± 0.18 Bromine T 0.05 - 13 mg/l Br 0.01 DPD No. -
Page 20: Acid Demand For Ph 4.3 / 0.1 - 4 Mmol/L
Turbidity can lead to errors 7.4 Aluminium, 0.01 - 0.3 mg/l Al The use of the DPD No. 1 tablet (No 95727747) in samples with 7.4.1 Important notes high calcium ion contents* and/or high conductivity* can lead to 1. Before use, clean the vials and the turbidity of the sample and therefore incorrect measurements. -
Page 21: Bromine, 0.05 - 13 Mg/L Br
7.5 Bromine, 0.05 - 13 mg/l Br 7.6 Chloride, 0.5 - 25 mg/l Cl 7.5.1 Important notes 7.6.1 Important notes 1. Vial cleaning: 1. Ensure that all particles of the tablet are As many household cleaners (e.g. dishwasher detergent) dissolved. Chloride causes an extremely fine distributed contain reducing substances, the subsequent determination of turbidity with a milky appearance. -
Page 22: Chlorine, 0.01 - 6 Mg/L Cl
7.7 Chlorine, 0.01 - 6 mg/l Cl 7.7.3 Chlorine, differentiated 7.7.1 Selection 1. Fill a clean vial (∅24) with 10 ml of the The following selection is shown in the Chlorine water sample, close tightly with the cap. >> diff display: free 2. -
Page 23: Chlorine Dioxide, 0.02 - 11 Mg/L Clo
7.7.5 Chlorine, total 4. For concentrations between 11 and 19 mg, the photometer shows that the measuring range (Overrange) has been exceeded. Concentrations above 19 mg/l chlorine dioxide can lead to results showing 0 mg/l. In this event, the water sample 1. -
Page 24: Chlorine Dioxide Analysis
7.9 Chlorine dioxide analysis (ClO Zero accepted 12. Press the [Test] key. chlorite, Cl free, Cl combined) prepare T 1 13. Remove the vial from the sample press TEST 0.01 - 6 mg/l chamber, empty the vial, rinse vial and 7.9.1 Important notes cap several times. - Page 25 7.9.2 Measurements 20. Place the vial correctly in the sample chamber. See fig. 4. Chlorine 1. Select "free" in display. diff Zero accepted 21. Press the [Test] key. 2. Confirm with the key. >> free prepare Test Write down the result as: reading A total press TEST 3.
-
Page 26: Cya Test (Cyanuric Acid), 2 - 160 Mg/L Cya
7.10 CyA TEST (cyanuric acid), 7.11.2 Measurement 2 - 160 mg/l CyA Observe section 7.11.1 Important notes! 7.10.1 Important notes 1. Fill a clean vial (∅24) (note 8) with 1. Use deionised water or tap water free of cyanuric acid. exactly 10 ml of water sample (note 4). -
Page 27: Iron, 0.02 - 1 Mg/L Fe
7.12.2 Measurement 7.13.2 Measurement 1. This method determines the total 1. Fill a clean vial (∅24) with 10 ml of the dissolved Iron as Fe and Fe water sample. Close tightly with the cap. 2. For the determination of total dissolved and undissolved iron 2. -
Page 28: Ozone, 0.02 - 2 Mg/L O
7.15 Ozone, 0.02 - 2 mg/l O 7.15.2 In the presence of chlorine 1. Fill a clean vial (∅24) with 10 ml of the The following selection is shown in the Ozone >> with Cl water sample. Close tightly with the cap. display: without Cl 2. -
Page 29: Phosphate, Ortho Lr, 0.05 - 4 Mg/L
7.15.3 In the absence of chlorine 7.16 Phosphate, ortho LR, 0.05 - 4 mg/l PO 7.16.1 Important notes 1. Fill a clean vial (∅24) with 10 ml of the 1. Ortho-phosphate ions react with the reagent to form an water sample, close tightly with the cap. intense blue colour. -
Page 30: Ph Value, 6.5
7.17 pH value, 6.5 - 8.4 7.17.1 Important notes 1. For photometric determination of pH values, only use Phenol red photometer tablets in black printed foil pack and marked with PHOTOMETER. 2. Water samples with low values of alkalinity-m* may give wrong pH readings. -
Page 31: Faults
8. Faults 8.1 Operating messages in the display (error display) Display Possible cause Remedy Overrange Reading exceeds the range. Dilute the sample (not for pH and acid demand). Turbid water sample. Filtrate the water sample. Too much light on the sample chamber. Makesure the vial is closed with cap and gasket. -
Page 32: Spare Parts
This product or parts of it must be disposed of in an environmentally sound way. Use appropriate waste collection services. If this is not possible, contact the nearest Grundfos company or service workshop. The 2006/66/EC guideline requires users to return all Note used and worn-out batteries and accumulators. - Page 33 Nosotros, Grundfos, declaramos bajo nuestra entera responsabilidad Nous, Grundfos, déclarons sous notre seule responsabilité, que les que los productos DIT-L, DIT-M y DIT-IR, a los cuales se refiere esta produits DIT-L, DIT-M et DIT-IR, auxquels se réfère cette déclaration, declaración, están conformes con las Directivas del Consejo en la sont conformes aux Directives du Conseil concernant le rapprochement aproximación de las leyes de las Estados Miembros del EM:...
- Page 35 Phone: +55-11 4393 5533 20th km. Athinon-Markopoulou Av. Telefax: +64-9-415 3250 Turkey Telefax: +55-11 4343 5015 P.O. Box 71 GRUNDFOS POMPA San. ve Tic. Ltd. Sti. Norway Bulgaria GR-19002 Peania Gebze Organize Sanayi Bölgesi GRUNDFOS Pumper A/S Grundfos Bulgaria EOOD...
- Page 36 95727428 0419 ECM: 1260226 www.grundfos.com...
Need help?
Do you have a question about the DIT-M and is the answer not in the manual?
Questions and answers