Advertisement
Available languages
Available languages
Table of Contents
- 1 Installation and Wiring
- 2 Support Contact Information
- 3 Installation und Verkabelung
- 4 Support- und Kontaktinformationen
- 5 Câblage du Système
- 6 Installation Et Câblage
- 7 Cablaggio del Sistema
- 8 Installazione E Cablaggio
- 9 Cableado del Sistema
- 10 Instalación y Cableado
- 11 Información de Asistencia Técnica
- Download this manual
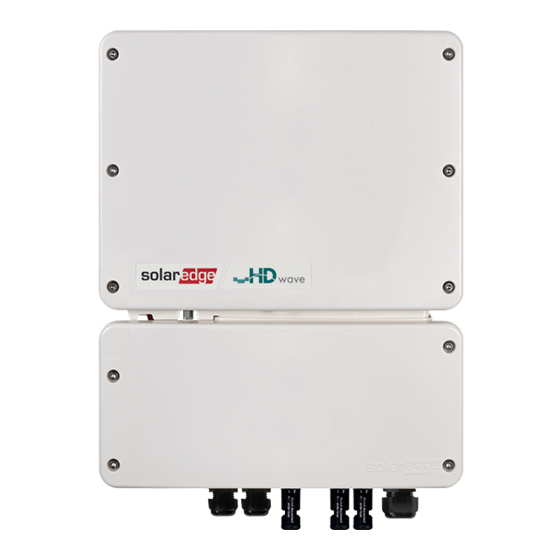
StorEdge Single Phase Inverter with HD-Wave Technology
and SetApp Configuration – Wiring and On Site Check
Quick Guide for Europe, APAC and South Africa
DE – Seite 5
NL – Bladzijde 17
Revision History
Revision 1.2 (December 2019) – Spanish translation added.
Overview
This document provides instructions for wiring and post-installation verification of a StorEdge system with the following
components:
StorEdge Single Phase Inverter with HD-Wave Technology and SetApp Configuration
LG Chem RESU7H/RESU10H Battery
Energy Meter
For more details and additional system configurations, refer to the StorEdge Inverter Installation Guide supplied with the
StorEdge Inverter.
CAUTION!
For proper battery performance, the LG Chem battery must remain connected to the StorEdge Interface and in
charging mode. Extended battery disconnection may result in deep discharge and damage the battery.
Wiring the System
Powering off the Battery
WARNING!
The LG Chem battery must be powered off before wiring.
LG Chem batteries are available with one of the following powering mechanism types:
With the disconnect switch
To power off the battery:
1.
Turn off the circuit breaker.
2.
Turn off the disconnect/auxiliary power switch.
To power on the battery:
1.
Turn on the disconnect/auxiliary power switch.
2.
Turn on the circuit breaker.
FR - Page 9
SP – Página 21
With the auxiliary power switch
MAN-01-00642-1.2 StorEdge Single Phase Inverter Wiring and On Site Check Quick Guide
IT – Pagina 13
1
Advertisement
Table of Contents

Related Manuals for SolarEdge StorEdge SE5000H-O4


Summary of Contents for SolarEdge StorEdge SE5000H-O4
- Page 1 StorEdge Single Phase Inverter with HD-Wave Technology and SetApp Configuration – Wiring and On Site Check Quick Guide for Europe, APAC and South Africa DE – Seite 5 FR - Page 9 IT – Pagina 13 NL – Bladzijde 17 SP –...
- Page 2 Wiring the System Connecting System Components Connect the system components as shown in the diagram below. Pay attention to: Cable types DIP switch setup If no Energy Meter is connected, terminate the inverter’s RS485 bus by switching the left DIP switch ON. Inverter Left DIP >...
-
Page 3: Installation And Wiring
Installation and Wiring Make sure the distances between the system components are as specified in the installation guide. Take a picture of each of the system components after wiring them and send the pictures to SolarEdge support. Inverter ... -
Page 4: Support Contact Information
Select Energy Manager > Energy Control > Maximum Self Consumption. Support Contact Information If you have technical queries concerning our products, please contact us: http://https://www.solaredge.com/service/support Before contact, make sure to have the following information at hand: Model and serial number of the product in question. - Page 5 StorEdge Einphasen-Wechselrichter mit HD-Wave- Technologie und SetApp-Konfiguration - Verkabelung und Kurzanleitung für die Überprüfung vor Ort für Europa, APAC und Südafrika Revisionshistorie Revision 1.2 – (Dezember 2019) Übersicht Dieses Dokument enthält Anweisungen für die Verkabelung und die Überprüfung nach der Installation eines StorEdge- Systems mit den folgenden Komponenten: StorEdge Einphasen-Wechselrichter mit HD-Wave-Technologie und SetApp-Konfiguration Batterie LG Chem RESU7H/RESU10H...
- Page 6 System Verkabeln Systemkomponenten anschließen Schließen Sie die Systemkomponenten wie in der folgenden Abbildung dargestellt an. Achten Sie darauf, dass: Kabeltypen den Anschlussbedingungen entsprechen DIP-Schalter-richtig eingestellt sind Wenn in der Applikation kein Energiezähler angeschlossen ist, terminieren Sie den RS485-Bus im Wechselrichters, indem Sie den linken DIP-Schalter in die Position EIN schalten. Wechselrichter Linker DIP-Schalter OFF Energiezähler...
-
Page 7: Installation Und Verkabelung
Installationsanleitung entsprechen. Machen Sie nach Fertigstellung Installation ein Bild von jeder der Systemkomponenten und dessen Verkabelung/Anschluss. Bewahren Sie diese Bilddokumentation in der Systemdokumentation mit auf. Im Falle eines technischen Defektes kann das SolarEdge Supportteam Sie nach dieser Dokumentation fragen. Wechselrichter ... -
Page 8: Support- Und Kontaktinformationen
Wählen Sie Energiemanager > Energiekontrolle (Energy Control) > Maximaler Eigenverbrauch (MSC). Support- und Kontaktinformationen Wenn Sie technische Fragen zu unseren Produkten haben, kontaktieren Sie uns: http://https://www.solaredge.com/service/support Bitte haben Sie bei der Kontaktaufnahme folgende Informationen zur Hand: Modellnummern und Seriennummer der betroffenen Produkte Der Fehler, der auf dem LCD-Bildschirm, der SetApp, in der Monitoring-Plattform oder durch die LEDs angezeigt wird, wenn eine solche Anzeige vorhanden ist. -
Page 9: Câblage Du Système
Onduleur monophasé StorEdge avec technologie HD-Wave et configuration SetApp - Guide simplifié pour le câblage et le contrôle sur site en Europe, APAC et Afrique du Sud Historique de révision Révision 1.2 (Décembre 2019) Présentation Ce document fournit des instructions pour le câblage et la vérification post-installation d'un système StorEdge avec les composants suivants: Onduleur monophasé... - Page 10 Câblage du système Connexion des composants du système Connecter les composants du système comme indiqué dans le schéma ci-dessous. Faites attention à : Types de câbles Configuration de l'interrupteur DIP Si aucun compteur d’énergie n’est connecté à l'onduleur, placer le commutateur DIP de gauche sur ON afin de terminer le bus RS485. Onduleur Compteur DIP gauche >...
-
Page 11: Installation Et Câblage
Installation et câblage S'assurer que les distances entre les composants du système sont comme spécifiées dans le guide d'installation. Prendre une photo de chaque composant du système après le câblage et envoyer les photos à l'assistance SolarEdge Onduleur ... - Page 12 Sélectionner Gestionnaire d'énergie > Contrôle d'énergie > Autoconsommation maximale. Contacts assistance et information Si vous avez des demandes techniques concernant nos produits, contactez-nous: http://https://www.solaredge.com/service/support Avant tout contact, assurez-vous de disposer des informations suivantes : Numéros de modèle de l'onduleur et de l'optimiseur de puissance Numéro de série du produit en question...
-
Page 13: Cablaggio Del Sistema
Inverter Monofase StorEdge con Tecnologia HD-Wave e Configurazione con SetApp – Cablaggio e lista di controllo in loco per Europa, APAC e Sud Africa Storico delle revisioni Versione 1.2 (Dicembre 2019) Panoramica Questo documento fornisce istruzioni per il cablaggio e la verifica post-installazione di un sistema StorEdge con i seguenti componenti: Inverter monofase StorEdge con Tecnologia Hd-Wave e configurazione con SetApp Batteria LG Chem RESU7H/RESU10H... - Page 14 Cablaggio del sistema Collegamento dei componenti di sistema Collegare i componenti del sistema come mostrato nello schema seguente. Prestare attenzione a: Tipi di cavo Impostazione dei DIP Switch Se non ci sono contatori di energia collegati, terminare il bus RS485 dell'inverter portando su ON il DIP switch di sinistra. Inverter Contatore DIP sinistro >...
-
Page 15: Installazione E Cablaggio
Installazione e cablaggio Assicurarsi che le distanze tra i componenti del sistema siano quelle specificate nella guida all'installazione. Scattare una foto di ciascuno dei componenti del sistema dopo averli collegati e inviarla al supporto di SolarEdge. Inverter ... - Page 16 Assistenza tecnica e informazioni di contatto Per problemi tecnici riguardanti i nostri prodotti, contattateci ai seguenti recapiti: http://https://www.solaredge.com/it/service/support Prima di contattare l’assistenza tecnica, assicurarsi di avere a portata di mano le seguenti informazioni: Modello e seriale del prodotto in questione L’errore indicato nella schermata dell’applicazione mobile o nella piattaforma di monitoraggio o dai LED, se una tale...
- Page 17 StorEdge eenfasige omvormer met HD-Wave technologie en SetApp configuratie – Bekabeling en Checklist – Quick Guide voor Europe, APAC en Zuid Afrika Apparaat Geschiedenis Revisie 1.2 (December 2019) Overzicht Dit document geeft instructies betreffende de bekabeling en verificatie na installatie van een StorEdge-systeem met de volgende componenten: StorEdge eenfase omvormer met HD-Wave technologie en SetApp configuratie LG Chem RESU7H/RESU10H Batterij...
- Page 18 Systeem Bekabelen Systeemcomponenten Aansluiten Sluit de systeemcomponenten aan zoals weergegeven in het onderstaande diagram. Let op het volgende: Kabeltypen DIP-schakelaar installatie Als er geen energiemeter is aangesloten, schakel dan de RS485-bus van de omvormer uit door de linker DIP-schakelaar op AAN te zetten. Omvormer Linker DIP-schakelaar >...
- Page 19 Installatie en Bekabeling Zorg ervoor dat de afstanden tussen de systeemcomponenten net zo zijn als gespecificeerd in de installatiehandleiding. Maak een foto van elk van de systeemcomponenten na bekabeling en stuur deze foto's naar de SolarEdge Support. Omvormer ...
- Page 20 Support en Contactinformatie Als u technische vragen heeft over onze producten, neem dan contact met ons op: http://https://www.solaredge.com/service/support Zorg ervoor dat u de volgende informatie bij de hand hebt voordat u contact opneemt: Model en serienummer van het product in kwestie.
-
Page 21: Cableado Del Sistema
Versión 1.2 (Diciembre 2019) Contenidos Este documento proporciona las instrucciones para cableado y verificaciones después de la instalación de un sistema SolarEdge compuesto por los siguientes equipos: Inversor Monofásico StorEdge Single con Tecnología HD-Wave y Configuración SetApp Batería LG Chem RESU7H/RESU10H Meter Para más detalles e información sobre posibles configuraciones del sistema consultar el Manual de Instalación del Inversor... - Page 22 Cableado del Sistema Conectar los Componentes del Sistema Conectar los componentes del sistema como indicado en los esquemas a continuación. Prestar especial atención a: Tipo de cables Configuraciones DIP switch Inverter Inversor Left DIP > OFF Meter Energy Meter 3 hilos apantallado y con Batería LG Chem LG Chem Battery par trenzado,...
-
Page 23: Instalación Y Cableado
de instalación Comprobaciones después Comprobaciones después de instalación Utilizar el siguiente checklist para verificar que el sistema esté conectado y configurado correctamente. Instalación y Cableado Asegurarse de mantener las distancias entre los componentes indicadas en los manuales de instalación. Tomar una foto de cada uno de los componentes después de cablearlos para enviarlas al equipo de Asistencia Técnica. -
Page 24: Información De Asistencia Técnica
Seleccionar Administrador de Energía > Control de Energía > Maximizar el Auto-Consumo (MSC). Información de Asistencia Técnica En caso de necesitar asistencia técnica no dude en contactarnos: http://https://www.solaredge.com/service/support Antes de contactar por favor asegurarse de disponer de la siguiente información: Modelo y número de serie del producto en cuestión.
Need help?
Do you have a question about the StorEdge SE5000H-O4 and is the answer not in the manual?
Questions and answers