Advertisement
Scan for full manual
Step 1: Check What's in the Box
RTBUS-24 Round Table Connection Bus
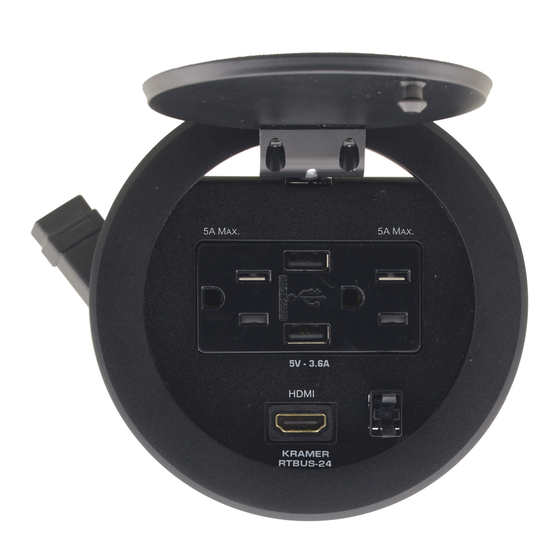
Step 2: Get to know your RTBUS-24
#
Feature
1
Pop-up Lid
2
Outer Rim
3
Pneumatic Mechanism
4
Connecting Surface
5
Rubber Protectors (x2)
6
Locking Butterfly Nuts (x2)
7
Mounting Screws (x2)
8
Mounting Butterfly Nuts
(x2)
9
Mounting Brackets (x2)
10
Mounting Bracket Slits (two
slits on each side)
11
HDMI Cable
12
5A/125V Power Connector
(x2)
When a single power socket is connected, consumption should
not exceed 5A.
When both power sockets are connected, the total consumption
should not exceed 6A.
13
5V-2A USB CHARGING
Port (x2)
14
Lid Latch
15
HDMI Connector
RTBUS-24 Quick Start
RTBUS-24 Quick Start Guide
This guide helps you install and use your RTBUS-24 for the first time.
Go to
www.kramerav.com/manual/RTBUS-24
1 Clamps set
Function
Covers the connecting surface, leaving the
table surface neat and tidy.
Fits over a table surface.
Enables automatic lifting and smooth
closing of the lid.
See items 12 to 15 for a detailed
description of the connecting surface.
Protect the table surface when mounting
the unit.
Tighten to lock the mounting butterfly
screw.
For securing the
RTBUS-24
Tighten to secure the unit to the table
surface.
Place in the bracket slits after inserting the
enclosure into the table, for securing the
unit to the table surface.
Insert the mounting brackets to the slits
when installing the RTBUS-24.
Connect to an HDMI acceptor.
Connect to up to two US power consuming
devices simultaneously.
Use to charge up to two devices
simultaneously.
For safely closing the lid.
Connect to an HDMI source.
to download the latest user manual
1 User manual
to the table.
P/N: 2 9 0 0 - 3 0 0 8 9 8 QS
1 Quick start guide
Rev: 3
Advertisement
Table of Contents

Related Manuals for Kramer RTBUS-24


Summary of Contents for Kramer RTBUS-24
- Page 1 RTBUS-24 Quick Start Guide This guide helps you install and use your RTBUS-24 for the first time. Go to www.kramerav.com/manual/RTBUS-24 to download the latest user manual Scan for full manual Step 1: Check What’s in the Box RTBUS-24 Round Table Connection Bus...
- Page 2 To mount the unit, follow these steps: A: Using any standard cup bit drill with a diameter B: Insert the RTBUS-24 into the hole cut into the table making sure the ranging from 111mm to 114mm (4.37” to 4.49”), drill outer rim is firm against the surface of the table.
Need help?
Do you have a question about the RTBUS-24 and is the answer not in the manual?
Questions and answers