Table of Contents

Related Manuals for Zaxcom Nomad Oasis


Summary of Contents for Zaxcom Nomad Oasis
- Page 1 USER MANUAL Published December 2015 Software Version Nomad 7.77 Oasis 0.86.03 interstage Phistersvej 31, 2900 Hellerup, Danmark Telefon 3946 0000, fax 3946 0040 www.interstage.dk - pro audio with a smile Nomad Oasis Stop Wandering...
-
Page 2: Table Of Contents
SYSTEM REQUIREMENTS ..........................4 SETTING UP THE PC ............................4 CONNECTING OASIS WITH THE PC AND NOMAD .................... 5 CONFIGURING THE DISPLAY .......................... 6 ............................9 AVIGATING THE MENU BAR ........................... 9 EPOSITIONING THE MENU TABS ..............................9 IEWING A MENU ITEM .......................... - Page 3 Arming Tracks ..............................32 ................................. 33 UDIO LAYER Loading an audio file ............................33 Playing an audio file ............................33 Deleting an audio file ............................33 SETUP MENU ............................... 34 PRODUCT SUPPORT ............................. 35 ZAXCOM WARRANTY POLICY AND LIMITATIONS ................... 36...
-
Page 4: System Requirements
2. Unzip the file onto the PC desktop - the folder will be labeled ZAXCOM 3. In the Zaxcom folder there is a subfolder labeled DRIVERS. There are three drivers in the folder that will need to be installed on any PC that is running the Oasis software. -
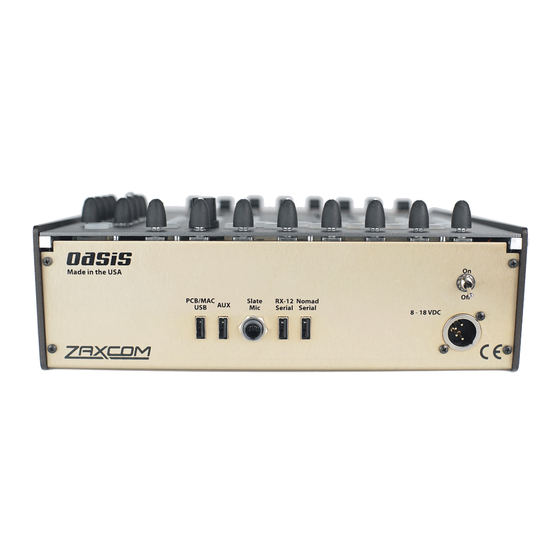
Page 5: Connecting Oasis With The Pc And Nomad
Oasis Getting Started 7. Windows will then ask to have access to the network for MovieSlate integration. To do so click ALLOW ACCESS TO PRIVATE NETWORKS. 8. If the Oasis software is not communicating with Nomad, or if communication between the software and Nomad is sluggish proceed to MAIN menu in the Oasis software then select SETUP menu. - Page 6 12 inches. For a current list of some recommended computers please visit our web site: http://zaxcom.com/products/oasis/ Please note we will be adding OSX support for Oasis in a future software upgrade; please register your Oasis for notification when OSX support is available: http://zaxcom.com/support/product-registration/...
- Page 7 Oasis Getting Started The Oasis Console 1. Input Trim / ZaxNet Gain Control - User assignable to act as input trim control or ZaxNet remote gain control. Please note that that these knobs always follow the fader bank 1 assignment and do not change assignments when changing fader banks.
- Page 8 Oasis Getting Started 6. Star Key / Plus Key - Pressing the star key will perform the same functions as pressing the star key on the face of Nomad. The plus key is reserved for future use. 7. Menu Knob, Back Key, Enter Key - Performs the same functions as the menu encoder and back key on the face of Nomad.
-
Page 9: Configuring The Display
After the menu items are displayed they can be re-positioned anywhere on the screen. To reposition a tab, click on the top banner of the menu where “Zaxcom” is shown, to turn the border green. When the border is green the menu item can be dragged to the desired position. -
Page 10: Oasis Menus
Oasis Navigating Oasis Oasis Menus The following are the 19 menus that make up the Oasis interface and what each menu item contains. Home - Home screen. Main Menu - Main menu keys. TC - Time code and user bit parameters and settings. ... -
Page 11: Home Screen
Oasis Home Screen Home Screen Transport key - Displays the transport status of Nomads recorder. Clicking on the transport key is a short cut to open the main menu. Headphone key - Displays the current headphone matrix being monitored. A quick click or press on the key will advance to the next headphone setup. -
Page 12: Time Code And User Bit Menu
Oasis Time Code Menu Time Code and User Bit Menu Selecting the time code source Oasis has the option to output and or display the time code from the internal time code generator or use the time code from the primary card. Selecting the key and the T.C. -
Page 13: Manually Entering Time Code And User Bits
Oasis Time Code Menu Manually entering time code and user bits Selecting the key will open the time code ENTER TIME CODE editor, and selecting the key will open the ENTER USER BITS user bit editor. From the editor enter the desired time code and user bits then select the green enter key to set the time code and user bits. -
Page 14: Metadata
Oasis Scene and Take Metadata Metadata Scene and Take Menu The note menu can be accessed by clicking on the note field on the home screen Inputting scene and take metadata Selecting key will open the text editor for the SCENE TAKE respective item. -
Page 15: Scene And Take List
Oasis Scene and Take Metadata Scene and take list The scene and take list will display the previous scene and take metadata. That scene and take metadata can be edited directly from this list. Any changes to the scene and take will be automatically made to the primary card. -
Page 16: Note Menu
Oasis Notes Metadata Note Menu The note menu can also be accessed by clicking on the note field on the home screen Inputting notes Select the note field to open the note text editor. The text editor is where the note will be entered. After the note information is typed press the green key to enter the information. -
Page 17: Selecting A Preset Note
Oasis Notes Metadata Selecting a preset note Oasis has the ability to store a list of preset notes. To select from the list - when in the note menu select the key to open the list then when the list is open simply PRESET click the desired note. -
Page 18: Main Menu
Oasis Main Menu Main Menu Engaging Tone Use the key to toggle Nomads tone generator on and off. TONE Exiting Oasis Use the key to close Oasis. EXIT... -
Page 19: Output Mix Menu
Oasis Output Mix Menu Output Mix Menu The output mix menu assigns the analog and digital inputs to Nomads 6 output busses. Selecting an output bus From the bottom of the output mix menu select the desired output bus to be routed. Routing inputs to the output buses For the output bus select the input to be routed to it. -
Page 20: Engaging Tone, Slate And Output Compressors
Oasis Output Mix Menu Engaging tone, slate and output compressors For each output bus the tone and slate and compressors can be assigned to that output bus by select the appropriate box. -
Page 21: Track Mix Menu
Oasis Track Mix Menu Track Mix Menu The track mix menu assigns the inputs and output busses to Nomads record tracks. Selecting the record track From the bottom of the output mix menu select the desired track to be routed. Assigning audio to the record track For the selected record track choose what will be routed to it. -
Page 22: Engaging Tone, Slate, Iso Attenuation And Card Compressors
Oasis Track Mix Menu Engaging tone, slate, ISO attenuation and card compressors For each card track the slate, tone, ISO attenuation and the compressors can be assigned to that card track by selecting the appropriate box. Please note the amount of ISO attenuation is set in the settings menu and is global for all tracks that ISO attenuation is enabled on. -
Page 23: Tape Mix Menu
Oasis Tape Mix Menu Tape Mix Menu The tape mix menu assigns the record tracks, output busses and return inputs to Nomads tape / IFB (ZaxNet) output. Assigning audio to the tape IFB output Select the appropriate record track, output bus or return input to be routed to the tape / IFB output. -
Page 24: Mono Mix Menu
Oasis Mono Mix Menu Mono Mix Menu The mono mix menu assigns the record tracks, output busses and return inputs to Nomads mono output. Assigning audio to the mono output Select the appropriate record track, output bus or return input that to be routed to the mono mix. Setting the phase Select the key to toggle between normal and inverted... -
Page 25: Headphone Mix Menu
Oasis Mono Mix Menu Headphone Mix Menu The headphone mix menu assigns what is routed to the 12 headphone presets. Creating headphone presets From the headphone mix menu select a preset and enable that preset. Enabling the preset allows that preset to be shown when cycling through the headphone selections. -
Page 26: Headphone 2 Mix Menu
Oasis Headphone 2 Mix Menu Headphone 2 Mix Menu The headphone mix menu assigns what is routed to the headphone 2 output. Assigning audio to headphone 2 Choose which card tracks, output buses, return inputs to assign to the headphone 2 output. Clicking on the selection will cycle through and assign it to L (left ear), R (right ear), LR (both left and right ear). -
Page 27: Input Channel Routing Menu
Oasis Input Channel Routing Menu Input channel routing menu The input routing menu is opened when the BUS key is pressed on the Oasis control surface. The input routing menu is an easy way to identify all the routing for a specific input, as well as a way to quickly assign inputs to the output busses and record tracks. -
Page 28: Input Configure
Nomad Touch Input Configure Input Configure Selecting opens the setup page for the 10 analog INPUT CONFIG inputs (6 Mic/Line, and 4 line level returns) and 8 AES digital inputs. From the input configure menu the following items can be adjusted (plese note the AES input configuration currently only allows for trim adjustments). -
Page 29: Fader Assign Menu
Oasis Fader Assign Menu Fader Assign Menu The fader assign menu is where the 8 hardware faders on the Oasis control surface are assigned. Individual assignments can be made for all three fader banks the same input can be assigned to multiple banks. When the bank key is pressed on the Oasis control surface the fader assignment for that bank will automatically change to follow the routing in this menu. -
Page 30: Track Naming
Oasis Track Naming Menu Track Naming From the track name page all 12 card tracks can be named and color coded. The name entered here will be used in the metadata and will appear in the meters for that input. Naming a track Select the track to be named. -
Page 31: Meters Menu
Oasis Meter Menu Meters Menu The meters menu shows the 8 input fader strips for the inputs that are routed to the fader bank in the fader assign menu. Any unassigned fader will be grayed out. When a fader bank is changed on the Oasis console the meters menu will change to reflect the fader assignment. -
Page 32: Record Enables Menu
Oasis Record Enables Menu Record Enables Menu The record enable menu is where the 12 record tracks are armed to record on Nomads primary card. Arming Tracks Clicking on a track will toggle between arming and disarming the track. If the track was named and or assigned a color, and that track is an ISO record track - meaning a single source is routed to the track - that name and color will be displayed in lieu of the track number. -
Page 33: Audio Player
Oasis Notes Menu Audio Player Oasis features an integrated audio player. Audio can selected directly from the tablet or computer that is running the Oasis software. The audio player can store and playback 14 audio files. The playback audio can be routed back to Nomad or to an external speaker or IFB. -
Page 34: Setup Menu
Oasis Setup Menu Setup Menu Sample rate - Adjust the sample rate of Nomads recorder. Tone Level - Adjusts the tone level of Nomads tone generator. Pre Record - Adjust the pre-record time for Nomad. MP3 Record ... -
Page 35: Product Support
Download the latest Firmware from: http://zaxcom.com/support/updates/ Download the latest User Manuals from: http://zaxcom.com/support/updates/ Submit Technical Questions at: http://www.zaxcom.com/submit-a-technical-question Submit information for Repair Services at: http://www.zaxcom.com/support/repairs Join the Zaxcom User Forum at: http://www.zaxcom.com/forum/forum.php Join the Zaxcom Face Book User Group at: https://www.facebook.com/groups/682199065139938/... -
Page 36: Zaxcom Warranty Policy And Limitations
Repair Services page. Insure the package, as we cannot be held responsible for what the shipper does. Zaxcom will return the warranty repaired item(s) via two-day delivery within the United States at their discretion. If overnight service is required, a FedEx or UPS account number must be provided to Zaxcom to cover the shipping charges.
Need help?
Do you have a question about the Nomad Oasis and is the answer not in the manual?
Questions and answers