Table of Contents
Advertisement
Quick Links
Model:R718X
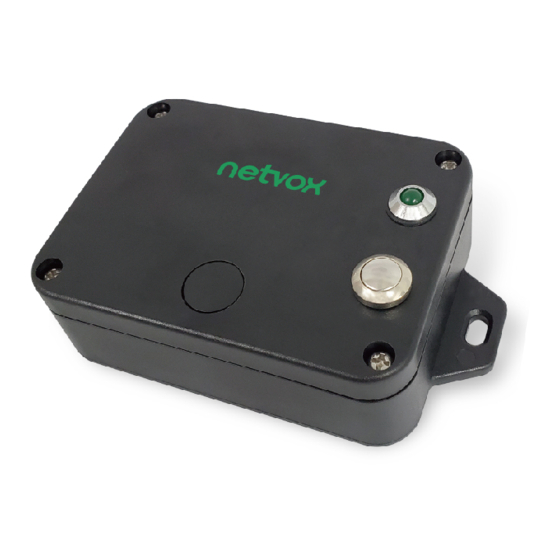
Wireless Ultrasonic Distance Sensor
Wireless Ultrasonic Distance Sensor
R718X
User Manual
Copyright©Netvox Technology Co., Ltd.
This document contains proprietary technical information which is the property of NETVOX Technology. It shall be maintained
in strict confidence and shall not be disclosed to other parties, in whole or in part, without written permission of NETVOX
Technology. The specifications are subject to change without prior notice.
Advertisement
Table of Contents

Related Manuals for netvox R718X


Summary of Contents for netvox R718X
- Page 1 This document contains proprietary technical information which is the property of NETVOX Technology. It shall be maintained in strict confidence and shall not be disclosed to other parties, in whole or in part, without written permission of NETVOX Technology. The specifications are subject to change without prior notice.
-
Page 2: Table Of Contents
Table of Content 1. Introduction ....................................... 3 2. Appearance ......................................3 3. Main Features ....................................4 4. Set up Instruction ....................................5 5. Data Report ....................................... 6 6. Application scenario ..................................13 7. Installation ...................................... 15 8. Information about Battery Passivation ............................18 8.1 To determine whether a battery requires activation........................ -
Page 3: Introduction
(for example: detect the height of garbage in the waste bin). R718X also has tilt angle and temperature detection function, it can detect the tilt angle and temperature of the waste bin. -
Page 4: Main Features
Available third-party platform: Actility / ThingPark, TTN, MyDevices/Cayenne Low power consumption and long battery life Battery Life: ⁻ Please refer to web: http://www.netvox.com.tw/electric/electric_calc.html ⁻ At this website, users can find battery lifetime for variety models at different configurations. 1. Actual range may vary depending on environment. -
Page 5: Set Up Instruction
4. Set up Instruction On/Off Power on Insert batteries. (users may need a screwdriver to open) Turn on Press and hold the function key for 3 seconds till the green indicator flashes once. Turn off Press and hold the function key for 5 seconds till green indicator flashes for 20 times. (Restore to factory setting) Power off Remove Batteries. -
Page 6: Data Report
(1) The device report interval will be programmed based on the default firmware which may vary. (2) The interval between two reports must be the minimum time. Please refer Netvox LoRaWAN Application Command document and Netvox Lora Command Resolver http://www.netvox.com.cn:8888/page/index to resolve uplink data. - Page 7 (2byte Unit:1mm) (2byte Unit:0.1℃) SetOnDistanceTh OnDistanceThreshold Reserved 0x03 resholdRreq (2byte Unit:1mm) (7Bytes,Fixed 0x00) SetOnDistanceTh Status Reserved 0x83 resholdRrsp (0x00_success) (8Bytes,Fixed 0x00) R718X 0x34 GetOnDistanceTh Reserved 0x04 resholdRreq (9Bytes,Fixed 0x00) GetOnDistanceTh OnDistanceThreshold Reserved 0x84 resholdRrsp (2byte Unit:1mm) (7Bytes,Fixed 0x00) SetFillMax FillMaxDistance...
- Page 8 Set Report Time (1) Configure device parameters MinTime = 1min, MaxTime = 1min, BatteryChange = 0.1v, DistanceChange = 500mm、 TemperatureChange=2°C Downlink: 0134003C003C0101F40014 003C(H = 60(D 01F4(H = 500(D 14(H = 20(D ec), ec), Device returns: 8134000000000000000000 (Configuration is successful) 8134010000000000000000 (Configuration failed) (2) Read device parameters Downlink: 0234000000000000000000 Device returns:...
- Page 9 Set Distance Threshold (7) Set OnDistanceThreshold to the appropriate value Downlink: 033401F400000000000000 // 01F4 (H ) = 500 (D Device returns: 8334000000000000000000 (8) Read OnDistanceThreshold, and check whether it is set successfully. Downlink: 0434000000000000000000 Device returns: 833401F400000000000000 *The mode switches via setting the value of FillMaxDistance and OnDistanceThreshold. If the current mode of the device is waste bin detection, it can be switched to the parking detection by setting FillMaxDistance to 0 first, and then setting OnDistanceThreshold.
- Page 10 (3) Set the temperature calibration: If the temperature the R718X detects is 26° and the actual temperature is 27°, it means the calibration we want to make is +1°. SensorType =0x01 ,Channel 2= 01, Multiplier = 000A, Divisor = 0000, DeltValue=0001 Downlink:010101000A000000010000...
- Page 11 (6) Check whether the setting in (5) calibration Downlink: 0237020000000000000000 //X axis 0237030000000000000000 //Y axis Response: 823702000A000000010000 //X axis (Current configuration) 823703000A000000010000 //Y axis (Current configuration) (7) Clear all Channels calibration Downlink:0300000000000000000000 Response: 8300000000000000000000(Configuration success) Note: 1. When Multiplier is not 1, Calibration value = DeltValue*Multiplier. 2.
- Page 12 Example#2 based on MinTime = 15 Minutes, MaxTime= 1 Hour, Reportable Change i.e. BatteryVoltageChange= 0.1V. MaxTime Sleeping(MinTime) sleeping sleeping sleeping Wakes up and Wakes up and Wakes up and Wakes up and Wakes up and collects data collects data collects data collects data collects data REPORT 3.6V...
-
Page 13: Application Scenario
6. Application scenario In the use case of detecting the garbage in waste bin, the device should be installed on the top of the waste bin. After the device is installed and powered, turn on the device and it will detect the distance between the device and the garbage as well as the percentage of the garbage in the waste bin. - Page 14 Illustration 2. If the R718X is installed as the following way, then the measured distance needs to add the height of the device itself which is 28mm. Note: (1) The default value of OnDistanceThreshold is 500mm, and the default value of FillMaxDistance is 2000mm.
-
Page 15: Installation
The purpose is to ensure that the angle calibration is complete. 7.1 The waste bin with frame Outer frame R718X Install the sensor above the outer frame, and make it be parallel to the bottom of the waste bin. - Page 16 7.3 Plastic Bucket Installation Use screws and locking nuts to fix the device, as the figure for reference. M4 Locking Nut M4 Gasket M4*20 Machine Screw 1. After finding the installation position, use the tool to drill 2 holes in the upper cover. M4 screws can be inserted into the hole.
- Page 17 Container ✖ R718X 2.Please do not disassemble the device unless it is required to replace the batteries. Do not touch the waterproof gasket, LED indicator light, function keys when replacing the batteries. Please use suitable screwdriver to tighten the screws...
-
Page 18: Information About Battery Passivation
8. Information about Battery Passivation Many of Netvox devices are powered by 3.6V ER14505 Li-SOCl2 (lithium-thionyl chloride) batteries that offer many advantages including low self-discharge rate and high energy density. However, primary lithium batteries like Li-SOCl2 batteries will form a passivation layer as a reaction between the lithium anode and thionyl chloride if they are in storage for a long time or if the storage temperature is too high. -
Page 19: Important Maintenance Instruction
9. Important Maintenance Instruction Kindly pay attention to the following in order to achieve the best maintenance of the product: • Keep the device dry. Rain, moisture, or any liquid might contain minerals and thus corrode electronic circuits. If the device gets wet, please dry it completely.
Need help?
Do you have a question about the R718X and is the answer not in the manual?
Questions and answers