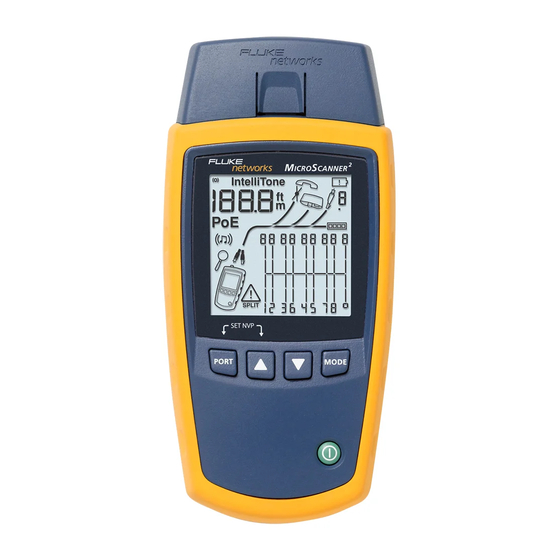
Fluke MicroScanner Series Getting Started Manual
Hide thumbs
Also See for MicroScanner Series:
- Getting started manual (156 pages) ,
- User manual (70 pages) ,
- Getting started manual (14 pages)
Table of Contents
Advertisement
Quick Links
Symbols
Warning or Caution: Risk of damage or
W
destruction to equipment or software. See
explanations in the manuals. On the tester's
display this symbol indicates a cable fault or
voltage on the cable.
Warning: Risk of fire, electric shock, or
X
personal injury.
See the user documentation
This equipment not for connection to
j
public communications networks, such as
active telephone systems.
Conformite Europeene. Conforms to the
P
requirements of the European Union and
the European Free Trade Association
(EFTA).
Conforms to relevant Australian standards.
EMC approval for Korea. Class A Equipment
(Industrial Broadcasting & Communication
Equipment). This product meets
requirements for industrial (Class A)
electromagnetic wave equipment and the
seller or user should take notice of it. This
equipment is intended for use in business
environments and is not to be used in
homes.
PN 4938980 (English) January 2019
©2019 Fluke Corporation
All product names are trademarks of their respective companies.
MicroScanner Series
Getting Started Guide
Advertisement
Table of Contents

Subscribe to Our Youtube Channel
Summary of Contents for Fluke MicroScanner Series
- Page 1 MicroScanner Series Getting Started Guide Symbols Warning or Caution: Risk of damage or destruction to equipment or software. See explanations in the manuals. On the tester’s display this symbol indicates a cable fault or voltage on the cable. Warning: Risk of fire, electric shock, or personal injury.
- Page 2 This key turns the Product on and off. Safety Information Warning To prevent possible fire, electric shock, or personal injury: Read all safety information before you use the Product. For additional information, see the MicroScanner Series Cable Verifiers Users Manual on the Fluke Networks website.
- Page 3 Do not modify the Product. Use only replacement parts that are approved by Fluke Networks. Do not touch voltages > 30 V AC rms, 42 V AC peak, or 60 V DC.
- Page 4 WSafety Information Do not use and disable the Product if it is damaged. Do not use the Product if it operates incorrectly. Batteries contain hazardous chemicals that can cause burns or explode. If exposure to chemicals occurs, clean with water and get medical aid.
- Page 5 Keys Have an approved technician repair the Product. Do not put metal objects into connectors. Keys Combinations of keys provide additional functions. See the Users Manual. MicroScanner Selects the Selects the active port test mode (RJ45 or coaxial) Scrolls through settings and detailed results.
- Page 6 Display Features Display Features MicroScanner G H I MicroScanner PoE K I J 802.3 Class...
- Page 7 Display Features Detail screen indicator. To scroll through detail screens, press during a cable test. MicroScanner : Indicates which port is active, the RJ45 port ( ) or the coaxial port Tone mode indicator ...
-
Page 8: Changing The Length Units
Changing the Length Units MicroScanner : Indicates an ID locator is connected to the far end of the cable. Ethernet port indicator. The speeds of the port show under the indicator. Wiremap diagram. The rightmost segments indicate the shield. ... - Page 9 Testing Cabling Connecting to Twisted Pair Network Cabling Patch panel RJ45 patch cords Wall outlet Wiremap adapter EGS03.EPS Connecting to a Bus Topology Distribution center Connection to bus RJ11 patch Wiremap cords adapter Note: You can swap the locations of the tester and wiremap adapter.
- Page 10 Testing Cabling Connecting to a Star Topology Distribution center Common connection to bridge tap RJ11 patch Wiremap cords adapter Note: For a correct length reading, connect the tester and wiremap adapter as shown. See the Users Manual for details. EGS16.EPS Connecting to Coaxial Cabling (MicroScanner Connection to service...
- Page 11 Using the Toner Using the Toner MicroScanner : Press to select twisted pair ( ) or coaxial ( ) cable. Connect the tester to the cable. Press until appears on the display. To cycle through the IntelliTone and analog ...
-
Page 12: Replacing The Batteries
Replacing the Batteries To select PoE mode, press until PoE appears on the display. In PoE mode, the tester solicits PoE power on pairs 1,2-3,6 and 4,5-7,8. The tester may activate a PoE source and will not be damaged by PoE power. ... -
Page 13: Learn More
1-800-283-5853, +1-425-446-5500 Fluke Networks 6920 Seaway Boulevard, MS 143F Everett WA 98203 USA Fluke Networks operates in more than 50 countries worldwide. For more contact information, visit our website. General Specifications 2 AA alkaline, NEDA 15A, IEC LR6 Battery Type Operating: 0 °C to 45 °C... - Page 14 LIMITED WARRANTY AND LIMITATION OF LIABILITY Fluke Networks mainframe products will be free from defects in material and workmanship for one year from the date of purchase, unless stated otherwise herein. The warranty period for the MicroScanner wiremap adapter is also one year.


Need help?
Do you have a question about the MicroScanner Series and is the answer not in the manual?
Questions and answers