
Subscribe to Our Youtube Channel
Related Manuals for HITEC RDX1 MiNi


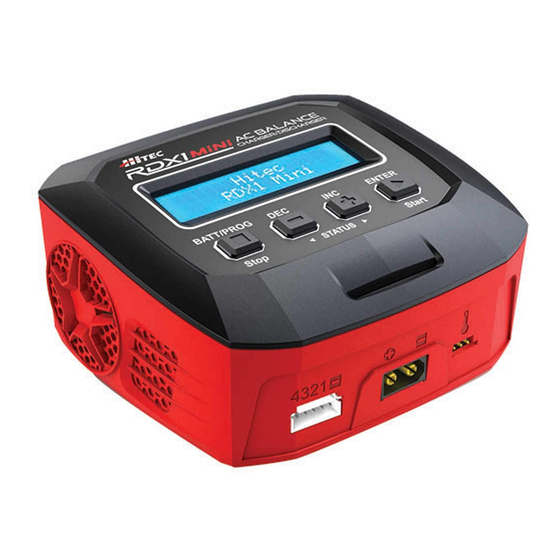
Summary of Contents for HITEC RDX1 MiNi
- Page 1 INSTRUCTION MANUAL WARNING: THE CHARGING AND DISCHARGING OF RC HOBBY BATTERIES CAN BE DANGEROUS. FAILURE TO FOLLOW THE INSTRUCTIONS AND WARNINGS IN THIS MANUAL MAY RESULT IN PROPERTY DAMAGE AND/OR LOSS OF LIFE.
-
Page 2: Table Of Contents
Table of Contents Table of Contents: Introduction..........................03 Warning and Safety Notes....................04 Product Layout.........................08 Input Functions.........................09 Speci cations | Features......................10 Charger Connections......................13 Program Flow Chart........................14 Charger Operations.......................15 Memory Preset - Data Store/Load..................20 Battery Meter..........................22 Battery Resistance Meter....................23 Advanced System Set Up....................24 Warning and Error Messages....................26 Commonly Used Terms......................27 Conformity Declarations.....................29... -
Page 3: Introduction
Mini’s battery management capabilities are suitable for use with most popular battery types and it features integrated balancing for two-four cells Lithium-Polymer (LiPo), Lithium-Ferrite (LiFe) and Lithium-ion (LiIon) as well as the High Voltage Lithium-Polymer (LiHV) batteries. Although simple to operate, the RDX1 Mini does require some background knowledge for successful and safe operation. -
Page 4: Warning And Safety Notes
Warning and Safety Notes Hitec RCD will not be held responsible for any damages or injuries that may occur by persons who fail to follow these warnings or who fail to properly follow the instructions in this manual. Warning: Be sure to read this section for your own safety. - Page 5 Warning and Safety Notes Continued To avoid a short circuit between the charge lead, always connect the charge cable to the charger rst, then connect the battery. Reverse the sequence when disconnecting. Never attempt to charge or discharge the following types of batteries: •...
- Page 6 Before charging your batteries, it is critical that you determine the maximum allowable charge rate for your batteries. The RDX1 Mini is capable of charging at high rates that may not be suitable or safe for your particular batteries. For example, Lithium cells are typically safe to charge at 1C, or the total mAh÷1000.
- Page 7 We do not recommend you use the RDX1 Mini charger to do this; normal use and recharging will achieve the same results. If you wish to perform a Lithium break-in on the bench with the RDX1 Mini, discharging to minimum acceptable voltages and performing a balance charge at 1C maximum rate is recommended. If you choose to break in your Lithium batteries under normal use, charging at only 1C for the rst ten cycles will help ensure full performance and service life from your Lithium cells.
-
Page 8: Product Layout
Product Layout 1. RDX1 Mini Charger 2. AC Cord 3. 2 PIN T-TYPE Charge Connector Battery Connector XT60 Female Balance Lead Temperature Sensor Port 3.2” SCREEN Ventilation Start/Enter BATT. Type| Stop Button Button DEC. Button AC Input (100-240V) INC. Button... -
Page 9: Input Functions
Input Functions DEC. Button BATT. Type/Stop Button INC. Button Start/Enter Button Used to enter parameter Stop the progress of Scroll through Scroll through or store parameter on the current action available menus available menus screen & start charging. or cycle back to the or decrease or increase previous step / screen. -
Page 10: Speci Cations | Features
Battery Memory (Data Store/Load): The RDX1 Mini is capable of storing up to 10 di erent charge/discharge pro les for your convenience. Users can keep the data pertaining to any program setting for any battery to facilitate seamless charging or discharging. - Page 11 Adaptable to Various Types of Lithium Battery: The RDX1 Mini is adaptable to various types of lithium batteries, including LiPo, LiIon, LiFe and LiHV batteries. Fast and Storage Mode of Lithium Battery: Depending on your application requirements, you may choose fast charge or storage mode. Fast charge reduces the amount of time required for charging, whereas ‘store’...
- Page 12 Speci cations | Features Continued Automatic Charging Current Limit: You can set the upper limit of the charging current when charging your NiMH or NiCd battery. The ‘AUTO’ charging mode, however, is recommended when charging NiMH batteries with low impedance and capacity. Battery Meter/Battery Resistance: The user can check the battery’s total voltage, the highest voltage, the lowest voltage and the voltage of each cell.
-
Page 13: Charger Connections
Depending on the type of battery you have you may have to use a balance adapter. Adapter are usually available wherever RC hobby products are sold. This diagram shows the correct way to connect your battery to the Hitec RDX1 Mini when charging in the balance charge program mode. -
Page 14: Program Flow Chart
Program Flow Chart LiPo BALANCE CHG BATT/PROGRAM START 2.0A 7.4V (2S) LiPo BATT ENTER LiFe BALANCE CHG BATT/PROGRAM START 2.0A 6.6V (2S) LiFe BATT ENTER Lilo BALANCE CHG BATT/PROGRAM START 2.0A 7.2V (2S) LiIo BATT ENTER LiHV BALANCE CHG BATT/PROGRAM START 2.0A 7.4V (2S) LiHV BATT... -
Page 15: Charger Operations
Depending on the battery type, di erent operations will be available. The chart below shows which operations are available for the di erent types of batteries the RDX1 Mini is capable of working with. It is highly recommended that you have the owchart handy while learning to operate this charger. - Page 16 Charger Operations Continued NiMH Charge The charger will charge NiMH and NiCd batteries using the charge current set NiCd by the user. In this program the user selects the maxium current and the charger will Auto Charge optimize the charge rate up to that current, depending on the internal resistance of the battery.
- Page 17 Charger Operations Continued The following steps describe how to setup the RDX1 Mini: In this example we are setting up the charger to charge a 3 cell (11.1v) 2000mAh Lithium Polymer battery pack. BATT/PROGRAM Select: Press the INC or DEC buttons to scroll...
- Page 18 Charger Operations Continued Program Start: Press and hold START/ENTER for 3 seconds to start the LiPo BALANCE 2.0A 11.1v (3s) program. START ENTER The charger will perform a quick check to detect the number of cells. > 3 S ECONDS R shows the number of cells detected by the charger while S is the BATTERY CHECK number of cells set by the user.
- Page 19 Charger Operations Continued Internal resistance of the individual cells when when the battery is mΩ connected with balance lead. mΩ INC ► From the process screen pressing the DEC will display a variety of charger LP3s 1.5A 12.14V settings. BAL 000:50 00022 Final voltage setting when the program ends.
-
Page 20: Memory Preset - Data Store/Load
10 batteries per channel. Data can be saved for each battery type and each charge mode available with the RDX1 Mini. This allows you to recall data for each battery when charging or discharging without having to set up the program over again. You can also edit settings for each saved battery. - Page 21 Memory Preset - Data Save/Load Continued Discharge Current: Press the ►button and the discharge current value will DSCH CURRENT begin to ash. Use the + or - buttons to change the discharge current then 2.0A press the► button to con rm your selection. Per Cell Discharge Voltage: Press the ►...
-
Page 22: Battery Meter
Battery Meter The user can check the battery’s total voltage, the highest voltage, the lowest voltage and each cell’s voltage. Connect the battery via the charger’s main battery lead to the battery socket and balance wires to the balance socket as shown below. The display indicates the current Main Voltage, Percentage of Charge, Individual Cell Voltage, and the Highest and Lowest voltages of the packs cells. -
Page 23: Battery Resistance Meter
Battery Resistance Measurement The user can check the battery’s total resistance, the highest resistance, the lowest resistance and each cell’s resistance in the battery pack. Connect the battery to the charger by inserting the main battery lead to the battery socket and balance wires to the balance socket. -
Page 24: Advanced System Set Up
Advanced System Set Up The system will be set to its default parameters when powered on for the fi rst time. The screen displays the following information in sequence and the user can change any given value on each screen. To change a parameter value in the program, press START/ENTER to make that value blink. - Page 25 Advanced Systems Set Up Continued DESCRIPTION ITEM SELECTION This program is for NiMH/NiCd batteries NiMH Sensitivity only. When the charger detects that the D.Peak Default: 4mV/Cell delta peak value has reached the value 3-15mV/Cell set by the user, the battery will read fully NiCd Sensitivity charged.
-
Page 26: Warning And Error Messages
The charging time is longer than the maximum charging time set by the user. The battery is already fully charged. Battery pack voltage is lower than 5 volts. The RDX1 Mini CONTROL FAIL cannot charge a pack with a voltage of less than 5v. -
Page 27: Commonly Used Terms
Commonly Used Terms A, mA: Unit of measurement relating to a charge or discharge current. 1000 mA = 1A (A = Ampere, mA = Milliampere). Ah, mAh: Unit of measurement for the capacity of a battery (Amperes x Time Unit; h = hour). If a pack is charged for one hour at a current of 2A, it has been fed 2Ah of energy. - Page 28 Do not attempt to guess the rated voltage of the battery. Note Hitec's RDX1 Mini satis es all relevant and mandatory CE directives and complies with FCC Part 15 Subpart B: 2010. For EC directives: The product has been tested to meet the following technical standards:...
-
Page 29: Conformity Declarations
Conformity Declarations | Disposal Prop 65 Warning This symbol indicates that when this type of electronic device reaches the end of its service life, it cannot be disposed of with normal household waste and must be recycled. To fi nd a recycling center near you, refer to the internet or your local phone directory for electronic waste recycling centers. -
Page 30: Warranty And Service
ONE YEAR LIMITED WARRANTY: For a period of one year from the date of purchase from HITEC RCD shall REPAIR OR REPLACE, at our option, defective equipment covered by this warranty, otherwise the purchaser and/or consumer is responsible for any charges for the repair or replacement of the charger. - Page 31 IS LIMITED IN DURATION TO THE DURATION OF THIS WARRANTY. REPAIR AND SERVICE. To have your Hitec charger serviced: 1. Visit the Hitec website at www.hitecrcd.com and download the service request form (under Support section). 2. Fill out the service request form completely and include a copy of your original receipt showing the purchase date.
- Page 32 Hitec RCD | 9320 Hazard Way Suite D, San Diego, CA 92123 | www.hitecrcd.com...
Need help?
Do you have a question about the RDX1 MiNi and is the answer not in the manual?
Questions and answers