Table of Contents
Advertisement
Quick Links
Advertisement
Table of Contents

Related Manuals for Ross Carbonite Series


Summary of Contents for Ross Carbonite Series
- Page 1 Carbonite Operation Manual v13.0...
- Page 2 Our employees truly care about doing a great job and delivering a high quality customer experience every day. This code of ethics hangs on the wall of all Ross Video locations to guide our behavior: 1. We will always act in our customers' best interest.
- Page 3 • Equipment: This document applies to all Carbonite customer site, reasonable out-of-pocket charges will frames and control panels. apply. At the discretion of Ross, and on a temporary loan basis, plug in circuit boards or other replacement parts Copyright may be supplied free of charge while defective items undergo repair.
- Page 4 Technical Support You can also contact Ross Video for more information At Ross Video, we take pride in the quality of our on the environmental performances of our products. products, but if a problem does occur, help is as close as the nearest telephone.
- Page 5 • Software Licenses (4802DR-502) — third-party • Carbonite Black Operation Manual (4804DR-110) software licences — operational instructions for all Carbonite Black switchers • Carbonite Multilingual Safety Information (4802DR-503) — translated product safety • Carbonite Setup Manual (4802DR-120) — setup and configuration instructions for Carbonite, information Carbonite+, and Carbonite MultiMedia frames •...
- Page 6 • Auxiliary Control Panel Installation (4802DR-305) — installation and mounting instruction for remote aux panel (CPS-AUX-053B) • GVG100 Supported Command (4802DR-401) — connection and GVG100 commands supported by the switcher • RossTalk Commands (4802DR-403) — supported commands using RossTalk protocol •...
-
Page 7: Table Of Contents
To Copy an ME Using the Control Panel....21 Contents To Copy an ME Using DashBoard......21 DashBoard............22 Features.............10 Connecting to the Switcher from DashBoard......22 Clean Feed Output..............10 To Manually Connect to the Switcher To Connect to the Frame ........22 Custom Controls..............10 Device Control...............10 Switcher Status..............22 DVE (Fly Key)................10... - Page 8 To Set the Camera Shot Attribute......51 To Set the Roll GPO Attribute........51 Keying..............35 To Set the Roll VTR Attribute.........51 Clear Memories..............52 Understanding the Keying Menu...........35 To Clear the Memory Registers......52 Self Keys................36 To Set Up a Self Key..........36 Auto Select Keys..............36 Switcher Sets............53 To Set Up an Auto Select Key........36 UltraChrome Chroma Key.............37...
- Page 9 Resetting Individual Components..........88 Glossary............89 Carbonite Operation Manual (v13.0) — Contents • 9...
-
Page 10: Features
Effects Dissolve Features The Effects Dissolve feature allows you to interpolate Thank you for buying a Ross Video Carbonite Series from one memory to another using a memory recall. The Multi-Definition Live Production Switcher. The switcher will interpolate from the starting memory to the... -
Page 11: Matte/Wash Generator
Matte/Wash Generator the memory is recalled with MemoryAI turned on, CAM1 is selected on the preset bus, and CAM2 is selected on a A matte generator and complex wash generator per ME, key that is not on-air. The transition area is then set up capable of multi-color washes comes standard. -
Page 12: Overdrive Caprica Support
routed to any box on the MultiViewer. All boxes on the MultiViewer output include mnemonic source names and red and green tallies. All Carbonite switchers come standard with 2 broadcast-quality integrated MultiViewer generators. Note: If the switcher is operating in 3G video mode, the number of video sources and layouts is reduced. -
Page 13: Xpression Live Cg
XPression Live CG ® Seamlessly combine the creative power of the Ross XPression Designer software with the ease of use of your ® Ross switcher. Create stunning still graphics using XPression Designer, and transfer them directly to an media-store channel on the switcher using the RossLinq interface. -
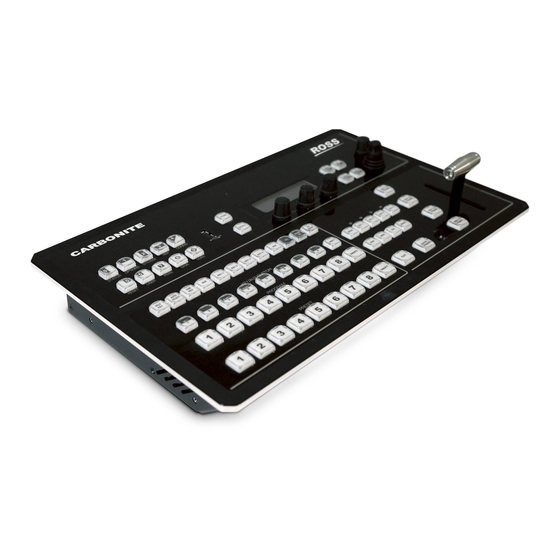
Page 14: Control Panel Overview
6. Key Select Buttons — These buttons are used to Control Panel Overview choose which keyer is selected. The key type buttons and key bus follow the selected keyer. This chapter provides a basic introduction to the control 7. Aux Bus Select Buttons — These buttons are used panel, including an overview of the different areas on to choose which aux bus is selected. - Page 15 select the various transition rates used on the switcher. 18. Memory Store/Recall Buttons — These buttons are used to store or recall memories to one or more MEs at the same time. On the C3S/C3X control panels, there are additional buttons for selecting ™...
-
Page 16: Menu System
│ ├ Resrc Menu System │ └ Mode ├ Clean ├ MultiView The menu system is accessed either by pressing MENU │ ├ MVFrmt* │ ├ MView and the Pattern/Menu Selection button for the menu you │ ├ Layout want to access, or through an auto-follow for selected │... -
Page 17: Reset
│ ├ GPO │ ├ MAuto2 │ ├ FSFC/Type* │ ├ KAuto2 │ ├ Substn │ ├ RlClip │ ├ Edit │ └ BGDDbl │ ├ Delete ├ NextBn Func2 │ └ TSLAdr └ GMUndo ├ BusMap │ ├ XptBtn Personality (Pers) │... -
Page 18: Switcher Basics
manipulated, you must ensure not to perform an operation Switcher Basics that will force the ancillary data to be stripped. Specifically, this includes any format conversion on the Before using your switcher, it is important to become input video signal or stripping of the ancillary data. familiar with how audio and video is handled by the switcher. -
Page 19: Video Layering
™ 1. Select the ME, MiniME , Aux, MultiScreen, or • Aux Follows — use the source that is active keyer that you want to select a source on. on selected aux bus. • ME Follows — use the source that is active on Tip: The user select buttons can be assigned to select any selected ME bus. - Page 20 the background or key on the other ME. If you select an ME on the background bus, the ME becomes background video source of the other ME. If you select an ME on a Key Bus, the ME becomes the key source of the other Keep the following in mind when working with re-entries: •...
-
Page 21: Flexiclean Clean Feed
MultiScreen. The entire contents of the destination is replaced with the contents of the source. When you copy an ME, the switcher tries to assign resources to the destination ME to match the source ME. If these resources are not available, the switcher may need to steal resources. -
Page 22: Dashboard
• Serial Number — the serial number of the frame The DashBoard control system allows remote access to • Engine Type — the model of frame multiple pieces of Ross Video equipment, including • Switcher Mode — the current mode the switcher is ®... -
Page 23: Custom Controls
currently selected ME and Keyer on the current tab. For example, with PaneLINK turned on, pressing KEY 1 SEL, WIPE, and then SELF KEY causes Live Assist to show the Keyers tab, the Trans tab, and then the Keyers tab again. With PaneLINK turned off, Live Assist does not switch between tabs. -
Page 24: Viewcontrol
ViewControl The ViewControl interface through DashBoard allows you to coordinate the control over the Carbonite switcher, XPression Live Graphics System, and the BlackStorm Playout Server all through a touchscreen interface. Through ViewControl you can select sources, perform transitions, and run custom controls. Keep the following in mind when working with ViewControl Figure 15: Bus Selection Buttons... -
Page 25: Custom Control Button Setup
Custom Control Button Setup When you assign a custom control to a button, you can give that button a unique name and assign an icon to it. The images for the icons must be on a USB drive in the frame when you assign them. -
Page 26: Transitions
options that are available depend on the type of transition Transitions that is selected. Transitions are used to change the background video and Table 2: Transition Menu Items take keys on and off-air. A transition can include any Menu Item Description combinations of background and keyers for an ME. -
Page 27: To Override The Pre-Delay Setting
For a background transition you must select the To Abort a Transition During the Pre-Delay source you want to transition to on the preset bus. During the pre-delay time, you can abort the transition 3. In the Transition Area, select the elements (BKGD, completely. -
Page 28: Whiteflash
Tip: You can use the same procedure for a MiniME or Tip: If you have a C2S/C2X/C3S/C3X control panel, press MultiScreen. ME RATE in the Effects Memory area for the ME you want to change the rate for, use the keypad to enter the new 2. -
Page 29: To Set Up A Wipe
13. Use the HMult knob to multiply the pattern To Set Up a Wipe horizontally. Use the HMultiply slider to multiply A wipe transition requires that you select a wipe pattern, the pattern horizontally. set the direction and number/size of wipe pattern, as well 14. -
Page 30: Mediawipe Transitions
1. Press DVE. Click Navigation Menu > Live • CirclL — Circle Left (8) Assist > MEDVE. • CirclR — Circle Right (double-press 8) • FlyTru — Fly Through (double-press 7) Tip: You can use the same procedure for a MiniME or MultiScreen. -
Page 31: To Set The Mediawipe Layer
To Set the MediaWipe Layer Tip: Press and hold the MEDIA button and select the Media-Store channel you want to assign the animation to The MediaWipe can be set to occur between any of the on the Preset bus. The Media-Store channels must be keys or the background. -
Page 32: Gpi Output Triggers
1. Set up the transition you want to perform. While holding the Next button, the mnemonic/pattern buttons light for each GPI output 2. Press NEXT until Limit is shown on the menu. that is currently triggered. Tip: You can use the same procedure for a MiniME or 2. -
Page 33: Patterns, Washes, And Mattes
10. Use the VMult knob to multiply the pattern Patterns, Washes, and vertically. Mattes Washes Patterns, Washes, and Mattes are internally generated Washes are applied to matte generators selected on the graphical elements that can be used for key or background or key buses and allow you to apply a background fill, key shapes, and transition effects. -
Page 34: To Set Up A Matte Color
To Set Up a Matte Color When a matte generator is assigned to a background or key, the matte setting are displayed. Selecting the source button again, or KEY SEL button returns to this menu. When a matte generator is assigned to a key border or wipe border, the matte settings is part of the setup menu, and become active when Border is set to greater than 1. -
Page 35: Keying
Table 3: Keying Menu Items Keying Menu Item Description Keying is the term used to describe when you insert (or Clip removes lower-saturated colors from the video image electronically cut) portions of one scene into another, or Gain adjusts the transition between video image, and the parts place titles over background images. -
Page 36: Self Keys
6. Use the Transp knob to adjust the transparency of Menu Item Description the key from opaque (0%) to fully transparent Top/B press to toggle between Top/B and T/Bttm (100%). Use the Transparency knob to adjust the • Top/B — adjusts the cropping of the top of the box transparency of the key from opaque (0) to fully mask transparent (100). -
Page 37: Ultrachrome Chroma Key
Note: The mode is reset to Normal when a different source Tip: You can return the clip and gain values to the default is selected on the key bus or the alpha is changed. settings by clicking Make Linear. 10. Press NEXT. 1. - Page 38 • Edge Softness — Allows you to adjust the amount • On — Include the maximum detail in the edges of edge softening applied to the foreground. This of the chroma key. helps blend the foreground into the new background. 9.
-
Page 39: Chroma Key Advanced Mode
• Decreasing the Reject value increases the amount with colors that will not be keyed out and will remain of adjacent hues that are included in the solid. foreground. • Spill Suppress — Spill Suppression elements are those pixels in the Foreground that have a noticeable 15. - Page 40 8. Use the Type knob to select Additv and the Value Foreground Clip slider to adjust the foreground knob to turn additive keying on or off. Click an clipping. Additive Keying button to turn it on or off. • Increasing the clip value removes lower-saturated •...
-
Page 41: Dve Keys
22. Use the Cntrl knob to select Gain and use the 27. Use the Cntrl knob to select Reject and use the Value knob to adjust the shadow appearance. Use Value knob to include or reject adjacent hues to the the Shadow Gain slider to adjust the shadow base. -
Page 42: To Set Up A Dve Key
Refer to the section To Apply a Border to a DVE Tip: You can see where DVE channels are allocated from the Status page in DashBoard. on page 43 for information on borders. Keep the following in mind when working with a Fly 8. -
Page 43: To Apply A Border To A Dve Key
c) Press Top/B and use the T/Bttm knob to crop Tip: Hold the SELF KEY, AUTO SELECT, or CHR KEY button again and press DVE to turn off the Fly Key. the key vertically on the bottom side only. 13. Use the Top and Bottom sliders to crop the upper 2. -
Page 44: Masks
9. Press NEXT. preview output of the ME shows the processed alpha of the selected key until the button is released. 10. Use the Pattrn knob to select the mask pattern you • Select the keyer that you want to show the alpha for want to use. -
Page 45: Split Keys
5. Use the M-Inv knob to invert the masked area with 1. Set up your key with the video source you want to the unmasked area (On). Click Mask Invert to use. invert the masked area with the unmasked area. 2. -
Page 46: To Perform A Key Swap
you to change the apparent key priority, or layering, of the keys in the video output. For example, key 3 appears over key 2. If you perform a swap between key 3 and key 2, it appears as if key 2 is now over key 3. Keep the following in mind when performing a key swap: •... -
Page 47: Memory Functions
2. Use the numbers on the mnemonic buttons to select Memory Functions the bank and register you want to store the memory A memory register is a snapshot of the current state of Tip: The C1 uses pattern buttons to select the bank and the switcher that can include one or multiple ME, register. -
Page 48: To Recall A Memory
• How a memory is recalled depends on the how the Tip: Press the memory number button again to undo the Memory Attributes are set. last recall. This can be turned off from the Personality menu. • Recalling a memory that includes a new Media-Store image to be loaded from a USB drive may result in the currently loaded image to be displayed for a few To Recall a Memory on the Effects Memory Area... -
Page 49: To Set Up The Recall Mode Memory Attribute
To Set Up the Recall Mode Memory Attribute • 1-999fr — sets a specific duration in frames 1. Press RECALL > NEXT. Tip: If you have a C2S/C2X/C3S/C3X control panel, press EFF RATE in the Effects Memory area for the ME you want 2. -
Page 50: To Set The Transition Type Attribute
™ ™ 3. Use the ME knob to select the ME, MiniME 3. Use the ME knob to select the ME, MiniME , or , or MultiScreen output that you want to set the attribute MultiScreen output that you want to set the attribute for. -
Page 51: To Set The Key Type Attribute
3. Use the Key knob to select the keyer you want to • Memory — settings come from the memory set the attribute for. being recalled • NoRcl — Media-Store image and settings are 4. Use the Value knob to select whether sources not recalled (default) selected on the selected key bus are recalled. -
Page 52: Clear Memories
3. Use the Value knob to select whether a play command is triggered when a source that is assigned to a video server is recalled. • Memory — settings come from the memory being recalled • NoRoll — play command is not triggered •... -
Page 53: Switcher Sets
• PersX — store only the personality registers to Switcher Sets the set. Use the Pers knob to select whether to include the personality setting for all panels The switcher stores configuration and operation data in (PersA) or only the current panel (PersM/1/2). a number of registers that contain the individual entries for items such as memories or personality settings. -
Page 54: Media-Store
Working With Media-Store Audio Media-Store Audio can be added to the playout of a Media-Store Media-Store allows you to load stills, animations, or channel either by loading the file directly, or by naming audio files from the USB drive and make them available the audio file the same as the animation or still you want across all MEs. -
Page 55: Media-Store File Specifications
number is made up of three sections, the Place (0-1), the • image.tga .wav — a still with an associated Bank (00-99), and the Item Number (0-9). The Place is audio file (not in the database) either 0 for internal stills, or 1 for external. •... -
Page 56: Media-Store Attributes
3. Press the Capt knob. Menu Item Description 4. Press the P/B or E/E knob to select the mode you CutFr selects the point, in frames, from the start of the animation want the Media-Store in. that the background transition occurs •... -
Page 57: To Lock A Media Number Place And Bank
JavaScript To Lock a Media Number Place and Bank cookies enabled. • Ross Video recommends that you do not connect Locking the Media Number Place and Bank means that more than 5 MediaManager clients to a single you do not have to enter them when loading a still. Lock switcher at the same time. - Page 58 Animation Controls Icon Name Description The MediaManager interface allows you to manually the Media-Store channel indicated with a check-mark. control the play-out of an animation. The playlist does not loop back to the top when it reaches the last item. Next Advance to the next item in the playlist.
-
Page 59: Custom Controls
Almost any action or setting can be stored in a custom Custom Controls control, with the following exceptions: • Diagnostic Functions Once programmed, a custom control (CC) can be played • Confirmation Dialogs back by pressing a button. The custom control can be as •... -
Page 60: To Insert A Special Event Into A Custom Control
special function can be inserted into any existing custom To Insert a Special Event into a Custom Control control, or used when creating a new custom control. A special function can be inserted into any existing custom control, or used when creating a new custom Table 7: Special Functions control. -
Page 61: Running A Custom Control
the bank (Bank) and custom control (CC) you Editing a Custom Control want to cancel After you have recorded a custom control, you can go • CancelAll — press the CancelAll knob to back and edit that custom control to add or remove insert a cancel all custom controls command events. -
Page 62: To Edit A Cc From Dashboard
d) Press START/STOP to finish recording. Event Location Description Audio Mixer Pan Devices > Set the pan level for the selected To Edit a CC From DashBoard Audio Mixer channel on the selected device. Click Audio Pan. When editing a custom control, you can delete and insert Click the Audio Mixer button events at any point in the custom control, or append and select the device you want... - Page 63 Event Location Description Event Location Description Click the CC button and select synchronized (Sync) or not the custom control you want to (NoSync). cancel. Switcher > Performs a cut on the selected ME. Chroma Key, Switcher > Initialize a chroma key for the selected Transition >...
- Page 64 Event Location Description Event Location Description Click the Component button and Click the Keyer button for the select the HSL component you key you want to perform the want to assign a value to. A event on. value should be applied to all Click the Change Type button three components.
- Page 65 Event Location Description Event Location Description Click the Change Type button DVE Key Switcher > Select the y-axis position for the DVE and select whether you want to Y-Position Keyer > DVE key on the selected key for the set (Absolute) or reset (Reset) Param selected ME.
- Page 66 Event Location Description Event Location Description Click the Effect button and EmbeddedTriggers Switcher Select the secondary data identifier select the pattern you want to — Set SDID Installation > word (SDID) you want to use for the use for the DVE wipe. Embedded EmbeddedTriggers message.
- Page 67 Event Location Description Event Location Description GPI Output — Devices > GPO Trigger a GPI output. Key Invert Switcher > Turn the key invert feature on or off for Trigger Keyer > Keyer the selected key for the selected area. Click GPO Trigger Invert Click the ME button and select...
- Page 68 Event Location Description Event Location Description the parameter. Some selections Mask, Force Switcher > Apply a mask to the selected key for will not be available when you Keyer > Mask the selected ME. reset the parameter. Force Click the ME button for the ME Enter a value for the clip, gain, that you want to perform the or transparency for the key in the...
- Page 69 Event Location Description Event Location Description Click the Parameter button and Mask (Box) — Switcher > Select the position for the bottom edge select Size. Bottom Edge Keyer > Box of the box mask on the selected key PositionMask (Box) Mask Param for the selected ME.
- Page 70 Event Location Description Event Location Description Mask (Pattern) — Switcher > Select the aspect ratio for the pattern Mask (Pattern) — Switcher > Select a pattern for the pattern mask Aspect Ratio Keyer > mask for the selected ME. Pattern Keyer >...
- Page 71 Event Location Description Event Location Description Click the Component button and Mask (Pattern) — Switcher > Select the x-axis position of the pattern select the HSL component you X-Position Keyer > mask for the selected ME. want to assign a value to. A Pattern Mask Click the ME button for the ME value should be applied to all...
- Page 72 Event Location Description Event Location Description Enter the number you want to the internal storage (Internal) or assign to the capture file in the on the USB (USB). Capture File field. Enter the number of the media item you want to load in the Media-Store —...
- Page 73 Event Location Description Event Location Description Click the Value button and select Media-Store — Switcher > Select the speed for an animation to whether the alpha of the media Play Speed MediaStore > play at on the selected Media-Store item is shaped (On) or not (Off). Playback channel.
- Page 74 Event Location Description Event Location Description the parameter. Some selections Click the Layer button to select will not be available when you what the MediaWipe animation reset the parameter. covers. Click the Parameter button and MediaWipe Trans Switcher > Sets the ending point for a MediaWipe select Y-Pos.
- Page 75 Event Location Description Event Location Description Click the Type button for the Click the Change Type button type of transition you want to and select whether you want to use. set (Absolute) or reset (Reset) the parameter. Some selections MultiScreen — Switcher Select whether edge blending is will not be available when you...
- Page 76 Event Location Description Event Location Description (White), black (Black), or if there MultiViewer Box — MultiViewer > Select the position of the source label is no border (Off). Label Position Box > MV Box for the selected box on the selected Label Position MultiViewer.
- Page 77 Event Location Description Event Location Description Click the Box button and select Click the Component button and the box that you want perform select the HSL component you the event on. want to assign a value to. A value should be applied to all Click the Change Type button three components.
- Page 78 Event Location Description Event Location Description will not be available when you Click the Layout button and reset the parameter. select the layout you want to use. Click a Value button and select whether the frame count is MultiViewer — Switcher Select which outputs the MultiViewer shown (On) or not (Off).
- Page 79 Event Location Description Event Location Description Click the Device button and • Cut — cut the transition to select the channel you want to the end send the command to. Click the Change Type button Personality — Next Switcher Have the transition area reset to a and select whether you want to Trans Reset Personality >...
- Page 80 Event Location Description Event Location Description Click the Channel button and RossTalk Clear Devices > Send the Clear Framebuffer command select the channel you want to RossTalk for a framebuffer and layer to the send the command to. selected device. Click the Change Type button Click Clear Channel.
- Page 81 Event Location Description Event Location Description Click the RossTalk Device want to send the RossTalk button and select the device you command to. want to send the RossTalk RossTalk — Swap Devices > Send the Swap command to the command to. Current RossTalk selected device.
- Page 82 Event Location Description Event Location Description Click the Value button and select Source Switcher Delete an entry from the substitution whether trans limit is on (On) or Substitution, Installation > table. not (Off). Delete Source Click the Source button and Substitution >...
- Page 83 Event Location Description Event Location Description Click the Video Server button Click the Matte button and select and select the device you want Wash. to send the command to. Click the Color button and select Click a Channel button to select the color you want to use.
- Page 84 Event Location Description Event Location Description Wipe Pattern — Switcher > Select the aspect ratio for the wipe Wipe Pattern — Switcher > Select the amount of softness to apply Aspect Ratio Transition > pattern you want to use for a wipe Edge Softness Transition >...
-
Page 85: Naming Custom Controls
Event Location Description Event Location Description Click the Parameter button and Click Reset Params to reset the select Size. wipe parameters or Reset Direction to reset the wipe Click the Change Type button direction and flip-flop. and select whether you want to set (Absolute) or reset (Reset) the parameter. -
Page 86: Deleting Custom Controls
The Invert (Inv) selection is not applied when the Tip: If you have a C10 or C1 control panel, use the Func mnemonic is in split mode. In split mode, the top knob to select Copy and press the Func knob to perform the copy. -
Page 87: Switcher Soft Reset
6. Repeat this for the remaining Media-Store channels. Switcher Soft Reset 7. Use the Attrib knob to select Aux. 8. Use the Aux knob to select Aux 1. If required, the switcher can be reset to return it to a user-defined default setting, or the factory default state. -
Page 88: Factory Default Settings
You can also press and hold MENU and press Reset All (RESET on the C10/C1). Factory Default Settings You can restore the switcher to the factory default state. All installation and personality settings are reset. To Factory Reset the Switcher 1. - Page 89 eliminates the need to manually enter the network Glossary parameters and IP address. Interlaced Field An Interlaced video format starts at the top of the screen One half of a complete picture (or frame) interval and draws all the odd number scan lines and then all the containing all of the odd, or all of the even, lines in even number scan lines in sequence.
- Page 90 The video signal used for cut and fill An ethernet based protocol that allows the control over can come from the same, or separate, sources. Ross devices using plain english commands. Key Alpha Standard-Definition The video signal which cuts a hole in the background A standard definition (480i or 576i) video signal.
- Page 91 a hard edge. Shaped Key alphas are sometimes used with Character Generators to cut very precise holes for the fill. Split Key A Split key allows you to assign a different alpha source for a key than the fill/alpha associations that are set up during configuration or to use a separate alpha source for a Self key.
- Page 92 Index Custom Control Event (continued) DVE Key Crop (Right Edge) Abort Transition DVE Key Crop (Top Edge) Allocated DVEs DVE Key Edge Softness Ancillary Mode DVE Key Size Animations DVE Key X-Position Audio DVE Key Y-Position Audio Mixer Control DVE Wipe, Reset Auto Select Keys DVE Wipe Direction DVE Wipe Direction (Flip-Flop)
- Page 93 Custom Control Event (continued) Custom Control Event (continued) Matte Color (HSL) MultiViewer Clock — Timecode Frame Count Matte Color (Preset) MultiViewer Clock — X-Position ME Copy MultiViewer — FSFC Label Media Cut Point, Set MultiViewer — Layout Media-Store — Auto Play MultiViewer —...
- Page 94 Custom Control Event (continued) Default Wash Color (HSL) Factory Wash Color (Preset) Device Control Wash Color Reset Dissolve Transitions Wash Generator — Disable 41–43 Wash Generator — Enable 41–43 Wipe Direction Cropping 42–43 Wipe Direction (Flip-Flop) Freeze Wipe Pattern — Aspect Ratio DVE Allocation Wipe Pattern —...
- Page 95 Menus Auto-Follow Live Assist Navigating PaneLINK Overview Load Custom Reset Menu Trees 16–17 Loading Media-Store Images Config Load Menus Load Options Pers Reset Mask Save Mattes Status System Selection User ME Copying ME RATE 28–30 MediaManager 23, 57–58 MiniME 11, 18, 26, connection status Keying DashBoard...
- Page 96 Serial Number Transitions (continued) Server Control Limit Sets Media Loading Menu Overview Storing MiniME Setup, External Devices Pause Show Alpha 36–39, 42–43 Performing Side Box Rate SideShot Roll Clip Software Version Wipes Sources Trigger GPO Selecting TSL UMD Port Sources, Layering Sources, Re-Entry Split Key Split Keys...
Need help?
Do you have a question about the Carbonite Series and is the answer not in the manual?
Questions and answers