Advertisement
Quick Links
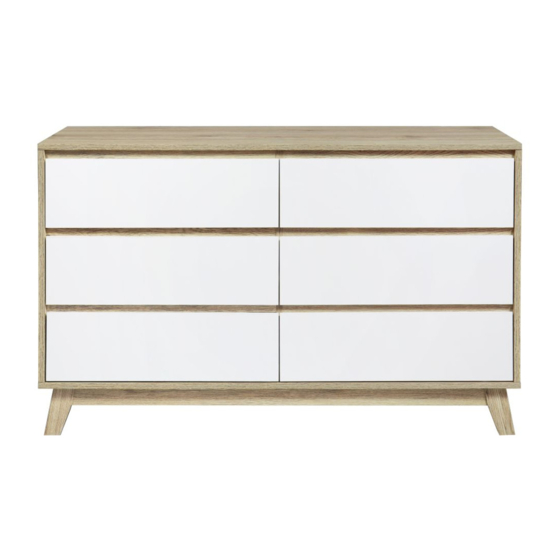
Jesse Six Drawer
Assembly Instructions
Thank you for your purchase.
Please follow the instructions below for correct assembly.
A
B
dowel
screw
x30
x42
G
H
CR runner tracks
DL runners
x6
x6
M
N
wedge
screw
x4
x4
WARNING:
Any furniture that is not anchored to a wall has the potential to tip over in certain
circumstances, i.e. if a child attempts to climb up on the furniture or in the event of an earthquake.
Accordingly, we recommend that all furniture is anchored to a wall. We supply a free safety wall anchor
with all furniture sold and we recommend these are used to prevent your product tipping. The fixing device
provided should fit most wall types, but please note that different wall materials may require different fixing
devices from those supplied.
mocka.co.nz | mocka.com.au | PO BOX 6171, Maroochydore, QLD, 4558
C
D
E
bolt
locking nut
small screw
x50
x50
x72
I
J
DR runners
long screw
x6
x8
O
P
plastic
long dowel
glide x5
x4
Hardware Supplied
Phillips & Flathead screwdrivers
and hammer required
For quicker assembly, we recommend the
use of a power drill on a low-speed setting.
F
CL runner tracks
safety
x6
strap x2
K
L
cam bolt
cam nut
x4
x4
V
W
X
Y
screw
wall
wall
x4
anchor
screw
x2
x2
Wall Strap
Z
washer
x4
1
Advertisement

Related Manuals for Mocka Jesse Six Drawer


Summary of Contents for Mocka Jesse Six Drawer
- Page 1 Phillips & Flathead screwdrivers and hammer required For quicker assembly, we recommend the use of a power drill on a low-speed setting. mocka.co.nz | mocka.com.au | PO BOX 6171, Maroochydore, QLD, 4558...
- Page 2 Attach 3x CL runner tracks (F) and 3x CR runner tracks (G) to Insert 8x bolts (C) into panels [2] and [3]. Tighten with a screwdriver. panels [2] and [3] as shown with 18x screws (E). Tighten with a screwdriver. mocka.co.nz | mocka.com.au | PO BOX 6171, Maroochydore, QLD, 4558...
- Page 3 Insert 8x bolts (C) into panel [5] as shown. Tighten with a screwdriver. 9x screws (E). Flip the panel [5], attach 3x CR runner tracks (G) to panel [5] as shown with 9x screws (E). Tighten with a screwdriver. mocka.co.nz | mocka.com.au | PO BOX 6171, Maroochydore, QLD, 4558...
- Page 4 Attach panel [5] to panels [6], [19] and [21] with 4x long dowels (P) and secure with 4x locking nuts (D). Tighten with a screwdriver. and secure with 4x locking nuts (D). Tighten with a screwdriver. mocka.co.nz | mocka.com.au | PO BOX 6171, Maroochydore, QLD, 4558...
- Page 5 Attach panel [2] to panels [6], [19] and [21] with 4x dowels (A) and secure with 4x locking nuts (D). Tighten with a screwdriver. 4x locking nuts (D). Tighten with a screwdriver. mocka.co.nz | mocka.com.au | PO BOX 6171, Maroochydore, QLD, 4558...
- Page 6 Insert 6x bolts (C) into panel [1]. Tighten with a screwdriver. Attach panel [1] to panels [2], [3] and [5] with 6x dowels (A) and secure with 6x locking nuts (D). Tighten with a screwdriver. mocka.co.nz | mocka.com.au | PO BOX 6171, Maroochydore, QLD, 4558...
- Page 7 [2] and [3] to form the to panel [10] with 2x dowels (A) and secure with 2x locking back of the unit as shown. nuts (D). Tighten with a screwdriver. mocka.co.nz | mocka.com.au | PO BOX 6171, Maroochydore, QLD, 4558...
- Page 8 Attach panel [12] to panel [4] with 2x long screw (J) and secure. with 4x cam nuts (L). Tighten with a screwdriver. Attach 4x plastic glides (O) Tighten with a screwdriver. into the panels [8] and [9] with a hammer as shown. mocka.co.nz | mocka.com.au | PO BOX 6171, Maroochydore, QLD, 4558...
- Page 9 Attach panel [4] to leg panels with 6x dowels (A) and secure Tighten with a screwdriver. Attach 1x plastic glide (O) into the panel [12] with 18x screws (B). Tighten with a screwdriver. with a hammer as shown. mocka.co.nz | mocka.com.au | PO BOX 6171, Maroochydore, QLD, 4558...
- Page 10 Attach panels [15] and [16] to front panels [13] and [14] using Insert 4x bolts (C) into panels [13] and [14]. Tighten with a screwdriver. 4x locking nuts (D). Tighten with a screwdriver. mocka.co.nz | mocka.com.au | PO BOX 6171, Maroochydore, QLD, 4558...
- Page 11 Attach panels [15], [16] and [18] as shown using 4x screws (B). Slide panel [17] along the grooves between the side panels [15] Tighten with a screwdriver. and [16] to form the base of the drawer. mocka.co.nz | mocka.com.au | PO BOX 6171, Maroochydore, QLD, 4558...
- Page 12 [15] and [16] as shown. Secure with 6x screws (E) and tighten with as shown. Ensure the drawers slide easily along the rails. a screwdriver. Complete the other three drawers. mocka.co.nz | mocka.com.au | PO BOX 6171, Maroochydore, QLD, 4558...
- Page 13 2x washers (Z) and 2x screws (W). Tighten with a screwdriver. You’re done, enjoy! Attach panels [7] to panel [5] as shown using 2x screws (W). Tighten with a screwdriver. mocka.co.nz | mocka.com.au | PO BOX 6171, Maroochydore, QLD, 4558...
Need help?
Do you have a question about the Jesse Six Drawer and is the answer not in the manual?
Questions and answers