Alesis Fusion Reference Manual
Alesis fusion synths: reference guide
Hide thumbs
Also See for Fusion:
- Quick start owner's manual (174 pages) ,
- Tutorial (37 pages) ,
- Manual (22 pages)
Table of Contents
Advertisement
Quick Links
Advertisement
Table of Contents

Related Manuals for Alesis Fusion


Summary of Contents for Alesis Fusion
- Page 1 Fusion Reference Manual...
- Page 2 This page intentionally left blank...
-
Page 3: Table Of Contents
What is a Program? ...21 What is a Mix?...21 What is a Song?...21 What is a Sampler? ...21 Fusion Architecture...22 Getting Around on the Fusion ... 23 The Mode Buttons ...23 Navigating The Fusion’s Menus...25 Useful Navigation Shortcuts...28 Storing Your Work ... 31 Storing Programs, Mixes, Songs, and Multisamples...31... -
Page 4: Table Of Contents
Table Of Contents Song Mode ... 115 Setting Overall Song Parameters...116 Setting Track Parameters ...123 Editing Song Tracks ...135 Track Editing Filters ...145 Processing Synth and Audio Tracks ...147 Song Utility Page ...167 Sampler Mode ... 171 Setting Overall Sample Settings...172 Setting Individual Zone Settings ...173 Capturing Samples...179 Editing and Processing Samples ...186... -
Page 5: Table Of Contents
Appendix A: Effects and Implementation ...263 Master EQ Effects Parameters...263 Insert Effects Parameters...264 Bus Effects Parameters...273 MIDI Implementation Chart (Synthesizer)...283 MIDI Implementation Chart (Sequencer)...284 Appendix B: Frequently Asked Questions...285 Appendix C: Troubleshooting...287 Index...289 Specifications ...291 Sound Engine...291 Sampling Inputs...291 Multitrack Inputs ...291 Audio Output...292 Physical...292 Legal Information: ...293... - Page 6 Table Of Contents This page intentionally left blank...
-
Page 7: Introduction
You could say Alesis knows a few things about synthesis. We have a 15- year long track record of creating some of the most powerful and well- regarded keyboards in the world. -
Page 8: Unpacking And Inspection
How to Use This Manual We’re sure you’d like to jump in and start using your Fusion quickly. To help you do this, check out the Fusion’s Quickstart guide. The Quickstart guide is a separate manual that should have everything you need to start playing quickly. -
Page 9: Main Features
Main Features Your Fusion workstation is packed with features to help you make better music. Let’s take a quick look at these features and get a sense of why each feature is important. Total Integration The Fusion has one of the biggest feature lists of any workstation on the market today. -
Page 10: The Fusion's Synthesis Engine
There are no artificial limits placed on synthesis or polyphony—you’re free to configure and push your Fusion as far as the synth engine can handle (which is pretty far considering there are eight processors inside). - Page 11 Inside a real instrument. This results in incredibly lifelike virtual instruments that you can play on the Fusion. The cool thing is that you can actually create virtual instruments that do not (or cannot) exist in real life by simply setting your parameters accordingly.
-
Page 12: Eight Channel Hard Disk Recorder
There are several advantages to having an integrated multitrack recorder over a separate keyboard and multitrack. First, you have much less gear to buy, carry around, and maintain—with the Fusion, you can do all your recording and mixing in one box making it much easier to record on the road. -
Page 13: Chapter 1: Fusion Hardware
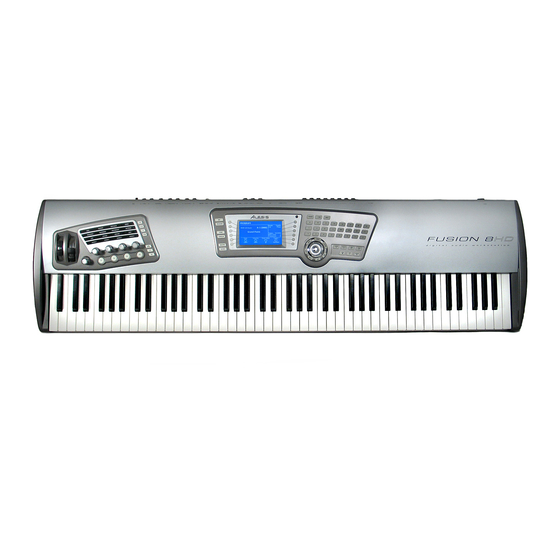
Center Section 1. Mode Selection Buttons (Mix, Program, Song, Sampler, Mixer and Global): These buttons select the main modes of the Fusion. 2. Soft Buttons (No Labels on the front panel): These buttons match up with the LCD screen labels and let you navigate the user interface. -
Page 14: Performance Panel Description
FM amount, etc. This wheel is usually mapped to vibrato as a default, but it is possible to map it to almost anything on the Fusion. Use the modulation matrix to map the mod wheel. See page 236 for more about the modulation matrix. - Page 15 6. ARP On/Off, S1, S2: The ARP On/Off (Arpeggiator) button engages and disengages the Fusion’s arpeggiator. The S1 and S2 buttons are assignable ON/OFF switches that can be set to affect all kinds of functions within the Fusion such as filters or effects sends. Switch assignments can be made through the modulation matrix.
-
Page 16: Audio Hookup Diagram
Chapter 1: Fusion Hardware Audio Hookup Diagram: This diagram will show you how you can hook up your Fusion to the rest of your studio. Let’s go through and discuss the inputs and outputs. We’ll start from the left side of the diagram above and work our way to the right: Sampling inputs: These inputs—labeled “Left/Mono”... - Page 17 Main Outputs: These are the Fusion’s primary outputs. By default, all multitrack and synthesizer audio is routed to these outputs and you’ll generally connect these outputs to your amplifier (or mixer). Aux Outputs: These are a second pair of outputs to which you can route multitrack and synthesizer audio if you’d like to process these...
- Page 18 Chapter 1: Fusion Hardware Multitrack Inputs: These eight inputs link directly to the Fusion’s hard disk recorder. You can use these inputs to record things like live instruments (guitars, bass, drums, etc.) as well as mixers, CD players, turntables, and more. Note that you need to plug in a line level signal into these inputs and many instruments (condenser microphones, guitars, turntables, etc.) will require a preamplifier to bring the signal up to line...
-
Page 19: Midi Hookup
There are two common scenarios in which you’ll want this: 1. You may want to use another keyboard to control the Fusion. This is commonly done by synth players on stage if they want to use one “master”... -
Page 20: Computer/Usb Hookup
Chapter 1: Fusion Hardware Computer/USB Hookup: USB: Connect your Fusion to a Mac or PC for easy file transfers. The Fusion supports USB 2.0 and is fully backwards-compatible with USB 1.1/1.0, but we highly recommend using 2.0 since audio files tend to be quite large and transfers will be slower on USB 1.1/1.0 connections. -
Page 21: Powering The Fusion
1. Plug the female end of the power cable into the Fusion’s power socket. 2. Plug the male (plug) end into a properly grounded power outlet. -
Page 22: Factory Reset
Resetting your Fusion is easy: Hold down both the Play and Record buttons as you turn on your Fusion and wait for the unit to finish loading. Once the Program screen is displayed, factory defaults have been loaded, and your Fusion is ready to go. -
Page 23: Chapter 2: Fusion Basics
This means you are not limited to the world-class set of programs that ship with the Fusion and that you are free to create your very own programs. -
Page 24: Fusion Architecture
Chapter 2: Fusion Basics Fusion Architecture The Fusion is packed with a ton of features and it can be easy to be overwhelmed by it all. Let’s take a moment to explain how all the different parts interact with one another. -
Page 25: Getting Around On The Fusion
Getting Around on the Fusion The Mode Buttons The Fusion has six modes: Mix, Program, Song, Sampler, Mixer, and Global. Each mode is specialized to handle specific tasks, which are covered below. Note that Mix, Program, Song, and Sampler modes have parameters that you can edit. - Page 26 Song Mode Song mode takes you to the audio and MIDI sequencer found within the Fusion. You can arrange, edit, and record your compositions using this mode. Song mode controls both your MIDI sequencer as well as your hard disk recorder and provides up to 32 MIDI tracks and 8 audio tracks for each song.
-
Page 27: Navigating The Fusion's Menus
Navigating The Fusion’s Menus All navigation on the Fusion takes place using the Center Panel. Let’s break down navigation section-by-section: MODE SELECT BUTTONS: These buttons let you switch into the Mix, Program, Song, Sampler, Mixer, or Global modes. If you’ve pressed the EDIT button and you’re editing parameters deep within the Fusion, you can return to the “Top... - Page 28 The BANK buttons allow you to cycle through the different banks of programs and mixes that are stored on the Fusion. QUICK ACCESS BUTTONS: The Fusion provides twenty- four QUICK ACCESS buttons for easy access to sounds, editable parameters, and other things.
- Page 29 Chapter 2: Fusion Basics TRANSPORT CONTROLS: These seven buttons control the Fusion’s integrated MIDI sequencer/multitrack audio recorder. The SET LOC button sets a locator point in the song that you can jump to using the LOCATE button. The remaining buttons control the recorder’s various Record and transport functions just like on a regular tape machine (or computer-based sequencer).
-
Page 30: Useful Navigation Shortcuts
Chapter 2: Fusion Basics Useful Navigation Shortcuts The Fusion has a number of shortcut features that are designed to make your life a lot easier. Take a moment to learn these shortcuts now and you’ll save a ton of time in your future sessions with the workstation. - Page 31 Compare mode—the mode is only provided as a reference. Finally, once you save your updated parameter settings, you can no longer compare your current program, mix, song, or sample since your current settings have overwritten the old ones. Chapter 2: Fusion Basics...
- Page 32 When you’re searching for a particular program, mix, song, sample, or arpeggiation pattern, you may spend quite a bit of time looking for it because the Fusion has a massive internal hard disk drive that can store a lot of data. We’ve made searching much easier by letting you link directly to the Fusion’s...
-
Page 33: Storing Your Work
Storing Programs, Mixes, Songs, and Multisamples Storing your work on the Fusion is easy. Whenever you want to save your work, press the “STORE” button and you’ll be taken to the menu shown below. This menu will let you name and store your work from Program, Mix, Song, and Sampler modes. - Page 34 Value Range: (varies depending on available banks) Your program, mix, song, or multisample can be stored in any bank available to your Fusion. Select that bank using this parameter. If none of the existing banks are appropriate for your needs, you can always create a new bank using the “New Bank”...
- Page 35 Value Range: Hard Drive, CF Media This parameter lets you select the physical location of your new bank on the Fusion. This parameter will vary depending on whether or not you have inserted a Compact Flash card into the Fusion.
-
Page 36: The Clipboard
Chapter 2: Fusion Basics The Clipboard The clipboard of the Fusion is a useful tool for copying and pasting an entire page of parameters. For example, if you want to transfer all of the envelope settings from one program to another, you can do so without having to write down (or remember) all the settings from one program and then manually enter them into another program’s envelope page. - Page 37 Chapter 2: Fusion Basics Now you can freely navigate through the Fusion’s pages. The “Paste” button will appear on the clipboard whenever you access a page to which you can copy the clipboard contents. In other words, if you copied Envelope parameters, every time you access an Envelope page, the “Paste...
-
Page 38: Connecting To A Computer Via Usb
Let’s say you move a program to a different folder (using either the Fusion’s own Item Explorer or through the USB connection). The next time you fire up your Fusion and try to load a mix or song that needs the program you just moved, you’ll get an error message telling you that the program can’t be found. -
Page 39: Chapter 3: Fusion Modes
Chapter 3: Fusion Modes This chapter covers all of the Fusion’s modes including Program, Mix, Song, Sampler, Mixer, and Global. Since some features (including Envelopes, LFOs, Filters, Arpeggiations, and Effects) are common to all of these modes, we cover them separately in chapter 4. - Page 40 Sometimes a sound fits into more than one category. For example a sawtooth synth sound might work equally well as a bass or a lead. For that reason, the Fusion allows you to assign a program to Alternate Categories. If you select any of these check boxes, the instrument will appear in multiple places when you’re browsing through your Fusion’s...
- Page 41 In other words, the Fusion does not set arbitrary limits on how many voices you can play at the same time and lets you push the processor to its absolute limit.
- Page 42 “2 semitones” transposition, every time you play a C key, the Fusion will play the D note instead. You can transpose the Fusion up to four octaves higher or four octaves lower than the default “0”-semitone setting.
- Page 43 Chapter 3: Fusion Modes Menu: Program/Program/Pitch Parameter: Pitch Bend Range Value Range: 0 – 12 Semitones Assign the pitch bend wheel’s range here. Values range from 0 (no pitch bend) to 12 semitones. Menu: Program/Program/Pitch Parameter: Portamento Time Value Range: 0 – 30 Sec Portamento is when your instrument “glides”...
- Page 44 Parameter: Insert (The effect is listed in the parenthesis to the right of the parameter) Value Range: On, Off An Insert Effect is “inserted” between the program and the Fusion’s audio outputs. Here you can choose whether to enable or disable an insert effect for the program.
- Page 45 Value Range: 0 – 100% Bus Effects, unlike Insert Effects are shared by every program, mix, and song on the Fusion. There are two Bus Effects available, labeled “Bus Send 1” and “Bus Send 2.” Dial in the amount of processing you want from each Bus Effect. For...
- Page 46 Chapter 3: Fusion Modes Menu: Program/Program/Output Parameter: Jump FX Value Range: (none) This button will take you to the Effects menu where you can select and edit the effects that you’d like to use.
-
Page 47: Synthesis Type: Sample Playback
• Envelopes: Up to eight envelopes for controlling volume, filter, pitch, or other parameters. • Low-frequency oscillators (LFO): Up to eight low-frequency oscillators for controlling vibrato, filter operation, or other parameters. Chapter 3: Fusion Modes... - Page 48 Chapter 3: Fusion Modes Menu: Program/Synth/Osc/Config Parameter: View Value Range: Osc Enable, Osc Multisample, Osc Transpose, Osc Coarse Tune, Osc Fine Tune, Osc Volume, Osc Pan This screen provides a convenient overview showing how many of the commonly used parameters in the Sample Synthesis submenus are configured.
- Page 49 “harder” strike (or pick, in the case of a guitar). Conversely, as you play more softly, more of the attack is bypassed and a mellower tone results. Chapter 3: Fusion Modes About Zero-Crossing Points: If you place your start point on a non-zero crossing (i.e., at the top or the bottom of a...
- Page 50 Chapter 3: Fusion Modes Menu: Program/Synth/Osc/Select Parameter: Trigger on key up Value Range: On, Off Usually, you want sounds to play when you press a key. But there are some cases–such as a harpsichord’s release sound–where you want the sound to play when you raise your fingers off the keys. Enable Trigger On Key Up in such cases.
- Page 51 Value Range: -48 to +48 semitones Use transpose to reassign the notes that are triggered when you play the keyboard (or access the Fusion via an external MIDI device). For instance, with a “2 semitones” transposition, every time you play a C key, the Fusion will play the D note instead.
- Page 52 Parameter: Optimize osc to Mono Value Range: On, Off This option conserves processing power and maximizes the number of voices on your Fusion by removing panning for an oscillator. Menu: Program/Synth/Osc/Output Parameter: Mono source channel (only appears when “Optimize to Mono”...
- Page 53 Chapter 3: Fusion Modes Menu: Program/Synth/Osc/Output Parameter: Osc Volume Value Range: 0 – 100% Sets the volume of each oscillator. This is different from the Volume parameter in the Program/Output menu because it lets you set the volume of each individual oscillator in your program, whereas the Volume/Output menu sets the level of the entire program.
-
Page 54: Synthesis Type: Drum
Chapter 3: Fusion Modes Synthesis Type: Drum This synthesis type is specifically designed and optimized for drums and other sample sets where each note on the keyboard corresponds to one distinct type of sound (i.e., kick drum, snare drum, ride cymbal, etc.) •... - Page 55 Chapter 3: Fusion Modes The Synth/Osc/Config screen provides a convenient overview showing how many of the commonly used parameters in the Drum Synthesis submenus are configured. This page shows parameter settings of eight consecutive oscillators in relation to one another. By having these common parameters on one screen, it saves users from having to jump back and forth between multiple oscillator pages.
- Page 56 Chapter 3: Fusion Modes Menu: Program/Synth/Osc/Select Parameter: EDIT Osc: Value Range: Osc 1 to Osc 64 Select the oscillator you’d like to edit. The value in the parenthesis varies depending on what note the oscillator has been assigned to (using the “Note”...
- Page 57 Chapter 3: Fusion Modes Menu: Program/Synth/Osc/Select Parameter: Mute Group Value Range: None, Self, A to P This allows you to mute one oscillator when another is played. Certain percussion sounds mute other sounds when played in succession. For example, when you play an open hi-hat and then follow it with a closed hi-hat, the closed hi-hat stops the open hat from ringing.
- Page 58 Chapter 3: Fusion Modes Menu: Program/Synth/Osc/Pitch Parameter: EDIT Osc Value Range: Osc 1 to Osc 64 Select the oscillator you’d like to edit. Since we’re in Drum Synthesis mode, you have 64 oscillators to choose from. The value in the parenthesis varies depending on what note the oscillator has been assigned to (using the “Note”...
- Page 59 Menu: Program/Synth/Osc/Output Parameter: Optimize osc to Mono Value Range: On, Off This option conserves processing power and maximizes the number of voices on your Fusion by removing panning for an oscillator. Menu: Program/Synth/Osc/Output Parameter: Osc Volume Value Range: 0 to 100% Sets the volume of each oscillator.
- Page 60 Chapter 3: Fusion Modes Menu: Program/Synth/Drum/Config Parameter: View Value Range: Drum Enable, Drum Sample, Drum Vel Max/Split, Drum Coarse Tune, Drum Fine Tune, Drum Volume, Drum This screen provides a convenient overview showing how many of the commonly used parameters in the Drum Synthesis submenus are configured.
- Page 61 Chapter 3: Fusion Modes Menu: Program/Synth/Drum/Select Parameter: EDIT Osc Value Range: Osc 1 to Osc 64 Choose the oscillator you’d like to edit. Since our synthesis type is set to Drum, you have 64 oscillators to choose from. The value in the parenthesis varies depending on what note the oscillator has been assigned to (using the “Note”...
- Page 62 (see above) and a loop will begin taking place between these two points. If the Loop End is less than or equal to the Loop Start then the Fusion will default to using the loop points defined within the sample.
- Page 63 Chapter 3: Fusion Modes Menu: Program/Synth/Drum/Pitch Parameter: EDIT Osc Value Range: Osc 1 to Osc 64 Choose the oscillator you’d like to edit. Menu: Program/Synth/Drum/Pitch Parameter: EDIT Drum Value Range: Drum 1 to Drum 4 Each oscillator in the Drum Synthesis type can have up to four drum parts.
- Page 64 Chapter 3: Fusion Modes Menu: Program/Synth/Drum/Output Parameter: EDIT Osc Value Range: Osc 1 to Osc 64 Choose the oscillator you’d like to edit. Menu: Program/Synth/Drum/Output Parameter: EDIT Drum Value Range: Drum 1 to Drum 4 Each oscillator in the Drum Synthesis type can have up to four drum parts.
-
Page 65: Synthesis Type: Analog
• Filters: One filter. You can assign the filter’s type, cutoff, frequency, and resonance. • Envelopes: Up to eight envelopes for controlling volume, filter, pitch, or other parameters. • Low-frequency oscillators (LFO): Up to eight low-frequency oscillators for controlling vibrato, filter operation, or other parameters. Chapter 3: Fusion Modes... - Page 66 Chapter 3: Fusion Modes Menu: Program/Synth/Osc/Config Parameter: View Value Range: Osc Enable, Osc Type, Osc Coarse Tune, Osc Fine Tune, Osc Random Tune, Osc Volume, Osc Pan This screen provides a convenient overview showing how many of the commonly used parameters in the Analog Synthesis submenus are configured.
- Page 67 “Ext In” as your oscillator type, your oscillator becomes whatever audio is being played into the ¼” input jacks labeled “Input Left” and Input Right” on the back of the Fusion. Menu: Program/Synth/Osc/Select Parameter: Shape (only available on Sawtooth and Pulse oscillator...
- Page 68 Chapter 3: Fusion Modes Menu: Program/Synth/Osc/Select Parameter: Sync Value Range: None, Osc 1, Osc 2, Osc 3, Ring Mod, Filter Resets the phase of your oscillator in relation to the initial phase of another Oscillator, Ring Mod, or Filter. This creates richer harmonic content on your currently selected oscillator.
- Page 69 Chapter 3: Fusion Modes Menu: Program/Synth/Osc/Pitch Parameter: EDIT Osc Value Range: Osc 1 to Osc 3 Choose the oscillator you’d like to edit. Since our synthesis type is set to Analog, you have three oscillators to choose from. Menu: Program/Synth/Osc/Pitch...
- Page 70 Parameter: Optimize Osc to Mono Value Range: On, Off This parameter reduces DSP load on the Fusion by summing the oscillator’s output into mono. Turning this option on allows you to have higher polyphony, but it means you cannot pan the oscillator across a stereo field.
- Page 71 Chapter 3: Fusion Modes Menu: Program/Synth/Osc/Output Parameter: Osc Pan (only visible if “Optimize to Mono” is turned off) Value Range: L100% to R100% Sets the pan position of each individual oscillator. This is different from the Pan parameter under the Program/Output section because each oscillator can be panned to its own position whereas the Program/Output setting will pan the entire program.
-
Page 72: Synthesis Type: Fm
Chapter 3: Fusion Modes Synthesis Type: FM FM is a form of synthesis that relies on two (or more) oscillators modulating each other to create a sound. Since its inception in the 1970s, FM synthesis has found its way into countless hit songs and continues to be used today because of the wide palette of sounds it can produce. - Page 73 Chapter 3: Fusion Modes Menu: Program/Synth/Osc/Config Parameter: View Value Range: Osc Enable, Osc Output, Osc Type, Osc Coarse Tune, Osc Fine Tune, Osc Random Tune, Osc Pan This screen provides a convenient overview showing how many of the commonly used parameters in the FM Synthesis submenus are configured.
- Page 74 Chapter 3: Fusion Modes Menu: Program/Synth/Osc/Select Parameter: EDIT Osc Value Range: Osc 1 to Osc 6 Select the oscillator you’d like to edit. Menu: Program/Synth/Osc/Select Parameter: Enable Value Range: On, Off Allows you to enable or disable each oscillator. Menu: Program/Synth/Osc/Select...
- Page 75 Chapter 3: Fusion Modes Menu: Program/Synth/Osc/Pitch Parameter: EDIT Osc Value Range: Osc 1 to Osc 6 Choose the oscillator you’d like to edit. Since our synthesis type is set to FM, you have six oscillators to choose from. Menu: Program/Synth/Osc/Pitch...
- Page 76 Chapter 3: Fusion Modes Menu: Program/Synth/Osc/Output Parameter: EDIT Osc Value Range: Osc 1 to Osc 6 Choose the oscillator you’d like to edit. Since our synthesis type is set to FM, you have six oscillators to choose from. Menu: Program/Synth/Osc/Output...
- Page 77 Value Range: Osc 1 to Osc 6, Output Use this parameter to select where you’d like the oscillator to be routed. The Fusion allows you to route an oscillator to any other oscillator (including itself) or to the audio output of the keyboard. Keep in mind it is possible to connect one source to multiple destinations.
- Page 78 Chapter 3: Fusion Modes Menu: Program/Synth/Router Parameter: Amount Value Range: 0-100% This parameter determines how much your currently selected source is going to modulate the currently selected destination. Note that the “Enable” box has to be checked for any modulation to take place.
-
Page 79: Synthesis Type: Reed Model
• Filters: One filter. You can assign this filter’s type, cutoff, frequency, and resonance. • Envelopes: Up to eight envelopes for controlling volume, filter, pitch, or other parameters. • Low-frequency oscillators (LFO): Up to eight low-frequency oscillators for controlling vibrato, filter operation, or other parameters. Chapter 3: Fusion Modes... - Page 80 Chapter 3: Fusion Modes The Reed Physical Model: The following diagram describes the Fusion’s Reed Model. In it, you’ll notice three distinct groups of parameters including “Breath,” “Reed,” and “Bore.” Each group makes up a different portion of the physical model and these groups interact with one another to create the overall sound that you hear.
- Page 81 Value Range: -100% to +100% This parameter affects the tonal character of the mouthpiece and contributes to the attack of the sound. Chapter 3: Fusion Modes The “Breath” and “Noise” parameters are used to model the act of blowing into the instrument.
- Page 82 Chapter 3: Fusion Modes Menu: Program/Synth/Model Parameter: Frequency Value Range: -12.00 to +12.00 Semitones This parameter determines the frequency of the harmonic component of the bore’s tone. Menu: Program/Synth/Model Parameter: Mix Value Range: 0 – 100% This parameter determines the tonal mix of the base tone and the harmonic component from the bore.
-
Page 83: Synthesis Type: Wind Model
• Filters: One filter. You can assign this filter’s type, cutoff, frequency, and resonance. • Envelopes: Up to eight envelopes for controlling volume, filter, pitch, or other parameters. • Low-frequency oscillators (LFO): Up to eight low-frequency oscillators for controlling vibrato, filter operation, or other parameters. Chapter 3: Fusion Modes... - Page 84 Chapter 3: Fusion Modes The Wind Physical Model: The following diagram describes the Fusion’s Wind Model. In it, you’ll notice three distinct groups of parameters including “Breath,” “Mouthpiece,” and “Bore.” Each group makes up a different portion of the physical model and these groups interact with one another to create the overall sound that you hear.
- Page 85 Parameter: Offset Value Range: -100 to +100 This parameter adjusts the tonal interaction between the mouthpiece and the bore. Chapter 3: Fusion Modes The “Breath” and “Noise” parameters are used to model the act of blowing into the instrument. The “Jet,” “Curve,” and “Offset,”...
- Page 86 Chapter 3: Fusion Modes Menu: Program/Synth/Model Parameter: Frequency Value Range: -12.00 to +12.00 Semitones This parameter determines the frequency of the harmonic component of the bore’s tone. Menu: Program/Synth/Model Parameter: Mix Value Range: 0 – 100% This parameter determines the tonal mix of the base tone and the harmonic component from the bore.
-
Page 87: Program Utility
Value Range: 1-8 This button adds your program to any of the 8 “favorite” program categories of the Fusion for easy access. Press the Category button and scroll down to the “Fav 1” through “Fav 8” categories to see your favorite programs. - Page 88 Chapter 3: Fusion Modes Menu: Program/Utility Parameter: Split point (only available for “Generate Split Mix”) Value Range: C-2 to G8 This parameter lets you select at which point the split will take place in your mix. Note that this parameter is only available when you select “Generate Split Mix”...
-
Page 89: Filters
Filters Filters are an integral part of a synthesizer’s ability to create sounds and the Fusion has variety of filters to help you achieve the sound you’re looking for. All of the Fusion’s synthesis modes have at least one filter per voice. - Page 90 This parameter determines the number of poles on your filter. Filters with one or two poles are more gradual whereas filters with six or eight poles are much steeper in cutoff. All filters on the Fusion except the 1- pole have variable resonance (see below).
-
Page 91: Envelopes
ADSR envelopes are commonly used to control amplitude, but can also be used to control countless other parameters (i.e., pitch, filter frequency, etc.) The Fusion allows you to hook up an envelope to any modulatable parameter using the modulation matrix (see page 236). - Page 92 Value Range: 1-8 Envelopes (Varies depending on how many envelopes you have created) All programs on the Fusion have up to eight envelopes to modulate things like volume, filter, and other parameters. Choose the envelope you’d like to edit here.
- Page 93 Chapter 3: Fusion Modes Menu: Program/Synth/Envelope Parameter: Legato Value Range: On, Off Legato mode keeps the envelope from re-triggering if you play in legato fashion (i.e., you play a note before releasing the last note played). Menu: Program/Synth/Envelope Parameter: Mode (Trigger Type)
- Page 94 Chapter 3: Fusion Modes Menu: Program/Synth/Envelope Parameter: Attack Value Range: 0 – 30 Sec This sets the amount of time the envelope will take to reach its maximum level. The higher the value, the slower the attack. Fast Attack Slow Attack...
- Page 95 This parameter allows you to mimic the feel of a piano’s sustain pedal. If this parameter is set to “off ” stepping on the sustain pedal during the release stage will not have any effect on the envelope. Chapter 3: Fusion Modes...
- Page 96 “overlap release” state and decays at whatever time defined in this parameter. This parameter can be used to efficiently steal voices in order to make better use of the Fusion’s DSP (which ultimately leads to higher polyphony count).
-
Page 97: Low Frequency Oscillators (Lfos)
Simply hooking up an LFO to the oscillator pitch parameter will get you the effect you need. The Fusion allows you to hook up an LFO to any modulatable parameter using the Modulation Matrix (See page 236). - Page 98 Chapter 3: Fusion Modes Menu: Program/Synth/LFO Parameter: EDIT LFO Value Range: 1-8 LFOs (You can create up to 8 LFOs) Select the Low Frequency Oscillator (LFO) you’d like to edit here. The word in parenthesis indicates where the current LFO is routed in the modulation matrix.
- Page 99 Synchronizes your LFO to the tempo (see p. 37 for more about setting your tempo). This is important for tempo-dependent effects like wah- wah and vibrato. Chapter 3: Fusion Modes Where are the Saw, Triangle, and Square LFO types??? You can create down-saw, triangle, and up- saw waveforms by selecting “Sawtooth”...
- Page 100 Chapter 3: Fusion Modes Menu: Program/Synth/LFO Parameter: Rate (Only available when Sync is set to “None”) Value Range: 0.0200 Hz – 200 Hz Sets the speed of the LFO. The higher the value, the faster the LFO will oscillate every second.
-
Page 101: Mix Mode
Chapter 3: Fusion Modes Mix Mode This section covers parameters relating specifically to Mix mode. This includes everything found on the “Mix,” “Part,” and “Utility” tabs (to the left of the display). See chapter 4 for detailed descriptions of the “Arp,”... -
Page 102: Setting Overall Mix Parameters
Chapter 3: Fusion Modes Setting Overall Mix Parameters Menu: Mix/Mix/Config Parameter: View Value Range: Part Programs, Part Enables, Part Volumes, Part Pans, Part Inserts, Part 1-2 Send Levels, Part Arpeggiators, Part Key Ranges (Edit lo), Part Key Ranges, (Edit hi), Part Alt... - Page 103 Sometimes a mix may fit into more than one category. For example, a mix consisting of a piano/string layer can be placed under either the Piano or the Strings category. For that reason, the Fusion allows you to assign a mix to Alternate Categories so that you can place this mix in both the Strings and Piano categories.
- Page 104 Chapter 3: Fusion Modes Menu: Mix/Mix Parameter: Add Part (Disappears once 16 parts have been created) Value Range: (none) This button creates a new part and jumps straight to the Mix/Part/General page where you can assign programs, channel numbers, and other parameters related to the newly created part.
-
Page 105: Setting Individual Part Parameters
Mix/Part/Controls page (see pg. 109). This parameter is often used in situations where you are using the Fusion with an external sequencer. In such cases, you may want to place each part on a separate channel so that your sequencer can trigger individual parts. - Page 106 Chapter 3: Fusion Modes Menu: Mix/Part/Range Parameter: EDIT Part Value Range: (Varies depending on how many parts have been created) Select the part you’d like to edit using this parameter. Menu: Mix/Part/Range Parameter: Low Key Value Range: C-2 to G8 This parameter sets the lowest note of the range to which your part will respond.
- Page 107 Chapter 3: Fusion Modes Menu: Mix/Part/Range Parameter: Alternate High Value Range: 0-127 This parameter sets the highest point of the alternate range to which your part will respond.
- Page 108 “2 semitones” transposition, every time you play a C key, the Fusion will play the D note instead. You can transpose the Fusion up to four octaves higher or four octaves lower than the default “0”-semitone setting.
- Page 109 Sustain Level, Sustain Decay, Release, Env Time, Delay, Ramp, Rate, Shape, Osc Start, Osc Frequency, Osc FM Amount, Osc Volume, Osc Pan, Filt Cutoff, Filt Resonance, Crossfade This selects what program parameter you’d like to edit. Chapter 3: Fusion Modes...
- Page 110 Chapter 3: Fusion Modes Menu: Mix/Part/Param Parameter: Index Value Range: (Varies depending on Parameter selection) Certain parameters have several sub-parameters that further specify what you’d like to edit. Index lets you select the specific item you’d like to edit. For example, if you want to edit filter cutoff on a sample-playback based program, you will have to select which filter you’d like to change...
- Page 111 Chapter 3: Fusion Modes In some cases (such as when you’re using an external sequencer), you need to disconnect your “local” keyboard so that the Fusion does not trigger notes twice (from both the keyboard and the sequencing application). To do this, turn the “Keyboard” parameter...
- Page 112 Chapter 3: Fusion Modes Menu: Mix/Part/Controls Parameter: Switches (S1-S2) Value Range: On, Off If you do not want the currently selected part to respond to the S1-S2 switches, uncheck this box. Otherwise, leave this box checked for normal operation. Menu: Mix/Part/Controls...
- Page 113 Chapter 3: Fusion Modes Menu: Mix/Part/Output Parameter: EDIT Part Value Range: (Varies depending on how many parts have been created) Select the part you’d like to edit using this parameter. Menu: Mix/Part/Output Parameter: Enable Value Range: On, Off This parameter lets you enable and disable the currently selected part. If you need to mute a part, uncheck this box.
- Page 114 In most cases you’ll want to route only one part into one insert, but we’ve programmed the Fusion to allow multiple parts to be routed to the same insert. This allows for more creative routing options, but keep in mind that once two parts are routed to the same insert effect they become summed and cannot be “unsummed”...
-
Page 115: Mix Utility
Value Range: 1-8 This button adds your mix to any of the 8 “favorite” mix categories of the Fusion for easy access. Press the Category button and scroll down to the “Fav 1” through “Fav 8” categories to see your favorite mixes. - Page 116 Chapter 3: Fusion Modes Menu: Mix/Utility Parameter: Edit Prog Value Range: (Varies depending on programs loaded) This button lets you jump directly to your selected program in Program mode. Use this button if you want to make tweaks to your program.
-
Page 117: Song Mode
“Utility” tabs (to the left of the display). See chapter 4 for the “Arp,” and “Effects” tabs. Song mode integrates all of the Fusion’s different parts together letting you create a complete song within the workstation. In this mode, you can load programs, arrange your synthesizer tracks, record live instruments, and mix your musical compositions into finished songs. -
Page 118: Setting Overall Song Parameters
Chapter 3: Fusion Modes Setting Overall Song Parameters Menu: Song/Song/Config Parameter: View Value Range: Programs, Enables, Record Armed, Volumes, Pans, Inserts, Send 1-2 levels, Arpeggiators, Key Ranges (low), Key Ranges (high), Alt Ranges (low), Alt Ranges (high) This screen provides a convenient overview showing how many of the commonly used parameters of your song’s tracks are configured. - Page 119 Chapter 3: Fusion Modes Menu: Song/Song/Config Parameter: Add Track Value Range: (varies) This button creates a new track. This button disappears once 32 synth tracks and 8 audio track have been created (since this is the maximum number of tracks available in one song).
- Page 120 Signature” setting (see above). Note that this parameter is not editable, and is included as a reference. Menu: Song/Song/General Parameter: Current LOCATE point (Point Letter) Value Range: A-P This parameter lets you select a locate point. Each song in the Fusion can have up to 16 locate points.
- Page 121 Chapter 3: Fusion Modes Menu: Song/Song/General Parameter: Current LOCATE point (Point Time) Value Range: (varies) This parameter lets you set the location for the currently selected locate point. This parameter is set in measures, beats, and pulses (formatted on screen from left to right as “measures:beats.pulses”)
- Page 122 Menu: Song/Song/Record Parameter: Record Method Value Range: Overdub, Replace, Spot Erase The Fusion has three recording methods for synth tracks (audio is always set to “replace”). They are as follows: 1. Overdub – Overdub recording keeps whatever is already recorded and lets you record additional performances on top of the original recording.
- Page 123 Chapter 3: Fusion Modes Menu: Song/Song/Record Parameter: Record Filter (Notes) Value Range: On, Off Turn this parameter off if you do not want note data to be recorded. Otherwise, leave this parameter set to “on” for normal operation. Menu: Song/Song/Record...
- Page 124 Menu: Song/Song/Record Parameter: Input Meter Value Range: Channel 1-2, 3-4, 5-6, 7-8 The two bars along the bottom of the screen indicate incoming audio levels on your Fusion. Use this parameter to view levels on multitrack inputs 1 through 8.
-
Page 125: Setting Track Parameters
Link allows for mixes to be emulated in Song mode. If you link several tracks to the same “Link” letter then the programs can be played and recorded together, as if playing the mix in Song mode. Chapter 3: Fusion Modes... - Page 126 Chapter 3: Fusion Modes Menu: Song/Track/General Parameter: Arp Number (not available for audio tracks) Value Range: None, 1-4 Each song can have up to four arpeggiation patterns. Select the arpeggiation pattern you’d like to use for this track. If you do not want to use an arpeggiation pattern for this track, set this parameter to “None.”...
- Page 127 AND within the “alternate range” (see the “Alternate Low” and “Alternate High” parameters below). Menu: Song/Track/Range Parameter: Alternate Low (not available for audio tracks) Value Range: 0-127 This parameter sets the lowest point of the alternate range to which your track will respond. Chapter 3: Fusion Modes...
- Page 128 Chapter 3: Fusion Modes Menu: Song/Track/Range Parameter: Alternate High (not available for audio tracks) Value Range: 0-127 This parameter sets the highest point of the alternate range to which your track will respond.
- Page 129 “2 semitones” transposition, every time you play a C key, the Fusion will play the D note instead. You can transpose the Fusion up to four octaves higher or four octaves lower than the default “0”-semitone setting.
- Page 130 Chapter 3: Fusion Modes Menu: Song/Track/Param Parameter: Fine Tune (not available for audio tracks) Value Range: -99 to 99 Cents Use this parameter to fine-tune (or detune) your currently selected track. Menu: Song/Track/Param Parameter: Use Prog Value (not available for audio tracks)
- Page 131 Chapter 3: Fusion Modes Menu: Song/Track/Param Parameter: Index (not available for audio tracks) Value Range: (Varies depending on Parameter selection) Certain parameters have several sub-parameters that you can select and those sub-parameters here. For example, if you want to edit filter cutoff on a sample-playback program, you will have to select which of the oscillator(s) you’d like to...
- Page 132 Chapter 3: Fusion Modes [Note: In some cases, you may want specific tracks to ignore certain kinds of incoming MIDI data. For example, if you are composing using an external sequencer, you may want to turn the “keyboard” off so that the track isn’t triggered twice (once when you press the key and once...
- Page 133 Chapter 3: Fusion Modes Menu: Song/Track/Controls Parameter: Trigger Buttons (T1-T4) [not available for audio tracks] Value Range: On, Off If you do not want the currently selected track to respond to the T1-T4 trigger buttons, uncheck this box. Otherwise, leave this box checked for normal operation.
- Page 134 Chapter 3: Fusion Modes Menu: Song/Track/Controls Parameter: Foot Pedal (not available for audio tracks) Value Range: On, Off If you do not want the currently selected track to respond to the foot pedal, uncheck this box. Otherwise, leave this box checked for normal operation.
- Page 135 Chapter 3: Fusion Modes Menu: Song/Track/Output Parameter: Edit Track Value Range: (Varies depending on how many tracks have been created) Select the track you’d like to edit using this parameter. Menu: Song/Track/Output Parameter: Enable Value Range: On, Off This parameter lets you enable and disable the currently selected track.
- Page 136 In most cases you’ll want to route only one part into one insert, but we’ve programmed the Fusion to allow multiple parts to be routed to the same insert. This allows for more creative routing options, but keep in mind that once two parts are routed to the same insert effect they become summed and cannot be “unsummed”...
-
Page 137: Editing Song Tracks
Chapter 3: Fusion Modes Editing Song Tracks Menu: Song/Editor/Tracks Parameter: Edit Track Value Range: (Varies depending on how many tracks have been created) Select the track you’d like to edit using this parameter. The screen can display groups of 6 tracks at a time. - Page 138 Chapter 3: Fusion Modes Menu: Song/Editor/Tracks Parameter: Zoom Out Value Range: (none) This button compresses your timeline and lets you see more events on screen. Menu: Song/Editor/Tracks Parameter: Process Value Range: (none) This button takes you to the Process page where you can make edits and other changes to your selected tracks.
- Page 139 Note Value Velocity Gate Controller Time MIDI CC Controller CC Value Aftertouch Time Aftertouch Pitch Time Pitch Chapter 3: Fusion Modes Value Range Varies C-2 to G8 1-127 Varies depending on length of note played Varies 0-119 0-127 Varies 0-127 Varies...
- Page 140 Chapter 3: Fusion Modes Menu: Song/Editor/Trk View Parameter: Insert Value Range: (None) This button creates an event in the event editor window. Menu: Song/Editor/Trk View Parameter: Delete Value Range: (None) This button deletes the currently selected event within the event editor...
- Page 141 Chapter 3: Fusion Modes [Note: You must select an audio track for your screen to appear like the one above. If the parameters on the screen look different from what you see above, it is because you have selected a synth track.]...
- Page 142 Chapter 3: Fusion Modes Menu: Song/Editor/Trk View Parameter: Process Value Range: (none) This button takes you to the Process page where you can make edits and other changes to your selected tracks. See page 147 for more about these processes.
- Page 143 Poly Aftertouch Note Velocity Pitch Pitch Value Chapter 3: Fusion Modes A note on the Master Track: Each song you create has a “Master Track” that appears before Track 1. This track allows you to insert two types of events: Tempo and Meter changes.
- Page 144 Chapter 3: Fusion Modes Patch Controller NRPN Menu: Song/Editor/Trk Event Parameter: Insert Value Range: (None) This button creates an event in the event editor window. Menu: Song/Editor/Trk Event Parameter: Delete Value Range: (None) This button deletes the currently selected event within the event editor window.
- Page 145 Coarse Tune RPN 3 – RPN1683 NRPN NRPN 0 – NRPN 1683 0 - 16383 Chapter 3: Fusion Modes Event Editor for Audio Tracks? Event Editors are typically associated with MIDI editing and you may be wondering why we have an event editor for audio tracks.
- Page 146 Chapter 3: Fusion Modes Menu: Song/Editor/Trk Event Parameter: Insert Value Range: (None) This button creates an event in the event editor window. Menu: Song/Editor/Trk Event Parameter: Delete Value Range: (None) This button deletes the currently selected event within the event editor window.
-
Page 147: Track Editing Filters
Chapter 3: Fusion Modes Track Editing Filters [About these filters: When you record pitch changes, continuous controller changes, or aftertouch into a MIDI sequencer, the event window can easily get cluttered with lots of data that you may not need to see. - Page 148 Chapter 3: Fusion Modes Menu: Song/Editor/Event/Filter Parameter: Include Other Events Value Range: On, Off Turn this parameter off if you do not want the event editor to display any event that is not explicitly stated above. Otherwise, leave it on for...
-
Page 149: Processing Synth And Audio Tracks
Parameter: Notes Value Range: Included, Not Included Set this parameter to “Included” if you want your notes to be cleared upon execution. If you’d like note values to be left alone, set this value to “Not Included.” Chapter 3: Fusion Modes... - Page 150 Chapter 3: Fusion Modes Menu: Song/Editor/Tracks/Process Parameter: Controllers Value Range: Included, Not Included Set this parameter to “Included” if you want your continuous controller data to be cleared upon execution. If you’d like continuous controller data to be left alone, set this value to “Not Included.”...
- Page 151 This parameter sets the point at which your edits will start to take place. Menu: Song/Editor/Tracks/Process Parameter: Edit End Value Range: (varies) This parameter sets the end point after which your track will not be affected. Chapter 3: Fusion Modes...
- Page 152 Chapter 3: Fusion Modes Note: This page will look different depending on what you select for the “Process” parameter (see below). Menu: Song/Editor/Tracks/Process Parameter: Process Value Range: Clear, Crop, Cut, Copy, Paste Over, Paste Mix, Slide, Adjust Note Gate, Adjust Note Velocity, Note Transpose, Note Quantize, Audio Gain, Audio Fade (Note: This parameter MUST be set to “Cut”...
- Page 153 Chapter 3: Fusion Modes Menu: Song/Editor/Tracks/Process Parameter: Controllers Value Range: Included, Not Included Set this parameter to “Included” if you want your continuous controller data to be cut upon execution. If you’d like continuous controller data to be left alone, set this value to “Not Included.”...
- Page 154 Chapter 3: Fusion Modes Note: This page will look different depending on what you select for the “Process” parameter (see below). Menu: Song/Editor/Tracks/Process Parameter: Process Value Range: Clear, Crop, Cut, Copy, Paste Over, Paste Mix, Slide, Adjust Note Gate, Adjust Note Velocity, Note Transpose, Note Quantize, Audio Gain, Audio Fade (Note: This parameter MUST be set to “Copy”...
- Page 155 Chapter 3: Fusion Modes Menu: Song/Editor/Tracks/Process Parameter: Controllers Value Range: Included, Not Included Set this parameter to “Included” if you want your continuous controller data to be copied upon execution. If you’d like continuous controller data to be left alone, set this value to “Not Included.”...
- Page 156 Chapter 3: Fusion Modes Note: This page will look different depending on what you select for the “Process” parameter (see below). Menu: Song/Editor/Tracks/Process Parameter: Process Value Range: Clear, Crop, Cut, Copy, Paste Over, Paste Mix, Slide, Adjust Note Gate, Adjust Note Velocity, Note Transpose, Note Quantize, Audio Gain, Audio Fade (Note: This parameter MUST be set to “Paste Over”...
- Page 157 “1.” If you would like to place multiple copies of this segment, change this parameter accordingly. Once you press the “Execute” action button, copies of the segment will be placed back-to- back as many times as you have specified here. Chapter 3: Fusion Modes...
- Page 158 Chapter 3: Fusion Modes Menu: Song/Editor/Tracks/Process Parameter: Execute Value Range: (none) This button executes the current process you’ve selected.
- Page 159 5% of their original length. A setting of 100% will result in no changes. A setting of 200% will double the length of each note. Menu: Song/Editor/Tracks/Process Parameter: Execute Value Range: (none) This button executes the current process you’ve selected. Chapter 3: Fusion Modes...
- Page 160 Chapter 3: Fusion Modes Note: This page will look different depending on what you select for the “Process” parameter (see below). Menu: Song/Editor/Tracks/Process Parameter: Process Value Range: Clear, Crop, Cut, Copy, Paste Over, Paste Mix, Slide, Adjust Note Gate, Adjust Note Velocity, Note Transpose, Note Quantize, Audio Gain, Audio Fade (Note: This parameter MUST be set to “Adjust None...
- Page 161 Chapter 3: Fusion Modes Menu: Song/Editor/Tracks/Process Parameter: Start velocity Value Range: 1-200% This parameter lets you adjust the velocity of the notes near the “Edit Start” point of your track. For example, a setting of 5% will reduce the velocity of all notes near your “Edit Start” point to about 5% of their original strength.
- Page 162 Chapter 3: Fusion Modes Note: This page will look different depending on what you select for the “Process” parameter (see below). Menu: Song/Editor/Tracks/Process Parameter: Process Value Range: Clear, Crop, Cut, Copy, Paste Over, Paste Mix, Slide, Adjust Note Gate, Adjust Note Velocity, Note Transpose, Note Quantize, Audio Gain, Audio Fade (Note: This parameter MUST be set to “Note Transpose”...
- Page 163 This parameter sets the end point after which your track will not be affected. Menu: Song/Editor/Tracks/Process Parameter: Slide Value Range: -999 to 999 This parameter lets you move your selected region forward or backward in relation to the rest of your track. Chapter 3: Fusion Modes...
- Page 164 Chapter 3: Fusion Modes Menu: Song/Editor/Tracks/Process Parameter: Units Value Range: Measures, Beats, Pulses This parameter determines how your region will be moved. “Measures” moves your region by full measures, whereas beats lets you move your region by individual beats. “Pulses” lets you move your region with the most amount of precision (each beat has 480 pulses).
- Page 165 32-note triplet This parameter determines the feel of your quantization. Each of these settings causes your quantized notes to snap to different parts of the beat and your actual composition determines what setting will work best. Chapter 3: Fusion Modes...
- Page 166 Chapter 3: Fusion Modes Menu: Song/Editor/Tracks/Process Parameter: Strength Value Range: 0-100% This parameter sets how rigidly your track will be quantized. In other words, a 0% setting will not quantize your track at all, whereas a 100% setting will cause every note to “snap” to its perfect position within the beat.
- Page 167 Value Range: -18 to +18 dB This parameter sets how many decibels of gain you’d like to have for your selected audio track (or tracks). Positive settings will make your selected segments louder whereas negative settings will make your track softer. Chapter 3: Fusion Modes...
- Page 168 Chapter 3: Fusion Modes Note: This page will look different depending on what you select for the “Process” parameter (see below). Menu: Song/Editor/Tracks/Process Parameter: Process Value Range: Clear, Crop, Cut, Copy, Paste Over, Paste Mix, Slide, Adjust Note Gate, Adjust Note Velocity, Note Transpose, Note Quantize, Audio Gain, Audio Fade (Note: This parameter MUST be set to “Audio Fade”...
-
Page 169: Song Utility
Press “Yes” if you’d like to delete unused audio and “No” to leave the recorded audio tracks whole. Chapter 3: Fusion Modes Once you clean your audio directory, unused segments of audio are permanently deleted from the hard disk of the Fusion and cannot be recovered. Use this function with caution! - Page 170 The “flatten” function consolidates all of your audio segments into one single file that is much easier for the Fusion to play back. This will improve audio performance (particularly if you have edited a track...
- Page 171 Fusion’s hard disk. The “flatten” function consolidates all of your audio segments into one single file that is much easier for the Fusion to play back. This will improve recording and playback performance (especially if you have edited a track heavily).
- Page 172 Chapter 3: Fusion Modes Menu: Song/Utility/TrackUtil Parameter: Edit Prog (only available for “Synth” tracks) Value Range: (none) This button will load the selected synth track into Program mode for editing.
-
Page 173: Sampler Mode
Sampler Mode This section covers all of the parameters found in Sampler mode. Sampler Mode gives you access to the Fusion’s internal sampler. Using this mode, you can record and edit sounds that you can then use in your own sample-playback programs. -
Page 174: Setting Overall Sample Settings
Chapter 3: Fusion Modes Setting Overall Sample Settings Menu: Sampler/Multi/General Parameter: Split point shift Value Range: -127 to +127 keys This parameter moves your split points but keeps the root note value of each zone. This lets you move the keygroup splits, but keeps the tuning constant. -
Page 175: Setting Individual Zone Settings
Chapter 3: Fusion Modes Setting Individual Zone Settings Menu: Sampler/Zone/General Parameter: EDIT Zone Value Range: (varies depending on number of zones created) Select the zone you’d like to edit using this parameter. Menu: Sampler/Zone/General Parameter: Sample Value Range: (varies) This parameter lets you select a sample for the current zone. The top row you select the bank whereas the bottom row lets you select an individual sample. - Page 176 Chapter 3: Fusion Modes Menu: Sampler/Zone/General Parameter: Pan (or “Balance” depending on sample type) Value Range: L100% to R100% Sets the pan position of each individual zone. Note that each zone can be panned to its own position.
- Page 177 Chapter 3: Fusion Modes Menu: Sampler/Zone/Range Parameter: EDIT Zone Value Range: (varies depending on number of zones created) Select the zone you’d like to edit using this parameter. Menu: Sampler/Zone/Range Parameter: Low Key Value Range: C-2 to G8 This parameter sets the lowest note of the range to which the sample in the zone will respond.
- Page 178 Chapter 3: Fusion Modes Menu: Sampler/Zone/Range Parameter: Velocity Low Value Range: 0 – 127 This parameter sets the lowest velocity of the range to which the sample in the zone will respond. Menu: Sampler/Zone/Range Parameter: Velocity High Value Range: 0 – 127 This parameter sets the highest velocity of the range to which the sample in the zone will respond.
- Page 179 Value Range: (Varies depending on length of recorded sample) Sets the starting point of your looped section. The loop start position is indicated with a right-facing arrow above the waveform display. Chapter 3: Fusion Modes The “Default” Setting: If your “Sample Start,” “Loop Start,” and “Loop End”...
- Page 180 Chapter 3: Fusion Modes Menu: Sampler/Zone/Settings Parameter: Loop End Value Range: (Varies depending on length of recorded sample) Sets the end point of your looped section. Once your sample playback reaches this point, looping will begin on your sample. The loop end...
-
Page 181: Capturing Samples
Chapter 3: Fusion Modes Capturing Samples Menu: Sampler/Sample/Select Parameter: EDIT Zone Value Range: (varies depending on number of zones created) Select the zone you’d like to edit using this parameter. Menu: Sampler/Sample/Select Parameter: Sample Value Range: (varies) This parameter lets you select a sample for the current zone. The top line row you select the bank whereas the bottom row lets you select an individual sample. - Page 182 Chapter 3: Fusion Modes Menu: Sampler/Sample/Info Parameter: EDIT Zone Value Range: (varies depending on number of zones created) Select the zone you’d like to view using this parameter. Note that none of the parameters on this page are editable—they are simply provided as a reference.
- Page 183 Chapter 3: Fusion Modes Menu: Sampler/Sample/Info Parameter: Compression Type Value Range: (not editable) This parameter reports what type of data compression has been used on the current sample, if any has been used at all.
- Page 184 Chapter 3: Fusion Modes Menu: Sampler/Sample/Edit Parameter: EDIT Zone Value Range: (varies depending on number of zones created) Select the zone you’d like to edit using this parameter. Menu: Sampler/Sample/Edit Parameter: Root Note Value Range: C-2 to G8 This parameter determines what note on the keyboard will play back your sample at its original pitch.
- Page 185 Chapter 3: Fusion Modes Menu: Sampler/Sample/Edit Parameter: Loop Start Value Range: (Varies depending on length of recorded sample) Sets the starting point of your looped section. The loop start position is indicated with a right-facing arrow above the waveform display.
- Page 186 “building up” before reaching the threshold. By setting this parameter between 1 and 999 milliseconds, the Fusion buffers the audio input allowing you to capture the initial portion of the sample.
- Page 187 Gain knob on the back of the Fusion (near the sampler inputs). When you are sampling, your levels should ideally peak around -6 dB since that will give you a healthy signal but leave enough headroom for the occasional loud transient.
-
Page 188: Editing And Processing Samples
Chapter 3: Fusion Modes Editing and Processing Samples [Note: The parameters on this page will look different depending on what you have selected for the “Process” parameter. If your screen looks different from the one above, it is probably because you have selected a different process type.]... - Page 189 Select the end point of your region here Fade Type This parameter determines how your fade will take place Menu: Sampler/Editor Parameter: Process (action button) Value Range: (none) This button executes whatever command you’ve selected using the “Process” parameter. Chapter 3: Fusion Modes...
- Page 190 Chapter 3: Fusion Modes Menu: Sampler/Editor Parameter: Zoom In Value Range: (none) This button lets you “zoom in” to see your individual samples in more detail. This is useful for making precise edits such as setting loop points. The number on the lower right of the graphical editor indicates your “zoom factor.”...
-
Page 191: Sampler Utility
Chapter 3: Fusion Modes Sampler Utility Page Menu: Sampler/Editor Parameter: New Multi Value Range: (none) This button creates a new multi-sample. Note that when you do this, any samples you’ve recorded for your current multi-sample will be deleted. If you have recorded any samples you’d like to save, make sure to store that sample before pressing this button. -
Page 192: Mixer Mode
Chapter 3: Fusion Modes Mixer Mode Mixer Mode Mixer Mode has been created so you can conveniently mix your synthesizer and audio tracks together on one screen. The mixer lets you set levels and pan positions for each synth and audio track as well as set send levels, and enable or solo tracks just like on a hardware mixer. - Page 193 Chapter 3: Fusion Modes Menu: Mixer Mode Parameter: Control Knobs/Triggers Value Range: (Varies depending on number of tracks created) This parameter determines which channels are currently selected for editing. Notice that active channels are highlighted on the bottom of the screen.
- Page 194 Chapter 3: Fusion Modes Menu: Mixer Mode Parameter: Enable Value Range: (none) This button assigns your T1-T4 trigger buttons to enable and disable your currently selected mixer channel. Menu: Mixer Mode Parameter: Solo Value Range: (none) This button assigns your T1-T4 trigger buttons to solo your currently...
-
Page 195: Global Mode
“2 semitones” transposition, every time you play a C key, the Fusion will play the D note instead. You can transpose the Fusion up to 12 semitones (1 octave) higher or lower than the default “0”-semitone setting. - Page 196 Value Range: 50.0 - 300.0 BPM The tempo that you set here–expressed in Beats Per Minute (BPM)– determines the tempo at which different parts of the Fusion (i.e., arpeggiator, synced LFOs, etc.) will operate when the Global Tempo parameter is checked.
- Page 197 Menu: Global/Settings/General Parameter: Global Tempo Value Range: On, Off The Fusion is capable of having completely independent tempos for each program or mix. If you want each program or mix to play at its own tempo, uncheck this box. In some circumstances, you will want to check this box because you’ll want things like arpeggiations to be at the same tempo when changing programs.
-
Page 198: Global Midi Settings
Parameter: Transmit MIDI Clock Value Range: On, Off Check this box if you’d like the Fusion to transmit MIDI clock to an external device such as a drum machine or a sequencer. This clock lets your Fusion and the external device remain in sync despite tempo changes. - Page 199 This parameter causes the Fusion to behave just like a General MIDI module. For example, if you load a song with a track set to MIDI channel 10, then the Fusion will automatically load a drum kit on that channel (having a drum kit on channel 10 is common General MIDI protocol).
-
Page 200: Global Controller Settings
Chapter 3: Fusion Modes Global Controller Settings: Menu: Global/Settings/Controls Parameter: Foot Switch CC# Value Range: 1 – 119 This parameter determines what continuous controller (CC) number is used for the Foot Switch. Menu: Global/Settings/Controls Parameter: Foot Switch Function Value Range: Mod Source, Increment, Decrement, Song Punch in/out, Song Play/Stop This parameter determines the alternate function of the Foot Switch. - Page 201 Chapter 3: Fusion Modes Menu: Global/Settings/Controls Parameter: Controller Knob 1 CC# Value Range: 1 – 119 This parameter determines what continuous controller (CC) number is used for Controller Knob 1. Menu: Global/Settings/Controls Parameter: Controller Knob 2 CC# Value Range: 1 – 119 This parameter determines what continuous controller (CC) number is used for Controller Knob 2.
-
Page 202: Metronome Settings
Chapter 3: Fusion Modes Metronome Settings Menu: Global/Settings/Metro Parameter: Enable Metronome Value Range: On, Off Check this box to enable the metronome during recording. Menu: Global/Settings/Metro Parameter: Count-in Value Range: Off, 1-2 Measures Many musicians like having one or two bars to “count-in” before the sequencer starts recording the performance. - Page 203 Chapter 3: Fusion Modes Menu: Global/Settings/Metro Parameter: Measure Note (value) Value Range: C-2 to G8 The metronome can play a different note when you’re at the top of a measure making it easier to keep track of where you are in the beat.
-
Page 204: Multitrack Audio Input Settings
Chapter 3: Fusion Modes Multitrack Audio Input Settings Menu: Global/Settings/Record Parameter: EDIT Audio Input Value Range: Ch 1 to Ch 8 Select the audio input channel you’d like to edit here. Menu: Global/Settings/Record Parameter: Input Channel Gain Value Range: -10 dBV, +4 dBu This parameter sets the input sensitivity of the currently selected audio input channel. -
Page 205: Other Global Settings (Usb & User Interface)
Parameter: USB Speed Value Range: Auto, Full-Speed The Fusion workstation is supports USB 2.0 and is fully backward- compatible with USB 1.0 and 1.1 devices. In other words, leaving this parameter set to “Auto” should allow the Fusion to automatically select the best USB speed. -
Page 206: The Item Explorer
Chapter 3: Fusion Modes The Item Explorer Menu: Global/Item Parameter: Back (not available when you’re in the root directory) Value Range: (none) This button returns you to the previous level of the directory structure. Menu: Global/Item Parameter: Open Value Range: (none) This button opens whatever is currently highlighted in your item explorer window. - Page 207 Chapter 3: Fusion Modes Menu: Global/Item Parameter: Process (not available in the root directory or ROM banks) Value Range: (none) This button brings up a tab allowing you to manipulate whatever is selected (or marked using the “Mark” button—see above) in a number...
- Page 208 Chapter 3: Fusion Modes Menu: Global/Item/Arrange Parameter: Store Value Range: (none) Use the Control Wheel (or INC/DEC buttons) to rearrange the order of your selected bank or item. Once you have moved the selected item to its desired position, press the “Store” button to save your rearranged order and return to the previous screen.
- Page 209 It will also add items to the bank that exist in the folder but not in the bank list. End users will usually not need to be worried about this unless they add, delete, or move files contained on the Fusion using the USB connection. Doing this may cause the Fusion’s bank list to become “out of sync”...
-
Page 210: The Media Explorer
Chapter 3: Fusion Modes The Media Explorer: Menu: Global/Media Parameter: Info Value Range: (none) This button brings up a prompt that describes the currently selected device, the name of the device, the amount of space available, and the total size of that device. -
Page 211: Operating System Information
Operating System Information Menu: Global/System/Info Parameter: Serial # Value Range: (not editable) The serial number of your Fusion workstation is listed here. Menu: Global/System/Info Parameter: Boot Version Value Range: (not editable) The version of the boot code and its creation date are listed here. If you... -
Page 212: Upgrading Your Operating System
Chapter 3: Fusion Modes Upgrading your Operating System Menu: Global/System/Upgrade Parameter: Select Device Value Range: CF Card, Hard Drive Select which device (either the Compact Flash card, or the Hard Drive) you’d like to access. Menu: Global/System/Upgrade Parameter: Load Value Range: (none) This button loads the operating system from the currently selected device. -
Page 213: System Cpu Usage
Chapter 3: Fusion Modes System CPU Usage This page is designed to let you know how much of your Fusion’s resources are being used. There are three bars on this screen—the “VEngine1” and “VEngine2” are your “Voice Engines” that are responsible for all synthesis that takes place on the Fusion. -
Page 214: Setting The Date And Time
The “Clock Enable” parameter has been included so that you can turn the clock off in case you plan to leave your Fusion off for a long period of time. For normal use, you should leave this box checked. -
Page 215: Chapter 4: Common Features
Chapter 4: Common Features The Arpeggiator The Fusion’s Arpeggiator is a powerful device that lets you play pre- programmed patterns by simply holding down one or more notes. This is very useful feature because it allows you to play extremely complex (or repetitive) passages of music with ease. - Page 216 Active Variation is. The four variations are completely independent and can be programmed and recorded however you’d like. However, the Fusion is optimized for having independent “A” and “B” variations whereas variations “A Fill” and “B Fill” are intended to be used for fills, or transitions, between the two variations.
-
Page 217: Configuring Your Arpeggiation Patterns
Value Range: Local, MIDI, Local+MIDI This parameter determines whether your arpeggiation pattern only plays locally or if the Fusion actually sends out the MIDI data contained in your arpeggiation pattern. The following chart should help clarify the different uses of each mode... - Page 218 (or trigger sources). This is useful because it frees up your hands to do other things in a performance (twiddle knobs, play other keyboards or instruments, etc.). The Fusion has two different modes of latching that are explained below. Note that latching does not take place until it is actually engaged using the modulation route (see below).
- Page 219 Menu: (various modes)/Arp/Edit Arp/Setup Parameter: Modulation Routes (Source) Value Range: FS Function, S1 Function, S2 Function, FS(m) Function, T1 Function, T2 Function, T3 Function, T4 Function Each arpeggiation pattern can have up to three sources for modulation. Your options include the T1-T4 trigger buttons, the S1-S2 buttons, and your Foot Switch (displayed as “FS Function”).
- Page 220 Chapter 4: Advanced Features Menu: (various modes)/Arp/Edit Arp/Structure Parameter: EDIT Arp (only available in Song and Mix modes) Value Range: Arp 1 to Arp 4 Select the arpeggiation pattern you’d like to edit here. Menu: (various modes)/Arp/Edit Arp/Structure Parameter: Pattern Repeat Value Range: Sustain, 1 to 126 This parameter determines how many times the current arpeggiation will repeat.
- Page 221 Menu: (various modes)/Arp/Edit Arp/Structure Parameter: Gap Value Range: Varies This parameter determines how many steps of silence there will be between the first and second segments. The number of steps available depends on the length of “Segment 1” and “Segment 2” since Segment 1 + Segment 2 + Gap cannot be larger than your “Pattern Length”...
- Page 222 Chapter 4: Advanced Features Menu: (various modes)/Arp/Edit Arp/Range Parameter: EDIT Arp (only available in Song and Mix modes) Value Range: Arp 1 to Arp 4 Select the arpeggiation pattern you’d like to edit here. Menu: (various modes)/Arp/Edit Arp/Range Parameter: Arp Note Low Value Range: C-2 to G8 This parameter sets the lowest note of the range in which your arpeggiation can be triggered.
- Page 223 Chapter 4: Advanced Features Menu: (various modes)/Arp/Edit Arp/Range Parameter: Arp Alternate High Value Range: 0-127 This parameter sets the highest point of the alternate range in which your arpeggiation can be triggered.
- Page 224 Chapter 4: Advanced Features Menu: (various modes)/Arp/Edit Arp/Playback Parameter: EDIT Arp (only available in Song and Mix modes) Value Range: Arp 1 to Arp 4 Select the arpeggiation pattern you’d like to edit here. Menu: (various modes)/Arp/Edit Arp/Playback Parameter: Keyboard Mode Value Range: (Varies depending on arpeggiation type) This parameter will vary depending on what arpeggiation type you have chosen in the Arp/Pattern/Setup menu.
- Page 225 Drum Machine Mono Your first note starts the full drum arpeggiation pattern. Any subsequent notes are ignored. Octave Assign Any note that you play will begin the arpeggiation pattern. The first 12 notes that were played when the pattern was recorded are assigned to the chromatic scale starting on the note “C.”...
- Page 226 Range” parameter is not set to “0.” Menu: (various modes)/Arp/Edit Arp/Playback Parameter: Note Order Value Range: Sorted, Played, RevPlayed The Fusion can treat your arpeggiation chords in a number of ways. The following will break it down by type: Sorted Played...
- Page 227 Menu: (various modes)/Arp/Edit Arp/Playback Parameter: Scan Order Value Range: Up, Down, Up/DnInc, Up/DnEx, Dn/Up Inc, Dn/Up Ex This parameter determines how your notes are sorted and played back. The following will explain each setting in detail: Plays notes according to the note order. Down Plays the notes in the reverse note order.
- Page 228 Chapter 4: Advanced Features Menu: (various modes)/Arp/Edit Arp/Playback Parameter: Velocity Scale Value Range: 1 to 200% This parameter lets you scale the velocities of your arpeggiation notes. For example, 1% causes velocities to be one percent of the original velocity value whereas 200% causes notes to be played back at twice their original velocity.
-
Page 229: Recording Arpeggiation Patterns
Parameter: Pattern Type Value Range: Standard, Phrase Arp and Drum Machine This parameter lets you select what type of arpeggiation pattern you’d like this to be. The Fusion supports three different arpeggiation types and they are outlined below: Standard “Standard” arpeggiation mode is when you... - Page 230 Chapter 4: Advanced Features Menu: (various modes)/Arp/Pattern/Record Parameter: EDIT Variation Value Range: A, Fill A, B, Fill B An arpeggiation pattern can have up to four variations. Select which variation you’d like to record here. Menu: (various modes)/Arp/Pattern/Record Parameter: Record Method Value Range: Overdub, Replace, Spot Erase Your arpeggiation variations can be recorded in the following ways: 1.
- Page 231 Chapter 4: Advanced Features Menu: (various modes)/Arp/Pattern/Record Parameter: Record Filter (Notes) Value Range: On, Off Turn this parameter off if you do not want note data to be recorded. Otherwise, leave this parameter set to “on” for normal operation. Menu: (various modes)/Arp/Pattern/Record Parameter: Record Filter (Contlrs) Value Range: On, Off Turn this parameter off if you do not want controller data to be...
-
Page 232: Processing Your Recorded Arpeggiations
Chapter 4: Advanced Features Processing Your Recorded Arpeggiations Menu: (various modes)/Arp/Proc Pat Parameter: Edit Start Value Range: (varies) This parameter sets the point at which your arpeggiation variation edits will start to take place. Menu: (various modes)/Arp/Proc Pat Parameter: Edit End Value Range: (varies) This parameter sets the end point after which your arpeggiation variation will not be affected. - Page 233 Chapter 4: Advanced Features Menu: (various modes)/Arp/Proc Pat Parameter: Process Value Range: (none) This button takes you to the Process page where you can make edits and other changes to your selected arpeggiation variation. See page 147 for detailed descriptions of each process. Note that while the descriptions starting on page 147 describe the processes as they relate to Song mode, the processes themselves are identical when applied to arpeggiation variations.
-
Page 234: Editing Your Arpeggiation Patterns
Chapter 4: Advanced Features Editing your Arpeggiation Patterns Menu: (various modes)/Arp/Edit Pat/Piano Parameter: EDIT Variation Value Range: A, Fill A, B and Fill B Select which variation you’d like to edit using this parameter. Menu: (various modes)/Arp/Edit Pat/Piano Parameter: Event Type Value Range: Note, Controller, Mono Aftertouch, Pitch Select the type of event you’d like to edit here. - Page 235 Chapter 4: Advanced Features Menu: (various modes)/Arp/Edit Pat/Piano Parameter: Insert Value Range: (none) This button creates an event in the event editor window. The type of event inserted is determined by what you have selected for the Event Type parameter. Menu: (various modes)/Arp/Edit Pat/Piano Parameter: Delete Value Range: (none)
- Page 236 Chapter 4: Advanced Features Menu: (various modes)/Arp/Edit Pat/Event Parameter: Edit Variation Value Range: A, Fill A, B, Fill B Select the variation you’d like to edit using this parameter. Menu: (various modes)/Arp/Edit Pat/Event Parameter: Time Value Range: (Varies depending on length of arpeggiation pattern) This parameter states the time at which the selected event will occur.
- Page 237 Pitch Range Fine Tune Coarse Tune RPN 3 – RPN16383 NRPN NRPN 0–NRPN 16383 0 - 16383 Menu: (various modes)/Arp/Edit Pat/Event Parameter: Insert Value Range: (None) This button creates an event in the event editor window. Menu: (various modes)/Arp/Edit Pat/Event Parameter: Delete Value Range: (None) This button deletes the currently selected event within the event editor...
-
Page 238: The Modulation Matrix
The Fusion has some major advantages over its competitors when it comes to the modulation matrix. Whereas our competitors have a limited amount of flexibility for each route, the Fusion lets you route virtually everything to everything else on the keyboard. This gives you all kinds of creative options not possible on other keyboards. -
Page 239: Creating And Deleting Modulation Routes
You can create up to 32 modulation routes for each program on the Fusion. This page shows you each route’s source and destination at a glance. The source is listed to the left of the arrow and the destination is listed to the right. - Page 240 Chapter 4: Advanced Features Menu: Program/Mod/Routes Parameter: Add Mod Value Range: (none) This button creates a new modulation route and automatically takes you to the “Edit” screen for that route so you can assign Sources and Destinations (as well as other parameters depending on the type of route you’re trying to make).
-
Page 241: Editing Your Modulation Routes
Editing Your Modulation Routes Menu: Program/Mod/Edit/Src/Des Parameter: EDIT Mod Value Range: Mod 1 up to Mod 32 (depends on how many Mod Routes you’ve created in the Program/Mod/Routes menu) Select the Modulation Route you’d like to edit here. Menu: Program/Mod/Edit/Src/Des Parameter: Source Value Range: None, Keytrack, Velocity, Rel Velocity, Mono Aftertouch, MIDI Poly Aftertouch, Controller , Envelope, LFO... - Page 242 4 envelopes). LFO – You can create up to eight LFOs for each program on the Fusion, and any of those LFOs can serve as a source for a mod route. Select which LFO you’d like to use here. Note that the available LFOs will vary depending on how many LFOs have been created for that program (i.e., you will not see LFOs...
- Page 243 Menu: Program/Mod/Edit/Src/Des Parameter: Destination Value Range: None, Pitch, Volume, Balance, Portamento Time, Amount, Curve, S&H Rate, Smoothing, Delay, Attack, Decay, Sust Level, Sust Decay, Release, Env Time, Delay, Ramp, Rate, Shape Available under Sample Synthesis only: Osc Start, Osc Frequency, Osc FM Amount, Osc Volume, Osc Pan, Filter Cutoff, Filt Resonance Available under Drum Synthesis only: Osc Start, Osc Frequency, Osc Volume, Osc Pan, Filt Cutoff, Filt Resonance...
- Page 244 Chapter 4: Advanced Features Menu: Program/Mod/Edit/Src/Des Parameter: Destination Index Value Range: Varies depending on the assigned destination (see above) Some of the destinations that you select (see above) have a number of additional options that let you define your destination more specifically. Each of the parameters here are defined and explained in their respective chapters throughout this manual.
- Page 245 Chapter 4: Advanced Features The following are available under Analog Synthesis only: Osc Frequency- Osc 1-3 Osc FM Amount- Osc 1-3 Osc Random Tune- Osc 1-3 Osc Shape- Osc 1-3 Osc Volume- Osc 1-3 Osc Pan- Osc 1-3 Filt Cutoff Filt Resonance The following are available under FM Synthesis only: Osc Frequency- Osc 1-6...
- Page 246 Chapter 4: Advanced Features Menu: Program/Mod/Edit/Src/Des Parameter: Type Value Range: Additive, Multiplicative This parameter determines how your modulation source interacts with the destination. The additive setting takes your modulation source and adds it to your destination whereas the multiplicative setting scales your modulation source and destination.
- Page 247 Chapter 4: Advanced Features Menu: Program/Mod/Edit/Shape Parameter: EDIT Mod Value Range: Mod 1 up to Mod 32 (depends on how many Mod Routes you’ve created in the Program/Mod/Routes menu) Select the Modulation Route you’d like to edit here. Menu: Program/Mod/Edit/Shape Parameter: Curve Value Range: -100% to 100% This parameter changes the feel and sound of your modulation by...
- Page 248 Chapter 4: Advanced Features Menu: Program/Mod/Edit/Shape Parameter: Retrigger [only visible if “Sample&Hold Enable” is enabled] Value Range: None, Key Down, Key Up, FS Down, FS Up, T1 Down, T2 Down, T3 Down, T4 Down, T1 Up, T2 Up, T3 Up, T4 Up This allows you to select a trigger that restarts the Sample &...
- Page 249 Chapter 4: Advanced Features Menu: Program/Mod/Edit/Shape Parameter: Rate [Only visible if “Sync” parameter is set to “None”] Value Range: 0.0200 Hz to 200 Hz Sets the rate of your Sample & Hold clock. Menu: Program/Mod/Edit/Shape Parameter: Smoothing Value Range: 0 to 100% Smoothing is analogous to the “Portamento”...
- Page 250 Menu: Program/Mod/Edit/Table Parameter: Number of Breakpoints Value Range: 1 up to 16 Every table on the Fusion can have up to 16 breakpoints. This parameter cannot be edited—it simply tells you how many breakpoints have been created. Menu: Program/Mod/Edit/Table...
-
Page 251: Effects
Master EQ The MasterEQ section is a global equalization curve that is applied to all sound before it leaves the “Main Outs” of the Fusion. Take a look at the Output Block Diagram on page 262 to see where the MasterEQ is located in your signal path. - Page 252 Chapter 4: Advanced Features Menu: (various modes)/Effects/MasterEQ Parameter: Low Mid Gain Value Range: 18.0 to 18.0 dB This parameter sets the amount of gain (or cut) in your Low-Mid Gain. Menu: (various modes)/Effects/MasterEQ Parameter: Low Mid Q Value Range: 0.50 to 4.00 The “Q”...
- Page 253 Chapter 4: Advanced Features Menu: (various modes)/Effects/MasterEQ Parameter: High Shelf Freq Value Range: 500.00 Hz to 10.00k Hz This parameter sets the cutoff point for your high frequency shelving filter. All frequencies above this setting will be boosted (or cut) depending on your “High Shelf Gain”...
-
Page 254: Insert Effects
An “insert” is any effect that is inserted into the signal path between the program’s output and the Fusion’s mixer. This menu allows you to select the type of effect you want to use, as well as that effect’s parameters. - Page 255 Menu: (various modes)/Effects/Insert/Select Parameter: Insert Route Value Range: (Varies depending on mode) The settings of this parameter vary depending on what mode you are in. The following will explain how insert mode works in each mode: Program Mode: Insert Route determines whether or not the effect is inserted into the signal path.
- Page 256 Chapter 4: Advanced Features Menu: (various modes)/Effects/Insert/Edit Parameter: Varies Value Range: Varies depending on your selection of insert “Type” (see above) This menu lets you adjust and fine tune your insert effect settings. The parameters listed in this menu will change depending on what kind of insert you have selected (using the “Type”...
-
Page 257: Bus Effects
Chapter 4: Advanced Features Bus Effects Each Program on the Fusion has two effects sends. This menu lets you assign the type of effect as well as send and return levels. Take a look at the Output Block Diagram on page 262 to see how the Bus Sends are routed. - Page 258 Chapter 4: Advanced Features Menu: (various modes)/Effects/Bus/Select Parameter: (Only visible when you are in Mix or Song modes—it is not required in Program mode.) Value Range: Varies depending on if you are in Program, Mix, or Song modes The settings of this parameter vary depending on what mode you are in. The following will explain how this parameter works in each mode: Mix &...
- Page 259 Menu: (various modes)/Effects/Bus/Select Parameter: Jump Prog (or “Jump Part” in Mix Mode or “Jump Trk” in Song Mode) Action: Varies depending on whether you are in Program, Mix, or Song Modes This quick access button is included for the convenience of the user. The button behaves differently depending on what mode you are in.
- Page 260 Chapter 4: Advanced Features Menu: (various modes)/Effects/Bus/Edit Parameter: Varies Value Range: Varies depending on your selection of Bus Send “Type” (see above) This menu lets you adjust and fine tune your bus effect settings. The parameters listed in this menu will change depending on what kind of bus effect you have selected (using the “Type”...
-
Page 261: Creating And Deleting Effects Modulation Routes
Chapter 4: Advanced Features Creating and Deleting Effects Modulation Routes Menu: (various modes)/Effects/Mod/Routes Parameter: Add Mod Value Range: (none) This button creates a new modulation route and automatically takes you to the “Edit” screen for that route so you can assign Sources and Destinations (as well as other parameters depending on the type of route you’re trying to make). -
Page 262: Editing Your Effects Modulation Routes
Chapter 4: Advanced Features Editing Your Effects Modulation Routes As you jump into the “Edit” menu, you can change the source/destination of each route as well as a number of other parameters associated with your source and destination. This menu is slightly tricky to document because the “Index”... - Page 263 Chapter 4: Advanced Features Menu: (various modes)/Effects/Mod/Edit Parameter: Amount Value Range: -100% to +100% This parameter sets the strength of modulation from your source to your destination. For example, if you have set your source to envelope and your destination to pitch, then as your amount value gets closer to 100% (or -100%), the changes in pitch will become more pronounced.
-
Page 264: Output Block Diagram
Chapter 4: Advanced Features Output Block Diagram This block diagram describes the flow of the signal after it leaves your Program. The triangles represent volume control points (engineers often use triangles in block diagrams to represent amplifiers). Note that the Effect Sends are returned back only to the Main Bus. This means you will not hear any effects on your signal if you have routed the signal to the Aux Bus. -
Page 265: Master Eq Effects Parameters
Effects and Implementation Master EQ Effects Parameters Parameter Default Low Freq: 153.59 kHz Low Gain: 0.0 dB Low Mid Freq 557.28 Hz Low Mid Gain 0.0 dB Low Mid Q 1.00 High Mid Freq 1.53 kHz High Mid Gain 0.0 dB High Mid Q 1.00 High Freq... -
Page 266: Appendix A: Effects And Implementation
Appendix A: Effects and Implementation Insert Effects Parameters Chorus Parameter Wet/Dry LFO Rate LFO Level LFO Shape PreDelay HP Chorus Parameter Wet/Dry LFO Rate LFO Level LFO Shape LFO Phase PreDelay HP Cutoff Overdrive Chorus Parameter Wet/Dry LFO Rate LFO Level LFO Shape LFO Phase PreDelay... - Page 267 Inverse Flanger Parameter Default Wet/Dry 100% wet, 0% dry Notch LFO Rate 1.014 Hz LFO Shape Sine Mod Depth Feedback Envelope Flanger Parameter Default Wet/Dry 100% wet, 0% dry Attack Speed Release Speed Sensitivity 100% Notch Feedback -50% Mod Depth S&H Flanger Parameter Default...
- Page 268 Appendix A: Effects and Implementation Contrary Phaser Parameter Wet/Dry Num Stages Notch LFO Rate Mod Depth LFO Shape Feedback Quadrature Phaser Parameter Wet/Dry Num Stages Notch LFO Rate Mod Depth LFO Shape Feedback Vintage Phaser Parameter Wet/Dry Num Stages Notch LFO Rate Mod Depth LFO Shape...
- Page 269 Rotary Parameter Default Wet/Dry 100% wet, 0% dry Motor Power Low Motor Rate 1.462 Hz Low Rotor Depth 100% High Rotor Rate 2.859 Hz High Rotor Depth 100% Overdrive Rotary Parameter Default Wet/Dry 100% wet, 0% dry Motor Speed Fast Motor Power Drive Low Rotor Depth...
- Page 270 Appendix A: Effects and Implementation Small Combo Parameter Low EQ Mid EQ High EQ Drive Small Combo Off Axis Parameter Low EQ Mid EQ High EQ Drive Blues Amp Parameter Low EQ Mid EQ High EQ Drive Blues Amp Off Axis Parameter Low EQ Mid EQ...
- Page 271 4 Band PEQ Parameter Default Band1 Freq 397.70 Hz Band1 Gain 0.0 dB Band1Q 1.00 Band2 Freq 1.83 kHz Band2 Gain 0.0 dB Band2 Q 1.00 Band3 Freq 1.83 kHz Band3 Gain 0.0 dB Band3Q 1.00 Band4 Freq 1.83 kHz Band4 Gain 0.0 dB Band4 Q...
- Page 272 Appendix A: Effects and Implementation Autopan Parameter LFO Rate MOD Depth LFO Shape Ring Modulator Parameter LFO Rate MOD Depth LFO Shape Envelope LP Filter Parameter Wet/Dry Attack speed Release speed Sensitivity Filter Q LFO LP Filter Parameter Center Wet/Dry LFO Rate LFO Shape Mod Depth...
- Page 273 Envelope HP Filter Parameter Default Wet/Dry 100% wet, 0% dry Attack speed Release speed Sensitivity Resonance LFO HP Filter Parameter Default Center Wet/Dry 100% wet, 0% dry LFO Rate 1.014 Hz LFO Shape Sine Mod Depth Resonance S&H HP Filter Parameter Default Freq...
- Page 274 Appendix A: Effects and Implementation Quadrature Decimator Parameter Wet/Dry Decimation LFO Rate MOD Depth LFO Shape Envelope Decimator Parameter Wet/Dry Attack speed Release speed Sensitivity Wet/Dry Decimation MOD Depth S&H Decimator Parameter Wet/Dry Decimation LFO Rate MOD Depth S&H Cont Decimator Parameter Wet/Dry Decimation...
-
Page 275: Bus Effects Parameters
Bus Effects Parameters Hall Reverb Parameter Default Decay Diffusion Density Damping Plate Reverb Parameter Default Decay Diffusion Density Damping Room Reverb Parameter Default Decay Diffusion Density 100% Damping Reverse Reverb Parameter Default Rate Time Damping Gated Hall Reverb Parameter Default Decay Diffusion Density... - Page 276 Appendix A: Effects and Implementation Input Gate Reverse Parameter Decay Diffusion Damping Attack Release Threshold Ratio Input Gate Hall Parameter Decay Diffusion Density Color Damping Attack Release Threshold Ratio Mono Delay Parameter Time Feedback Brightness Split Delay Parameter Left Time Left Fb Right Time Right Fb...
- Page 277 Overdrive Delay Parameter Default Time 500.0 ms Feedback Drive 100% Wah+Dist+ Delay Parameter Default Time 500.0 ms Feedback Attack speed Release speed Sensitivity Resonance Drive Wah+OvDrv+ Delay Parameter Default Time 500.0 ms Feedback Attack speed Release speed Sensitivity Resonance Drive Lowpass Delay Parameter Default...
- Page 278 Appendix A: Effects and Implementation Flanger+Delay Parameter Time Feedback Notch LFO Rate LFO Shape MOD Depth Feedback Chorus+Delay Parameter Time Feedback LFO Rate LFO Level LFO Shape Pre-delay LFO Phase Decimator Delay 1 Parameter Time Feedback Decimation LFO Rate MOD Depth Decimator Delay 2 Parameter Time...
- Page 279 Multi Chorus HP Parameter Default LFO Rate 0.235 Hz LFO Level HP Cutoff 153.59 Analog Multi Chorus Parameter Default LFO Rate 0.235 Hz LFO Level Pre Delay 50.0 ms Flanger Parameter Default Notch LFO Rate 1.014 Hz LFO Shape Sine Mod Depth Feedback HP Flanger...
- Page 280 Appendix A: Effects and Implementation Envelope Flanger Parameter Attack Speed Release Speed Sensitivity Notch Feedback Mod Depth S&H Flanger Parameter Notch Feedback LFO Rate Mod Depth S&H Cont Flanger Parameter Notch Feedback LFO Rate Mod Depth S&H Quad Flanger Parameter Notch Feedback LFO Rate...
- Page 281 S&H Phaser Parameter Default Num Stages Notch LFO Rate 1.014 Hz Mod Depth LFO Shape Sine Feedback S&H Cont Phaser Parameter Default Num Stages Notch LFO Rate 1.014 Hz Mod Depth Feedback S&H Quad Phaser Parameter Default Num Stages Notch LFO Rate 1.014 Hz Mod Depth...
- Page 282 Appendix A: Effects and Implementation Rotary Delay Parameter Motor Speed Motor Power Drive Low Rotor Depth High Rotor Depth Time Feedback Delay Rotary Parameter Motor Speed Motor Power Drive Low Rotor Depth High Rotor Depth Time Feedback Rotary Room Parameter Motor Speed Motor Power Drive...
- Page 283 S&H Quadrature LP Parameter Default Frequency LFO Rate 1.014 Hz Mod Depth Resonance S&H HP Filter Parameter Default Freq 1.83 kHz LFO Rate 1.014 Hz Mod Depth Resonance S&H Contrary HP Parameter Default Freq 1.83 kHz LFO Rate 1.014 Hz Mod Depth Resonance S&H Quadrature HP...
- Page 284 Appendix A: Effects and Implementation S&H Cont Decimator Parameter Decimation LFO Rate MOD Depth S&H Quad Decimator Parameter Decimation LFO Rate MOD Depth Default Range Low 16.0 0.184 Hz 0.100 Hz Default Range Low 16.0 0.184 Hz 0.100 Hz Range High 32.0 5000.000 Hz 100%...
-
Page 285: Midi Implementation Chart (Synthesizer)
MIDI Implementation Chart (Synthesizer) Fusion Synthesizer Section (Fusion 6HD/8HD) Function Basic Default 1 — 16 Channel Changed 1 — 16 each Default Mode 3 Messages Mode * * * * * * * * Altered Note 0 — 127 * * * * * * * *... -
Page 286: Midi Implementation Chart (Sequencer)
Appendix A: Effects and Implementation MIDI Implementation Chart (Sequencer) Fusion Sequencer Section (Fusion 6HD/8HD) Function Basic Default Channel Changed Default Messages Mode Altered Note Number True Voice Note On Velocity Note Off After Keys Touch Ch’s Pitch Bend Control Change... - Page 287 1. Why are the 12 unlabeled buttons around the LCD called “soft- buttons?” Most of the buttons on the Fusion are “hard wired.” In other words, the “Program” button will always take you to the program screen and the “Inc” and “Dec” buttons will always increase and decrease your currently selected parameter.
- Page 288 There is no way to translate the patches between the two synthesizers. 9. Can I use the Fusion as a control surface for the soft-synths on my computer? Yes. You can configure the four Control knobs, T1-T4 trigger buttons, S1-S2 switches, foot switch, and expression pedal to output MIDI CC data that can be used to control software.
-
Page 289: Troubleshooting
Troubleshooting If you experience problems while operating your Fusion, please use the following table to check for possible causes and solutions before contacting Alesis customer service for assistance. Symptoms The display does not light up when the ON/OFF switch is turned on. - Page 290 Troubleshooting This page intentionally left blank...
-
Page 291: Index
Insert Effects Parameters ...264 Master EQ ...249 Master EQ Effects Parameters ...263 Envelopes Adding an Envelope...89, 94 Factory Reset ...20 Formatting Fusion Media...208 Fusion Architecture...22 Global Mode ...193 Global Controller Settings ...198 Global MIDI Settings...196 Global Workstation Settings ...193 Local Control ...197 Metronome Settings ...200... -
Page 292: Table Of Contents
Mode Buttons... 23 Navigating The Fusion... 25 Useful Navigation Shortcuts ... 28 Optimize to Mono... 50 Output Block Diagram... 262 Powering the Fusion ... 19 Processing Synth and Audio Adjust Gate ... 157 Adjust Velocity ... 158 Clear... 147 Copy... 152 Cut... -
Page 293: Specifications
Varies depending on type of program loaded. Basic programs using minimal oscillators, filters, and envelopes play back the following number of voices on each engine (the Fusion has two voice engines in total): Sample playback: 136 voices (272 total) FM: 120 voices (240 total) -
Page 294: Audio Output
+18dBV Main L/R, +15.8 dBV Aux 3-4 1kΩ Fusion 6HD: 61 keys (semi-weighted with aftertouch) Fusion 8HD: 88 keys (fully weighted with aftertouch) Four 360-degree Control Knobs with four layers of parameters (giving you 16 knobs in total), Assignable Modulation Wheel, Pitch Wheel... -
Page 295: Legal Information
Legal Information: All software and documentation except TTA lossless compression codec is Copyright 2005 Alesis Studio Electronics. All rights reserved. TTA lossless audio compression codec copyright notice and disclaimer: Copyright 2004 Alexander Djourik. All rights reserved. Redistribution and use in source and binary forms, with or without... - Page 296 7-51-0174-C...
Need help?
Do you have a question about the Fusion and is the answer not in the manual?
Questions and answers