Table of Contents
Advertisement
Quick Links
Advertisement
Table of Contents

Related Manuals for Alesis Ion


Summary of Contents for Alesis Ion
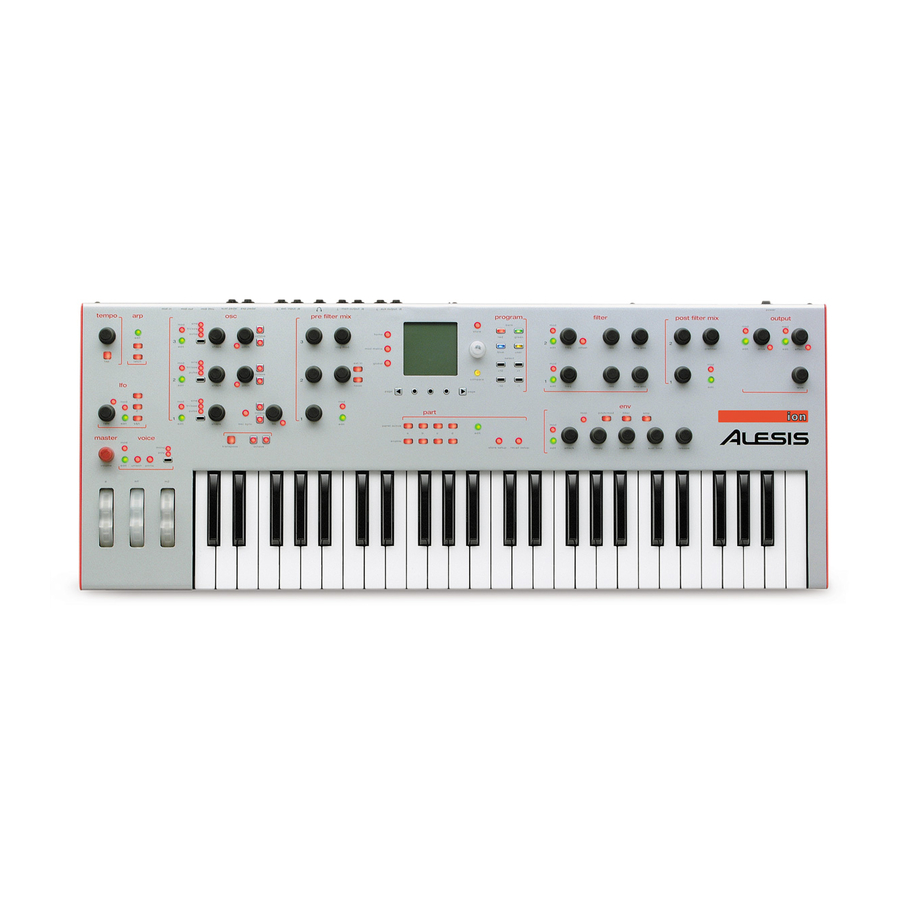
- Page 1 Reference Manual...
- Page 2 This page intentionally left blank...
-
Page 3: Table Of Contents
Table Of Contents Introduction ...7 Welcome!...7 Unpacking and Inspection ... 8 How to Use This Manual ... 8 Important Safety Instructions ...9 Important Safety Instructions (English)... 9 Safety symbols used in this product ...9 Please follow these precautions when using this product:...9 Instructions de Sécurité... - Page 4 Mod 1 Wheel Enable ...36 Mod 2 Wheel Enable ...37 Transpose...37 Octave ...37 Chapter 5: Program Parameters ...39 How the Ion Makes Sound ... 39 The Oscillators...39 The Pre Filter Mix ...39 The Filters...39 The Post Filter Mix ...40 Output...40 Signal Flow Diagram...40...
- Page 5 Voice: the [porta] button ...43 Voice [edit]: Portamento type ...43 Voice [edit]: Portamento time...44 Voice [edit]: Portamento trigger...44 Voice: the [mono/poly] button ...44 LFO [edit]: Rate...44 LFO [edit]: Sync...45 LFO [edit]: Reset ...45 LFO [edit]: M1 to LFOx ...46 LFO: the [1] button...46 LFO: the [2] button...46 LFO: the [s&h] button ...46 Sample &...
- Page 6 Table Of Contents Pre Filter Mix [edit]: External Input Balance...59 Pre Filter Mix [edit]: Noise Balance...59 Pre Filter Mix [edit]: Noise Type...60 Pre Filter Mix [edit]: f1 -> f2 Level ...60 The Filters ... 60 Filter [edit]: Type...60 Filter [edit]: Frequency...62 Filter 2: the [offset] button...62 Filter [edit]: Resonance ...62 Filter [edit]: Key Track...63...
- Page 7 40-Band Vocoder...87 Chapter 8: MIDI ...89 What is MIDI? ... 89 MIDI Connections...89 Using Your Ion With a MIDI Sequencer ...91 Changing the MIDI Channel...91 Local vs. MIDI Control...92 Saving Programs and Setups via MIDI...93 Loading Programs and Setups via MIDI...94 Updating Software Via MIDI...95...
-
Page 9: Introduction
Ion’s operating system is upgradeable via MIDI, you will want to check the site once in a while for updates. We may well add new features in later versions of the Ion’s software. We plan to have additional program banks there as well, so keep checking back with us! We hope your investment will bring you many years of creative enjoyment and help you achieve your goals. -
Page 10: Unpacking And Inspection
Chapters 5 through 7. Each parameter is covered in detail. For more specific information on how to use the Ion with MIDI, refer to Chapter 8 “MIDI.” Near the end of the manual are troubleshooting tips and specifications. -
Page 11: Important Safety Instructions
Important Safety Instructions Important Safety Instructions (English) Safety symbols used in this product This symbol alerts the user that there are important operating and maintenance instructions in the literature accompanying this unit. This symbol warns the user of uninsulated voltage within the unit that can cause dangerous electric shocks. -
Page 12: Instructions De Sécurité Importantes (French)
Important Safety Instructions Instructions de Sécurité Importantes (French) Symboles utilisés dans ce produit Ce symbole alèrte l’utilisateur qu’il existe des instructions de fonctionnement et de maintenance dans la documentation jointe avec ce produit. Ce symbole avertit l’utilisateur de la présence d’une tension non isolée à l’intérieur de l’appareil pouvant engendrer des chocs électriques. -
Page 13: Lesen Sie Bitte Die Folgende Sicherheitshinweise (German)
Lesen Sie bitte die folgende Sicherheitshinweise (German) Sicherheit Symbole verwendet in diesem Produkt Dieses Symbol alarmiert den Benutzer, daß es wichtige Funktionieren und Wartung Anweisungen in der Literatur gibt, die diese Maßeinheit begleitet. Dieses Symbol warnt den Benutzer der nicht isolierten Spannung innerhalb der Maßeinheit, die gefährliche elektrische Schläge verursachen kann. -
Page 14: Ce Declaration Of Conformity
Important Safety Instructions CE Declaration Of Conformity See our website at: http://www.alesis.com FCC Compliance Statement This device complies with Part 15 of the FCC rules. Operation is subject to the following two conditions: (1) This device may not cause harmful interference and (2) this device must accept any interference received, including interference that may cause undesired operation. -
Page 15: Chapter 1: Connections
Making Audio Connections Making Audio Connections T T here are a couple ways to hook up your Ion synthesizer’s audio outputs: here are a couple ways to hook up your Ion synthesizer’s audio outputs: • Stereo. Connect two cables from the Ion’s left and right outputs to two •... -
Page 16: Connection Diagram
Connections Connection Diagram... -
Page 17: Chapter 2: Overview
A Tour of the Front Panel The display The Liquid Crystal Display (LCD) is at the center of the Ion in more ways than one. Depending on the button or knob you’ve activated, it may show the program name, which Programs are used in a Setup, the values of the parameters being edited, or even a graphic representation of a aveform or an envelope. - Page 18 Overview T he Edit pages Any time a knob is moved or a button is pressed, the Ion enters Edit mode and displays a screen with parameters related to that knob or button. The appearances of the pages can vary quite a bit, but there are some things they have in common: •...
-
Page 19: Led Functions
LED functions T he Ion’s front panel has lots of LED lights. They serve many purposes: • Two LEDs serve as “speed” indicators: the rate LED and the tempo LED. The rate LED may blink at a different speed depending on which of three functions has been selected in the LFO section: [lfo 1], [lfo 2], or [s&h]. -
Page 20: All Notes Off: The [Home] Button
Note that this control has no effect on the aux outputs. • tempo knob – This is the knob in the upper left corner of the Ion. It controls the speed of any number of functions, most notably the arpeggiator. -
Page 21: Chapter 3: Global Parameters
This parameter determines how the Ion will respond when you turn a knob. A setting of edit only means the Ion will not update the display when you turn a knob. You may prefer this when performing live, for example, because you won’t have to press the [home] button in order to... -
Page 22: Master Tune
Ion that has its sync parameter set to tempo will slave to the external MIDI clock. If a value of gen midi clock or off is selected, the Ion will ignore incoming MIDI clock messages. A setting of gen midi clock tells the Ion to send out MIDI clock messages so external MIDI devices, such as drum machines, can slave to the Ion’s arpeggiator. -
Page 23: Tempo Source
This parameter allows you to determine which MIDI controller or This parameter allows you to determine which MIDI controller or controller number the Ion will transmit when you use (m2). It will also controller number the Ion will transmit when you use (m2). It will also... -
Page 24: Exp Pedal Curve
A setting of on will allow your sequencer to capture your performance exactly as it happened. It will also enable the Ion to arpeggiate other synthesizers! If this parameter is set to off, the arpeggiator will still control the Ion internally, but the Ion will only send out the notes that you hold down. -
Page 25: Analog Drift
The Ion can model the “drifting” behavior of analog synths as well. An The Ion can model the “drifting” behavior of analog synths as well. An Analog Drift setting of on will cause the frequencies for each of the Analog Drift setting of on will cause the frequencies for each of the oscillators and filters per voice to “drift”... -
Page 26: Global Parameters
Global Parameters This page intentionally left blank. -
Page 27: Chapter 4: Parts And Setups
“zones” of the keyboard are what make up a Setup. Programs vs. Parts Parts reside at a slightly higher level of the Ion’s hierarchy than do Programs. A Part consists of the Program plus settings for key range, MIDI channel and controllers, panning, transposition, etc. -
Page 28: Storing A Program Or Setup
Once you are sure that you will not be overwriting a Program you would prefer to keep, press the same [store] button a second time. The Ion will store your edited Program to the location you have selected. -
Page 29: Naming A Program Or Setup
With so many characters available for creating a name, it could be quite cumbersome without a shortcut to the characters you’re most likely to use. The Ion keyboard can be used to call up letters, numbers, and even a couple of punctuation marks. Once you know your way around, this is a real time-saver. -
Page 30: Character Chart
Parts and Setups I nserting and deleting characters using the keyboard The two lowest black keys perform a special function. • The Db key will insert a space, taking all letters to the right of and including the vertical column and pushing them to the right. Once a letter exceeds the right-most side, it is erased. -
Page 31: Sending A Program Or Bank Via Sys-Ex
When you press the [store] button the second time, a little marker is placed in the Program data that tells the Ion to put the Program in the “to” location when it is sent back via MIDI. This is fine if you’re expecting it, but if you aren’t it can be difficult to find the... -
Page 32: Special Cases
Of course, these are useful as a “from” location, but they are even more useful as a “to” location. Herein lies the solution to the problem of knowing where a Program will arrive when it is sent back to the Ion via MIDI, and wondering if it will accidentally overwrite something you wanted to keep. -
Page 33: Sending One Setup Or All Setups Via Sys-Ex
When you press the [store setup] button the second time, a little marker is placed in the Setup data that tells the Ion to put the Setup in the “to” location when it is sent back via MIDI. This is fine if you’re expecting it, but if you aren’t it can be difficult to find the... -
Page 34: Sending All Programs And Setups Via Sys-Ex
Store Program mode or Store Setup mode. In either case, it is on page 2, Soft button 3. To initiate the bulk dump, navigate to this screen and press the same [store] button a second time. All data will be sent out the Ion’s MIDI jack. -
Page 35: Compare Mode
Compare Mode When you select a new Program or recall a Setup, it is placed in a temporary workspace known as an “edit buffer.” There is an edit buffer for each Program within the current Setup and for the Setup itself. This allows you to edit the Program or Setup without affecting the original stored version of the item. -
Page 36: Midi Channel
Part: • midi only – equivalent to “local off.” The selected Part’s Program will not be heard when the keys are played. However, the Ion will send and receive MIDI data to and from an external device. •... -
Page 37: Out Level
Out Level Page: Soft Button: Range: 0-100% D efault: 100% The Out Level parameter sets the level of the Part within the Setup. It is distinct from the Program Output Level parameter controlled by the knob on the right side. This parameter allows you a further level of mix control so you can balance the levels of the Parts without editing the level stored with the Program. -
Page 38: Sust Pedal Enable
Parts and Setups Sust Pedal Enable Page: Soft Button: Range: on, off D efault: When this parameter is set to on, the currently selected Part will respond to the sust pedal and will send and receive sustain pedal commands via MIDI. -
Page 39: Mod 2 Wheel Enable
Mod 2 Wheel Enable Page: Soft Button: Range: on, off D efault: When this parameter is set to on, the currently selected Part will respond to the (m2) wheel and will send and receive its assigned controller number information via MIDI. When set to off, the selected Part will neither send nor respond to MIDI messages at its assigned controller number. - Page 40 Parts and Setups This page intentionally left blank.
-
Page 41: Chapter 5: Program Parameters
In this way, the Ion can generate a virtually limitless variety of sounds. Let’s take a quick look at the Ion’s signal path, from start to finish. The Oscillators The oscillators are where sound is born. You may have heard that what you perceive as “sound”... -
Page 42: The Post Filter Mix
The sound is getting near the end of its journey, but still has one more processing stage to go through. In the output stage, the Ion allows you to apply a drive effect, to give the sound a final push and add some compression, distortion, or other amplification effect. -
Page 43: Modulation
The problem with that, if you’re anything like us, is that you only have two hands, and you are probably using at least one of them to hit the notes in the first place. Fortunately, the Ion is willing to lend you a helping hand—twelve of them, in fact. -
Page 44: Program Parameter Descriptions
When set to 4 voices each key will trigger 4 voices, allowing a maximum of 2 keys to be played before running out of voices. When set to full, all 8 of the Ion’s voices will be evenly divided among the keys that are held down. -
Page 45: Voice [Edit]: P Wheel Mode
Voice [edit]: P Wheel mode Voice [edit]: P Wheel mode Page: Page: Soft Button: Soft Button: Range: Range: held, all held, all Default: Default: The setting of this parameter dictates the response of the (p) wheel, The setting of this parameter dictates the response of the (p) wheel, which is normally assigned to pitch bend. -
Page 46: Voice [Edit]: Portamento Time
Program Parameters Voice [edit]: Portamento time Page: Soft Button: Range: 10 msec to 10 seconds Default: 160.22 msec This parameter determines the length of time it takes for the Portamento feature to slide from note to note. The exact response is determined by the Portamento type parameter. -
Page 47: Lfo [Edit]: Sync
The second Range (x 1/16 – x 16) is provided if the Sync parameter is The second Range (x 1/16 – x 16) is provided if the Sync parameter is set to on. This means the LFO is synchronized to the setting of the set to on. -
Page 48: Lfo [Edit]: M1 To Lfox
Program Parameters LFO [edit]: M1 to LFOx Page: Soft Button: Range: 0-100% Default: There are several ways to use an LFO, but the two main ways are as an expressive modulation source tied to one of the wheels, or as a constant modulation source for some aspect of the sound. -
Page 49: Sample & Hold (S&H)
Sample & Hold (S&H) Most of the Sample & Hold’s parameters are identical to those of the LFOs discussed on pages 45-46, so we will only list them and refer you to those pages. There are some important distinctions, though, and we will point those out. -
Page 50: Program Parameters
Program Parameters Source None Note-On Velocity Release Velocity Key Track M1 Wheel M2 Wheel P Wheel Sustain Pedal Expression Pedal Amp Env Level Filter Env Level Pitch/Mod Env Level LFO 1 Sine LFO 1 Cosine LFO 1 Triangle LFO 1 Cos-Triangle LFO 2 Saw LFO 2 Cos-Saw LFO 1 Square... -
Page 51: S&H [Edit]: Reset
S&H [edit]: Reset Page: Soft Button: Range: mono, poly, key-mono, key-poly Default: mono The S&H Reset parameter dictates how the Sample & Hold responds when the first key is pressed, and then determines how it will react to overlapping keypresses. For a full description of the Reset parameter, see the LFO [edit]: Rate section on page 45. -
Page 52: The Arpeggiator
An arpeggio is what you get when the notes in a chord are played one at a time instead of all at once. The Ion’s arpeggiator allows you to create automated arpeggios based on a combination of the notes you hold down and the settings of the arpeggiator. -
Page 53: Arp [Edit]: Octave Span
For example, set the Octave Range value to 0, turn on the arpeggiator For example, set the Octave Range value to 0, turn on the arpeggiator and hold down three notes. You should hear those three notes being and hold down three notes. You should hear those three notes being cycled by the arpeggiator. -
Page 54: Arp [Edit]: Tempo Multiplier
Program Parameters r-n-r x This stands for “rock & roll exclusive.” It also mixes the forward and settings, but with one difference: it plays up and down the notes you are holding without repeating the top note and the bottom note. oct jump The Arpeggiator plays the notes you are holding, but plays the first note in two or more octave registers... -
Page 55: The Oscillators
Each waveform type really represents a family of sounds; you will use the Osc Shape parameter, described below, to tell the Ion exactly what wave you want. Sine waves have a smooth, pure sound to them. Tri/saw can represent a triangle wave, a sawtooth wave, or anything in between. -
Page 56: Osc [Edit]: Octave
Program Parameters Osc [edit]: Octave Page: Soft Button: Range: -3 – 3 Default: This parameter lets you transpose the pitch of the oscillator up or down a number of octave. You can use this to get high pitches from low keys, or you can stagger the octaves of your three oscillators to create a very rich sound from a single note. -
Page 57: Osc [Edit]: Pitch Wheel Range
This is the first of the cross-oscillator parameters that can be found on This is the first of the cross-oscillator parameters that can be found on the extra pages in Oscillator 1’s parameter section. The Ion’s Osc FM, the extra pages in Oscillator 1’s parameter section. The Ion’s Osc FM, or “frequency modulation”, feature allows you to use one oscillator to... -
Page 58: Osc 1 [Edit]: Fm Config
Default: osc 2 Whereas FM lets you use Oscillators 2 and 3 to affect Oscillator 1, Ion’s Osc Sync feature allows you to turn around and use Oscillator 1 to affect Oscillators 2 and 3. The Sync Osc parameter determines which oscillators are synced to Oscillator 1 when the Osc Sync feature is enabled. -
Page 59: Osc 1: The [Osc Sync] Button
This parameter is the first of the levels in the Pre Filter Mix, which provides you a virtual mixing board for adjusting the strengths of the Ion’s various signal sources before they are sent to the filters. The Osc 1 Level parameter controls how much of Oscillator 1 will appear at the inputs of the filters. -
Page 60: Pre Filter Mix [Edit]: External Input Level
This parameter controls the level of the External Input source in the Pre Filter Mix. This allows you to feed an external audio signal into the Ion and process it using the Ion’s powerful filters and effects, and even play your external signal as if it were an instrument. -
Page 61: Pre Filter Mix [Edit]: Osc 3 Balance
Pre Filter Mix [edit]: Osc 3 Balance Page: Soft Button: Range: 0%/100% – 100%/0% Default: 50%/50% This parameter controls the filter balance of Oscillator 3 in the Pre Filter Mix. Pre Filter Mix [edit]: Ring Mod Balance Page: Soft Button: Range: 0%/100% –... -
Page 62: Pre Filter Mix [Edit]: Noise Type
Filter 2. This allows you to cascade the two filters, one after the other. If you shift the oscillator balances toward Filter 1 and then turn up this parameter, you are effectively routing the Ion’s filters in series. - Page 63 Compare its sound to the mg or rp filters. 8- pole lowpass Unique to the Ion. 8 poles give this filter an extremely steep cutoff. 8v e dual bandpass Unique to the Ion. Two 2-pole bandpass filters, spaced 1 octave apart.
-
Page 64: Filter [Edit]: Frequency
Unique to the Ion. A 5-band formant filter based on an idealized model of the vocal tract. ba nd limit Unique to the Ion. A 2-pole highpass filter and a 2-pole lowpass filter in series, limiting the signal to everything in between them. The resonance control adjusts the bandwidth. -
Page 65: Filter [Edit]: Key Track
Filter [edit]: Key Track Page: Soft Button: Range: -100 to +200% Default: +100 This parameter adjusts the way the filter follows, or “tracks” the keyboard. A setting of 0 means the filter frequency will remain constant across the keyboard. If the key track parameter is set to +100, the filter tracks the keyboard perfectly, and with enough resonance, can be played as if it were an oscillator. -
Page 66: Post Filter Mix [Edit]: Filter 1 Pan
Program Parameters Post Filter Mix [edit]: Filter 1 Pan Page: Soft Button: Range: 1-100% left, center, 1-100% right Default: center This parameter determines the balance of Filter 1 between the left and right outputs. Post Filter Mix [edit]: Filter 2 Pan Page: Soft Button: Range:... -
Page 67: The Output Section
The drive effect is an insert effect, and takes over after the amp envelope but before the program level has been applied. The Ion’s drive effects are designed to model the sorts of boxes you would normally put... -
Page 68: Output [Edit]: Effects Send Level
When set to 100%, the full output of each voice is available for the effects processor to play with. For complete details on how to put the Ion’s effects to work, see Chapter 7. This parameter can also be adjusted by turning the effects knob. -
Page 69: Env [Edit]: Attack Slope
This mimics the charging characteristics of electronic capacitors, which were used to generate envelopes in vintage analog synths. This slope is good for making your attacks extra-snappy. A -exp slope is bowed downard—it starts off slowly and bursts up at the end. -
Page 70: Env [Edit]: Sustain Level
If you are familiar with analog synths, this paramter may surprise you, since a traditional synth will remain in the sustain stage as long as you have the note held down. The Ion provides this behavior, of course—simply set this parameter to “hold”, and your note will be sustained until your finger gets tired. -
Page 71: Env [Edit]: Release Time
Env [edit]: Release Time Env [edit]: Release Time Page: Page: Soft Button: Soft Button: Range: Range: 2.0 ms – 30 sec, hold 2.0 ms – 30 sec, hold Default: Default: 2.0 ms 2.0 ms This parameter determines the length of the release stage of the This parameter determines the length of the release stage of the envelope. -
Page 72: Env [Edit]: Reset
Program Parameters Env [edit]: Reset Page: Soft Button: Range: reset, legato D efault: reset This parameter determines where your envelope starts when you play a note. When set to reset, the envelope always starts from the beginning of the attack stage, no matter what. But when set to legato, if you play a note while holding down another note, the envelope starts from the same position that the held note’s envelope. -
Page 73: Env [Edit]: Loop
Loop feature of the envelope, this parameter will have further effects on the envelope behavior, and these will be discussed below. Env [edit]: Loop Page: Soft Button: Range: decay, zero, hold, off Default: off Under normal circumstances, you’ll want your envelope to go straight through its stages, from attack to decay to sustain and/or release. -
Page 74: Env [Edit]: Sustain Pedal
When on, if you press the sustain pedal and release a key, the Ion will pretend that you still have the note held down, and will not move the envelope to the release stage until you let up on the pedal. -
Page 75: Chapter 6: The Mod Matrix
The Mod Matrix What is the Mod Matrix? The Modulation Matrix is where all of the previously discussed voice elements—envelopes, oscillators, and filters, and so on—interact with each other to make a powerful, expressive synthesizer voice. It is essentially a set of 12 virtual patch cables that can be used to connect a large a selection of Source modifiers to Destination parameters. -
Page 76: Mod Source
The Mod Matrix Mod Source Page: Soft Button: Range: see table Default: “none” Source None Note-On Velocity Release Velocity Key Track M1 Wheel M2 Wheel P Wheel Sustain Pedal Expression Pedal Amp Env Level Filter Env Level Pitch/Mod Env Level LFO 1 Sine LFO 1 Cosine LFO 1 Triangle... -
Page 77: Mod Destination
Mod Destination Page: Soft Button: Range: see table D efault: “none” Note that while the majority of the Mod Destinations are Program parameters that show up in the Edit screens, there are a few special destinations that are unique to the Mod Matrix. Destination None Voice Pitch... - Page 78 The Mod Matrix Filter 1 Level Filter 2 Level Pre-Filter Level Filter 1 Pan Filter 2 Pan Pre-Filter Pan Drive Level Program Level Main/Aux Balance Amp Env Amplitude Amp Env Rate Amp Env Attack Amp Env Decay Amp Env Sust Time Amp Env Sust Level Amp Env Release Filter Env Amplitude...
-
Page 79: Mod Level
Mod Level Page: Soft Button: Range: -100% - +100% Default: This parameter determines how much the Source will affect the destination. Mod Offset Page: Soft Button: Range: -100% - +100% Default: This is a fixed offset added to the Destination value. It can be used to fine-tune the range of the modulation. -
Page 80: Tracking Generator
The Mod Matrix Tracking Generator The Tracking Generator is a special feature of the Mod Matrix. It is used to achieve more complex or precise modulations by taking an input signal (Mod Source) and re-mapping it. The input signal’s amplitude is represented as 31 (or 24) points from –100% to zero to +100%. -
Page 81: Tracking Input
Tracking Input Page: Soft Button: Range: see table Default: m2 wheel Source None Note-On Velocity Release Velocity Key Track M1 Wheel M2 Wheel P Wheel Sustain Pedal Expression Pedal Amp Env Level Filter Env Level Pitch/Mod Env Level LFO 1 Sine LFO 1 Cosine LFO 1 Triangle LFO 1 Cos-Triangle... - Page 82 The Mod Matrix This page intentionally left blank.
-
Page 83: Chapter 7: Effects
Effects Master Effects In addition to the Drive Effects, which are unique to each Part, the Ion has a Master Effects Processor that is shared across all of the Parts. All Effects parameters are stored with individual Programs. Because there is only one, shared effects processor, the Program assigned to Part A will determine which Effect Type and settings are used for all Programs. -
Page 84: Super Phaser
Effects Super Phaser The classic phaser effect is created by ganging multiple all-pass filter stages to create “notches,” or sharp dips in the frequency spectrum. The frequencies of these all-pass filters are usually modulated by an LFO to create a dramatic sweeping sound. The Super Phaser follows this classic formula but allows you to select from 4 to 64 all-pass stages for a wide variety of timbres. -
Page 85: String Phaser
String Phaser This effect is based on the phaser built into a classic analog string synthesizer. It has 14 stages, and uses combination of positive and negative feedback to produce a rich and complex sound. A . Feedback This is the amount of the phaser output added back into the input to produce a deeper effect. -
Page 86: Theta Flanger
Effects Theta Flanger The Theta Flanger is a combination of phaser and flanger effects. The input is filtered through a 32-stage phaser, and then fed to the input of a flanger. The sound is very interesting and musical. A . Feedback This is the amount of the flanger output added back into the input to produce a deeper effect. -
Page 87: Thru Zero Flanger
Thru Zero Flanger A Flange effect using two delay lines (per stereo side) to emulate the classic flange effect produced using two analog tape machines. Because there are two delay lines in constant motion, the delay time can fall through zero to become negative. This has a unique sound that can’t be replicated with a standard, single-delay flanger. -
Page 88: Chorus
Effects Chorus A chorus effect uses an LFO to modulate the pitch of the input signal, which is then added back to the dry signal. In small doses this will create the illusion of multiple voices playing at once. Turn up the Feedback and Depth for more pronounced “shimmering”... -
Page 89: 40-Band Vocoder
40-Band Vocoder A vocoder uses two sets of band-pass filters (filter banks) to impart the characteristics of one sound source onto another. The analysis filter bank determines the level of the input at several different frequencies. These levels are used to modulate the output levels of the corresponding frequencies of the synthesis filter bank. - Page 90 Effects This page intentionally left blank.
-
Page 91: Chapter 8: Midi
MIDI is the communication standard for electronic musical instruments. You can use MIDI to: • Record what you play on your Ion synthesizer into a sequencer or computer. • Play back sequences from a sequencer or computer on your Ion. -
Page 92: Editing Effects
MIDI device to control several. Attach a cable from the MIDI OUT of the first device to the [MIDI IN] jack of the Ion; and then attach another cable from the Ion’s [MIDI THRU] jack to the MIDI IN of the third device. -
Page 93: Using Your Ion With A Midi Sequencer
MIDI interface and sequencing software. Using a MIDI sequencer, you can record what you play on your Ion, and then play it back later. Changing the MIDI Channel In order for MIDI to work, the MIDI Channel must be set properly. -
Page 94: Local Vs. Midi Control
Editing Effects Local vs. MIDI Control When using the Ion with a sequencer, it is best to disable local control of the keyboard. This disconnects the keyboard of the Ion from the internal sound engine. A sequencer will usually “echo” the MIDI data at its input back to its output. -
Page 95: Saving Programs And Setups Via Midi
Saving Programs and Setups via MIDI Saving Programs and Setups via MIDI The Ion lets you transmit Programs - individually, or a Bank at a time - The Ion lets you transmit Programs - individually, or a Bank at a time -... -
Page 96: Loading Programs And Setups Via Midi
The Ion doesn’t need to be in a special mode to receive MIDI sysex information. Simply connect a MIDI cable from the MIDI out jack of your MIDI player to the [MIDI IN] port of your Ion and start the sysex dump on your MIDI storage device or computer. If everything is working properly, the Ion display will read “RECEIVING MIDI... -
Page 97: Updating Software Via Midi
5. Press the Left Soft Button, marked “yes”. 6. Play the “.syx” file. 7. The Ion will display the status of the update. After it has finished, it will reboot itself. Sending and Receiving Bank Select Messages The MIDI Specification defines two Bank Select messages – CC00 is Bank Select MSB and CC32 is Bank Select LSB. -
Page 98: Midi Controller Numbers
Editing Effects MIDI Controller Numbers Each type of controller has its own MIDI controller number. Not all controller numbers have been standardized for specific functions, but the following indicates the current list of assigned controllers. Function Bank Select Modulation Wheel Breath Controller Early DX7 Aftertouch Foot Controller... -
Page 99: Midi Implementation Chart
MIDI Implementation Chart Function Transmitted Basic Default 1 — 16 Channel Changed 1 — 16 each Default Mode 3 Mode Messages * * * * * * * * Altered Note 0 — 127 * * * * * * * * Number True Voice Velocity... - Page 100 Editing Effects This page intentionally left blank.
-
Page 101: Appendix A: Frequently Asked Questions
(or string) “section”. Each of the Ion’s 4 Parts can be assigned to any range on the keyboard. They can overlap to create layers or you can assign them to exclusive zones to create splits. - Page 102 Frequently Asked Questions This page intentionally left blank.
-
Page 103: Appendix B: Troubleshooting
Troubleshooting If you experience problems while operating your Ion, please use the following table to check for possible causes and solutions before contacting Alesis customer service for assistance. Symptoms The display does not light up when the ON/OFF switch is turned on. -
Page 104: Recovering From A Crash
Troubleshooting Recovering from a Crash If your Ion behaves erratically or “freezes” on you, turn it off, wait for a moment, and then turn it on again. Make sure you turn off any amplification first! If your instrument still isn’t working after that, then disconnect the [MIDI IN] cable and repeat the power on/off trick. -
Page 105: Specifications
Specifications Sound Engine Sound Engine Sound Generation: Sound Generation: Alesis proprietary DSP Analog Alesis proprietary DSP Analog Modeling Modeling Polyphonic Voices: Polyphonic Voices: 8, each with 3 oscillators, 2 multi-mode 8, each with 3 oscillators, 2 multi-mode filters, 3 envelope generators, 2 LFOs,... - Page 106 Index This page intentionally left blank.
-
Page 107: Warranty/Contact Alesis
The purchaser should complete and return the enclosed warranty card within 14 days of purchase. During the warranty period ALESIS shall, at its sole and absolute option, either repair or replace free During the warranty period ALESIS shall, at its sole and absolute option, either repair or replace free...
Need help?
Do you have a question about the Ion and is the answer not in the manual?
Questions and answers