Table of Contents
Advertisement
d
OPERATING INSTRUCTIONS
INSTRUCCIONES DE MANEJO
MODE D'EMPLOI
WARNING
TO REDUCE THE RISK OF FIRE OR
ELECTRIC SHOCK, DO NOT EXPOSE
THIS APPLIANCE TO RAIN OR
MOISTURE.
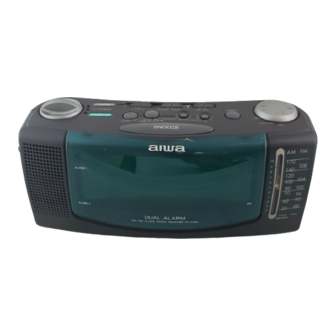
FR-A530
RADIO RECEIVER
RECEPTOR DE RADIO
OWNER'S RECORD
For your convenience, record the model number (you will find it
at the bottom of the unit) and serial number (you will find it in the
battery compartment) in the space provided below. Please refer
to them when you contact your AIWA dealer in case of difficulty.
Model No.
Serial No.
U
Advertisement
Table of Contents

Related Manuals for Aiwa FR-A530


Summary of Contents for Aiwa FR-A530
-
Page 1: Operating Instructions
(you will find it in the battery compartment) in the space provided below. Please refer to them when you contact your AIWA dealer in case of difficulty. Model No. Serial No. - Page 2 CAUTION RISK OF ELECTRIC SHOCK DO NOT OPEN “CAUTION:TO REDUCE THE RISK OF ELECTRIC SHOCK, DO NOT REMOVE COVER (OR BACK). NO USER-SERVICEABLE PARTS INSIDE. REFER SERVICING TO QUALIFIED SERVICE PERSONNEL.” Explanation of Graphical Symbols: The lightning flash with arrowhead symbol, within an equilateral triangle, is intended to alert the user to the presence of uninsulated “dangerous...
- Page 3 PRECAUCIONES Lea detenidamente todas las instrucciones que se describen en el Manual de Instrucciones antes de proceder a utilizar el aparato y guarde el manual para posibles consultas posteriores. Siga al pie de la letra todas las advertencias y precauciones indicadas en este Manual de Instrucciones, al igual que las sugerencias de seguridad que se indican a continuación.
- Page 4 PRECAUTIONS Electric Power 1 Power sources — Connect this unit only to power sources specified in the Operating Instructions, and as marked on the unit. 2 Polarization — As a safety feature, some units are equipped with polarized AC power plugs which can only be inserted one way into a power outlet.
- Page 5 PRECAUCIONES Alimentación eléctrica 1 Fuentes de alimentación — Conecte el aparato solamente a las fuentes de alimentación especificadas en el Manual de Instrucciones y del modo indicado en el mismo aparato. 2 Polarización — Como medida de seguridad, algunos aparatos cuentan con enchufes de corriente polarizados, los cuales pueden enchufarse en el tomacorriente solamente en una dirección.
- Page 6 PRECAUTIONS Maintenance Clean the unit only as recommended in the Operating Instructions. Damage Requiring Service Have the units serviced by a qualified service technician if: – The AC power cord or plug has been damaged – Foreign objects or liquid have gotten inside the unit –...
- Page 7 PRECAUCIONES Mantenimiento Limpie de acuerdo a las instrucciones del manual de instrucciones. Desperfectos que requieren servicio técnico Solicite la reparación de su aparato el servicio técnico autorizado en los siguientes casos: – Cuando se haya dañado el cable de corriente o el enchufe –...
-
Page 8: Backup Function
BACKUP FUNCTION If the AC power supply is interrupted, the clock display goes off and the alarm setting is canceled. To back up the clock and alarm, insert a 6F22 battery in the battery compartment on the rear of the unit. •... - Page 9 FUNCION DE RESPALDO Si se corta la fuente de corriente alterna, se apaga la indicación del reloj y se cancela la alarma. Para mantener el respaldo del reloj la alarma, instale una pila 6F22 en el portapilas en la parte trasera del aparato. •...
-
Page 10: Setting The Clock
CLOCK SET DIMMER SNOOZE ALARM 1 ALARM 2 SETTING THE CLOCK 1 Connect the AC power cord to a wall outlet (a). The clock display begins flashing. 2 While holding down CLOCK SET, press UP or DOWN to set the clock. Using the UP button changes the time faster. -
Page 11: Ajuste Del Reloj
AJUSTE DEL RELOJ 1 Conecte el cable eléctrico en el tomacorriente de la pared (a). La pantalla del reloj empieza a destellar. 2 Mantenga el botón CLOCK SET oprimido y oprima UP o DOWN para ajustar la hora. Utilice el botón UP para cambiar la hora más rápidamente. 12:00 medianoche 12:00 •... -
Page 12: Radio Reception
RADIO RECEPTION 1 Turn ALARM/POWER ON to POWER ON. 2 Set BAND to select FM or AM. 3 Turn the TUNING control to tune in to a station. 4 Adjust the volume. To turn off the radio Turn ALARM/POWER ON to n STANDBY. For better reception FM: Extend the FM wire antenna fully. -
Page 13: Reception Radio
RECEPCION DE LA RADIO 1 Gire el ALARM/POWER ON a POWER ON. 2 Mueva el BAND para seleccionar FM o AM. 3 Gire el control TUNING para sintonizar una emisora. 4 Ajuste el volumen. Para desconectar la radio Gire el ALARM/POWER ON a n STANDBY. Para una mejor recepción FM: Extienda completamente la antena de cable FM. -
Page 14: Alarm Setting
ALARM SET ALARM OFF/ SLEEP OFF ALARM 1 ALARM 2 ALARM SETTING The radio or buzzer automatically sounds at the designated time every day. You can set two different alarm times, one in ALARM 1 and one in ALARM 2, so that the alarm timer operates twice a day. 1 Set ALARM MODE to 1 or 2. -
Page 15: Ajuste De La Alarma
AJUSTE DE LA ALARMA La radio o la alarma suenan automáticamente a la hora especificada todos los días. Se pueden ajustar dos horas de alarma diferentes, una en la ALARM 1 y la otra en la ALARM 2 para que la alarma suene dos veces al día. - Page 16 ALARM 1 ALARM 2 ALARM SETTING To check the alarm time Set ALARM MODE to 1 or 2 and press ALARM SET. The alarm time will be displayed. To change the alarm time Set the alarm time again. Listening to radio while the alarm is set Turn ALARM/POWER ON to POWER ON.
- Page 17 AJUSTE DE LA ALARMA Para verificar la hora de la alarma Ajuste el ALARM MODE a 1 o a 2 y oprima ALARM SET. Aparecerá la hora de la alarma. Para cambiar la hora de la alarma Ajuste nuevamente la hora de la alarma. Para escuchar la radio mientras la alarma está...
-
Page 18: Sleep Timer Setting
ALARM OFF/ SLEEP OFF SLEEP TIMER SETTING You can use the sleep timer to turn the radio off automatically after up to 59 minutes. • Before setting, tune in to a station. (See page 12.) 1 Turn ALARM/POWER ON to n STANDBY. 2 While holding down SLEEP, press UP or DOWN to set the time to turn off the radio. -
Page 19: Ajuste Del Temporizador Para Dormir
AJUSTE DEL TEMPORIZADOR PARA DORMIR Se puede utilizar el temporizador para dormir para desconectar automáticamente la radio después de 59 minutos. • Antes de este ajuste, sintonice una emisora. (Consulte la página 13.) 1 Gire el ALARM/POWER ON a n STANDBY. 2 Mantenga oprimido SLEEP y oprima UP o DOWN para ajustar la hora de desconexión de la radio. -
Page 20: Specifications
SPECIFICATIONS Power source AC 120 V, 60 Hz Output 280 mW (EIAJ) Power consumption Speaker 50 mm, 8 ohms Frequency range FM: 87.5 – 108 MHz AM: 530 – 1,710 kHz Antennas FM wire antenna Ferrite bar antenna for AM Maximum outside dimensions (W Weight 834 g (1.83 lbs.) -
Page 21: Especificaciones
ESPECIFICACIONES Fuente de alimentación CA de 120 V, 60 Hz Salida 280 mW (EIAJ) Consumo eléctrico Altavoz 50 mm, 8 ohmios Gama de frecuencias FM: 87,5 – 108 MHz AM: 530 – 1.710 kHz Antenas Antena de cable FM Antena de barra de ferrita para Máximas dimensiones exteriores (An. - Page 22 CAUTION Modifications or adjustments to this product, which are not expressly approved by the manufacturer, may void the user’s right or authority to operate this product. This device complies with Part 15 of the FCC Rules. Operation is subject to the following two conditions: (1) This device may not cause harmful interference, and (2) this device must accept any interference received, including interference that may cause undesired operation.
Need help?
Do you have a question about the FR-A530 and is the answer not in the manual?
Questions and answers