Table of Contents
Advertisement
Quick Links
Table of Contents
......................................................................................................................
Step 35 - Final check
Step 2 - Preparing parts from the package
.................................................................................
..........................................................................................................
........................................................................................
.....................................................................................
.................................................................................................................
...................................................................................
....................................................................................
................................................................................
.................................................................................
................................................................................
...............................................................................
................................................................................
.......................................................................................
.........................................................................................
..................................................................................
.................................................................................................
...................................................................................................
.......................................................................................................
................................................................
..........................................................................
.........................................................................
................................................................
........................................................................
.................................................
...................................................................
..............................................................
..............................................................
..............................................................
..............................................................................
..............................................................................
..............................................................
........................................................................
.....................................................................
...................................................................
....................................................................
..............................................................................
..............................................................................
.............................................................................
.........................................................
.........................................................
.....................................................................
.......................................................................
......................................................................
.........................................................
....................................................................
.......................................................................
.........................................................................
...................................................................
.............................................................
5
6
6
6
7
7
7
8
9
10
11
13
14
14
14
15
15
16
16
17
17
18
18
19
20
20
20
21
21
22
22
23
23
24
24
25
25
26
26
27
27
28
28
29
29
30
30
32
33
33
1
Advertisement
Table of Contents

Subscribe to Our Youtube Channel
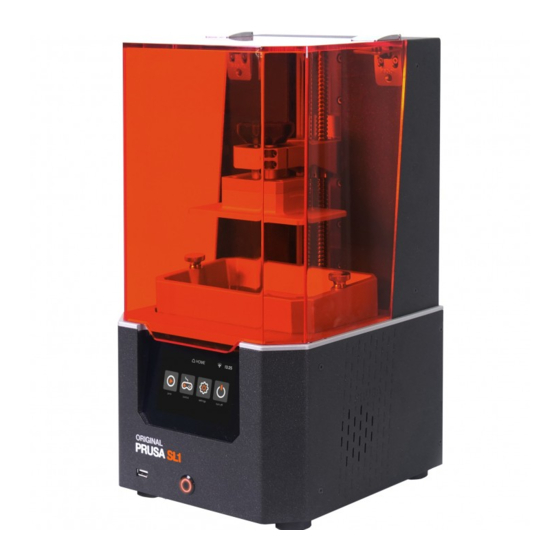
Related Manuals for Prusa Research SL1


Summary of Contents for Prusa Research SL1
-
Page 1: Table Of Contents
................. Step 5 - View high resolution images ..................Step 6 - We are here for you! ..................Step 7 - Unpacking the SL1 kit ..............Step 8 - Important: Electronics protection ................ Step 9 - Regular rewards are crucial! .......... - Page 2 ............... Step 3 - Tower covers - parts preparation ..............Step 4 - Mounting the left tower sheet ................Step 5 - Sensors parts preparation ................Step 6 - Assembling the sensors ................ Step 7 - Assembling the covercheck ............... Step 8 - Sensors cable management ...............
- Page 3 ..............Step 22 - Removing the protective film ............. Step 23 - Preparing the print display parts ..........Step 24 - Inserting the print display in the printer ................. Step 25 - Fixing the display in place ..........Step 26 - Display cable holder parts preparation ..............
- Page 4 ................... Step 27 - Printable 3D models ................Step 28 - Prusa knowledge base ..................Step 29 - Join PrusaPrinters! Manual changelog SL1 ........................................ Step 1 - Versions history ................Step 2 - Changes to the manual (1) ................
-
Page 5: Introduction
1. Introduction Original Prusa SL1 kit assembly... -
Page 6: Step 1 All The Required Tools Are Included
(or box). Note the displayed label of the bag is just an example, the content of the bag might differ. This is valid for the entire assembly manual. Original Prusa SL1 kit assembly... -
Page 7: Step 3 Use Labels For Reference
Just hover your cursor over the image and click the Magnifier button ("View original") in the top left corner. The picture is used as an example. Original Prusa SL1 kit assembly... -
Page 8: Step 6 We Are Here For You
Lost in the instructions, missing screw or damaged part? Let us know! You can contact us using the following channels: Using comments under each step. Using our 24/7 live chat at shop.prusa3d.com Writing an email to info@prusa3d.com Original Prusa SL1 kit assembly... -
Page 9: Step 7 Unpacking The Sl1 Kit
1. Introduction STEP 7 Unpacking the SL1 kit The SL1 kit parts are separated into several layers of protective foam, which mostly comply with the chapters. However, some parts had to be moved into different layers due to their dimensions. -
Page 10: Step 8 Important: Electronics Protection
Be extra cautious in the rooms with carpets, which are a source of electrostatic energy. Clothes from wool and certain synthetic fabrics can easily gather static electricity. It is safer to wear cotton clothing. Original Prusa SL1 kit assembly... -
Page 11: Step 9 Regular Rewards Are Crucial
1. Introduction STEP 9 Regular rewards are crucial! Building the SL1 printer is a challenge unlike any other and you should treat yourself for every milestone you reach. That is why a bag of Haribo Bears is included! After you finish each stage of this assembly guide, you will be given a specific amount of sweets to eat. - Page 12 In the case of electronic screwdriver, make sure the torque is set to low and proceed carefully. READY? You can start by assembling the printer in the next chapter - 2. Base & Tower Original Prusa SL1 kit assembly...
-
Page 13: Base & Tower
2. Base & Tower Original Prusa SL1 kit assembly... -
Page 14: Step 1 Tools And Bags For This Chapter
Remember to keep all electronics in their ESD bags, until you have to assemble them to the printer. WARNING: Handle the tower with care!!! If you drop it or skew it, it will affect the print quality. Original Prusa SL1 kit assembly... -
Page 15: Step 4 Tower And Psu Parts Preparation
Tower and PSU parts preparation For the following steps, please prepare: Back plate (1x) including the cardboard Tower (1x) SL1 PSU (1x) M4x8 screw (4x) M3x18 screw (3x) M3x5 screw (2x) M4w serrated lock washer (1x) Original Prusa SL1 kit assembly... -
Page 16: Step 5 Arranging The Back Plate
Rotate the tower on the back plate, then align the holes and insert two screws M4x8 in the lower row. Don't tighten them yet! Push the tower DOWN and to the RIGHT and then tighten: First the screw on the left Second the screw on the right Original Prusa SL1 kit assembly... -
Page 17: Step 8 Connecting The Sl1 Psu
Take the M3x5 screws and screw them in the back plate, 2-3x turns are enough. We will slide a sheet in later on, so don't tighten them. Make sure each screw is perpendicular to the back plate in both axes. Original Prusa SL1 kit assembly... -
Page 18: Step 9 Tower And Psu Parts Preparation
Place the side of the bottom plate with the groove on the back plate. Make sure both parts are aligned properly and no wires are pinched. Secure both parts together using four M3x8 screws. Original Prusa SL1 kit assembly... -
Page 19: Step 11 - Mounting The Supports
M3x8 screws from the bottom. Check the bottom plate and support outer surfaces are aligned. If not, release the screws a little bit and readjust the support. Then tighten the screws again. Continue in the next step... Original Prusa SL1 kit assembly... -
Page 20: Step 12 Mounting The Adjustable Feet
Cables are symmetrical, use any side with the connector. See the holes, which will be used later on to mount the reflector. Guide the cable from the tower motor in the indicated direction. Original Prusa SL1 kit assembly... -
Page 21: Step 15 - Preparing The Tilt Motor Parts
The side marked with the red arrow must be connected to the optical sensor. There are two versions of the connecting rod. They differ in the manufacturing process, assembly is the same. Original Prusa SL1 kit assembly... -
Page 22: Step 17 The Tilt Motor Assembly
IMPORTANT: Align the connecting rod with the protrusion on the holder. Both surfaces should be flush. This will ensure the rod will be vertical. Tighten the grub screw against the flat part of the shaft. Original Prusa SL1 kit assembly... -
Page 23: Step 20 Preparing The Reflector
STEP 20 Preparing the reflector For the following steps, please prepare: Reflector (1x) M4x5 screw (2x) Inside the reflector, there is a protective film, don't peel it off for now! Wait for the last chapter. Original Prusa SL1 kit assembly... -
Page 24: Step 21 Mounting The Reflector
Right blower fan parts preparation For the following steps, please prepare: Right blower fan (1x) Blower fan holder (1x) New version (with columns) Old version (without columns) Blower (1x) Blower gasket (1x) The list continues in the next step... Original Prusa SL1 kit assembly... -
Page 25: Step 24 Blower Fan Gasket
Place the gasket on the fan as in the picture, with the glue facing down. Press it all around to ensure full contact between the gasket and the fan. Make sure no part of the gasket is interfering with a spinning (central) part of the fan! Original Prusa SL1 kit assembly... -
Page 26: Step 25 Fan Assembly (New Version)
The left side of the fan. The right side of the fan. Guide the cable through the hole. Turn the assembly around and insert two screws M5x10r (previously M5x16r). Tighten them very carefully, or you will break the fan's casing. Original Prusa SL1 kit assembly... -
Page 27: Step 27 Blower Assembly
Secure the assembly using two M3x10b countersunk screws. Flip the cable from the fan inside the printer. First, guide it between the fan and the reflector, then turn to the left and guide it between the reflector and the tower. Original Prusa SL1 kit assembly... -
Page 28: Step 29 Tilt Preassembly Parts Preparation
"bite" in the surface of the tilt, but be careful not to damage the screw. It is very important that the washer is in direct contact with the surface of the tilt. Make sure you didn't switch the order! Original Prusa SL1 kit assembly... -
Page 29: Step 31 Tilt Parts Preparation
The tilt assembly is properly aligned with the edge of the back plate. No wire is pinched. The tilt assembly fits "around" the tower. The tilt assembly fits on top of both supports. After the tilt assembly is properly seated, secure it using eight M3x8 screws. Original Prusa SL1 kit assembly... -
Page 30: Step 33 Optical Sensor Calibration
You can use the resin tank to organise the bears, but keep in mind the bottom is missing for now Eat the first row to replenish the energy lost during this chapter. Original Prusa SL1 kit assembly... - Page 31 From now on, please always use the lower part of the printer while moving with the printer. Avoid using the tower or the cantilever! Compare the look of the assembly with the picture. Ready? Let's build the upper part of the printer 3. Covers & Platform Original Prusa SL1 kit assembly...
-
Page 32: Covers & Platform
3. Covers & Platform Original Prusa SL1 kit assembly... -
Page 33: Step 1 Tools And Bags For This Chapter
Fourth layer hides a cover, which has to be used in this chapter. To get access to the cover, you have to first remove the middle part of the fourth layer. Original Prusa SL1 kit assembly... -
Page 34: Step 3 Tower Covers - Parts Preparation
Use the M3x5 screws to fix it to the tower. Use the hole in the lower part of the sheet for easier access to the screw. Finish fixing the sheet to the tilt (horizontal part) using the M3x5 screw. Original Prusa SL1 kit assembly... -
Page 35: Step 5 Sensors Parts Preparation
Covercheck bottom SL1 (1x) Thermistor (1x) Lid safety switch (1x) M3x5 screw (1x) Zip tie (3x) Don't worry about recognising which printed part is top and which bottom, it will be clear from the next step. Original Prusa SL1 kit assembly... -
Page 36: Step 6 Assembling The Sensors
Guide the cable down through the hole in the printer. Don't pull the cable, leave it hanging. Check the three perforations in the steel sheet we will use them in the next step for cable management. Original Prusa SL1 kit assembly... -
Page 37: Step 8 Sensors Cable Management
Apply the same procedure on the remaining two perforations. No need to stretch the cable, leave it hanging down. STEP 9 Tower covers - parts preparation For the following steps, please prepare: Tower sheet right (1x) M3x5 screw (3x) Original Prusa SL1 kit assembly... -
Page 38: Step 10 Mounting The Right Tower Sheet
Finish fixing the sheet to the tilt (horizontal part) using the M3x5 screw. STEP 11 Filtration assembly parts preparation For the following steps, please prepare: M3x5 screw (2x) M3x10b countersunk screw (4x) Cleaning pad The list continues in the next step... Original Prusa SL1 kit assembly... -
Page 39: Step 12 Filtration Assembly Parts Preparation
Align the fan on "columns" of the filtration cover with the sticker fan casing facing down. Make sure the cable is on the lower-left corner, see the picture. Press the fan all the way down. Use a reasonable force, the case is made from plastic. Original Prusa SL1 kit assembly... -
Page 40: Step 14 Gasket Preparation
Peel the protective film from the filter gasket, leave the circular part in the middle untouched. Glue the gasket on the housing. Press it firmly all around the housing. In case you will damage the gasket during the installation, there is spare one in the spare bag ;) Original Prusa SL1 kit assembly... -
Page 41: Step 16 Removing Parts Of The Gasket
Squished gasket might interfere with the blades of the fan. In such case remove the gasket and replace it with the spare one. This time tighten the screws slightly less than before. Original Prusa SL1 kit assembly... -
Page 42: Step 18 Preparing The Second Gasket
Glue the gasket inside the housing. Press it firmly all around the housing. Slide the filter in, see the marks on the side. If the filter is packed in a thin plastic film, remove it first. Original Prusa SL1 kit assembly... -
Page 43: Step 20 Assembling The Housing Lid
Secure it using two M3x5 screws. Make sure the lid and the housing are in contact. STEP 21 Preparing the rear cover parts For the following steps, please prepare: Filtration hinge (1x) M3nN nut (2x) M3w washer (2x) M3x5b countersunk screw (6x) Cable cover (1x) Rear cover (1x) Original Prusa SL1 kit assembly... -
Page 44: Step 22 Mounting The Filtration Assembly
Orient the filtration assembly like in the picture. Make sure it fits properly all around. STEP 23 Mounting the filtration assembly Turn the cover, use two M3x5b countersunk screws. Tighten firmly. Align the assembly, tighten the nuts. Slide the cable from the assembly in the printer. Original Prusa SL1 kit assembly... -
Page 45: Step 24 Cable Management - The Rear Cover
Slide the rear cover on the printer. Ensure no wire is pinched! Align the cover, make sure the holes in the cover match the holes in the left/right tower sheets. Secure it with M3x5b countersunk screws on both sides. Original Prusa SL1 kit assembly... -
Page 46: Step 26 Print Platform Part Preparation
The correct assembly the groove is hidden (facing down) Make sure the edges of both parts are aligned. In this plane, the part can be rotated 180 ° (its orientation doesn't matter). Secure both parts using M4x10 screws. Original Prusa SL1 kit assembly... -
Page 47: Step 28 Knob Parts Preparation
We need to ensure the screws won't fall out. Your printer might have only one screw, the procedure is the same. There is a grease inside the thread(s), don't remove it. Original Prusa SL1 kit assembly... -
Page 48: Step 30 Mounting The Eccentric
Close the assembly using the cover. Make sure both parts are aligned. If not, the screw isn't properly seated inside. Screw slightly the "knob" assembly in the printer. Original Prusa SL1 kit assembly... -
Page 49: Step 32 Mounting The Print Platform
Tighten the knob and ensure the platform holds. Since the screw(s) in the cantilever isn't/aren't tightened, the eccentric might wobble, but that is ok for now. STEP 33 Haribo time! Eat the second row to regain energy for the next chapter. Original Prusa SL1 kit assembly... -
Page 50: Step 34 Final Check
Compare the look of the assembly with the pictures. WARNING: for safety reasons, release the knob and remove the platform. Make sure the platform is placed on a soft surface. Ready? Let's build the upper part of the printer 4. Electronics & Lid Original Prusa SL1 kit assembly... -
Page 51: Electronics & Lid
4. Electronics & Lid Original Prusa SL1 kit assembly... - Page 52 3.0 mm Allen key 4.0 mm Allen key TX20 Torx key Cutting pliers The list continues in the next step ... STEP 2 Tools and bags for this chapter Bag 4. Fasteners Bag 4. Accessories Original Prusa SL1 kit assembly...
-
Page 53: Step 3 Preparing Parts From The Package
Remember to keep all electronics in their ESD bags, until you have to assemble them to the printer. STEP 4 Cable management parts preparation For the following steps, please prepare: Zip tie (4x) Cardboard (1x) used earlier Original Prusa SL1 kit assembly... -
Page 54: Step 5 Cable Management
UV LED, which will be mounted to the circular opening in the upcoming steps. That is all for now regarding the cable management, we will continue later on in this chapter. Original Prusa SL1 kit assembly... -
Page 55: Step 7 Uv Led Parts Preparation
UV LED fan cable (1x) UV LED cable (1x) with shrink tubing (new version) with twisted wires (old version) M3x5b countersunk screw (8x) Note that the UV LED cables have the same properties, only difference is a manufacturing method. Original Prusa SL1 kit assembly... -
Page 56: Step 8 Removing The Cover
Slide the assembly up with the cables facing to the back and secure it using M3x5b countersunk screws. Tighten on a diagonal to ensure proper seating of the assembly. Make sure the cables are facing to the back of the printer and no wire is pinched. Original Prusa SL1 kit assembly... -
Page 57: Step 10 Preparing The Touchscreen Parts
Place the touchscreen in the printer and secure it using two M4x10 screws. Note: The touchscreen assembly contains three cables: for the touchscreen, then Wi-Fi antenna and a speaker. Handle them with care! Original Prusa SL1 kit assembly... -
Page 58: Step 12 Preparing The Electronics
Electronics holder (1x) M3x5 screw (8x) Thermal pad (1x) There is a RED sticker on the PrusA64-SL1 board, don't peel it off! STEP 13 Glueing the thermal pad Before you continue, please clean the bent part of the holder with IPA cleaning pad. -
Page 59: Step 14 Inserting The Electronics Holder
Remember to touch the boards only at the edges, avoid touching the chips or capacitors. Both boards have to be connected before assembling them to the printer. Look for the connectors on both boards. Carefully connect the boards together, make sure the pins are properly aligned. Original Prusa SL1 kit assembly... -
Page 60: Step 16 Connecting Wi-Fi & Speaker
Be careful, you might damage the electronics if your tool slips. Tip: For more convenient installation, you can also lay the printer on its right side, but make sure no wire is pinched or any part deformed. Original Prusa SL1 kit assembly... -
Page 61: Step 18 Cable Management Parts Preparation
Proceed carefully, some cables and connectors are fragile and you might damage them. LED UV cable PSU power cable Tower motor (labelled "W") Tilt motor (labelled "T") Resin sensor cable Continue in the next step... Original Prusa SL1 kit assembly... -
Page 62: Step 21 - Connecting The Electronics
Continue in the next step... STEP 21 Connecting the electronics Optical sensor (labelled "O") Filtration fan Right blower fan UV LED cooling fan (labelled "U") Power panic LCD screens will be connected in separate steps. Original Prusa SL1 kit assembly... -
Page 63: Step 22 Removing The Protective Film
Preparing the print display parts For the following steps, please prepare: Print display assembly (1x) M4x14b countersunk screws (10x) Be careful with the cable while assembling the display. Make sure it doesn't get pinched or bent. Original Prusa SL1 kit assembly... -
Page 64: Step 24 Inserting The Print Display In The Printer
Use the M4x14b countersunk screws to fix the LCD back in place. Don't tighten them, first make sure the LCD is seated properly. Now, tighten all 10 screws firmly, but with a reasonable force. You might strip the screw. Original Prusa SL1 kit assembly... -
Page 65: Step 26 Display Cable Holder Parts Preparation
Make sure the cable is facing to the "front" and not stuck between the reflector and the electronics holder. Secure the print display cable with the printed part. Be careful while tightening the M3x8 screws. Original Prusa SL1 kit assembly... -
Page 66: Step 28 Connecting The Touchscreen (New Version)
Gently pull out the black safety latch. Note that it is not removable. Insert the cable from the touchscreen. Make sure the cable is straight and not twisted. Lock the cable in place by pushing the safety latch back. Original Prusa SL1 kit assembly... -
Page 67: Step 30 Final Check
Make sure no cable is near the edge or overlapping on the left side of the printer. This will avoid pinching any cable after adding the cover. Tie together the USB & Power, optical and touchscreen cables. Original Prusa SL1 kit assembly... -
Page 68: Step 33 Preparing The Cover Parts
Slide the cover half-way to the printer and stop, we need to connect the front USB and power button first. Look from above in the front cover and connect the USB & Power cable. Make sure the safety pin "clicks" Original Prusa SL1 kit assembly... -
Page 69: Step 35 Assembling The Cover
Resin tank screw (2x) M4x8rt Torx screw (22x) FEP film (1x) STEP 37 Preparing the resin tank frame Take the resin tank frame (orientation doesn't matter) and push through four M4x8rt Torx screws in the corners. Original Prusa SL1 kit assembly... -
Page 70: Step 38 Preparing The Fep Film
STEP 39 Preparing the resin tank frame Carefully place the FEP film on the frame and on the screws, use them to stretch and align the film. Carefully rotate the frame upside down. Original Prusa SL1 kit assembly... -
Page 71: Step 40 Inserting The Torx Screws
Final tightening of the screws, but BE CAREFUL. If the Torx tool slips, you might damage your FEP film. Pro tip: Turn the tank upside down to its "normal position" and fill it with tap water to its max level. Watch the tank and ensure no water is leaking. Original Prusa SL1 kit assembly... -
Page 72: Step 43 Installing The Resin Tank
Remove the protective film from the print display. Insert the tank in the printer and secure it using two screws. STEP 44 Preparing acrylic lid parts For the following steps, please prepare: Acrylic lid (1x) Lid hinge (2x) M4x8b countersunk screws (4x) Original Prusa SL1 kit assembly... -
Page 73: Step 45 Mounting The Acrylic Lid
Slide the print platform back in and secure it using the knob. The platform is now still able to move (wobble on the cantilever), it is ok. Final tightening will be done during the calibration process by adjusting the marked screw(s). Original Prusa SL1 kit assembly... -
Page 74: Step 47 Haribo Time
Immediately eat the third row and take a short break ;) STEP 48 Final check ...and it's done! Great job ;) Your Original Prusa SL1 is fully assembled. Follow the next chapter to calibrate the printer and run first print Preflight check... -
Page 75: Preflight Check
5. Preflight check Original Prusa SL1 kit assembly... -
Page 76: Step 1 Printer Calibration
Never service the printer with the resin inside! Spilling the resin inside the printer will most probably end up damaging the SL1. Be careful! Never look inside the printer during the calibration of the screen or UV LED. There is a risk of PERMANENT DAMAGE to your eye(s). -
Page 77: Step 3 - Setup Wizard
Take look from above the printer. Your eye level needs to be above, not in front. Otherwise, you won't be able to judge the result correctly. Check the entire screen, you must be able to see our company logo in full. No parts (letters) should be missing. Original Prusa SL1 kit assembly... -
Page 78: Step 7 - Setup Wizard
That is why for now, you need to rotate the platform. Don't touch the printer during the procedure. STEP 11 Setup Wizard 9 To fully utilize the printer's features, we recommend setting your local timezone. Set the values and hit "Continue" Original Prusa SL1 kit assembly... -
Page 79: Step 10 - Setup Wizard
Rotate the tank by 90° on the printer. Behind the scenes: We will use the tank to calibrate the tilting mechanism. The tank will work as a levelling tool to set the tilt horizontal. Press "Continue" Original Prusa SL1 kit assembly... - Page 80 Resin tank Printing display Printing platform Press "Continue" WARNING: Do not clean the FEP film with isopropyl alcohol! Use a combination of warm water and a dishwashing product. Original Prusa SL1 kit assembly...
-
Page 81: Step 22 - Calibration
Open the lid and take a look inside the printer, make sure the edges of the platform and the tank are parallel. Press "Continue" STEP 23 Calibration 11 Tighten firmly one or both screws on the cantilever to finish the adjustment. Press "Continue" Original Prusa SL1 kit assembly... -
Page 82: Step 24 - Finalising The Calibration
See our free 3D Printing Handbook - prusa3d.com/3dhandbookSL1 Your printer is already calibrated and ready for printing. Read the Handbook to learn all about the first steps with resins, printing or connecting the SL1 to the network. Original Prusa SL1 kit assembly... -
Page 83: Step 27 Printable 3D Models
Printable 3D models Printable models are included with the printer, you can download them directly from our servers using the printer's menu. List of the models for the SL1 is available on PrusaPrinters.org. Look for collection "SL1 Sample Objects" by Prusa Research. -
Page 84: Manual Changelog Sl1
Manual changelog SL1 Original Prusa SL1 kit assembly... -
Page 85: Step 1 Versions History
Manual changelog SL1 STEP 1 Versions history Versions of the SL1 manual: 07/2019 - Initial version 1.00 08/2019 - Updated to version 1.01 10/2019 - Updated to version 1.02 STEP 2 Changes to the manual (1) 08/2019 - 2. Base & Tower Assembly procedure of the reflector adjusted for easier installation. -
Page 86: Step 2 - Changes To The Manual
Manual changelog SL1 STEP 3 Changes to the manual (2) 09/2019 - 2. Base & Tower New M4w washer added to further improve the grounding between the parts. New revision of the Optical IR-sensor introduced. Functionality is the same. The assembly procedure remains the same as well. - Page 87 Notes:...
- Page 89 Notes:...
- Page 91 Notes:...
Need help?
Do you have a question about the SL1 and is the answer not in the manual?
Questions and answers