Table of Contents
Advertisement
Quick Links
Advertisement
Table of Contents

Subscribe to Our Youtube Channel
Related Manuals for NSA MTFDC-84RC


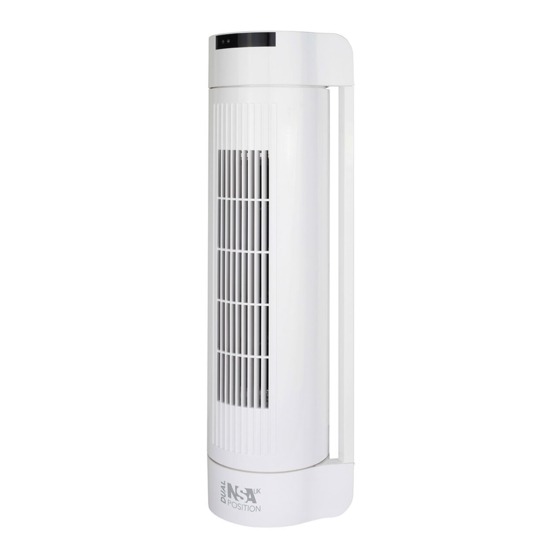
Summary of Contents for NSA MTFDC-84RC
- Page 1 Dual Position Midi Tower Fan with DC motor User manual www.nsauk.com...
- Page 2 Welcome With a clear focus on new technologies, innovation and design, NSA played a leading role in the Air Improvement industry for over 20 years. uses the latest technologies to maximise consumer benefits with energy saving DC motors and cordless rechargeability at the forefront.
-
Page 3: Table Of Contents
Contents Thank you for purchasing this Dual Position Midi Tower Fan with energy saving DC motor, LED Display, 8 speeds, 8hr Timer and Remote Control. Please read this instruction manual before using your Midi Tower Fan for the first time. Box Contents Parts Description Controls... -
Page 4: Box Contents
What’s included Fig.1 ON/OFF ON/OFF OSC C SPEED/TIME SPEED/TIMER R TIMER TIMER / / MODE E PRE SET PRE SET MUTE MUTE Included in the box you will find: 1. Dual Position Midi Tower Fan 2. Remote Control 3. CR2032 cell battery (for remote control) 4. -
Page 5: Parts Description
Parts Description Front view 1. LED Display Screen & RC Receiver 2. Front Grille (Air outflow) 3. Oscillation Base (in Vertical position) 4. Oscillation Base (in Horizontal position) & Carry Handle 5. Fan casing - front panel Fig.2 Side view 6. -
Page 6: Controls
Controls Manual controls 1. On / Off 2. Speed (increase only) / Hours (increase only) 3. Timer / Pre-Set Timer 4. Oscillation Fig.4 Display 5. Sleep mode icon 6. Breeze mode icon 7. LED Display for Timer & Speed settings Fig.5 Remote control ON/OFF... -
Page 7: Operation Guide
Operation guide On/Off Press ON/OFF once to turn on the unit and press again to turn off. If the fan is on and the display is off – pressing the ON/OFF button once will only turn ON the display – press the ON/OFF button a second time to turn off the fan. Oscillation (OSC) Using the manual controls or the remote control, press OSC once to activate the oscillation feature, for wide distribution of air. - Page 8 Speed When first connected to the mains supply, the fan will start at Speed 1. Subsequent uses, the fan will remember the previous setting until disconnected from the mains supply. Press the Speed/Hours button on the manual controls (Refer Fig.4 - Button #2) to increase the speed to the desired level.
- Page 9 Timer With the fan ON – you can set the run time between 1 and 8 hours duration. On the manual controls [refer Fig.4], press the Timer button “3” once and then press the Speed/Hours button “2” to increase the hours to the desired setting. Using the remote control, press the Timer button once and then use the “+”...
- Page 10 Pre set timer With the fan OFF – press TIMER/PRESET button on the Remote Control or manual controls to set the delayed start between 1 and 8 hours in the same way you set the normal timer off function – see page 9. The only difference is the display shows the static clock, the number of hours until the delayed start and “h”...
- Page 11 Breeze Mode On Remote Control ONLY, press Mode button once to select Natural Breeze Mode (Speed/Airflow Variation), After pressing Mode button, use the “+” or “–“ buttons on the remote control to increase or decrease the speed setting. Use in conjunction with the timer &/or oscillation function for varied cooling.
- Page 12 Sleep Mode On the remote control ONLY, press the Mode button twice to select Sleep mode (Speed/Airflow Reduction), the “moon” symbol will be lit during the selection process, then, as for Breeze Mode, use the “+” or “–“ buttons to increase or decrease the speed setting.
-
Page 13: Remote Operation
Remote Operation The fan can be operated either manually by the control panel on the fan unit itself or by the remote control supplied with the product. NB: Mode selection can only be operated via the remote control. Fig.10 • Be sure to direct the remote control toward the receiver on the control panel. •... - Page 14 Replacing the Remote Control Battery (1pc x Lithium 3V CR2032) Lock Fig.11 Turn over the remote Install the battery into the Close the battery cover. control. Open the cover battery compartment. Ensure it clicks closed. of battery compartment Take care of the polarity ~ squeeze lock towards of the battery, which NB Please dispose of used...
-
Page 15: Cleaning & Care
Cleaning & Care • Unplug the appliance before cleaning. • Do not use any chemical-based solutions for cleaning surfaces. • Slightly moisten a cloth and then wipe off the surfaces of the fan. • In order to remove the dust from the protective fan grille use a vacuum cleaner upholstery attachment. -
Page 16: Annual Maintenance
Annual Maintenance Cleaning the Washable Drum • Unplug from the mains power supply. • Unscrew the rear grille via the single screw at the top of the grille. (Keep screw in safe place) • Push in gently and lift upwards using the lip at the top of the grille to clear the six lugs from the casing. -
Page 17: Recycling & Disposal
Recycling & Disposal The packaging of your new fan has a recycle mark on it. Please dispose of it as recycled paper or by using the “Dual System”. Please recycle The symbol on the product or on its packaging indicates that this product may not be treated as general household waste. -
Page 18: Tips & Troubleshooting
Tips & Troubleshooting 1. If the fan is ON and the display is OFF – pressing the ON/OFF button (or any button) with only turn on the display. You will then need to select the function you require eg: Oscillation, change Speeds, alter the Timer, select Mode, etc. 2. -
Page 19: Safety
Safety Check the household voltage to ensure it matches 13. Always place your fan on a firm, dry, level surface, the fan’s rated specification before using. away from curtains & blinds. Always use this devise in accordance with the 14. This fan is intended for indoor, domestic & light instructions. -
Page 20: Technical Data
Technical Data Model No: MTFDC-84RC EAN No: 5 060301 912124 Rated Power: Voltage: 220-240V ~ 50Hz Ref: IM/MTFDC84/2102/GU86AA Product Dims: 540 x 151 x 140 mm (H*W*D) N.W. 2.38kg G.W. 3.11kg © 2021 Newton Stovold Assocs Ltd GU8 6AA www.nsauk.com...
Need help?
Do you have a question about the MTFDC-84RC and is the answer not in the manual?
Questions and answers