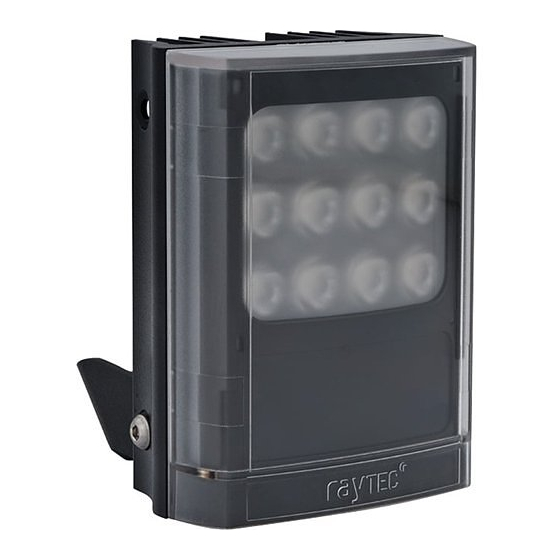
Raytec VARIO2 Instructions Manual
Hide thumbs
Also See for VARIO2:
- Full installation and setup manual (60 pages) ,
- Installation manual (36 pages) ,
- Quick setup instructions manual (21 pages)
Advertisement
Quick Links
VARIO2 REMOTE CONTROL INSTRUCTIONS
1. LED Status Indicators,
Using the Remote and
Operating Modes
2. Power Adjust
3. Photocell Sensitivity
4. Wiring of Remote Switch or
Input (Telemetry Input)
4a. Telemetry – TEL – Remote
Switching
4b. Telemetry – DIM – Remote
Dimming
4c. Timer Function
5. LED Status Indicators -
Enable/Disable
Control features
6. Restore Factory Default
7. Disable Remote Control
8. Disable Manual Buttons
9. Control Feature
10. PIN function security
11. Mechanical Details and
12. VARIO2 Remote Control -
Settings & Stored Memory
Set-up
Combinations
feature
Battery Information
Troubleshooting
Rev 2.0
1
Advertisement

Summary of Contents for Raytec VARIO2
- Page 1 4a. Telemetry – TEL – Remote 10. PIN function security Switching feature 4b. Telemetry – DIM – Remote 11. Mechanical Details and Dimming Battery Information 4c. Timer Function 12. VARIO2 Remote Control - Troubleshooting 5. LED Status Indicators - Enable/Disable...
- Page 2 Programing mode will automatically be disabled after 7 days or until the user actively disables the programming mode or 30 minutes after any press of the manual buttons VARIO2 Hybrid: Programming mode automatically disabled after 4 weeks If required: Adjust Power Press 5 for 100% power, 4 for 80%, 3 for 60%, 4 for 40% and 2 for 20% power.
- Page 3 Telemetry Input - General Wiring of Remote Switch or Input VARIO2 unit’s factory set to turn on/off automatically from Photocell. Orange and Purple Telemetry input wires are joined to mimic volt-free input (dry contact). Separate the wires to use with remote switch or input.
- Page 4 The Remote Control is designed to operate at distances up to 8 metres. The status information provided by each of these LEDs differs depending on which of the two operating modes the VARIO2 illuminator is in: (A) Programming OR (B) Normal Operating. VARIO2 Hybrid: These illuminators have different LED indicators and...
-
Page 5: Programming Mode
(see ‘Disable Remote Control Set-up’ (section 7)), or 30 minutes after any press of the manual buttons on the illuminator. VARIO2 Hybrid: Programming mode automatically disabled after 4 weeks During Programming mode, the LEDs indicate the following status:... -
Page 6: Power Adjust
VARIO2 Hybrid: Programming mode automatically disabled after 4 weeks 2. Power Adjust The power output of the VARIO2 illuminator can be adjusted between 5 pre-set levels. To select the required light intensity, use the buttons shown. Factory default = 100% power. -
Page 7: Photocell Sensitivity
Photocell disabled IMPORTANT NOTE: When the Photocell is disabled: VARIO2 / VARIO2 POE Premium: The illuminator will turn on/off from a telemetry input, regardless of ambient lighting conditions. VARIO2 POE (not premium): The illuminator is permanently on VARIO2 Hybrid: the illuminator is permanently on in either White... - Page 8 4. Wiring of Remote Switch or Input (Telemetry Input) VARIO2 is supplied with a pair of Telemetry Input Wires – Orange and Purple – which are designed to be used with a remote switch or input from an alarm system, PIR detector, control room, Video Management system or camera output.
- Page 9 Factory Default =Telemetry DIM Disabled. See detail on Telemetry input wires - section 4 VARIO2 POE (Non Premium): Using the DIM function on the remote will just cycle the power up and down continuously, until the user presses the TEL button.
- Page 10 4c. Timer Function The timer function allows the VARIO2 illuminator to be triggered ON via a telemetry input and remain on for a pre-defined period of time. There are four pre-defined times and a timer disable function. To select timer function, first press and release Telemetry TEL button, then secondly press duration of timer required as shown below.
- Page 11 5. LED Status Indicators - Enable/Disable The LED Indicators on the base of the Illuminator provide important operating and status information. (See section 1 for information on LED status indicator system). This status indicator function can be switched on and off by pressing the STATUS button.
- Page 12 10 Lux On, 30 Lux Off • Timer Disabled • Telemetry -TEL Enabled • Telemetry Input wires soldered together for automatic photocell operation of unit (VARIO2 POE Non Premium - No Telemetry wires, photocell activates automatically) • Telemetry -DIM Disabled • LED Status Indicators Enabled •...
- Page 13 Once the installer/user has finished programming the settings of the VARIO2 illuminator, they can choose to lock-in these settings by pressing the ‘Disable Remote Set-up’ button. To disable the remote control, continuously press the ‘Disable Remote Control’...
- Page 14 9. Control Feature Combinations The following features can be altered / adjusted when programmed or used together: Power Adjust Timer Photocell Sensitivity Remote Dim LED Status Indicator Note: VARIO2 POE (Non-Premium): Timer not available. VARIO2 Hybrid: Timer only available in White Light mode...
- Page 15 (RHS LED FLASHING AMBER) (You may need to press the status button first to enable the LED indicators) If not in programming mode, re-power VARIO2 illuminator. Turn power off for at least 10 seconds and then power on. If the unit has a PIN set, you will need to use the PIN number to change to programming mode.
- Page 16 Remote failure, test with new remote. If the remote is still not delivering the required performance, please contact Raytec for further assistance on +44 (0)1670 520055 or +1 613 270 9990 for Americas. Instruction Guide Part No. 0330-D-00001 Rev 2.0...


Need help?
Do you have a question about the VARIO2 and is the answer not in the manual?
Questions and answers