
Related Manuals for Pacific Scientific 6430


Summary of Contents for Pacific Scientific 6430
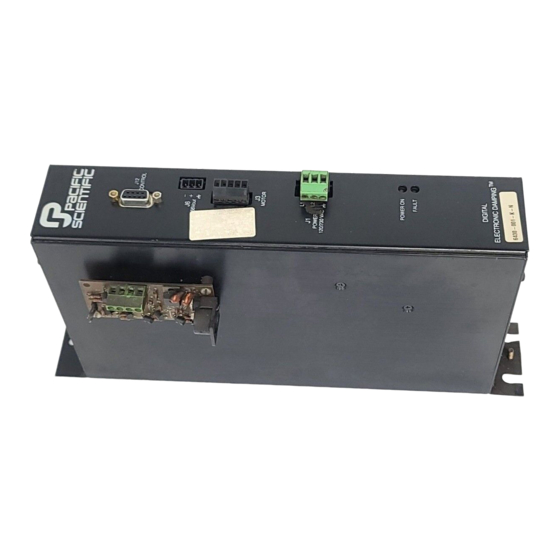
- Page 1 (217) 352-9330 | Click HERE Find the Kollmorgen / Pacific Scientific 6430-001-N-N at our website:...
- Page 2 110 Fordham Road HIGH PERFORMANCE MOTORS & DRIVES Wilmington, MA 01887 (978) 988-9800 Fax (978) 988-9940 Part# MA6430 List Price $30 U.S. January, 1999 Rev 2 M A 6 4 3 0 6 4 3 0 D r i v e Installation &...
- Page 3 This document is copyrighted by Pacific Scientific Company. It is supplied to the user with the understanding that it will not be reproduced, duplicated, or disclosed in whole or in part without the express written permission of Pacific Scientific Company.
- Page 4 (v) any party other than Pacific Scientific who modifies, adjusts, repairs, adds to, deletes from or services the Programs. This warranty for Programs is valid for a period of ninety (90) days from the date Pacific Scientific first delivers the Programs to Customer.
- Page 5 Pacific Scientific’s date of warranty. No person, including any agent, distributor, or representative of Pacific Scientific, is authorized to make any representation or warranty on behalf of Pacific Scientific concerning any Products or Programs manufactured by Pacific Scientific, except to refer purchasers to this warranty.
-
Page 6: Table Of Contents
1 Overview of the 6430 1.1 6430 Definition....... 1-1 1.2 Other System Components ......1-4 1.3 How to Use this Manual . - Page 7 4 Maintaining/Troubleshooting 4.1 Maintaining the 6430 Drive ......4-1 4.2 Troubleshooting the 6430 Drive ..... 4-1 4.2.1 Troubleshooting the Power Board.
-
Page 8: Overview Of The 6430
The output current of the 6430 is dip switch selectable from 0.625A rms (0.88A peak in microstep mode) to 5A rms (7.1 A peak in microstep mode). - Page 9 66 @ 4.6 A or 300 W ± 10%. 1 - 2 6430 Installation & Hardware Reference Manual - Rev 1 Artisan Technology Group - Quality Instrumentation ... Guaranteed | (888) 88-SOURCE | www.artisantg.com...
- Page 10 Off line 120/240 Vac - switch selects AC input. DO NOT apply 240 Vac with AC Switch in 120 Vac position. 6430 Installation & Hardware Reference Manual - Rev 1 1 - 3 Artisan Technology Group - Quality Instrumentation ... Guaranteed | (888) 88-SOURCE | www.artisantg.com...
-
Page 11: Other System Components
Installation guidelines for these components are described in Chapter 2, “Installing the 6430 Stepper Motor Drive.” 1 - 4 6430 Installation & Hardware Reference Manual - Rev 1 Artisan Technology Group - Quality Instrumentation ... Guaranteed | (888) 88-SOURCE | www.artisantg.com... - Page 12 120 - 240 Vac 60/50 Hz Power Stud Note: Your installation may vary from this configuration. 6430 Installation & Hardware Reference Manual - Rev 1 1 - 5 Artisan Technology Group - Quality Instrumentation ... Guaranteed | (888) 88-SOURCE | www.artisantg.com...
-
Page 13: How To Use This Manual
Chapter 2 and Chapter 3. 1.4 Warranty The Pacific Scientific 6430 drives have a two year warranty against defects in material and assembly. Products that have been modified by the customer, physically mishandled, or otherwise abused through miswiring, incorrect switch settings, and so on, are exempt from the warranty plan. -
Page 14: Installing The 6430
• Mounting the 6430 in your installation • Connecting input/output cables 2.1 Unpacking and Inspecting Unpacking 1. Remove the 6430 from the shipping carton. Make sure all procedure packing materials are removed from the unit. 2. Check the items against the packing list. A label located inside the chassis of the unit identifies the unit by model number, serial number, and date code. -
Page 15: Installing And Using The 6430
• Do not operate the drive without the motor case tied to earth ground. Note: This is normally done by connecting the motor’s case to J3-5 of the 6430 and connecting J1-3 of the 6430 to earth ground. These pins are marked by a symbol on the silkscreen and are shown on the diagram on page 2-4. -
Page 16: Selecting Other System Components
300 RPM, an indexer that can ramp the step frequency is required. Selecting a The 6430 is designed for use with Pacific Scientific’s line of motor hybrid stepper motors or most other 2 phase stepper motors. - Page 17 Mounting When mounting the 6430, please refer to the dimensions dimensions below: 1.12 [28.45mm] CONTROL 66Vout MOTOR POWER 120/240 VAC 12.50 [317.50mm] 11.61 [294.89mm] 10.75 [273.05mm] POWER ON FAULT 6430 6.25 0.30 0.50 [158.75mm] [7.62mm] [12.70mm] 1.24 [31.50mm] 2.25 [57.15mm]...
-
Page 18: Connecting To The 6430
MOTOR CASE ENABLED (C) GROUND ENABLED (E) 120 - 240 Vac 60/50 Hz Power Stud 6430 Installation and Hardware Reference Manual - Rev 1 2 - 5 Artisan Technology Group - Quality Instrumentation ... Guaranteed | (888) 88-SOURCE | www.artisantg.com... -
Page 19: J1 120/240 Vac Power Connector
2.5.2 J1 120/240 Vac Power Connector Introduction The J1 power connector should be used to power the 6430 from 120/240 Vac (60/50 Hz). Mating The J1 120/240 Vac power connector mates to a PCD 3-pin connector screw cable connector. - Page 20 Do not solder the tips of the cables going into the PCD connector. This can result in a loose connection. 6430 Installation and Hardware Reference Manual - Rev 1 2 - 7 Artisan Technology Group - Quality Instrumentation ... Guaranteed | (888) 88-SOURCE | www.artisantg.com...
-
Page 21: J3 Motor Connections
(SPC-xxx-6410) and K and N series stepper motors (SPC-xxx-6410-KN). Please refer to the correct diagram on the following page. Pacific Scientific If you are using Pacific Scientific E and H series motor cable, cabling diagram with the mating connectors already attached, install as follows: JACKET... - Page 22 Pacific Scientific If you are using Pacific Scientific’s K or N series stepper cabling diagram motors, install as follows: JACKET SHIELD MOTOR 16 AWG PHASES 16 AWG SHIELD CASE GND SPC - XXX - 6410 - KN 5 Pin MS Connector...
- Page 23 J3-5 Connected to the motor case (Earth) Ground ground. Mating The J3 motor connector on the 6430 mates to a 5-pin PCD connector screw cable connector. The mating cable connector is type ELVP05100. Cable The mating connector terminals will accept #16 to #18 AWG requirements wire.
- Page 24 (7 mm) A (Black) .27 in (7 mm) Note: The colors in the diagram follow the Pacific Scientific stepper motor cable color code. Procedure 1. Strip the wires to 0.27 in (7mm). 2. Attach wires to connector as indicated in the diagram.
- Page 25 Flying Lead The figure below shows the connections required between the Connection 6430 connector J3 and Pacific Scientific motors having flying leads. Connections are shown for 4 lead motors, 8 lead motors with paralleled windings, and 8 lead motors with series windings.
- Page 26 The figure below shows the connections required between the connections 6430 connector J3 and Pacific Scientific stepper motors having a terminal board in the rear end bell. Connections are shown for 4 lead motors, 8 lead motors with paralleled windings, and 8 lead motors with series windings.
- Page 27 MS connectors The figure below shows the connections required between the connection 6430 J3 connector and Pacific Scientific stepper motors having MS connectors. Connections are shown for 4 lead motors, 8 lead motors with paralleled windings, and 8 lead motors with series windings.
- Page 28 Power Max motor The figure below shows the connections required between the connections 6430 and Pacific Scientific Power Max Motors. Power Max motors have an eight pin connector and can be configured with either parallel or series windings. CONNECTOR TO J3-1...
-
Page 29: J6 External 66 Vdc Output Connector
2.5.3 J6 - External 66 Vdc Output Connection Introduction The J6 external 66 Vdc output allows the 6430 to power additional drives. Mating The J6 output connector mates to a PCD 3-pin screw cable connector connector. The mating connector, supplied with the unit, is type ELVP03100. - Page 30 6410 6410 6430 Note: If the 6430 is powering additional 6410s with J6, a total of 1000 µf (maximum) 100 Vdc aluminum electrolytic capacitor, rated for 2A ripple current or greater @ 10 KHz and 105°C, must be installed at the 6410 (as close to the 6410 as possible) if the cable length is over 3 feet.
-
Page 31: J12 Signal Interface Connector
Introduction The J12 signal interface accepts step, direction and enable signals from an indexer or other source and outputs an enabled signal which indicates the 6430 is applying current to the motor windings. J12 signal table Note: All inputs and outputs are optically isolated. - Page 32 J12-9 Output. Emitter of transistor that is on when the Emitter 6430’s power stage is active. See figure at the end of the table for timing and circuit information. Typical interface The figure on the following page shows a typical interface between the user’s electronics and the 6430.
- Page 33 SETUP TIME 50 S MIN µ DIRECTION INPUT DIRECTION DATA MUST BE STABLE OVER THIS INTERVAL 2 - 20 6430 Installation and Hardware Reference Manual - Rev 1 Artisan Technology Group - Quality Instrumentation ... Guaranteed | (888) 88-SOURCE | www.artisantg.com...
- Page 34 Voltages up to 30 volts can be used for the opto power input interface to the 6430 drive. However, a resistor must be put in series with the command inputs as shown below. Values for several common supply voltages are given in the following table.
-
Page 35: Powering Up The 6430 Drive
3 Powering Up the 6430 Drive In this chapter This chapter explains how to power up the 6430 drive after installation. Topics covered are: • Setting up functions using switch S1 and Jumper J6 • AC Switch (SW1) Settings • Testing the installation... -
Page 36: Setting Switch S1 & Jumper J6 On Drive Board
DISABLED OPEN 0.1 SEC DELAY OPEN ENABLED CLOSED 0.05 SEC DELAY OPEN 1.0 SEC DELAY 3 - 2 6430 Installation and Hardware Reference Manual - Rev 1 Artisan Technology Group - Quality Instrumentation ... Guaranteed | (888) 88-SOURCE | www.artisantg.com... -
Page 37: Step Size
Selecting a microstep size of 1/5 or smaller results in: • higher resolution • smoother low speed operation • ability to operate in low-speed resonance regions 6430 Installation and Hardware Reference Manual - Rev 1 Artisan Technology Group - Quality Instrumentation ... Guaranteed | (888) 88-SOURCE | www.artisantg.com... -
Page 38: Digital Electronic Damping Control
3 - 4 6430 Installation and Hardware Reference Manual - Rev 1 Artisan Technology Group - Quality Instrumentation ... Guaranteed | (888) 88-SOURCE | www.artisantg.com... -
Page 39: Idle Current Reduction
50%. Benefits The ICR function: • Reduces motor and drive heating during stand-by operation 6430 Installation and Hardware Reference Manual - Rev 1 Artisan Technology Group - Quality Instrumentation ... Guaranteed | (888) 88-SOURCE | www.artisantg.com... -
Page 40: Setting Motor Current
(current flows in enable opto). This allows the 6430 to be used with no connection to the enable input. With the J6 5-6 jumper installed, the enable input must be driven (current in opto) for the 6430 power stage to be enabled. -
Page 41: Setting Ac Switch On Power Board
3.2 Setting AC Switch on Power Board Introduction The AC Switch (SW1) on the 6430 power board allows the user to select 120 OR 240 Vac. Warning! Connecting 240 (230) Vac with switch in 120 (115) Vac position will permanently damage the drive. -
Page 42: Testing The Installation
The following procedure verifies that the 6430 is installed properly and that it was not damaged during shipment. Procedure After installing the 6430 as described in Chapter 2, test your installation as follows. Warning Perform this initial power up with the motor shaft disconnected from the load. - Page 43 The direction of rotation should change. Getting help If you need further assistance with your installation, please contact your local distributor. 6430 Installation and Hardware Reference Manual - Rev 1 Artisan Technology Group - Quality Instrumentation ... Guaranteed | (888) 88-SOURCE | www.artisantg.com...
-
Page 44: Maintaining/Troubleshooting
4.2 Troubleshooting the 6430 Drive Introduction The 6430 has an “enabled” output which is on when the drive is enabled and off when the drive is disabled or faulted due to any of the following: • Output overcurrent (line-to-line or line-to-neutral short) •... -
Page 45: Troubleshooting The Power Board
4.2.1 Troubleshooting 6430 Power Board Corrective action Use the following table to troubleshoot the 6430’s power table supply. SYMPTOM POSSIBLE CAUSE ACTION Motor does not 120/240 Vac switch in 240 Turn power off, correct switch turn LEDs ON position, input from 120 position. - Page 46 See Section 4.2.2 Motor stops after running Internal failure. Return to factory for service. once. 6430 Installation and Hardware Reference Manual - Rev 1 4 - 3 Artisan Technology Group - Quality Instrumentation ... Guaranteed | (888) 88-SOURCE | www.artisantg.com...
-
Page 47: Troubleshooting The Drive Board
2. Enable Digital Electronic Damping control. (S1 position 4 OFF). Check that the STEP and DIRECTION Inputs satisfy all electrical and timing requirements. 4 - 4 6430 Installation and Hardware Reference Manual - Rev 1 Artisan Technology Group - Quality Instrumentation ... Guaranteed | (888) 88-SOURCE | www.artisantg.com... - Page 48 Low = < 1 Vdc IMPORTANT NOTE! If you suspect that the 6430 drive has been damaged, DO NOT simply replace it with another and apply power. 6430 Installation and Hardware Reference Manual - Rev 1 4 - 5 Artisan Technology Group - Quality Instrumentation ... Guaranteed | (888) 88-SOURCE | www.artisantg.com...
- Page 49 Eastern Standard Time to get a Returned Materials Authorization Number (RMA#). Note: Do not attempt to return the 6430 or any other equipment without a valid RMA#. Returns received without a valid RMA# will not be accepted and will be returned to the sender.
-
Page 50: Appendix A Specifications
5 A Slo-Blo 250 Vac Drive circuit Two-phase bipolar, chopper current regulated Chopper 20 KHz, nominal frequency 6430 Installation and Hardware Reference Manual - Rev 1 A - 1 Artisan Technology Group - Quality Instrumentation ... Guaranteed | (888) 88-SOURCE | www.artisantg.com... - Page 51 (Optically isolated NPN transistor with open collector and Enabled open emitter) Maximum low level voltage while sinking 2 mA: 0.5 volts A - 2 6430 Installation and Hardware Reference Manual - Rev 1 Artisan Technology Group - Quality Instrumentation ... Guaranteed | (888) 88-SOURCE | www.artisantg.com...
- Page 52 2. With digital electronic damping control disabled, delay is less than 10 µsec at all step frequencies. 6430 Installation and Hardware Reference Manual - Rev 1 A - 3 Artisan Technology Group - Quality Instrumentation ... Guaranteed | (888) 88-SOURCE | www.artisantg.com...
- Page 53 PCD ELVH0510 connector. Mating connector: PCD ELVP05100. 66 Vdc output PCD ELVH0310 connector. Mating connector: PCD ELVP03100. A - 4 6430 Installation and Hardware Reference Manual - Rev 1 Artisan Technology Group - Quality Instrumentation ... Guaranteed | (888) 88-SOURCE | www.artisantg.com...
-
Page 54: Appendix B Ordering Information
Appendix B Ordering Information Background This appendix lists 6430 part numbers and gives information on ordering. 6430 part number table Pacific Scientific Order # Part Comment Stepper Drive 6430 Connector Kit CK6430 9-pin D connector 5-pin PCD 3-pin PCD 3-pin PCD... - Page 55 815-226-3100 from 8am to 6pm Eastern Standard Time. Write Pacific Scientific 4301 Kishwaukee Street Rockford, IL 61105 (815) 226-3048 B - 2 6430 Installation & Hardware Reference Manual - Rev 1 Artisan Technology Group - Quality Instrumentation ... Guaranteed | (888) 88-SOURCE | www.artisantg.com...
-
Page 56: Index
J1, 2-6 Enabling the drive, 3-9 J3, 2-10 J6, 2-16 Fuse selection, A-1 J12, 2-21 6430 Installation & Hardware Reference Manual - Rev 1 I - 1 Artisan Technology Group - Quality Instrumentation ... Guaranteed | (888) 88-SOURCE | www.artisantg.com... - Page 57 J1-Power, 2-6 Manual, how to use, 1-4 cable, 2-6 Microstepping, 1-2, 3-3 diagram, 2-7 procedure, 2-7 I - 2 6430 Installation & Hardware Reference Manual - Rev 1 Artisan Technology Group - Quality Instrumentation ... Guaranteed | (888) 88-SOURCE | www.artisantg.com...
- Page 58 2-17 Short circuit protection, circuitry, 1-2 connector, 2-16 diagram, 2-16 Overview, general, 1-1 6430 Installation & Hardware Reference Manual - Rev 1 I - 3 Artisan Technology Group - Quality Instrumentation ... Guaranteed | (888) 88-SOURCE | www.artisantg.com...
- Page 59 2-4, A-4 storage, 2-1, A-4 Testing, 3-8 connections, 3-8 procedure, 3-8 signals, 3-9 Troubleshooting, 4-1 I - 4 6430 Installation & Hardware Reference Manual - Rev 1 Artisan Technology Group - Quality Instrumentation ... Guaranteed | (888) 88-SOURCE | www.artisantg.com...
Need help?
Do you have a question about the 6430 and is the answer not in the manual?
Questions and answers