
Related Manuals for Pulsar N021


Summary of Contents for Pulsar N021
- Page 1 CAL. N021 DUO-DISPLAY QUARTZ l Analogue time display l Digital time and calendar l Chronograph l Data recall function l Timer l 3-channel alarm l World time function l Illuminating light (Electroluminescent panel)
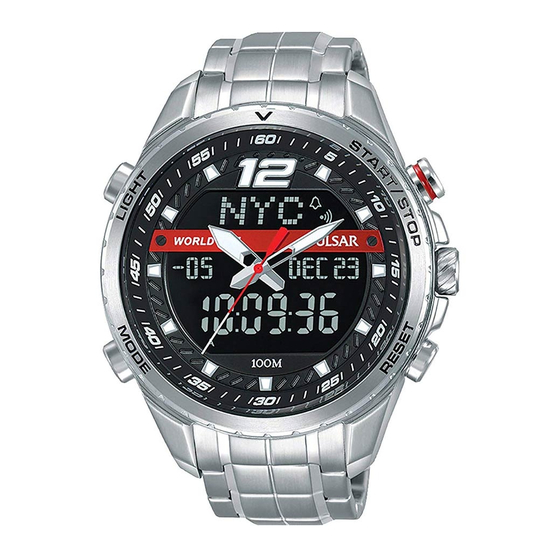
- Page 2 CROWN/BUTTONS AND DISPLAYS Day of the week Minute hand Illuminating light Date Hour hand CROWN Month Second hand a: normal position b: extended position (analogue time setting) Mode change Second Hour Minute The analogue and digital displays are separately illustrated in the following sections of this manual for the purpose of explanation.
- Page 3 MODE CHANGE With each press, the mode in the digital display changes in the following order. TIME/CALENDER mode STOPWATCH mode DATA RECALL mode ALARM mode TIMER mode WORLD TIME mode...
-
Page 4: Illuminating Light
ILLUMINATING LIGHT Press to turn the illuminating light on. Th e b u i lt- i n e l e c tro l u m i n e s c e nt b a c kl i g ht illuminates the display for approximately 3 seconds for easy viewing in darkness. - Page 5 SCREW DOWN CROWN [for models with screw down crown] Unlocking the crown 1 Turn Crown counterclockwise until you no longer feel the threads turning. 2 Crown can be pulled out. Locking the crown 1 Push Crown back into normal position. 2 Turn Crown clockwise while pressing it lightly until tight.
-
Page 6: Time/Calendar Mode
TIME/CALENDAR MODE ANALOGUE TIME SETTING Second hand CROWN Hour hand Pull out when the second hand Minute hand is at the 12 o’clock position. The second hand will stop on the spot. Tu r n t o s e t t h e h o u r a n d CROWN minute hands to the correct time. -
Page 7: Digital Time/Calendar Setting
DIGITAL TIME/CALENDAR SETTING Press to enter TIME/CALENDAR mode. Press and hold for 2 to 3 seconds to show TIME/CALENDAR SETTING display. The City Code starts flashing. Press to select the item to be adjusted (flashing). Second Hour Minute The item to be adjusted changes in the following order. - Page 8 With each press of the button C (or D ), the flashing digits increase ( or decrease). The flashing digits move quickly if the button C or D is kept pressed. Press to confirm the settings and return to TIME/CALENDAR mode. NOTES • If the watch is left untouched in the TIME/CALENDAR SETTING display with the digits/item flashing, it will automatically return to the...
- Page 9 • 12-/24-hour indication setting • When the 12-hour indication is selected, "A" indicator appears for the morning and "P" indicator appears from the afternoon. • When setting the hour digits in the 12-hour indication, check that AM/PM is properly set. • Language setting S e l e c t yo u r l a n g u a g e a m o n g E n g l i s h ( EN G ) , Fre n c h ( FR A ) , German(GER) and Spanish(SPN).
- Page 10 HOW TO HIDE THE SECOND • If you prefer a time display without second, keep pressing down the button B for four seconds in the Time/Calendar mode. HOW TO CHECK THE HOME CITY City code • To c h e c k w h i c h c i t y i s c u r r e n t l y selected, press the button D.
- Page 11 HOW TO SET THE HOURLY TIME SIGNAL • With each press of button C, the hourly time signal will be alternately engaged or disengaged. Accordingly, the hourly time signal mark will appear or disappear indicating whether the hourly time signal is ON or OFF.
-
Page 12: Stopwatch Mode
STOPWATCH MODE l The stopwatch can measure up to 99 hours 59 minutes 59 seconds and 99 in 1/100 second increments. l Up to 100 split or lap records can be taken. l The split or lap records can be recalled in DATA RECALL mode. For details, refer to "HOW TO USE THE DATA RECALL FUNCTION". - Page 13 STOPWATCH OPERATION When a new measurement is started, the perviously stored data will be automatically deleted. <Standard measurement > LAP 1 LAP 2 LAP 3 START GOAL START STOP RESET SPLIT 1 SPLIT 2 SPLIT 3 <Lap/Split time measurement> STOP START RESET LAP/SPLIT...
- Page 14 automatically returns to the ongoing measuring display. • When the total number of split or lap records reaches 100, "FULL" and "L-100" will be alternately shown on the display. After that, even if the button D is pressed, no more record will be taken. •...
- Page 15 HOW TO USE THE DATA RECALL FUNCTION l Up to 100 measurement data can be recalled. l The “ total time,” each “lap time,” “best lap time and best lap number,”and “average lap time” will be presented. l The measurement data will be stored until the next measurement is started. HOW TO RECALL MEASURED DATA Press to show DATA RECALL mode.
- Page 16 HOW TO DELETE THE DATA Press to delete all the data stored. Press and hold for 2 to 3 seconds to confirm the deletion of the data.
-
Page 17: Timer Setting
TIMER MODE l The timer can be set 10 seconds up to 99 hours 59 minutes and 59 seconds. TIMER SETTING Press to enter TIMER mode. Press and hold for 2 to 3 seconds to show TIMER SETTING display. The second digits start flashing. Press to select the item to be adjusted (flashing). -
Page 18: Timer Operation
The flashing digits move quickly if the button C or D is kept pressed. Press to confirm the TIMER setting. TIMER OPERATION Press to start the timer. Press to stop the timer. Press to reset the timer. Remember to reset the timer by pressing the button D for next use. -
Page 19: Alarm Mode
ALARM MODE l The three-channel daily alarm sounds at a designated time every 24 hours. Each alarm channel can be engaged or disengaged independently. Press to enter ALARM mode. Alarm channel Press to select an alarm channel . Press and hold for 2 to 3 seconds to show ALARM SETTING display. - Page 20 decrease). The flashing digits move quickly if the button C or D is kept pressed. Press to confirm the alarm setting and return to ALARM mode. NOTES • If the watch is left untouched in the ALARM SETTING display with the digits flashing, it will automatically return to the ALARM mode in 2 to 3 minutes.
- Page 21 Engagement/disengagement of the alarm With each press of the button C in the ALARM mode, the alarm will be alternately engaged or disengaged. When at least one alarm is engaged, the alarm mark appears on the display. Alarm mark The alarm is disengaged (OFF). The alarm is engaged (ON).
-
Page 22: World Time Mode
WORLD TIME MODE l Time in the 44 cities and regions around the world can be displayed. l Daylight saving time can also be set (except for GMT). Press to enter WORLD TIME mode. Press to select the cit y code whose local time you want to display on the watch. - Page 23 CITIES AND TIME DIFFERENCES Time Time difference difference City code City name City code City name from GMT from GMT +3.5 Teheran Lisbon Dubai London +4.5 Kabul Paris Karachi Rome +5.5 Delhi Berlin Dacca Athen +6.5 Yangon Cairo Bangkok Moscow Jakarta Jeddah Singapore...
- Page 24 Time Time difference difference City code City name City code City name from GMT from GMT Beijing Vanvouver Seoul Los Angeles Tokyo Denver +9.5 Adelaide Chicago Guam New York Sydney Montreal Goldcoast Boston Noumea Santo Domingo Wellington Buenos Aires Honolulu Rio de Janeiro Anchorage Azores...
-
Page 25: Battery Change
When the batteries expire, be sure to replace them as soon as possible to prevent any malfunction. l We recommend that you contact an AUTHORIZED PULSAR DEALER for battery replacement. l The watch is equipped with a battery life indicator that enables you to know when the battery needs to be replaced. - Page 26 l Necessary procedure after battery change After the battery is replaced with a new one, or when an abnormal display (failing digits, etc.) appears, follow the procedures below to reset the built- in IC. The watch will resume its normal operation. Press button A, B, C and D at the same time for 2 to 3 seconds until the display becomes blank, and “16-1-1 (FRI)”...
-
Page 27: To Preserve The Quality Of Your Watch
3 bar, such as acci dental a bath, shallow diving, but not for scuba diving. contact with splashes of water or rain, but it We recommend that you wear a PULSAR Diver’s is not designed for swimming or diving. watch for scuba diving. - Page 28 * Before using the water resistance 5, 10, 15 or 20 bar watch in water, be sure the crown is pushed in completely. Do not operate the crown when the watch is wet or in water. If used in sea water, rinse the watch in fresh water and dry it completely.
-
Page 29: Periodic Check
CARE OF CASE AND BRACELET MAGNETISM Y o u r w a t c h w i l l b e To prevent possible rusting of a d v e r s e l y a f f e c t e d b y the case and bracelet caused by strong magnetism.
Need help?
Do you have a question about the N021 and is the answer not in the manual?
Questions and answers