Advertisement
MODE CHANGE

 With each press, the mode in the digital display changes in the following order:

 Press in TIME/CALENDAR mode to show SINGLE-TIME ALARM mode.
SCREW DOWN CROWN
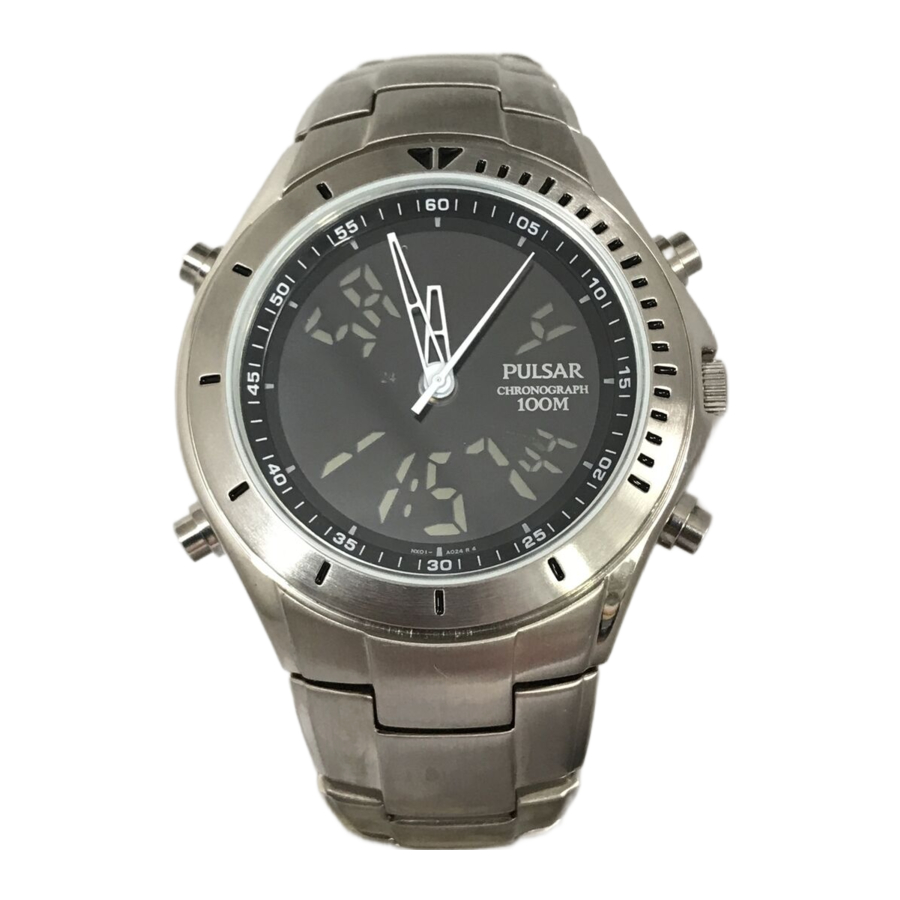
[for models with screw down crown]
Unlocking the crown

- Turn Crown counterclockwise until you no longer feel the threads turning.
- Crown can be pulled out.
Locking the crown

- Push Crown back in to normal position.
- Turn Crown clockwise while pressing it lightly until tight.
TIME/CALENDAR MODE
- Before setting the analogue time, be sure to set the digital time.
DIGITAL TIME/CALENDAR SETTING

*Selection of the digits

ANALOGUE TIME SETTING

CROWN
- Pull out when the second hand is at the 12 o'clock position.
- Turn to set the hour and minute hands.
- Push back in to normal position when the second digits count "00" in the digital time display.
CHANGEOVER OF DISPLAYS
 With each press in TIME/CALENDAR mode, the display changes in the following order:

DEMONSTRATION FUNCTION
- The watch shows the modes and displays in order.
![]() Press for 2 to 3 seconds in TIME/CALENDAR mode to start the demonstration.
Press for 2 to 3 seconds in TIME/CALENDAR mode to start the demonstration.
* The modes and displays are shown for 2 seconds in the following order:
![]()
* To stop the demonstration, press any of the buttons.

STOPWATCH MODE
- The stopwatch measures up to 24 hours in 1/100 second increments for the first hour and in 1 second increments thereafter.

 Press to show STOPWATCH mode.
TIMER MODE
- The timer can be set up to 9 hours and 59 minutes in minute increments.
- The remaining time is displayed in seconds.
 Press to show TIMER mode.
TIMER SETTING

TIMER OPERATION

* When the set time is up, a warning sound beeps for 10 seconds.
To stop it manually, press any of the buttons.
REGULAR ALARM MODE
- The regular alarm can be set to ring on a 24-hour basis.
 Press to show REGULAR ALARM mode.
REGULAR ALARM SETTING

*The regular alarm mark is automatically displayed and the regular alarm is engaged.
ENGAGEMENT/DISENGAGEMENT OF REGULAR ALARM AND HOURLY TIME SIGNAL

 With each press, the engagement/ disengagement of the regular alarm and hourly time signal are made as follows:

*At the designated time, the regular alarm rings for 20 seconds. To stop it manually, press any of the buttons.
SINGLE-TIME ALARM MODE
- The single-time alarm can be set to ring only once at the designated time. As it rings, it is automatically disengaged.
- The single-time alarm can be set in minute increments starting from the current time.
SINGLE-TIME ALARM SETTING

Press to show TIME/ CALENDAR mode.

Press to show SINGLE- TIME ALARM mode.
or  Set the desired alarm time.
Return to TIME/CALENDAR mode.
*At the designated time, the single-time alarm rings for 20 seconds. To stop it manually, press any of the buttons.
- To cancel the single-time alarm you have set, press buttons C and D at the same time in the SINGLE-TIME ALARM mode, or press button C or D to set the alarm time to the current time.
ILLUMINATING LIGHT (Electroluminescent panel)

 Press in any mode.
* The digital display is evenly illuminated for 3 seconds.
ViViDiGi
![]() is a new type of liquid crystal panel that makes possible various colors and high contrast.
is a new type of liquid crystal panel that makes possible various colors and high contrast. - Excellent light reflection and transmission make the display bright and clear.
- Various color options are available.
- Either the whole panel or the displayed data only can be illuminated.
 is a new type of liquid crystal panel that makes possible various colors and high contrast.
 *Features vary in different models.
NOTES ON USING THE WATCH
TIME/CALENDAR MODE
[DIGITAL TIME/CALENDAR SETTING]
- The calendar automatically adjusts for odd and even months including February of leap years from 1998 to 2048.
- Once the year, month and date have been set, the day of the week is automatically set.
- Setting the seconds:
- With the second digits flashing, press button D in accordance with a time signal. Thesecond digits are reset to "00".
- When the seconds count any number from "30" to "59" and button D is pressed, oneminute is added and the seconds are reset to "00".
- The flashing digits except the seconds and 12-/24-hour indication move quickly if button D is kept pressed.
- When setting the hour digits in the 12-hour indication, check that AM/PM is properly set. Only the "PM" mark is displayed. For the AM setting, there is no indication. In the 24hour indication, "24" is displayed.
- If the watch is left untouched with the digits flashing, it will automatically return to the TIME/CALENDAR mode in 1 to 2 minutes.
- Note on unusual display:
While setting the time/calendar, all the segments of the display will light up if both buttons C and D are pressed at the same time. This is not a malfunction. Press any one of the buttons to return to the TIME/CALENDAR mode, and then set the time/calendar again.
[ANALOGUE TIME SETTING]
- When setting the minute hand, first advance it 4 to 5 minutes ahead of the desired time and then turn it back to the exact minute.
STOPWATCH MODE
- Restart and stop of the stopwatch can be repeated by pressing button C.
- Even if the STOPWATCH mode is changed to another while the measurement is in progress, it continues counting properly. After the stopwatch is used, however, be sure to reset it as the battery energy is consumed enormously to shorten the battery life.
TIMER MODE
[TIMER SETTING]
- Before setting the desired time for the timer, reset the digits to "0:00'oo" by pressing button D.
- The flashing digits move quickly if button D is kept pressed.
- If the watch is left untouched with the digits flashing, it will automatically return to the TIMER mode in 1 to 2 minutes.
[TIMER OPERATION]
- Restart and stop of the timer can be repeated by pressing button C.
- Even if the TIMER mode is changed to another while the measurement is in progress, it continues counting properly. After the timer is used, however, be sure to reset it as the battery energy is consumed enormously to shorten the battery life.
REGULAR ALARM MODE
[REGULAR ALARM SETTING]
- The flashing digits move quickly if button D is kept pressed.
- If the watch is left untouched with the digits flashing, it will automatically return to the REGULAR ALARM mode in 1 to 2 minutes.
- When the time function is displayed in the 24-hour indication, the regular alarm is also displayed in the 24-hour indication.
- When setting the hour digits in the 12-hour indication, check that AM/PM is properly set. Only the "PM" mark is displayed. For the AM setting, there is no indication. In the 24hour indication, "24" is displayed.
- Regular alarm test: The regular alarm can be tested by keeping button C pressed in the REGULAR ALARM mode. After the alarm is tested, press button C to engage/disengage the regular alarm/hourly time signal as desired.
SINGLE-TIME ALARM MODE
[SINGLE-TIME ALARM SETTING]
- When button C or D is pressed to set the single-time alarm, the single-time alarm mark "1-AL" is displayed and the single-time alarm is automatically engaged.
- With each press of button C or D, one minute is advanced or moved back, respectively.
- If the watch is left untouched in the SINGLE-TIME ALARM mode, it will automatically return to the TIME/CALENDAR mode in 20 to 30 seconds.
- The single-time alarm rings differently from the regular alarm.
ILLUMINATING LIGHT (Electroluminescent panel)
- The display remains illuminated if button B is kept pressed.
- When button B is pressed in the calendar or blank display of the TIME/CALENDAR mode, the time/calendar display is shown while the display is illuminated.
- The electroluminescent panel loses its luminance as the battery voltage gets lowered. Also, its luminance level decreases gradually with use.
- When the illuminating light becomes dim, replace the battery with a new one. If the light remains dim after the battery is replaced, have the electroluminescent panel replaced with a new one by the retailer from whom the watch was purchased. It will be replaced at cost.
- While the illuminating light is used, the watch gives out a slight noise. However, this is not a malfunction.
BATTERY CHANGE

Battery life: Approx. 2 years
Battery: SEIKO SR626SW, 1 piece
(for analogue display)
SEIKO SR41W, 1 piece
(for digital display)
- The battery life may be less than 2 years if the alarm is used for more than 10 seconds a day and/or the illuminating light more than once (for 3 seconds) a day.
- Even if either of the two batteries has run down, replace both of them with new ones.
- As the batteries are inserted at the factory to check the function and performance of the watch, their actual lives once in your possession may be less than the specified period.
- When the batteries expire, be sure to replace them as soon as possible to prevent any malfunction.
- We recommend that you contact an AUTHORIZED PULSAR DEALER for battery replacement.
- Necessary procedure after battery change
After the battery is replaced with a new one or if an abnormal display (broken digits, etc.) appears, follow the procedure below to reset the IC.
Press and hold buttons A, B, C and D at the same time for 2 to 3 seconds. When the buttons are released, "12:00'00" a.m., Jan. 1st, 2000, SAT" will be displayed.
*Before using the watch, set the time/calendar and then, the alarm.

- Do not remove the battery from the watch.
- If it is necessary to take out the battery, keep it out of the reach of children. If a child swallows it, consult a doctor immediately.
- Never short-circuit, tamper with or heat the battery, and never expose it to fire. The battery may burst, become very hot or catch fire.

- The battery is not rechargeable. Never attempt to recharge it, as this may cause battery leakage or damage to the battery.
TO PRESERVE THE QUALITY OF YOUR WATCH
WATER RESISTANCE
- Non-water resistant
If "WATER RESISTANT" is not inscribed on the case back, your watch is not water resistant, and care should be taken not to get it wet as water may damage the movement. If the watch becomes wet, we suggest that you have it checked by an AUTHORIZED PULSAR DEALER or SERVICE CENTER.
![]()
- Water resistance (3 bar)
If " WATER RESISTANT " is inscribed on the case back, your watch is designed and manufactured to withstand up to 3 bar, such as acci dental contact with splashes of water or rain, but it is not designed for swimming or diving.
![]()


- Water resistance (5 bar)*
If "WATER RESISTANT 5 BAR" is inscribed on the case back, your watch is designed and manufactured to withstand up to 5 bar and is suitable for swimming, yachting and taking a shower.
![]()
- Water resistance (10 bar/15 bar/20 bar)*
If "WATER RESISTANT 10 BAR", "WATER RESISTANT 15 BAR" or "WATER RESISTANT 20 BAR" is inscribed on the case back, your watch is designed and manufactured to withstand up to 10 bar/15 bar/20 bar and is suitable for taking a bath, shallow diving, but not for scuba diving. We recommend that you wear a PULSAR Diver's watch for scuba diving.
![]()


* Before using the water resistance 5, 10, 15 or 20 bar watch in water, be sure the crown is pushed in completely. Do not operate the crown when the watch is wet or in water. If used in sea water, rinse the watch in fresh water and dry it completely.
* When taking a shower with the water resistance 5 bar watch, or taking a bath with the water resistance 10, 15 or 20 bar watch, be sure to observe the following:
- Do not operate the crown when the watch is wet.
- If the watch is left in warm water, a slight time loss or gain may be caused. This condition, however, will be corrected when the watch returns to normal temperature.
NOTE:
Pressure in bar is a test pressure and should not be considered as corresponding to actual diving depth since swimming movement tends to increase the pressure at a given depth. Care should also be taken on diving into water.
TEMPERATURES
Your watch works with stable accuracy within a temperature range of 5°C 5 and 35°C (41°F and 95°F). Temperatures over 50°C (122°F) may cause battery leakage or shorten the battery life.
Do not leave your watch in very low temperatures below –5°C (+23°F) for a long time since the cold may cause a slight time loss or gain. However, the above conditions will be corrected when the watch returns to normal temperature.

MAGNETISM
Your watch will be adversely affected by strong magnetism. Keep it away from close contact with magnetic objects.

SHOCKS & VIBRATION
Light activities will not affect your watch, but be careful not to drop your watch or hit it against hard surfaces, as this may cause damage.

CARE OF CASE AND BRACELET
To prevent possible rusting of the case and bracelet caused by dust, moisture and perspiration, wipe them periodically with a soft dry cloth.

PERIODIC CHECK
It is recommended that the watch be checked once every 2 to 3 years. Have your watch checked by an AUTHORIZED PULSAR DEALER or SERV ICE CENTER to ensure that the case, crown, buttons, gasket and crystal seal remain intact.

CHEMICALS
Be careful not to expose the watch to solvents, mercury, cosmetic spray, detergents, adhesives or paints. Otherwise, the case, bracelet, etc. may become discolored, deteriorated or damaged.

STATIC ELECTRICITY
The IC (Integrated Circuit) used in your watch will be affected by static electricity which may disturb the display. Keep the watch away from close contact with objects such as TV screens which emit strong static electricity.

PRECAUTION REGARDING CASE BACK PROTECTIVE FILM
If your watch has a protective film and/or a sticker on the case back, be sure to peel them off before using your watch.

THIS PRODUCT CONTAINS A BUTTON BATTERY

If swallowed or placed inside any part of the body, the battery can cause severe or fatal injuries within 2 hours or less.
Button batteries are hazardous whether new or used. Keep batteries out of reach of children.
If you think the battery may have been swallowed or placed inside any part of the body, seek immediate medical attention. Contact the
Australian Poisons Information Centre immediately on 13 11 26 (New Zealand 0800 764 766) for 24 / 7 fast, expert advice.
Documents / ResourcesDownload manual
Here you can download full pdf version of manual, it may contain additional safety instructions, warranty information, FCC rules, etc.
Advertisement


Need help?
Do you have a question about the NX01 and is the answer not in the manual?
Questions and answers