Toshiba LF622 Quick Start Manual
Magmeter
Hide thumbs
Also See for LF622:
- Instruction manual (160 pages) ,
- Manual (18 pages) ,
- Quick start manual (8 pages)

Related Manuals for Toshiba LF622


Summary of Contents for Toshiba LF622
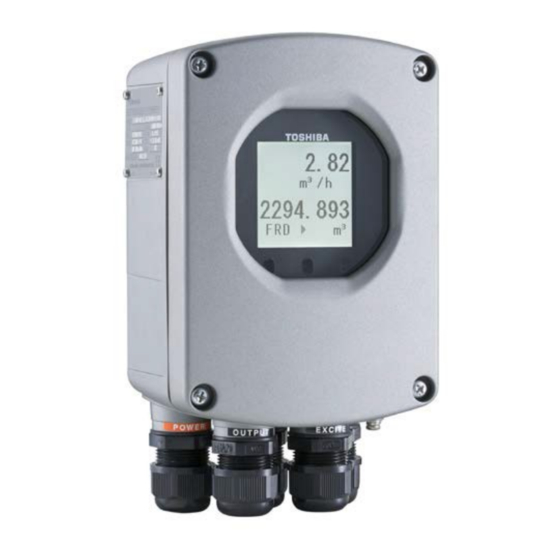
- Page 1 TOSHIBA INTERNATIONAL CORPORATION Magmeter Quick Start Guide NOTE: CHECK THE OPERATION MANUAL FOR SAFETY AND STORAGE PRECAUTIONS BEFORE INSTALLATION!! Magquickstart1_ver3...
-
Page 2: Table Of Contents
Table of Contents I. Installation and wiring………………………………………………………. 2 II. Configuration…………………………………………………………………. 2 II.I Procedure…………………………………………………………….. 3 III. Additional Set up if required………………………………………………... 6 III.1 Totalizer………………………………………………………………6 IV. Verification Check……………………………………………………………. 7 IV.1 Procedure………………………………………………………………. 7 i. Appendix A………………………………………………………………………. 8 A. Magmeter Operation Preparation…………………………………….. 8 B. Magmetger installation/Connection……………………………………9 C. -
Page 3: Installation And Wiring
Install meter in accordance to the installation instructions and wire unit according to the wiring diagrams shown in the operational manual. For signal and excitation it is preferably to use Toshiba provided cables- Cable 3A (for excitation) and Cable 2A (for signal). See Fig 1 E-(Green) -
Page 4: Procedure
Range – default set at – 2500 gal/min (Note 2. After setting up and converter and detector are connected and powered up, a verification of excitation current can be done, as a sanity check. A combine style magmeter generally needs no configuration, but is ready to go out of the box.) 11.1 Procedure After converter has been connected and power up, hold finger over the center key for 3 seconds or longer (cover don’t have to be removed) and enter code (a series of arrows) - Page 5 At the first menu A: DECTECTOR press enter Select EXC CUR and press enter (default = 0.2000 A). – Set right excitation current for detector (note 3)
- Page 6 Select SIZE and press enter (default = 6 in) – Set correct meter size and verify excitation frequency under the EXC FREQ option (note 4) Next go to menu C: RANGE and press enter Select R1 and press enter (default = 2500 gal/min)- Set desired range for meter (note 5)
-
Page 7: Additional Setup If Required
(Note 3. The excitation current of the detector is normally stamped on the small metal plate on the neck of the detector body that indicates the direction of flow. It can also be found on the calibration sheet that comes with every meter. For the LF series flow meter, size 20” and above, the excitation current remains at 0.2000 A, and the K-factor for the detector is used instead.) (Note 4. -
Page 8: Verification Check
Operation of totalizer is done by choosing the CNT option at start up- In this menu, totalizer can be Stop, Start and Reset. (Note 6. The count rate is limited to a setting range of 3.6 pulse/s to 36000 pulse/h; Automatic and manual options are available for pulse width (PLS WID) settings. -
Page 9: Magmeter Operation Preparation
i. Appendix A A. Magmeter Operation Preparation NOTE: CHECK THE OPERATION MANUAL FOR SAFETY AND STORAGE PRECAUTIONS BEFORE INSTALLATION!! System check Check the wiring between the detector and the converter Check the wiring between converter and related instruments Make sure all the bolts of the connection flanges on which the flow meter is mounted is securely tightened Make sure the direction of flow arrow is in accordance with actual flow Make sure flow meter is grounded with 100 ohm or less ground resistance. -
Page 10: Magmetger Installation/Connection
Cabling It is preferable to use the 2-conductor shielded signal cable and the 3-conductor excitation cable provided by Toshiba. Attached these securely to the detector/converter with the proper termination. (see wiring procedure in instruction manual) Note: - Cable length may not exceed 300m;... - Page 11 Use an independent ground. - If connection pipe is conductive: - Connect between the grounding terminal and both ends of the mating flanges 10 AWG copper wire. - If connection pipe is non-conductive:- Use 10 AWG copper wire to ground the terminal to a good earth ground.
-
Page 12: Mag Connect
For best protection of LF*** Converter from Lightning, Magmeter connections for connect meter tube to earth Remote Style Converters ground. Toshiba Signal Cable [2A] 2-core individually shielded conductors in rubber covered cable. Toshiba Excitation Cable [3A] 3-core 16/3 SOOW rubber covered Cable... -
Page 13: Do Connect
D. DO Connection for Magmeter Note 7. Refer to operation manual for complete DI/DO connection diagram...
Need help?
Do you have a question about the LF622 and is the answer not in the manual?
Questions and answers