Table of Contents
Advertisement
Quick Links
Advertisement
Table of Contents

Subscribe to Our Youtube Channel
Related Manuals for Parker XRF


Summary of Contents for Parker XRF
- Page 1 XRF Analyser Instruction manual...
-
Page 3: Table Of Contents
Contents About this manual Introduction Product description XRF safety Radiation safety on land Radiation safety at sea Health and Safety Chemical compatibility Technical specification Sulphur measurement precision Wear metal measurement precision Manufacturer information Spares/consumables Instrument set-up Sample preparation 10.1 Sample handling 10.2... -
Page 4: About This Manual
Note Introduction This manual covers the use and operation of the Parker Kittiwake XRF (X-Ray Fluorescence) Analyser. The instrument is rugged, compact, stable and easy to operate. Besides being able to accurately and rapidly measure the concentration of sulphur in marine fuels, it can determine the concentration of wear metals in oil. -
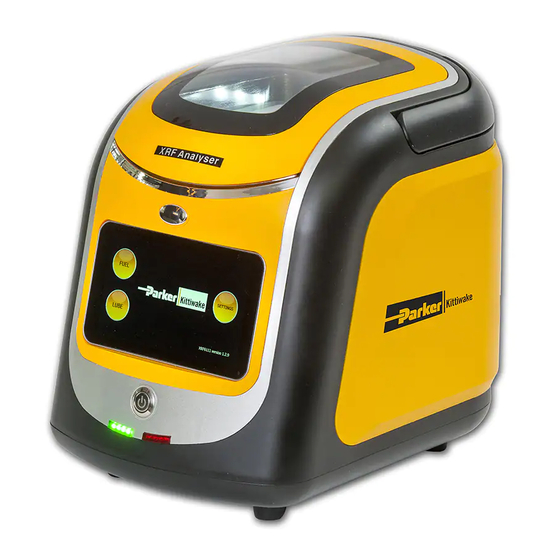
Page 5: Product Description
Product description Open lid button Screen Power on / off Warning lights USB socket Power socket... -
Page 6: Xrf Safety
While the XRF Analyser is designed to be usable without any special training or qualifica- tion, appropriate safety precautions must still be taken. If the XRF Analyser is used in any manner or for any purpose, other than that described in this manual, safety protection may be impaired. -
Page 7: Health And Safety
Keep the XRF in cool, dry conditions. • When not in use, the XRF should be stored in a secure location, under lock and key, to prevent unauthorised access and use. As well as being good practice, this may be a requirement of local regulations covering the use of ionising... -
Page 8: Chemical Compatibility
Chemical compatibility The XRF Analyser is only intended to measure liquid hydrocarbons, such as lubricating oils and fuel samples. Any liquids that are chemically incompatible with polyester may breach the Mylar film used to retain samples and destroy the X-ray detector. -
Page 9: Wear Metal Measurement Precision
± 2 Nickel ± 1 Copper ± 1 Zinc ± 4 Manufacturer information Please contact the manufacturer for service, consumables, spare parts and repairs. Parker Hannifin Manufacturing Email:kittiwakeinfo@parker.com 3-6 Thorgate Road Littlehampton BN17 7LU Spares/consumables Part no. Item Contents ACCK04001... -
Page 10: Instrument Set-Up
Instrument set-up Warning! It is critically important that the XRF Analyser is connected to the local mains power supply using the power adaptor and cable provided. Damage to internal circuitry caused by accidental use of the incorrect power supply is not covered by the warranty. -
Page 11: Constructing And Filling A Sample Cup
10.2 Constructing and filling a sample cup Liquid samples MUST be put into a prepared sample cup before being placed inside the spectrometer. Begin by setting a sample cup base on a flat surface. Extract roughly 2 ml of sample fluid using one of the supplied syringes and dispense it into the sample cup base. - Page 12 Cut off a roughly-square piece of Mylar sheet from the roll provided and lay it over the sample cup base. The subsitution of Parker-Kittiwake-supplied Mylar film with any other product (including other types of Mylar) will cause measurement inaccuracies. Identify the flanged side of a sample cup ring.
- Page 13 Press the flanged side of the sample cup ring down over the Mylar and snap it onto the sample cup base.
-
Page 14: General Maintenance And Cleaning
At this stage the sample cup can be safely inverted in preparation for insertion into the XRF Analyser. General Maintenance and cleaning Wipe the instrument body with a dry cloth to remove most oily marks. The removal of par- ticularly stubborn stains can be assisted by the use of a mild hydrocarbon solvent such as isopropyl alcohol. - Page 15 Depress the oval silver button on the front of the unit to open the lid. Undo the screw nearest the front of the XRF Analyser within the sample compartment. Lift the screw completely out of the compartment and store safely.
- Page 16 Carefully remove the existing Mylar sheet from over the detector window. Cut a square of Mylar film from the roll provided and rest it gently over the aperture.
- Page 17 Examine the Mylar film to ensure that it is free of wrinkles and tears. The XRF Analyser does not have any user serviceable parts and any attempt to dismantle the unit will invalidate the warranty.
-
Page 18: Method Of Operation
Method of operation 12.1 Switching the unit on Prior to switching the unit on, depress the oval silver button to open its lid. Place a copper target centrally over the detector aperture and reclose the lid. -
Page 19: Making A Measurement
Turn on the power switch and wait roughly 1 min for the HOME screen to appear. 12.2 Making a measurement Depress the oval silver button to open the lid and replace the copper target with the sam- ple of interest (prepared according to the instructions in section 10.2). Place the sample centrally over the detector before closing the lid. - Page 20 Press the FUEL button on the HOME screen if you wish to determine the sulphur content in a fuel or the LUBE button if you wish to determine the wear metal content in a lubricant. The unit will present a START screen. Press the PLAY button on START screen to reveal SAMPLE ID screen.
- Page 21 Press any of the fields on the right of the sample ID table to reveal a soft keyboard that can be used to change their contents. Press the ENTER key on the keyboard to complete any changes and then press OK to begin the test.
-
Page 22: User Settings
An alert will sound at the end of the test and the results will be presented. 12.3 User settings Starting from the HOME page, press the SETTINGS button to reveal the SETTINGS screen. -
Page 23: Bluetooth Printing
Press the USER SETTINGS button to show a USER SETTINGS screen. 12.4 Bluetooth printing Plug the XRF printer into a local power supply and hold down the power button for a second or two until it lights up green. - Page 24 Press the SCAN button and wait until “Qsprinter” appears as a local Bluetooth device. Press “Qsprinter” to highlight the device and then press CONNECT. Once the XRF unit and printer are connected, a blue tick will appear next to Qsprinter.
-
Page 25: Touchscreen Calibration
12.5 Touchscreen calibration Under normal circumstances there is no need to adjust the screen calibration. However, if finger presses do not correspond with activation of the underlying button, recalibration may be worthwhile. From USER SETTINGS page, press TOUCH SCREEN CALIBRATION. Carefully press and briefly hold finger on the centre of the target (cross). -
Page 26: Initialisation (Init.)
11.1). However, the following procedure may be used to re-initialise a running unit as an alternative to switching it on and off. Depress the oval silver button on the XRF Analyser to open its lid. Place a copper target centrally over the detector aperture and reclose the lid. -
Page 27: History
Use upward or downward finger strokes to highlight the desired year, month, day, hour and minutes and press OK to return to the USER SETTINGS screen. 12.8 History From the USER settings screen, press the HISTORY option to reveal the HISTORY screen. The HISTORY screen lists out all of the test result files stored by the instrument. - Page 28 After a few seconds the instrument will report that the files have been successfully exported.
- Page 29 Once OK has been pressed, the unit will ask for confirmation that you wish to switch to USB mode (press YES). Connect the XRF Analyser to a laptop or PC using the USB port on the rear of the instrument (see Section 3). Windows will recognise the XRF Analyser as a USB mass...
- Page 30 Opening the folder to view files option will reveal the contents of the device. Open the Test history folder to reveal a file entitled All_HistoryRecord.csv. Double click on the All_HistoryRecord.csv file to open the spreadsheet.
-
Page 31: Expert Settings
Save the spreadsheet to your laptop and then disconnect the USB lead between the XRF analyser and the computer. Now press RETURN on the XRF Analyser screen to continue working with the unit. The contents of particular files can be exported by pre-selecting the corresponding tick boxes on the left of the HISTORY screen. -
Page 32: Interpretation Of Results
0.95 %, while yielding the result of 1.05 % when measured on a ship. Please note that the repeatability and reproducibility of sulphur measurements made using the Parker Kittiwake XRF Analyser are at least as good as those provided in ISO8754. A degree of result uncertainty is unavoidable. -
Page 33: Recalibration
Recalibration The XRF Analyser has been designed for long term accuracy of measurements. It is recommended that sulphur check standards are purchased and benefits from periodic recalibration to ensure the most accurate results. Contact the manufacturer for details on service and recalibration (see page 32). - Page 34 The key processes in X-ray fluorescence The two most important components of an XRF spectrometer are the vacuum tube, which generates the probing electromagnetic radiation (usually X-rays), and the detector, which responds to the X-ray photons released by the sample as a result of the radiation.
- Page 35 (Si-PIN) detector. The substantially greater cost of an SDD is justified in higher end units, such as the Parker Kittiwake XRF Analyser, by better resolution and sensitivity. An SDD is a semiconductor device built around high-resistivity silicon that absorbs X-ray photons fluoresced by the sample under consideration.
-
Page 36: Ce Declaration Of Conformity
EU Declaration of Conformity Parker Kittiwake Parker Hannifin Manufacturing Ltd, 3-6 Thorgate Road Littlehampton West Sussex BN17 7LU United Kingdom Declare that the following apparatus: Product Name: XRF Analyser Part Number XRF6111 Complies with the essential requirements of the following Directives:... - Page 38 Parker Kittiwake © 2019 Parker Hannifin Corporation 3 - 6 Thorgate Road, Littlehampton, MA-K31464-KW Rev.C West Sussex BN17 7LU United Kingdom Tel: +44 (0)1903 731470 Fax: +44 (0)1903 731480 Email: kittiwakeinfo@parker.com Web: www.parkerkittiwake.com...
Need help?
Do you have a question about the XRF and is the answer not in the manual?
Questions and answers