Table of Contents
Advertisement
Quick Links
Advertisement
Table of Contents

Subscribe to Our Youtube Channel
Related Manuals for Avnet MaaXBoard


Summary of Contents for Avnet MaaXBoard
- Page 1 MaaXBoard (AES-MC-SBC-IMX8M-G) Android User Manual V1.0...
- Page 2 The MaaXBoard single board computer (partnumber: AES-MC-SBC-IMX8M-G) and its related intellectual property are owned by Avnet Manufacturing Services. Avnet Manufacturing Services has the copyright of this document and reserves all rights. Any part of the document should not be modified, distributed or duplicated in any approach and form without the written permission issued by Avnet Manufacturing Services.
-
Page 3: Revision History
MaaXBoard-Android-UM-V1.0 Revision History Rev. Description Author Date V1.0 Initial version Sandy 20200301 http://www.avnet.me/maaxboard... -
Page 4: Table Of Contents
MaaXBoard-Android-UM-V1.0 Catalog Revision History ............................3 Chapter 1 Introduction ..........................7 Package Content ........................7 Feature List ..........................8 Chapter 2 Quick Start ..........................9 Select Image ........................... 9 Boot from SDCard ........................9 Chapter 3 Feature Configuration & Introduction ..................11 Software version ........................11... - Page 5 MaaXBoard-Android-UM-V1.0 3.7.1 Audio Devices ....................... 24 3.7.2 Play Audio ........................25 3.7.3 Volume Adjustment ....................... 27 Camera ..........................28 3.8.1 MIPI-Camera ......................... 28 3.8.2 USB Camera ......................... 29 ETH ............................30 3.10 Wi-Fi ............................. 32 3.10.1 Enable and Disable Wi-Fi ..................... 32 3.10.2...
- Page 6 MaaXBoard-Android-UM-V1.0 Technical Support ......................... 50 Warranty Conditions ............... Error! Bookmark not defined. Chapter 7 Contact Information ..............Error! Bookmark not defined. http://www.avnet.me/maaxboard...
-
Page 7: Chapter 1 Introduction
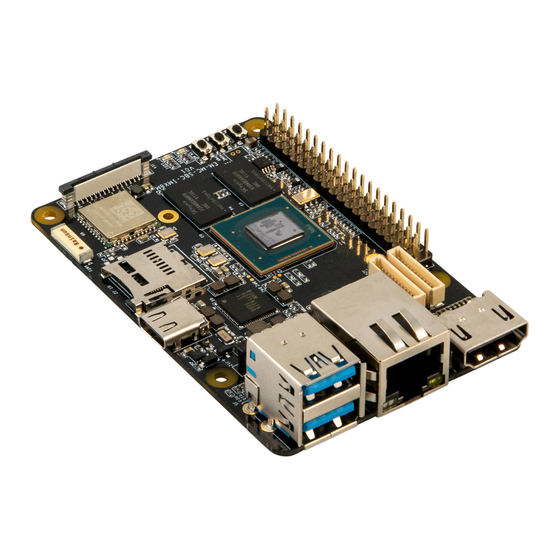
MaaXBoard-Android-UM-V1.0 Chapter 1 Introduction 1.1 Package Content The content of software release package is subject to the actual release sources. For the file structure and instructions, refer to the following table: Release Folder tree 01Doc Description MaaXBoard-Android- Release Note ReleaseNote-Vxx.pdf MaaXBoard-Android- UserManual-Vxx.pdf... -
Page 8: Feature List
MaaXBoard-Android-UM-V1.0 1.2 Feature List U-Boot version: 2018.03 Kernel version: 4.14.78 Evaluation image Android P(9) Development based on NXP i.MX 8M Micro SD boot 1 Gigabit Ethernet (RJ45) 2 USB 3.0 can work in Host & Device mode 2 UART (TTL) include debug port External interfaces (I2C, UART, SPI, SAI and GPIO) WIFI &... -
Page 9: Chapter 2 Quick Start
MaaXBoard-Android-UM-V1.0 Chapter 2 Quick Start The default version of MaaXBoard supports boot up from SD Card only. To burn the OOB image to SD Card, refer to Chapter 4. For the hardware connection and accessories details, please check the QSG. - Page 10 MaaXBoard-Android-UM-V1.0 ◼ Connect HDMI displayer to J9, users may need to connect USB mouse and keyboard as well. ◼ Connect MIPI-DSI screen to J16 Insert the SD card (with pre-burned image) into the card slot J2. Powered the board with a 5V, 2A, Type-C interface power (to J4).
-
Page 11: Chapter 3 Feature Configuration & Introduction
This section will use MIPI-DSI screen version as example, it introduces how to configure or use each function of MaaXBoard in Android OS. If you are using an HDMI displayer, the basic operation is consistent, while the screen direction might be different. Most HDMI display screens don't have the touch screen function;... -
Page 12: Developer Options
MaaXBoard-Android-UM-V1.0 3.2 Developer options 3.2.1 Enable Developer options The develop options screen is hidden by default, to make it visible, go to “Setting” -> “System” -> “About tablet” and tap “Build number” for 7 times. When you tap the option, it will prompt: You are now x steps away from being a developer. -
Page 13: Common Important Options
MaaXBoard-Android-UM-V1.0 3.2.2 Common Important Options Developers options include some important settings, while ordinary users may not need this, it’s very important for developers, such as: Stay awake USB debugging Default USB configuration Input Drawing Apps http://www.avnet.me/maaxboard... -
Page 14: Usb Debug
MaaXBoard-Android-UM-V1.0 3.3 USB Debug In Android development, we often use the USB debug mode to connect development board. There are many kinds of USB Debug applications on PC. Here we will with Android ADB and WIN10 as an example, to introduce how to use the USB debugging capabilities. -
Page 15: Connect To Device
MaaXBoard-Android-UM-V1.0 3.3.2 Connect to device 1. After system set up, connect USB0 (the lower one in USB interface J5) to PC, Windows will detect Universal serial bus device: EM_SBC_IMX8M. 2. Then set the default USB connection to File Transfer in Developer options: Note: You may need to execute this step each time connect the device. -
Page 16: Start And Connect Adb
MaaXBoard-Android-UM-V1.0 3.3.3 Start and Connect ADB Run command line tool in Windows, go to the path of adb tool, execute adb devices to know what device instances are connected to the adb server. D:\work\platform-tools>adb devices * daemon not running; starting now at tcp:5037... -
Page 17: Install An App
MaaXBoard-Android-UM-V1.0 D:\work\platform-tools>adb shell em_sbc_imx8m:/ $ su em_sbc_imx8m:/ # ls acct init.environ.rc init.usb.rc sdcard data init.rc init.zygote32.rc postinstall storage bugreports default.prop init.recovery.freescale.emmc.rc init.zygote64_32.rc proc cache init.recovery.freescale.rc lost+found product system charger init.recovery.freescale.sd.rc ueventd.rc config init init.usb.configfs.rc sbin vendor em_sbc_imx8m:/ # exit em_sbc_imx8m:/ $ To exit an interactive shell, press Control + D or type exit. -
Page 18: Copy Files To/From A Device
MaaXBoard-Android-UM-V1.0 package:com.example.android.livecubes package:com.android.internal.display.cutout.emulation.double package:com.android.providers.telephony package:com.android.providers.calendar …… package:com.shenyaocn.android.usbcamera 2. Uninstall the app Execute commands: adb uninstall package name For example: Search the package name for the app in above result, such as com.shenyaocn.android.usbcamera: D:\work\platform-tools>adb uninstall com.shenyaocn.android.usbcamera Success 3.3.8 Copy files to/from a device Use the pull and push commands to copy files to and from a device. -
Page 19: Button
MaaXBoard-Android-UM-V1.0 3.4 Button MaaXBoard support 3 physical buttons: BACK, HOME and PWR. 3.4.1 PWR Short press PWR button, system will enter sleep mode, press PWR again, the system will resume from sleep mode. Long press PWR, it will prompt 3 option on the right side of screen, “Power off”, “Restart”, and “Screenshot”. -
Page 20: Back & Home
MaaXBoard-Android-UM-V1.0 In screen “Settings” -> “System” -> “Gestures”, enable option “Jump to camera”, then you can open the system application: “Camera” quickly by press PWR twice. 3.4.2 BACK & HOME HOME: Back to HOME page BACK: Back to last screen 3.4.3 Virtual Button... -
Page 21: Display
MaaXBoard-Android-UM-V1.0 3.5 Display 3.5.1 Displayer MaaXBoard Android system supports 2 kinds of displayer: HDMI and MIPI-DSI screen. Users can connect the screen to MaaXBoard, select corresponding system image before boot up the system according to the following table. Resolution Screen Type... -
Page 22: Display Settings
MaaXBoard-Android-UM-V1.0 3.5.2 Display Settings Go to “Settings” -> “Display” to configure displayer. In this screen, user could adjust Brightness level, Sleep, Font size, Display size, Screen saver, etc. You can also adjust brightness level by slide down from the top of screen. -
Page 23: Touch Screen
MaaXBoard-Android-UM-V1.0 3.6 Touch Screen MIPI-DSI screen support multi-touch function, tap the screen to operate the system. ⚫ In Developer options screen, enable “Show taps” to display taps when you touch the screen. A circle appears under your finger or stylus and follows you as you move around the screen. -
Page 24: Audio
HDMI audio. Connect the audio output device, you can play audio from HDMI device. 3.7.1.2 USB AUDIO DEVICE MaaXBoard could support USB audio device (which do not need specified driver) to play audio. Connect USB audio device to USB 1, you can play audio from USB audio device. 3.7.1.3 BLUETOOTH AUDIO MaaXBoard also support play audio files via the Bluetooth audio device such as Bluetooth headset and speaker. -
Page 25: Play Audio
MaaXBoard-Android-UM-V1.0 3.7.2 Play Audio Copy wav or mp3 files to a U-disk, connect it to USB1, then open “Settings” -> “Storage” -> “SanDisk USB drive”, double click the audio file to play it. http://www.avnet.me/maaxboard... - Page 26 MaaXBoard-Android-UM-V1.0 You can also copy the audio file to the Music folder of Android internal storage, open “Music” application to play the music. http://www.avnet.me/maaxboard...
-
Page 27: Volume Adjustment
MaaXBoard-Android-UM-V1.0 3.7.3 Volume Adjustment Go to “Settings” -> “Sound”, drag the volume bar to adjust it. http://www.avnet.me/maaxboard... -
Page 28: Camera
MaaXBoard-Android-UM-V1.0 3.8 Camera MaaXBoard support USB Camera and MIPI-CSI Camera. 3.8.1 MIPI-Camera Connect the Camera module to J16 before system boot up. The Android system provide a Camera application, which could be used with MIPI Camera to catch photos. 3.8.1.1 PREVIEW AND CATCH PHOTOS 1. -
Page 29: Usb Camera
MaaXBoard-Android-UM-V1.0 3. Click the option button in the lower right corner to use the delay-catch mode and show gridlines in preview pictures. 4. The path of the photos: /sdcard/DCIM/Camera 3.8.1.2 RECORD VIDEO(TBD) In current version, the Audio input device is not supported yet, so MIPI camera could not record video. -
Page 30: Eth
MaaXBoard-Android-UM-V1.0 3.9 ETH Connect the network cable to J13, after connecting the network cable, MaaXBoard will automatically obtain the IP by default. You can use the ifconfig command to view the IP information and use the following command to perform the network test:... - Page 31 MaaXBoard-Android-UM-V1.0 You could also use the “WebView Browser Tester” APP to browse website. Input the address in the address bar. http://www.avnet.me/maaxboard...
-
Page 32: Wi-Fi
MaaXBoard-Android-UM-V1.0 3.10 Wi-Fi The on-board Wi-Fi module support 2.4G/5G network and hotspot. 3.10.1 Enable and Disable Wi-Fi There are 2 kinds of way to enable and disable the Wi-Fi, the first one is to click the Wi-Fi icon in the system drop-down box http://www.avnet.me/maaxboard... - Page 33 MaaXBoard-Android-UM-V1.0 You also could open the Wi-Fi at Settings APP, steps as below: http://www.avnet.me/maaxboard...
-
Page 34: Connect The Wi-Fi Network
MaaXBoard-Android-UM-V1.0 3.10.2 Connect the Wi-Fi Network Click the Wi-Fi, enable “Use Wi-Fi”, it could auto scan the available Wi-Fi networks, click the network you want to connect and input the password, then you could using the Wi-Fi network. http://www.avnet.me/maaxboard... -
Page 35: Delete The Network
MaaXBoard-Android-UM-V1.0 3.10.3 Delete the network Click the network details, and click the FORGET key. http://www.avnet.me/maaxboard... -
Page 36: Wi-Fi Hotspot
MaaXBoard-Android-UM-V1.0 3.10.4 Wi-Fi Hotspot Before using the Hotspot, you must disconnect the Wi-Fi, and connect the cable to the Ethernet interface. Then start the Settings APP and click into the “Network & internet” to start the configuration of Wi-Fi Hotspot 1. -
Page 37: Bluetooth 4.2
MaaXBoard-Android-UM-V1.0 3.11 Bluetooth 4.2 3.11.1 Start Bluetooth There is 2 ways to open the Bluetooth, first way is the Bluetooth icon of the system drop-down box http://www.avnet.me/maaxboard... - Page 38 MaaXBoard-Android-UM-V1.0 1. Another way is using Settings APP, start the APP , go to the Connected Device , Connection preferences in proper sequence and slide the key to “ON”, then the Bluetooth is enabled. http://www.avnet.me/maaxboard...
-
Page 39: Scan And Connect The Bluetooth Devices
MaaXBoard-Android-UM-V1.0 3.11.2 Scan and Connect the Bluetooth Devices Click the Pair new device, system could scan the Bluetooth device, click the device you want connect in the available devices list. The board support the Bluetooth earphone, sound box and mobile phone... -
Page 40: Led
User can control the 2 single color LED indicators, LED0 and LED1 (corresponding to usr_led and sys_led) on MaaXBoard Board. Execute the following instructions in terminal to control them. Users could also write their own applications to control the LED. -
Page 41: Uart2
MaaXBoard-Android-UM-V1.0 In default, you are login with ordinary account permission, if you need permission for root, type su command: em_sbc_imx8m:/ $ ls sdcard ls: sdcard: Permission denied 1|em_sbc_imx8m:/ $ su em_sbc_imx8m:/ # ls sdcard Alarms DCIM Movies Notifications Podcasts Android Download Music Pictures Ringtones 3.13.2 UART2... -
Page 42: Storage
MaaXBoard-Android-UM-V1.0 3.14 Storage The system image size is 16GB, to query storage amount, go to “Settings” -> “Storage”. In this screen, you can also “FREE UP SPACE” or use “Storage manger” to manage storage. If you need to write or read files from the storage, use Files app. - Page 43 MaaXBoard-Android-UM-V1.0 Insert a U-disk to USB1, system will mount the storage device automatically. In drop-down list, it will display as follows: Users could open U disk to explore the files or eject the U-disk. In “Settings” -> “Storage” screen, you will find portable storage...
-
Page 44: Usb Device
Connect USB0 and PC before power on the board. The system will not boot normally, it will enter burning mode. Then users could burn the system image to the development board using uuu tools. For the detail information, refer to MaaXBoard EMMC burning Guide. http://www.avnet.me/maaxboard... - Page 45 MaaXBoard-Android-UM-V1.0 3.15.2.2 TRANSFER FILES Start up the system, then connect USB0 and PC, open default USB configuration option in Developer options. 1. Choose “File Transfer” The device manager on the computer will show portable device: EM_SBC_IMX8M, open computer, you will find EM_SBC_IMX8M.
- Page 46 MaaXBoard-Android-UM-V1.0 Open EM_SBC_IMX8M, users could edit all the files / folders under /sdcard of the board. 2. Choose “PTP” EM_SBC_IMX8M will be listed in device manager and computer. Users could visit /sdcard/Pictures and /sdcard/DCIM on the board, edit the files / folders.
-
Page 47: Chapter 4 Burn Or Update The System Image
1. Firstly, you should prepare a SD card, which is no less than 16GB. 2. Then, download and install “Win32 Disk Imager” from: https://sourceforge.net/projects/win32diskimager/. 3. Select the system images file: eg: MaaXBoard-AndroidShipmentImage-SDcard-MIPI-V1.0.2r03.img 4. Click “Write” button to burn the images: http://www.avnet.me/maaxboard... -
Page 48: Burn The System Image To Sd Card Under Android Os
USB0 (The lower one in USB interface HUB1) support burning mode. Connect USB0 and PC before power on the board. The system will enter burning mode. Then users could burn the system image to the development board using uuu tools. For the detail information, refer to MaaXBoard EMMC burning Guide. http://www.avnet.me/maaxboard... -
Page 49: Chapter 5 Appendix
5.1 Hardware For the detail hardware introduction, please refer to MaaXBoard Hardware User Manual. 5.2 Software MaaXBoard support Linux Debian system and Android system, for the detail software introduction, please refer to related user manual. Linux MaaXBoard Linux Software Release Note... -
Page 50: Chapter 6 Technical Support And Warranty
MaaXBoard-Android-UM-V1.0 Chapter 6 Technical Support 6.1 Technical Support To receive technical support, please post any questions you may have to the forum on https://www.avnet.me/maaxboard or contact your local Avnet FAE. http://www.avnet.me/maaxboard...
Need help?
Do you have a question about the MaaXBoard and is the answer not in the manual?
Questions and answers