Advertisement
Quick Links
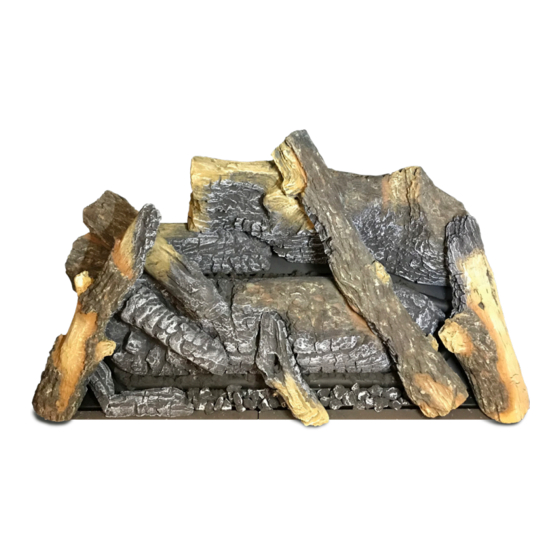
CLASSIC WOOD LOGS WITH EMBER AND
FOR USE ON FG00002 (SRF40) FIREPLACE
INSTALLATION INSTRUCTIONS
WARNING
If the information in these instructions are not
followed exactly, a fire or explosion may result
causing property damage, personal injury or
loss of life.
— Do not store or use gasoline or other
flammable vapors and liquids in the
vicinity of this or any other appliance.
— WHAT TO DO IF YOU SMELL GAS
•
Do not try to light any appliance.
•
Do not touch any electrical switch;
do not use any phone in your
building.
•
Leave the building immediately.
•
Immediately call your gas supplier
from a neighbor's phone.
Follow the gas supplier's
instructions.
•
If you cannot reach your gas
supplier, call the fire department.
— Installation and service must be
performed by a qualified installer,
service agency or the gas supplier.
INSTALLER: LEAVE THIS MANUAL WITH THE COMPLIANCE.
CONSUMER: READ AND KEEP THIS MANUAL FOR REFERENCE
Printed in Canada
BLACK GLOWING WOOL
AC04320
We suggest that our
gas hearth products be
installed and serviced
by professionals who
are certified in the U.S.
by the National Fireplace
Institute
®
(NFI) as NFI
Gas Specialists.
WARNING
If not installed, operated and maintained
in accordance with the manufacturer's
instructions, this product could expose you
to substances in fuel or from fuel combustion
which can cause death or serious illness.
NOTICE: Ceramic fiber logs
may differ in appearance from
those shown in this manual.
Safety tested
according to ANSI Z21.88-2017
and CSA 2.33-2017 standards
by an accredited laboratory.
46229A
2020-10-15
Advertisement

Related Manuals for Valcourt AC04320


Summary of Contents for Valcourt AC04320
- Page 1 CLASSIC WOOD LOGS WITH EMBER AND BLACK GLOWING WOOL AC04320 FOR USE ON FG00002 (SRF40) FIREPLACE INSTALLATION INSTRUCTIONS WARNING If the information in these instructions are not followed exactly, a fire or explosion may result causing property damage, personal injury or loss of life.
- Page 2 AC04320 LOG SET IDENTIFICATION INDEX LETTER PART FRONT VIEW TOP VIEW & DESCRIPTION NUMBER (A) CENTER BOTTOM 22382 (B) REAR LEFT 22383 BOTTOM LOG (C) REAR RIGHT 22384 BOTTOM LOG (D) FRONT LEFT SMALL 22385 BOTTOM LOG (E) FRONT SMALL...
-
Page 3: Log Placement
LOG INSTALLATION PREPARATION LOG PLACEMENT The positioning of logs is critical to safe and clean operation of this fireplace. Sooting and other problems may result if the logs are not properly and firmly positioned in the fireplace. BEFORE BEGINNING THE INSTALLATION: 1. - Page 4 Figure 2: Pin Locations Figure 3: Glowing embers placement WARNING Apply loose material (embers) per instruction manual. DO NOT apply extra material not supplied with this appliance. All previously applied loose material (embers) must be removed prior to reapplication. Do not cover large portswith loose material (embers). Page 4 Installation Instructions - Log Set...
-
Page 5: Log Set Placement
LOG SET PLACEMENT STEP 1. Place LOG A onto burner base pins (4) and (5) located between the front and rear burner tubes. STEP 2. Place LOG B onto burner base pins (1) located to the left behind the rear burner. Installation instructions - Log Set Page 5... - Page 6 LOG SET PLACEMENT STEP 3. Place Log C to the right behind the rear burner onto burner base pins (2) and (3). STEP 4. Place the glowing embers (A) on the top of the burner tubes, covering all ports. Then place decorative rocks (B) alongside the front burner tube on the burner base.
- Page 7 LOG SET PLACEMENT STEP 5. Place LOG D and E to the left across the front burner tube. STEP 6. Place Log F onto the lower left pin of Log A. Installation instructions - Log Set Page 7...
- Page 8 LOG SET PLACEMENT STEP 7. Place Log G onto the pin located on top left of the Log A. Page 8 Installation Instructions - Log Set...
- Page 9 LOG SET PLACEMENT STEP 8. Place log H on top right of Log C and Log A. Secure the bottom part of the log onto pin (7). STEP 9. Place Log J on top of Log G and onto the pin of the Log F. Secure the bottom part of the log onto pin (6).
- Page 10 LOG SET PLACEMENT STEP 10. Place Log I onto the pin on top right of Log C. Page 10 Installation Instructions - Log Set...
- Page 11 LOG SET PLACEMENT STEP 11. Place Log K into the front recess of Log A. Installation instructions - Log Set Page 11...
- Page 12 This document is available for free download on the manufacturer’s website. It is a copyrighted document. Stove Builder International inc. Resale is strictly prohibited. The manufacturer may update 250, De Copenhague street, this document from time to time and cannot be responsible St-Augustin-de-Desmaures (Québec), Canada for problems, injuries, or damages arising out of the use G3A 2H3...
Need help?
Do you have a question about the AC04320 and is the answer not in the manual?
Questions and answers