Table of Contents
Advertisement
Quick Links
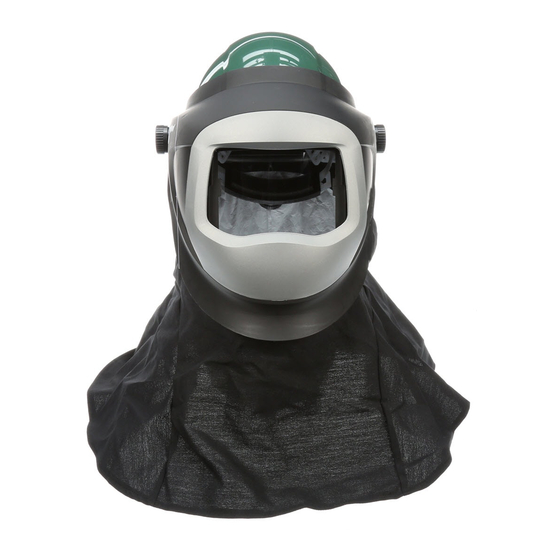
3M™ Helmet L-905 with Welding Shield
1) To reassemble the L-163 Foam Liner:
a. With the foam liner positioned such that the model number is
oriented to the front of the headgear shell, insert the foam liner into
the headgear shell. If the liner is hard to install, you are probably
inserting it backwards.
b. Reinstall the complete suspension assembly to secure the liner.
NOTE: The cut-out pockets in the foam liner must align for the
head suspension to fit into the headgear.
2) To replace the L-115 Sweat Pad:
a. Wrap the sweat pad around the headband, in the area that comes
into contact with your forehead.
b. Secure the sweat pad by closing the three snaps.
3) To replace the L-116 Head Pad:
a. Orient the head pad such that the padded surface is facing you
(so that it will be in contact with your head when installed in the
headgear).
b. Slip the head pad tabs into the four slots in the hanger suspension.
4) To replace the L-117 Hanger Suspension:
a. Place the ladder tabs in the slots on the headband, then turn the
four ladder tabs a quarter-turn.
5) To replace the L-113 Head Suspension:
a. Place the 4 mounting clips back into the slots in the headgear.
© 3M June 2006. All rights reserved.
and Wide-view Faceshield
Reassembly
L-905 - Reassembly
Advertisement
Table of Contents

Related Manuals for 3M L-905


Summary of Contents for 3M L-905
- Page 1 L-905 - Reassembly 3M™ Helmet L-905 with Welding Shield and Wide-view Faceshield Reassembly 1) To reassemble the L-163 Foam Liner: a. With the foam liner positioned such that the model number is oriented to the front of the headgear shell, insert the foam liner into the headgear shell.
- Page 2 Press the lens down so that it lies between the upper tabs and the four latches. e. Assure that the lens is seated tightly against the sides of the tabs located to the left and right of the upper post. © 3M June 2006. All rights reserved.
- Page 3 Press the flap down onto the hook and loop material. 14) Installing a Shade Glass into the welding shield: a. Grasp the wire welding lens retainer clip and pull gently in the direction of the welding shield “chin”. © 3M June 2006. All rights reserved.
- Page 4 Re-install the wire retaining clip. Make sure that the retaining clip seats itself into the two slots at the bottom of the lens opening. © 3M June 2006. All rights reserved.
- Page 5 Remove the face shield knobs. b. Remove the face shield or shields from the headgear. c. Apply the 4-inch strip of hook and loop fastener to the front of the headgear shell. © 3M June 2006. All rights reserved.
- Page 6 Insert the latch end of the breathing tube in the hole in the back of the cover. Attach the breathing tube to the headgear. b. Pull the cover over the top until the elastic covers the top of the wide-view frame. c. Reinstall the faceshield or shields. © 3M June 2006. All rights reserved.
Need help?
Do you have a question about the L-905 and is the answer not in the manual?
Questions and answers