
Related Manuals for Theben SELEKTA 171 top3 RC


Summary of Contents for Theben SELEKTA 171 top3 RC
-
Page 1: Table Of Contents
307411 02 Astronomical time switch SELEKTA 171 top3 RC 1710330 SELEKTA 172 top3 1720130 SELEKTA 172 top3 RC 1720330 1. Basic safety information 2. Proper use Disposal 3. Installation and connection 5 Connecting the time switch Connecting the cable Disconnecting the cable 4. - Page 2 Initial operation 5. Settings and functions ASTRO menu Changing the astro time/ location Setting the offset function Setting individual twilight ranges Setting the astro pulse Setting a fixed switching time (e.g. in standard program) Setting special programs Setting summer/winter time 24 Switching permanent ON/OFF 25 Setting holiday function Setting an external input...
- Page 3 Setting channel lock (only for 1720130+1720330) Channel combination (program change) Activating PIN code Setting manual control or permanent switching Hour counter Time signal can be received with appropriate top2 RC antenna (only with 1720130+1720330) 34 Using Bluetooth OBELISK top3 Connecting time switch, Blue- tooth OBELISK top3 and smart- phone (via app) Resetting the time switch...
- Page 4 6. Technical data 7. Contact...
-
Page 5: Basic Safety Information
1. Basic safety information WARNING Danger of death through electric shock or fire! Installation should only be carried out by a ¾ ¾ qualified electrician! • The device is designed for installation on DIN top hat rails (in accordance with EN 60715) •... -
Page 6: Disposal
Disposal Dispose of device in environmentally sound manner † ¾ 3. Installation and connection WARNING Danger of death through electric shock or fire! Installation should only be carried out by a ¾ ¾ qualified electrician! Mounting the time switch click... -
Page 7: Connecting The Time Switch
Minimum number of participants needed to operate the GPS antenna: • 2 x weekly timer TR 611 top3 RC, SELEKTA 171 top3 RC LUNA 121–122 top3 RC each with 50 mA feed, or • 1 x weekly timer with 50 mA feed plus 1 x top2 GPS... - Page 8 SELEKTA 171 top3 RC SELEKTA 172 top3 4 5 6 L Ext1 – + Ext1Ext2 Data RC DCF RC GPS 1 2 3 1 2 3 SELEKTA 172 top3 RC 4 5 6 – + Data RC DCF 1 2 3...
-
Page 9: Connecting The Cable
Connecting the cable Correct connection required for smooth function of the † ¾ zero-cross switching Strip cable to 8 mm (max. 9) † ¾ Insert cable in the open DuoFix plug-in terminal at 45° † ¾ L 2 cables per terminal position possible To open the DuoFix plug-in terminal, press screwdriver †... -
Page 10: Device Description
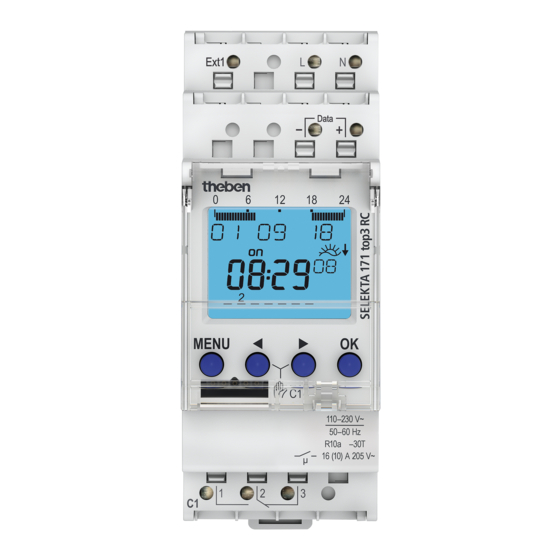
4. Device description Display and buttons Programmed ON Display of times sunrise/ sunset Date display Time display DCF antenna display Weekday from Channel status 1–7 C1, C2 Display of active buttons with the respective functions ¾ OK ¾ MENU MENU ... -
Page 11: Operating Instructions
Operating instructions 1. Read text line Text/symbol represents query 2. Make a decision Modify/ Confirma- Change tion Press OK Press... -
Page 12: Overview Of Navigation Menu
Overview of navigation menu MENU ASTRO PROGRAM TIME/DATE ASTRO CHANNEL C1 TIME TIMES STANDARD SET DATE TOTAL SPECIAL 1 SIMULATION SU-WI ASTRO PROG OFFSET WEEK DAY SPECIAL 2 ON ASTRO DATE MODE SPECIAL 3 OFF FORMAT ASTRO TIME TOTAL TIME FORMAT SIMULATION LOCATION EASTER DATE... -
Page 13: Initial Operation
Initial operation MENU GERMAN COUNTRY ENGLISH COORDINATES ESPANOL FRANCAIS GERMANY STUTTGART DATE FORMAT SPAIN BERLIN YEAR ESTONIA BREMEN MONTH FRANCE DRESDEN GREAT BRITAIN DUESSELDORF TIME FORMAT HOUR MINUTE SU-WI EUROPE 28 10 18 9:40 Set language, country, town/city, date, time as well as †... -
Page 14: Settings And Functions
Press any button and follow on-screen instructions (see † ¾ picture). 5. Settings and functions L In standard setting, an astronomical time switch switches on during twilight and off during sunrise. Therefore, in most applications, only one night switch-off (e.g. from 22:00 to 06:00) has to be programmed –... - Page 15 • Offset The offset (correction value) can be used to shift the calculated astro times by +/– 120 min. This means that the astro turn-on and turn-off times can be adapted to local conditions (e.g. mountains, high buildings etc.) or to personal requirements.
-
Page 16: Changing The Astro Time/Location
Changing the astro time/location MENU ASTRO ASTRO TIMES TOTAL SIMULATION OFFSET ASTROMODE ASTRO TIME LOCATION COUNTRY COORDINATES FRANCE AJACCIO SPAIN BAYONNE ESTONIA BORDEAUX GERMANY BREST GREAT BRITAIN CAEN E.g. enter a different country, a different town/city Press MENU (see picture). †... -
Page 17: Setting The Offset Function
Setting the offset function MENU ASTRO ASTRO TIMES TOTAL SIMULATION OFFSET CHANNEL C1 OFFSET OFFSET ASTROMODE MORNING EVENING OFFSET OFFSET MORNING EVENING 00:00 00:00 Press MENU † ¾ Select ASTRO and press OK to confirm † ¾ Select OFFSET and press OK to confirm †... - Page 18 MENU ASTRO ASTRO TIMES TOTAL SIMULATION OFFSET ASTRO MODE ASTRO TIME CHANNEL C1 SUNSET TWILIGHT DARKNESS Press MENU † ¾ Select ASTRO and press OK to confirm † ¾ Select ASTRO TIME, confirm with OK † ¾ Select CHANNEL, confirm with OK †...
-
Page 19: Setting The Astro Pulse
Setting the astro pulse Suited for blinds and roller blinds control, etc. MENU ASTRO ASTRO TIMES CHANNEL C1 ASTROMODE EVENINGS ON MORNINGS EVENINGS AND PULSE ASTRO PULSE MORNINGS PULSE MORNINGS DURATION 0:01 Press MENU † ¾ Select ASTRO and press OK to confirm †... -
Page 20: Setting A Fixed Switching Time (E.g. In Standard Program)
Setting a fixed switching time (e.g. in standard program) MENU PROGRAM CHANNEL C1 STANDARD FREE 84 SPECIAL 1 NIGHT LIGHT CHECK ASTRO PROG BREAK MODIFY HOUR DELETE MINUTE Starting time MONDAY DURATION UNTIL Copy switching time to Switching COPY SAVE other days of the week. -
Page 21: Setting Special Programs
L There are 84 memory cells available Press MENU † ¾ Select PROGRAM, confirm with OK † ¾ Select CHANNEL, confirm with OK † ¾ Select STANDARD, confirm with OK † ¾ Select NEW, confirm with OK † ¾ Select NIGHT BREAK or LIGHT ON and press OK to confirm †... - Page 22 L The public holiday set is set via app, or OBELISK software. L 24:00 is programmed as 00:00 of the following day. Holidays depending on Easter in Germany Holiday days before/after Easter Sunday Start Monday before Lent – 48 –47 Good Friday –...
- Page 23 • Special program 2 Permanent ON – ¾ Always on during the programmed date areas – ¾ Example: The standard program switches on lighting of a neon advertising sign only at night. The special program switches on the neon advertising sign per- manently during a promotion week from 2018-04- 17, 9:00 until 2018-04-24, 18:00.
- Page 24 MENU PROGRAM CHANNEL C1 STANDARD NIGHT BREAK SPECIAL 1 ASTRO PROG SPECIAL 2 ON DURATION LIGHT DURATION NEW DATE FREE 84 FIXED DATE DAYS BEFORE/ CHECK SET AFTER EASTER DATE EVERY YEAR MODIFY DATE START YEAR DELETE SET START MONTH DATE START DAY END YEAR...
-
Page 25: Setting Summer/Winter Time
Setting summer/winter time MENU TIME/DATE TIME SET DATE SU-WI SU-WI EUROPE WEEK DAY SU-WI GB/ IRL/P SU-WI FIN/ GR/TR Press MENU † ¾ Select TIME/DATE and press OK to confirm † ¾ Select SU-WI and press OK to confirm † ¾... -
Page 26: Switching Permanent On/Off
Switching permanent ON/OFF MENU MANUAL CHANNEL C1 PERM ON PERM OFF OVERR ON TIMER HOLIDAY Press MENU † ¾ Select MANUAL, confirm with OK † ¾ Select CHANNEL, confirm with OK † ¾ Select PERM ON or PERM OFF and press OK to confirm †... -
Page 27: Setting Holiday Function
Setting holiday function MENU MANUAL CHANNEL C1 PERM ON PERM OFF OVERRIDE OFF TIMER HOLIDAY BEGIN HOLIDAY END HOLIDAY Press MENU † ¾ Select MANUAL, confirm with OK † ¾ Select CHANNEL, confirm with OK † ¾ Select HOLIDAY, confirm with OK †... -
Page 28: Setting An External Input
Setting an external input For the channel, an EXT INPUT (see figure) can be set with different functions. 3 sub-menus can be selected: not active, button (function), switch (function) • NOT ACTIVE: The external input has no function • BUTTON: Manual (manual control), timer (countdown timer), and staircase light timer switch are selectable •... - Page 29 MENU OPTIONS OPERATING EXT INPUT HOUR CHANNEL C1 NOT ACTIVE BUTTON OVERRIDE STAIRCASE LIGHT SWITCH TIMER PERM ON PERM OFF ONLY ASTRO TIMER HOUR MINUTE...
-
Page 30: Setting Channel Lock (Only For 1720130+1720330)
Setting channel lock (only for 1720130+1720330) There are situations where two channels must not be swit- ched at the same time! The channels can be interlocked in this case. L The channel lock can prevent both channels from swit- ching on at the same time. L This prevents damages at consumers, e.g. -
Page 31: Channel Combination (Program Change)
MENU OPTIONS OPERATING HOUR LCD LIGHTING CHANNEL CHANNEL LOCK COMBINATION LANGUAGE NOT ACTIVE PROGRAM CHANGEOVER FACTORY SETTINGS INFO Channel combination (program change) The channel combination reduces maintenance for wear to the lamps and also allows energy to be saved. 1. Astronomical switch-on at sunset 2. - Page 32 3. Changing the channel that is switched off each week/day, to use the consumers evenly. 4. Switching both channels back on in the morning, switching off astronomically at sunrise.
-
Page 33: Activating Pin Code
Activating PIN code The PIN code is set in OPTIONS via the menu. L If you have forgotten your PIN, please call the Theben Hotline. L Have the serial number of the device ready! MENU OPTIONS OPERATING HOUR CHANNEL COMBINATION... -
Page 34: Setting Manual Control Or Permanent Switching
Setting manual control or permanent switching Manual control or permanent switching can be set via the menu in MANUAL or (in the automatic display) by button combination (see picture). • Manual control: Reversing the channel status until the next automatic or programmed switch. -
Page 35: Hour Counter
Hour counter The operating hours of the channel (relay) are displayed and deleted in the OPTIONS menu. If the number of operating hours exceeds the value set in the Service menu, SERVICE will appear in the display. Example: Replace a lamp after 5,000 h. Delete operating hours or set a higher value in Service (e.g. - Page 36 Adjusting of time zones After successful synchronisation, the time zone can be altered in the TIME/DATE menu option. In the TIME menu (display: MODIFY HOUR) correct the † ¾ applicable local time (time zone). Ext1 DCF transmission signal reception: DATA Display: Day + Month + RC (Radio Control) No reception of the DCF...
-
Page 37: Using Bluetooth Obelisk Top3
Using Bluetooth OBELISK top3 All functions can also be transferred to the time switch using the Bluetooth OBELISK top3 memory card (9070130). Copy OBELISK → TIME SWITCH This copies the switch programme and optionally all time switch settings (e.g. time format, etc.) from the memory card to the time switch. -
Page 38: Connecting Time Switch, Bluetooth Obe- Lisk Top3 And Smartphone (Via App)
OBELISK BLUETOOTH COPY COPY TIME CHECK OBELISK -> SWITCH -> OBELISK OBELISK TIME SWITCH OBELISK OVERWRITE COPY ALL DATA COPY PROGRAM Connecting time switch, Bluetooth OBE- LISK top3 and smartphone (via app) The devices in the top3 range can be programmed using an app (for Android, iOS) on a mobile end device. - Page 39 Open the app and activate using one of the 3 commands, † by pressing "Download" , "Manual command" "Upload" ▻ Device/device list appears on the display. Device/device list appears on the display. Device/device list appears on the display. Press "Connect" †...
-
Page 40: Resetting The Time Switch
Now, for example, projects can be created and uploaded. Now, for example, projects can be created and uploaded. Now, for example, projects can be created and uploaded. Resetting the time switch Press the 4 buttons simultaneously † ▻ Now, you can choose between RETAIN PROGRAMS and DELETE PROGRAMS... - Page 41 6. Technical data Operating voltage: 230 V AC, +10% / –15% (1720130) 110 – 230 V AC (1720130+1720330) Frequency: 50–60 Hz Standby: < 0.4 W (1720130) 0.8 W (1720130+1720330) Max. switching capacity: 16 A (at 250 V AC, cos ϕ = 1) Switching capacity: 10 A (at 250 V AC, cos ϕ...
- Page 42 – Range: 15 m on open air test site L The time switch display is only fully functional at temperatures from –20 °C ... +55 °C. 7. Contact Theben AG Hohenbergstr. 32 72401 Haigerloch GERMANY Phone +49 7474 692-0 Fax +49 7474 692-150...
Need help?
Do you have a question about the SELEKTA 171 top3 RC and is the answer not in the manual?
Questions and answers