Advertisement
Available languages
Available languages
Quick Links
Advertisement

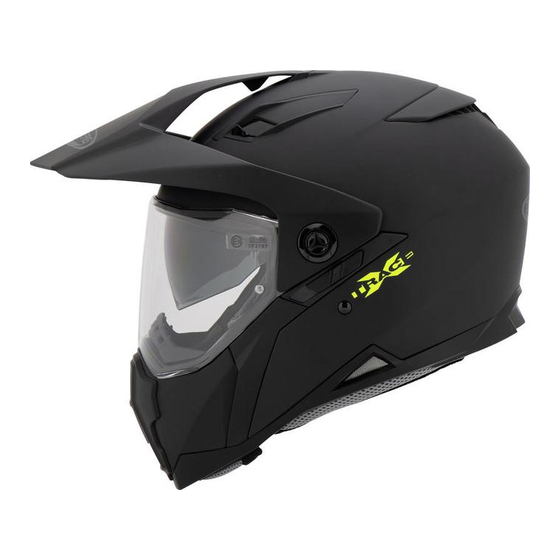
Summary of Contents for Caberg XTRACE
- Page 1 TOURMAX...
- Page 3 Italiano pag. 4-5 ................................English pag. 6-7 ................................Deutsch pag. 8-9 ..............................Français pag. 10-11 ..............................Español pag. 12-13 ...............................
- Page 4 1. SOSTITUZIONE FRONTINO E VISIERA 1.1 Ruotare in senso antiorario la vite visiera A (Fig.1) e rimuoverla insieme alla relativa rondella in plastica si- tuata tra frontino e visiera. 1.2 Ripetere l’operazione dal lato opposto. 1.3 Svincolare il frontino dal fermo centrale(Fig.2). 1.4 Svincolare la visiera.
- Page 5 del casco fino a sganciare i bottoni di fissaggio posti sul retro e sfilare l’intero guanciale, quindi ripetere l’o- perazione anche nell’altro lato (Fig.6). 4.2 Partendo dal paranuca sganciare la fodera eserci- tando una leggera trazione verso l’interno del casco (Fig.7) fino a svincolare il telaietto di fissaggio posterio- re C.
- Page 6 1. HOW TO REMOVE THE AND FIT THE PEAK AND VISOR 1.1 Rotate counter clockwise the visor screw A (Pic.1) and remove it with its own plastic washer placed between peak and visor. 1.2 Follow the same step on the other side of helmet. 1.3 Release the peak from the shell central locking (Pic.
- Page 7 pulling slightly towards the inside of the helmet (Pic.7) until release the fixing plastic frame in the rear C. Still pulling gently, release also the fixing plastic frame in the front D (Pic.8). 4.3 Remove completely the lining. 5. HOW TO FIT THE WASHABLE LINING 5.1 Place the main liner padding inside the helmet.
- Page 8 1. ANLEITUNG ZUM WECHSEL DES KLAREN VISIERS UND SCHILD 1.1 Drehen Sie die Visierschraube gegen den Uhrzeigersinn A (Abb.1) und entfernen Sie diese mit der dazugehörigen Kunststoffscheibe zwischen Schild und Visier platziert. 1.2 Wiederholen Sie den Vorgang auf der anderen Seite. 1.3 Lösen Sie das Scild aus der Zentralverrieglung (Abb.
- Page 9 4.1 Das Wangenpolster langsam herausnehmen, indem man die Druckknopfe löst. (Abb. 6) 4.2 Ausgehend vom NackenPolster, entfernen Sie das Futter durch leichtes Ziehen in Richtung der Innensei- te des Helms (Abb.7), danach lösen Sie die Befesti- gungspunkte Hinten C und Vorne D (Abb. 8). 4.3 Entfernen Sie das Futter jetzt vollständig.
- Page 10 1. INSTRUCTIONS DEMONTAGE/MONTAGE VISIERE ET ECRAN TRANSPARENT 1.1 Tourner la vis de l’écran A (fig. 1) dans le sens contraire des aiguilles d’une montre, la retirer en même temps que la rondelle en plastique située entre la visière et l’écran. Répéter l’opération du coté...
- Page 11 4.1 Enlever la mousse de joue en la tirant vers l’intérieur du casque jusqu’à déclancher les boutons de fixage placés à l’arrière et défiler la mousse. Ensuite répéter l’opération de l’autre côté (fig. 6). Détacher l’intérieur à partir du pare nuque par une petite traction vers l’intérieur du casque (fig.
- Page 12 1. MONTAJE/DESMONTAJE DE LA PANTALLA TRANSPA- RENTE Y PANTILLA 1.1 Girar en sentido antihorario el tornillo de la pantalla A (Fig.1) y sacarla junto con la arandela de plástico situada entre la pantalla y la visiera. Repetir la acción en el lado contrario. Sacar la visiera del freno central (Fig.2).
- Page 13 El desmontaje de los interiores puede iniciarse indistintamente por la mentonera izquierda o por la derecha. 4.1 Extraer la mentonera tirando hacia la parte interna del casco hasta desenganchar el clip de fijacion de la parte interior. Repetir la operacion con la mentonera del otro lado. (Fig. 6) Partiendo del paranuca, desencajar el interno de la calota del casco ejerciendo una ligera presion hacia el interior del casco (Fig.7) hasta desencajar la lenguata trasera C.Con-...
- Page 14 fig. 1 fig. 2 fig. 3 fig. 4 fig. 5 fig. 6...
- Page 15 fig. 7 fig. 8 fig. 9 fig. 10 fig. 11 fig. 12 fig. 13...


Need help?
Do you have a question about the XTRACE and is the answer not in the manual?
Questions and answers