Advertisement
Available languages
Available languages
Quick Links
Advertisement

Related Manuals for Caberg DUKE EVO


Summary of Contents for Caberg DUKE EVO
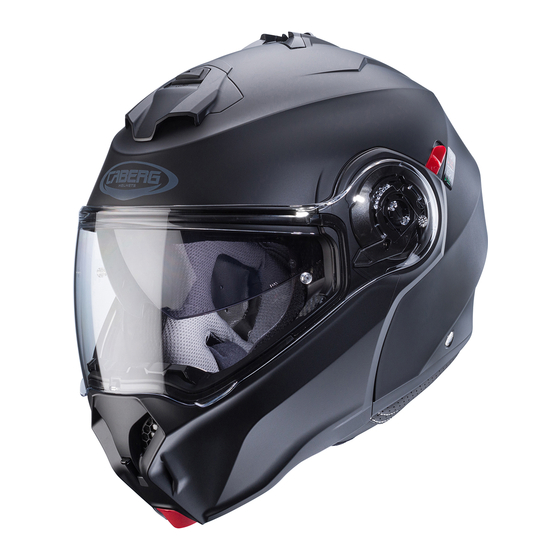
- Page 1 FLIP-UP DUKE EVO...
- Page 2 GENERAL INSTRUCTIONS FOR COMMUNICATION DEVICES SPECIFIC TO DUKE EVO MODELS ALLGEMEINE ANWEISUNGEN FÜR DIE SPRECHANLAGEN, DIE SPEZIFISCH FÜR DIE MODELLE DUKE EVO INSTRUCCIONES GENERALES DE LOS DISPOSITIVOS DE COMUNICACIÓN ESPECÍFICOS PARA LOS MODELOS DUKE EVO INSTRUCTIONS GÉNÉRALES DISPOSITIFS DE COMMUNICATION SPÉCIFIQUES DES MODÈLES ET DUKE EVO CABERG JUST SPEAK EVO (A8596) - CABERG PRO SPEAK EVO (A9235) 1.
- Page 3 4. Se il comunicatore è dotato di centralina BT separata, 5. Applicare il tastierino sul lato sinistro (casco indossato), alloggiarla nella tasca predisposta ricavata nella parte posteriore a circa 30 mm dal bordo inferiore della calotta mediante della calotta interna. l’utilizzo dell’apposito adesivo fornito.
- Page 4 Il casco DUKE EVO , grazie alla doppia omologazione P/J può essere utilizzato in 2 configurazioni (mentoniera chiusa “P” e mentoniera aperta “J”) Leva P/J Quando la leva P/J viene posizionata in “J” è possibile bloccare la mentoniera in posizione sollevata (fig.1) La selezione “J”...
- Page 5 5. ISTRUZIONI SMONTAGGIO FODERA INTERNA LAVABILE Per lo smontaggio della cuffia interna potete iniziare indifferentemente dal guanciale destro o sinistro. 5.1 A mentone alzato rimuovere il guanciale sganciando i bottoni di fissaggio posti sul retro, quindi ripetere l’operazione anche sull’altro guanciale. (Fig.9) 5.2 Estrarre il guanciale sfilandolo dal cinturino sottogola attraverso l’asola, quindi ripetere l’operazione anche sull’altro guanciale.
- Page 6 Your helmet DUKE EVO thanks to the double homologation P/J can be used in 2 configurations (chinguard closed “P” and chinguard open “J”) Lever P/J When the P/J lever is positioned on “J” it is possible to block the chinguard in the open position ( Pic.1).
- Page 7 5. HOW TO REMOVE THE WASHABLE INNER LINER You can start to remove the internal padding from either the right or left cheek. 5.1 With the chin guard raised, remove the cheek pad by releasing the snap fasteners on the back. Then repeat for the other side (Pic. 9). 5.2 Extract the cheek pad by pulling it from the chin strap through the slot.
- Page 8 Ihr Helm DUKE EVO kann durch die doppelte Homologation P / J in 2 Einstellungen verwendet werden (Kinnschutz geschlossen “P“ und Kinnschutz offen “J“) Hebel P / J Wenn der P / J - Hebel auf “J“ steht, ist es möglich, den Kinnschutz in der offenen Position zu blockieren (Abb.
- Page 9 4.1 Wiederholen Sie die Schritte 1.1. 4.2 Schraube B lösen (Bild 8). 4.3 Kinnschutz entfernen. Wiederholen Sie die obigen Schritte in umgekehrter Reihenfolge, um den Kinnschutz wieder in seine ursprüngliche Position zu bringen. ACHTUNG: Benutzen Sie den Helm niemals ohne den Kinnschutz. 5.
- Page 10 Le casque DUKE EVO grace à sa double homologation P/J peut être utilisé en 2 configurations (mentonière fermé ‘P’ et mentonière ouverte ‘J’). Levier P/J Quand le levier P/J vient positionné sur ‘J’ est possible bloquer la mentonnière en position soulevée (fig.1).
- Page 11 4.3 Détacher la mentonnière ouvrable. Pour remonter le menton ouvrable, faites ces opérations dans le sens contraire. ATTENTION! Ne pas utiliser le casque sans sa mentonnière. 5. INSTRUCTIONS POUR LE DEMONTAGE DE L’INTERIEURE LAVABLE Pour le démontage de la coiffe intérieure, vous pouvez commencer par l’oreillette droite ou gauche. 5.1 Quand la mentonnière est levée, enlevez une oreillette en détachant les boutons de fixation qui se trouvent à...
- Page 12 El casco DUKE EVO, gracias a la doble homologación P/J puede ser utilizado en dos configuraciones (mentón cerrado P y mentón abierto J). Pestaña P/J Cuando la pestaña P/J se posiciona en J es posible boquear el mentón enla posición indicada fig1.
- Page 13 5. INSTRUCCIONES PARA DESMONTAR ELFORRO INTERIOR LAVABLE Para desmontar el forro interior se puede empezar indistintamente por la almohadilla derecha o izquierda. 5.1 Con la mentonera alzada retirad la almohadilla, desenganchándola. del botón de fijación colocado en la parte posterior, repetir la misma operación con la otra almohadilla (Fig.
- Page 14 Fig. 1 Fig. 2 Fig. 3 Fig. 4 Fig. 5 Fig. 6 Fig. 7 Fig. 8...
- Page 15 Fig. 9 Fig. 10 Fig. 11 Fig. 12 Fig. 13 Fig. 14 Fig. 15...
- Page 16 COD. D1835 DUKE EVO CABERG SPA via Emilia,11 24052 Azzano S.Paolo (BG) ITALY...
Need help?
Do you have a question about the DUKE EVO and is the answer not in the manual?
Questions and answers