cytiva Amersham ImageQuant 800 User Manual
Hide thumbs
Also See for Amersham ImageQuant 800:
- Operating instructions manual (130 pages) ,
- Quick start manual (2 pages)
Table of Contents
Advertisement
Quick Links
Advertisement
Table of Contents

Related Manuals for cytiva Amersham ImageQuant 800


Summary of Contents for cytiva Amersham ImageQuant 800
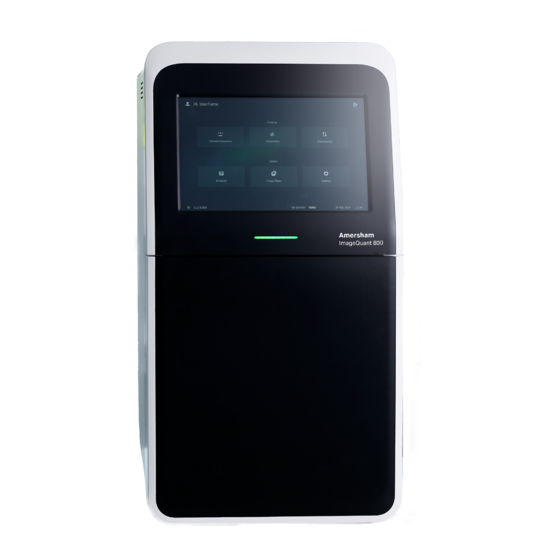
- Page 1 Amersham ImageQuant 800 User Manual Amersham ImageQuant 800 cytiva.com...
-
Page 2: Table Of Contents
System Preparation .................... 9 Amersham ImageQuant 800 control software ................10 2.1.1 Introduction ..............................11 2.1.2 Start the Amersham ImageQuant 800 control software ............12 2.1.3 System settings ............................. 16 2.1.4 Account management ..........................22 Amersham ImageQuant CONNECT ...................... 29 2.2.1... - Page 3 Table of Contents Index ........................... 107 Amersham ImageQuant 800 User Manual 29383813 AB...
-
Page 4: Introduction
This chapter contains important user information and a general description of the Amersham™ ImageQuant™ 800 and its intended use. In this chapter Section See page About this manual The Amersham ImageQuant 800 instrument Amersham ImageQuant 800 User Manual 29383813 AB... -
Page 5: About This Manual
1.1 About this manual About this manual About this manual The Amersham ImageQuant 800 User Manual provides instructions for setting up the Amersham ImageQuant 800 system, performing image capture, and handling image files using the Amersham ImageQuant 800 control software and Amersham ImageQuant CONNECT software. - Page 6 Note: A note is used to indicate information that is important for trouble-free and optimal use of the product. Tip: A tip contains useful information that can improve or optimize your proce- dures. Amersham ImageQuant 800 User Manual 29383813 AB...
-
Page 7: The Amersham Imagequant 800 Instrument
The Amersham ImageQuant 800 instrument About the Amersham ImageQuant The Amersham ImageQuant 800 is an imaging instrument designed to detect and quantify proteins, DNA, and other biological samples, such as bacterial colonies. A cooled 8.3 megapixel CCD camera is used to capture high resolution digital images of electrophoretically separated protein and DNA bands in gels or membranes obtained through blotting methods. - Page 8 1.2 The Amersham ImageQuant 800 instrument Light source Emission wavelength White Epi 470 to 635 nm White Trans 470 to 635 nm A fully equipped filter turret in the Amersham ImageQuant 800 instrument contains the following emission filters: Emission filter Data 525BP20 Cy3(UV) 605BP40...
-
Page 9: System Preparation
This chapter provides information on how to start and set up the Amersham ImageQuant 800 control software and Amersham ImageQuant CONNECT software. In this chapter Section See page Amersham ImageQuant 800 control software Amersham ImageQuant CONNECT Amersham ImageQuant 800 User Manual 29383813 AB... -
Page 10: Amersham Imagequant 800 Control Software
2 System Preparation 2.1 Amersham ImageQuant 800 control software Amersham ImageQuant 800 control software About this section This section contains information on how to start the Amersham ImageQuant 800 control software, adjust settings, and manage user accounts. In this section Section See page 2.1.1... -
Page 11: Introduction
The Amersham ImageQuant 800 is operated through the Amersham ImageQuant 800 control software either via the touchscreen panel or an external monitor. For informa- tion on the installation process and how to set up the Amersham ImageQuant 800 system, refer to the Amersham ImageQuant 800 Operating Instructions (29372604). -
Page 12: Start The Amersham Imagequant 800 Control Software
Start the Amersham ImageQuant 800 control software Introduction This section contains information on how to start the Amersham ImageQuant 800 system via Amersham ImageQuant 800 control software. For information on how to set up and install the system, see Amersham ImageQuant 800 Operating Instructions (29372604). - Page 13 2 System Preparation 2.1 Amersham ImageQuant 800 control software 2.1.2 Start the Amersham ImageQuant 800 control software Step Action Tap I Agree to agree to the End User License Agreement. Note: Uncheck the Show license agreement at startup box to no longer see the End User License Agreement at startup.
- Page 14 The self-diagnostic process will normally take a few minutes. Connection to a network may take longer. Turn on the computer and log into Windows. Double click on the Amersham ImageQuant 800 control software icon to connect to the instrument. If Login is turned On, enter your Username and Password.
- Page 15 Home screen will display. Note: The default time until the instrument enters sleep mode is 30 minutes. To change this setting, refer to the Amersham ImageQuant 800 Operating Instructions (29372604). Amersham ImageQuant 800 User Manual 29383813 AB...
-
Page 16: System Settings
To adjust the focus for a specific imaging mode, follow the steps below. Step Action Open the imaging mode being used. Note: In this example, Chemiluminescence imaging mode is used. Open the Settings tab. Select Focus from the left side of the screen. Amersham ImageQuant 800 User Manual 29383813 AB... - Page 17 Note: Focus changes will only affect the selected image capture mode. If the user changes to another mode, for example, Fluorescence, the focal distance will still be set to the default setting. Amersham ImageQuant 800 User Manual 29383813 AB...
- Page 18 2 System Preparation 2.1 Amersham ImageQuant 800 control software 2.1.3 System settings Screen display If an external monitor is being used to control the Amersham ImageQuant 800 instru- ment, the screen settings can be changed in the Settings tab. Function Function...
- Page 19 Select whether the Focus is automatic, or manually set a fixed focal distance. Select whether the Correction is calculated automatically, or manually apply a set correction file. Note: For more information on correction file, see Image correction files, on page Tap Save. Amersham ImageQuant 800 User Manual 29383813 AB...
- Page 20 2.1.3 System settings Check filter information The Amersham ImageQuant 800 holds seven filters. These can be either system filters, or custom filters. The installed filters depend on the system configuration. A list of installed filters and their specifications can be seen by tapping the Filter specs button.
- Page 21 Tap Save. To make the folder the default save location, tap the check box next to the folder name and tap Make default. Result: The default symbol will appear next to the selected folder. Amersham ImageQuant 800 User Manual 29383813 AB...
-
Page 22: Account Management
Turn off password protection By default, the Amersham ImageQuant 800 control software is password protected. It is possible to turn off the password requirement for the Amersham ImageQuant 800 by disabling the System login. To do this, use the following procedure. - Page 23 Slide the System user login ON/OFF toggle to OFF. Close the System user login ON/OFF window by tapping the cross in the top right corner. Result: The System login settings now shows as OFF. Tap Done. Amersham ImageQuant 800 User Manual 29383813 AB...
- Page 24 Tap cogwheel and tap Shut down to shut down the Amersham ImageQuant 800 system. Note: The new setting is available after restarting the Amersham ImageQuant 800 control software. Create a new user New users can be added in the Settings screen. To do this, use the following steps.
- Page 25 Type the password again in the Confirm password space. Tap Add. Tap Done. Delete a user To delete a user account, use the following steps. Note: Account deletion can only be performed by an administrator with the master password. Amersham ImageQuant 800 User Manual 29383813 AB...
- Page 26 Create a new user, on page Change a password To change the password of the current user, follow the procedure below. Step Action In the Settings screen, tap User accounts on the left side of the screen. Amersham ImageQuant 800 User Manual 29383813 AB...
- Page 27 If a user has forgotten their password and is unable to access their account, the admin- istrator can reset their password. This requires use of the master password. To reset a password, use the following steps. Amersham ImageQuant 800 User Manual 29383813 AB...
- Page 28 Tap the cogwheel icon in the top left corner and tap Settings. Tap the box next to the desired user to select that account. Tap Reset password. Enter the master password and tap OK. Result: The user's password is reset to 0123456789. Tap Save. Amersham ImageQuant 800 User Manual 29383813 AB...
-
Page 29: Amersham Imagequant Connect
This chapter contains information on how to connect to and manage Amersham ImageQuant 800 instruments via the Amersham ImageQuant CONNECT software package. In this section Section See page 2.2.1 Introduction 2.2.2 Connect to the instrument Amersham ImageQuant 800 User Manual 29383813 AB... -
Page 30: Introduction
2.2.1 Introduction Introduction It is is possible to access the Amersham ImageQuant 800 remotely via a computer elsewhere on the network using Amersham ImageQuant CONNECT. This allows users to remotely book experiments using the Scheduler function, and to manage image files. -
Page 31: Connect To The Instrument
To connect a new instrument to the Amersham ImageQuant CONNECT software, use the following steps. Step Action Click the options icon in the top right corner and click Settings. Click Add instrument. Result: A new line appears on the Instruments list. Amersham ImageQuant 800 User Manual 29383813 AB... - Page 32 To log in to Amersham ImageQuant CONNECT and access the Amersham ImageQuant 800 from a remote computer, use the following procedure. Step Action Double click on the Amersham ImageQuant CONNECT icon. Carefully read the license agreement and click I Agree. Amersham ImageQuant 800 User Manual 29383813 AB...
- Page 33 To access another instrument on the network via Amersham ImageQuant CONNECT, either click the HOME button in the top left corner to return to the Home screen and select another instrument, or use the following steps. Amersham ImageQuant 800 User Manual 29383813 AB...
- Page 34 Click the Instrument drop-down menu at the top of the screen. Click the instrument to which you want to connect. Sync instruments To refresh the list of connected Amersham ImageQuant 800 instruments, click the refresh button at the top of the screen. Disconnect an instrument To disconnect an instrument from ImageQuant CONNECT, use the following steps.
- Page 35 Step Action Click the box next to the instrument to be deleted. Click Delete. Click Save. Note: To undo the deletion, click Cancel. This must be done before the Save button is clicked. Amersham ImageQuant 800 User Manual 29383813 AB...
-
Page 36: Use Of Methods In Imagequant 800 Control Software
This chapter contains information on how to create and run methods using the Amersham ImageQuant 800 control software. In this chapter Section See page Introduction General settings Advanced settings Chemiluminescence image capture Colorimetric image capture Fluorescence image capture Amersham ImageQuant 800 User Manual 29383813 AB... -
Page 37: Introduction
Methods can be saved and opened at a later time. If an opened method is changed, it needs to be saved again. Image files contain information on the method and image settings used. See help text in the Amersham ImageQuant 800 control software for more information. -
Page 38: General Settings
Depending on the imaging method being used, samples can be placed in the upper (1) or lower (2) tray position. The position of the tray is detected automatically by the Amersham ImageQuant 800 control software and displayed at the bottom of the screen. The display is automati- cally updated if the tray position is changed. - Page 39 Fluorescence imaging methods. Run a method To open and run a previously saved method, use the following steps. Step Action In the method editor for Chemiluminescence, Colorimetric, or Fluores- cence, select Open method. Amersham ImageQuant 800 User Manual 29383813 AB...
- Page 40 Result: The image capture method screen is shown. Tap Start. Help function For information, tips, and help when using the ImageQuant 800 control software, tap the Help button in the top right corner. Amersham ImageQuant 800 User Manual 29383813 AB...
-
Page 41: Advanced Settings
Capture area and Live View The Amersham ImageQuant 800 has a maximum image capture area of 160 × 220 mm. This capture area is dependent on which tray position is being used and whether the NP lens is being used. The capture area under each setting is detailed in the table below. - Page 42 Changing the capture area is only possible in the Lower tray position. In the Upper tray position, it is possible to see a live view of the capture area to position the sample within the default capture area. Tap Select. Amersham ImageQuant 800 User Manual 29383813 AB...
- Page 43 This allows for detection of a fainter signal in image analysis, but results in a loss of resolution compared to 2 × 2 binning. When performing image capture on the Amersham ImageQuant 800, it is possible to adjust the binning settings for either greater sensitivity or greater resolution.
- Page 44 Under Advanced settings, tap Select binning. Tap to drag the slider to move the slider towards High resolution, or High sensitivity. Tap Select. Tip: To avoid image saturation, either set a lower binning or reduce the exposure time. Amersham ImageQuant 800 User Manual 29383813 AB...
-
Page 45: Chemiluminescence Image Capture
This section contains information on how to create and run chemiluminescence imaging methods. In this section Section See page 3.4.1 Chemiluminescence imaging 3.4.2 Automatic chemiluminescence exposure 3.4.3 Manual chemiluminescence exposure 3.4.4 Time series chemiluminescence exposure 3.4.5 SNOW chemiluminescence exposure Amersham ImageQuant 800 User Manual 29383813 AB... -
Page 46: Chemiluminescence Imaging
The illustration below shows the main components of the Chemiluminescence screen. Part Function Part Function Save image capture settings Toggle full dynamic range as a method Image library tab SNOW (noise reduction mode) Amersham ImageQuant 800 User Manual 29383813 AB... - Page 47 The option to add multiplex imaging is found in the Advanced settings panel when creating a method. To use the fluorescence multiplex imaging, use the following steps. Step Action Next to Fluorescence multiplex, tap Select. Tap Select dye. Amersham ImageQuant 800 User Manual 29383813 AB...
- Page 48 To cancel changes and return to the previous screen, tap Cancel. Image a plate or petri dish The Amersham ImageQuant 800 is capable of artefact-free chemiluminescence imaging of multi-well plates (e.g., 96-well plates) and petri dishes with the use of the NP lens and NP Tray Guide accessories.
- Page 49 Note: The NP lens must be inserted fully up to the stop position. Adjust the focus if needed, see Adjust focus, on page Close the instrument door. Select capture settings and tap Start. Amersham ImageQuant 800 User Manual 29383813 AB...
-
Page 50: Automatic Chemiluminescence Exposure
Enter the settings for Fluorescence multiplex if required, see Fluores- cence multiplex, on page To save the capture settings for future use, tap Save method. In the popup window, enter the Name of the method and tap Save. Amersham ImageQuant 800 User Manual 29383813 AB... - Page 51 3.4.2 Automatic chemiluminescence exposure Step Action Tap Pre-capture. Note: To take an automatic exposure without predefining a region of interest, tap Start, without tapping Pre-capture. Tap the button to toggle between Point and Area measurement. Amersham ImageQuant 800 User Manual 29383813 AB...
- Page 52 Use an area as the frame of reference, toggle to Area. Tap and drag to select the desired reference area (1). Note: The area can be moved without redrawing it by using the arrow buttons (2). Tap Start. Amersham ImageQuant 800 User Manual 29383813 AB...
-
Page 53: Manual Chemiluminescence Exposure
+ and - buttons, or the keypad to enter the desired value. Note: The maximum time that can be set is 10 hours. The minimum time that can be set is 0.1 sec. Tap OK to return to the create method window. Amersham ImageQuant 800 User Manual 29383813 AB... - Page 54 Enter the settings for Fluorescence multiplex if required, see Fluores- cence multiplex, on page To save the capture settings for future use, tap Save method. In the popup window, enter the Name of the method and tap Save. Tap Start. Amersham ImageQuant 800 User Manual 29383813 AB...
-
Page 55: Time Series Chemiluminescence Exposure
Under 1.Select Exposure, tap Time series. Under Number of images, use the + and - buttons to select the desired number of image to be taken. Under Exposure time per image, tap the white box. Amersham ImageQuant 800 User Manual 29383813 AB... - Page 56 Section 3.3 Advanced settings, on page 41 for more information. To save the capture settings for future use, tap Save method. In the popup window, enter the Name of the method and tap Save. Amersham ImageQuant 800 User Manual 29383813 AB...
- Page 57 Tap Start. Result: The View image screen will show while all of the images are being taken. The current image being taken will show as Exposing and images to be taken afterwards as Pending. Amersham ImageQuant 800 User Manual 29383813 AB...
-
Page 58: Snow Chemiluminescence Exposure
To save the capture settings for future use, tap Save method. In the popup window, enter the Name of the method and tap Save. Tap Start to begin the image pre-capture. Amersham ImageQuant 800 User Manual 29383813 AB... - Page 59 In the pre-capture screen, tap Select (1) next to Step 2: Select area of interest. Tap and drag to select the area of interest (2). Result: The area of interest is selected and appears in green. Amersham ImageQuant 800 User Manual 29383813 AB...
- Page 60 The background area is selected and appears in yellow. To manually enter a target improvement ratio, toggle off Auto stop (1), tap the box next to Target improvement ratio (2), and enter a new value. Amersham ImageQuant 800 User Manual 29383813 AB...
- Page 61 To manually enter a target improvement ratio during image capture, toggle off Auto stop, tap the box next to Target improvement ratio, and enter a new value. Result: The manual boundary will show in the graph. Amersham ImageQuant 800 User Manual 29383813 AB...
-
Page 62: Colorimetric Image Capture
Colorimetric image capture About this section This section contains information on how to create and run colorimetric imaging methods. In this section Section See page 3.5.1 Colorimetric imaging 3.5.2 Gel documentation 3.5.3 Optical Densitometry Amersham ImageQuant 800 User Manual 29383813 AB... -
Page 63: Colorimetric Imaging
To achieve the best possible accuracy, trans illumination is recommended. This method is only available in certain instrument configurations. For more information on instrument configurations and upgrading the Amersham ImageQuant 800 instrument, see Amersham ImageQuant 800 Operating Instructions (29372604). The Colorimetric tab The illustration below shows the main components of the Colorimetric screen. - Page 64 3 Use of methods in ImageQuant 800 control software 3.5 Colorimetric image capture 3.5.1 Colorimetric imaging Part Function Part Function OD measurement Start capture Gel documentation Amersham ImageQuant 800 User Manual 29383813 AB...
-
Page 65: Gel Documentation
Section 3.3 Advanced settings, on page 41 tion. To save the capture settings for future use, tap Save method. In the popup window, enter the Name of the method and tap Save. Tap Start. Amersham ImageQuant 800 User Manual 29383813 AB... -
Page 66: Optical Densitometry
To save the capture settings for future use, tap Save method. In the popup window, enter the Name of the method and tap Save. Tap Start. Note: Both color and greyscale images for analysis are saved in the image file folder. Amersham ImageQuant 800 User Manual 29383813 AB... -
Page 67: Fluorescence Image Capture
This section contains information on how to create and run fluorescence imaging methods. In this section Section See page 3.6.1 Fluorescence imaging 3.6.2 Automatic fluorescence exposure 3.6.3 Manual fluorescence exposure 3.6.4 SNOW fluorescence exposure Amersham ImageQuant 800 User Manual 29383813 AB... -
Page 68: Fluorescence Imaging
Save image capture settings as a Select dyes method SNOW (noise reduction mode) Select capture area Manual exposure Toggle colorimetric marker Auto exposure Toggle full dynamic range Open method Start pre-capture Help Start image capture Amersham ImageQuant 800 User Manual 29383813 AB... - Page 69 To select which dye or dyes are being used in the sample, use the following steps. A maximum of three dyes can be analyzed at one time. Step Action To select the dyes used, under 2.Basic settings, tap Select. Amersham ImageQuant 800 User Manual 29383813 AB...
- Page 70 Tap Select to return to the method screen. Sample positioning for IRlong IRlong imaging can be susceptible to background gradient effects. Position the sample in the center of the tray for IRlong image capture. Amersham ImageQuant 800 User Manual 29383813 AB...
-
Page 71: Automatic Fluorescence Exposure
If shorter exposure times are required, tap the toggle button next to Full dynamic range to the off position. Note: Turning off Full dynamic range will reduce the range of intensity levels used in the image. Amersham ImageQuant 800 User Manual 29383813 AB... - Page 72 Name of the method and tap Save. Tap Pre-capture. Note: To take an automatic exposure without predefining a region of interest, tap Start, without tapping Pre-capture. Tap the button to toggle between Point and Area measurement. Amersham ImageQuant 800 User Manual 29383813 AB...
- Page 73 Use an area as the frame of reference, toggle to Area. Tap and drag to select the desired reference area (1). Note: The area can be moved without redrawing it by using the arrow buttons (2). Tap Start. Amersham ImageQuant 800 User Manual 29383813 AB...
-
Page 74: Manual Fluorescence Exposure
Under 1.Select Exposure, tap Manual. To select the dyes used, tap Select. In the Fluorescence dyes window, tap the drop-down arrow and select the dye being used. Under Exposure time, tap the white box. Amersham ImageQuant 800 User Manual 29383813 AB... - Page 75 Enter an Exposure time for the new dye. If needed, add a third dye. If an overlay image of the sample and marker is required, tap the toggle button next to Colorimetric marker. Amersham ImageQuant 800 User Manual 29383813 AB...
- Page 76 Section 3.3 Advanced settings, on page 41 for more information. To save the capture settings for future use, tap Save method. In the popup window, enter the Name of the method and tap Save. Tap Start. Amersham ImageQuant 800 User Manual 29383813 AB...
-
Page 77: Snow Fluorescence Exposure
To save the capture settings for future use, tap Save method. In the popup window, enter the Name of the method and tap Save. Tap Start to begin the image pre-capture. Amersham ImageQuant 800 User Manual 29383813 AB... - Page 78 In the pre-capture screen, tap Select (1) next to Step 2: Select area of interest. Tap and drag to select the area of interest (2). Result: The area of interest is selected and appears in green. Amersham ImageQuant 800 User Manual 29383813 AB...
- Page 79 The background area is selected and appears in yellow. To manually enter a target improvement ratio, toggle off Auto stop (1), tap the box next to Target improvement ratio (2), and enter a new value. Amersham ImageQuant 800 User Manual 29383813 AB...
- Page 80 To manually enter a target improvement ratio during image capture, toggle off Auto stop, tap the box next to Target improvement ratio, and enter a new value. Result: The manual boundary will show in the graph. Amersham ImageQuant 800 User Manual 29383813 AB...
-
Page 81: Manage Images In Imagequant 800 Control Software
About this chapter This chapter contains information on how to view and manage images in ImageQuant 800 control software. In this chapter Section See page View the image after capture The Image library screen Amersham ImageQuant 800 User Manual 29383813 AB... -
Page 82: View The Image After Capture
Zoom in and out of image Editing tools Image overlays Depending on the imaging type used, the image overlays tabs will be different. Imaging method Display options Toggle Marker on and off Chemiluminescence with colorimetric marker Amersham ImageQuant 800 User Manual 29383813 AB... - Page 83 Crop. Set image crops if multiple samples have been used. Note: Using Half crop and Quarter crop will separate the image into 2 or 4 image files when saved. Rotate image. Exposure time for each image type. Amersham ImageQuant 800 User Manual 29383813 AB...
- Page 84 To measure the signal intensity, use the following procedure. Note: Signal intensity measurements are not reliable in saturated images. Satu- rated parts of an image are highlighted in purple. Part Function Non-saturated band Saturated band Amersham ImageQuant 800 User Manual 29383813 AB...
- Page 85 In the Image view screen, tap Intensity. Tap and drag to select the area of interest. Read the intensity signals in the right table. Note: If multiple images are being viewed, the intensities of all dyes will be displayed. Amersham ImageQuant 800 User Manual 29383813 AB...
- Page 86 4 Manage images in ImageQuant 800 control software 4.1 View the image after capture Step Action Use the arrow buttons (1) to move the area selection without resizing. Amersham ImageQuant 800 User Manual 29383813 AB...
- Page 87 Select which individual image Display selected image on full to save screen Toggle colorimetric Marker Zoom in all images on and off Selected image for full screen Zoom out all images (indicated by blue border) Amersham ImageQuant 800 User Manual 29383813 AB...
-
Page 88: The Image Library Screen
Select imaging method Delete image Sort images Select all images Search images Open an image To open an image in the Image library screen, use the following steps. Step Action Tap the Image library icon. Amersham ImageQuant 800 User Manual 29383813 AB... - Page 89 If multiple images have been selected, the option to Open is not available. The option to Copy/Move this images is available for multiple images. Move image Image files can be copied and moved in Amersham ImageQuant 800 control software. Step Action In the Image library screen, tap to select the image or images to be moved.
- Page 90 Tap Move to move the image to the new location and remove it from the current location. Print image Amersham ImageQuant 800 control software can print images directly to a printer connected on the network. To do this, use the following steps. Step Action In the View image screen, tap Print.
-
Page 91: Imagequant Connect Operation
About this chapter This chapter describes the ImageQuant CONNECT software and provides information on how to use the different functions. In this chapter Section See page Introduction Use the scheduler tool Manage images Amersham ImageQuant 800 User Manual 29383813 AB... -
Page 92: Introduction
The Amersham ImageQuant CONNECT software enables the user to connect remotely to any Amersham ImageQuant 800 instrument on the network. Using this package, it is possible to monitor runs, book a time slot for using the machine, as well as view, and download image files from the instrument. -
Page 93: Use The Scheduler Tool
5 ImageQuant CONNECT operation 5.2 Use the scheduler tool Use the scheduler tool Introduction The ImageQuant CONNECT scheduler tool can be used to remotely book or edit a time slot on the Amersham ImageQuant 800 instrument remotely. The Scheduler screen Part Function Part... - Page 94 In the Scheduler screen, select the booking to be edited. Click Edit booking. In the Edit booking window, enter the new information. Click Save. To delete a booking, select the booking slot and click Delete. Amersham ImageQuant 800 User Manual 29383813 AB...
-
Page 95: Manage Images
Image information Select folder Open image Filter by method Copy image Sort images by date or alpha- Select all images in the folder betically Search images Toggle between list and thumbnail image view Amersham ImageQuant 800 User Manual 29383813 AB... - Page 96 The Method, Sort by, and Search... tools can be used to help find specific images. Click on the desired image to display the image information in the right panel. Note: If more than one image is selected, no information will be displayed. Amersham ImageQuant 800 User Manual 29383813 AB...
- Page 97 Increasing the lower (blue) boundary will lighten the image and decreasing the upper (pink) boundary will darken the image. To return to the Images tab, click Close. To save a local copy of the image, click Download. Amersham ImageQuant 800 User Manual 29383813 AB...
- Page 98 The Intensity function can be used to measure the signal intensity of either a single point or a defined area of the image. to use this function, follow the instructions in Measure the signal intensity, on page Amersham ImageQuant 800 User Manual 29383813 AB...
-
Page 99: Troubleshooting
If the suggested actions in this guide do not solve the problem, or if the problem is not covered by this guide, contact your Cytiva representative for advice. In this chapter... -
Page 100: Instrument Problems
Step Action Make a note of the error code and error message on the monitor. Shut down the Amersham ImageQuant 800 control software using the usual procedure, see the Amersham ImageQuant 800 Operating Instruc- tions (29372604). If the shut down procedure does not work, use the task manager to force the Amersham ImageQuant 800 control software to exit. - Page 101 The instrument does not The instrument is not Unplug the instrument and check that all appear to respond to soft- connected to the external connections between the instrument and ware control computer external computer are secure Amersham ImageQuant 800 User Manual 29383813 AB...
-
Page 102: Image Problems
White Epi source relative to the gel gel so that the lanes of the gel are parallel imaging in the upper tray lanes to the long side of the tray position Amersham ImageQuant 800 User Manual 29383813 AB... - Page 103 Captures are too quickly and restart. If there is no such flat back- auto stopped ground area, select a background area next to the membrane or gel Amersham ImageQuant 800 User Manual 29383813 AB...
-
Page 104: Software Problems
CONNECT is not showing to the network. See Amersham on host instrument ImageQuant 800 Operating Instructions (29372604) Unable to log in Forgotten password Reset the user's password, see Reset a password, on page 27 Amersham ImageQuant 800 User Manual 29383813 AB... -
Page 105: Error Messages
Insert tray Open the instrument and insert the tray into the correct position. If a tray is already in place, confirm that it is correctly inserted. Amersham ImageQuant 800 User Manual 29383813 AB... - Page 106 The images captured in this session have not been saved. To return to the software and save the image, tap No. To exit the software without saving and new images or methods, tap Yes. Amersham ImageQuant 800 User Manual 29383813 AB...
- Page 107 Image, 20, 41, 43, 82–84, 88–90 binning, 43 capture area, 41 Time series exposure, 55, 87 copy, 89 image view, 87 correction files, 20 Tray guide, 49 editing, 83 Typographical conventions, 6 histogram, 84 Amersham ImageQuant 800 User Manual 29383813 AB...
- Page 108 Index User account, 24, 25 create user, 24 delete user, 25 Amersham ImageQuant 800 User Manual 29383813 AB...
- Page 109 Page intentionally left blank...
- Page 110 © 2020 Cytiva All goods and services are sold subject to the terms and conditions of sale of the supplying company operating within the Cytiva business. A copy of those terms and conditions is available on request. Contact your local Cytiva representative for the most current information.
Need help?
Do you have a question about the Amersham ImageQuant 800 and is the answer not in the manual?
Questions and answers