
Subscribe to Our Youtube Channel
Related Manuals for OPTIMUM Maschinen OPTidrill DH 40CT


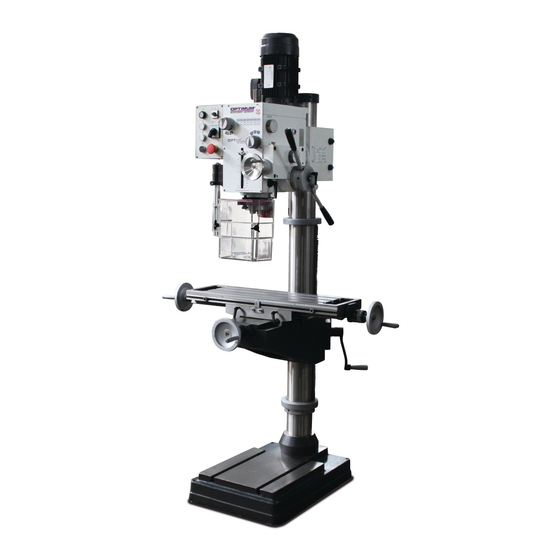
Summary of Contents for OPTIMUM Maschinen OPTidrill DH 40CT
- Page 1 Operating Manual Version 1.0.2 Gearbox drilling milling machine Part no. 3034350 Part no. 3034351 DH40CTP DH40CT...
-
Page 2: Table Of Contents
Table of contents Safety Rating plate..............................6 1.1.1 Machine variants ..........................6 Safety instructions (warning notes)........................ 7 1.2.1 Classification of hazards ........................7 1.2.2 Other pictograms..........................7 Intended use ..............................8 Reasonably foreseeable misuse........................9 1.4.1 Avoiding misuse ..........................9 Possible dangers posed by the drilling milling machine ................ - Page 3 3.4.5 Fixing ..............................23 Lubrication ..............................24 First commissioning............................24 3.6.1 Warming up the machine ........................24 3.6.2 Power supply ..........................24 3.6.3 Checks ............................25 Operation Control and indicating elements ........................26 4.1.1 DH40 CTP spindle sleeve feed.......................27 Safety ................................27 Switching on the machine ..........................27 4.3.1 Switching off the machine.......................28 Feed for milling .............................28 Speed setting ...............................28...
- Page 4 6.6.1 Ersatzteilliste Pinolenvorschub - Spare part list spindle sleeve feed - DH40 CTP......54 Bohrfutterschutz - Drilling chuck protection ....................56 6.7.1 Schaltbox - Switch box........................57 6.7.2 Säule und Bohrtisch - Column and drilling table ................58 6.7.3 Teileliste Säule und Bohrtisch - Parts list column, column and drilling table ......... 59 Schaltplan - Wiring diagram.........................
- Page 5 If you have any further questions after reading these operating instructions and you are not able to solve your problem with a help of these operating instructions, please contact your specialised dealer or directly the company OPTIMUM. Optimum Maschinen Germany GmbH Dr.- Robert - Pfleger - Str. 26 D-96103 Hallstadt...
-
Page 6: Safety
Always keep this documentation close to the drilling milling machine. INFORMATION If you are unable to rectify an issue using these operating instructions, please contact us for advice: Optimum Maschinen Germany GmbH Dr.-Robert-Pfleger-Str. 26 D-96103 Hallstadt email: info@optimum-maschinen.de Rating plate 1.1.1... -
Page 7: Safety Instructions (Warning Notes)
Safety instructions (warning notes) 1.2.1 Classification of hazards We classify the safety warnings into different categories. The table below gives an overview of the classification of symbols (ideogram) and the warning signs for each specific danger and its (possible) consequences. Symbol Alarm expression Definition / consequence... -
Page 8: Intended Use
We expressly point out that the guarantee will expire, if any constructive, technical or proce- dural changes are not performed by the company Optimum Maschinen Germany GmbH. It is also part of the intended use that you ... -
Page 9: Reasonably Foreseeable Misuse
Reasonably foreseeable misuse Any use other than that specified under "Intended use" or any use beyond that described will be deemed non-intended use and is not permissible. Any other use must be discussed with the manufacturer. It is only allowed to process metal, cold and non-inflammable materials with the drilling- milling machine. -
Page 10: Qualification Of Personnel
INFORMATION Everyone involved in the assembly, commissioning, operation and maintenance must be duly qualified, and strictly follow these operating instructions. In the event of improper use there may be a risk to personnel, there may be a risk to the machine and other material values, ... -
Page 11: Authorized Persons
Qualified electrician With professional training, knowledge and experience as well as knowledge of respective standards and regulations, qualified electricians are able to perform work on the electrical sys- tem and recognise and avoid any possible dangers. Qualified electricians have been specially trained for the working environment, in which they are working and know the relevant standards and regulations. -
Page 12: Operator Positions
secure against restarting, check that there is no voltage. Operator positions The user position is in front of the drilling milling machine. INFORMATION The power plug of the drilling milling machine must be readily accessible. Safety measures during operation CAUTION! Danger due to inhaling dust and mist that are hazardous to health. -
Page 13: Emergency Stop Button
an adjustable spindle guard with position switch. 1.9.1 Emergency stop button The drilling milling machine is equipped with an emergency stop button. 1.9.2 Protective cover The spindle head is equipped with a pro- tective cover. WARNING! Protective cover Only remove the protective cover when the mains plug of the drilling milling machine is disconnected. -
Page 14: Safety Check
1.10 Safety check Check the drilling milling machine at least once per shift. Inform the person responsible immedi- ately of any damage, defects or changes in the operating function. Check all safety devices at the beginning of each shift (with the machine stopped), ... -
Page 15: Safety During Operation
Clean your personal protective equipment after each use, regularly once a week. Personal protective equipment for special works Wear protective gloves when handling pieces or tools with sharp edges. Wear safety shoes when you assemble, disassemble or transport heavy components. Use ear protectors if the noise level (emission) in the workplace exceeds 80 dB (A). -
Page 16: Using Lifting Equipment
Check if they are working properly! 1.15 Accident report Inform your supervisors and Optimum Maschinen Germany GmbH immediately in the event of accidents, possible sources of danger and any actions which almost led to an accident (near misses). There are many possible causes for "near misses". -
Page 17: Inspection Deadlines
1.17 Inspection deadlines Define and document the inspection deadlines for the machine in accordance with § 3 of the Factory Safety Act and perform an operational risk analysis in accordance with § 6 of the Work Safety Act. The inspection intervals in the maintenance section should be used as reference values. -
Page 18: Technical Data
Technical data The following information represents the dimensions and indications of weight and the manu- facturer‘s approved machine data. Electrical connection DH40 CT DH40 CTP Connection 3 x 400V ~ 50Hz ( 60Hz ) Fusing performed by the operator 16 A Operating mode, duty cycle S6 - 60% Drilling capacity / milling capacity... -
Page 19: Emissions
Work area Keep a work area of at least one metre around the machine free for operation and maintenance. Speeds Spindle speeds [ rpm ] 95 - 3200 Number of steps Spindle quill feed DH40 CT DH40 CTP automatic manual 0.10 | 0.18 | 0.26 mm/rev Environmental conditions Temperature... -
Page 20: Installation Plan Dh 40Ct | Dh40Ctp
CAUTION! Depending on the overall noise exposure and the basic threshold values, machine operators must wear appropriate hearing protectors. We generally recommend the use of noise and ear protection. 2.12 Installation plan DH 40CT | DH40CTP Img.2-1: Dimensions DH 40CT | DH 40CTP Technical data Translation of original instruction Version 1.0.2 - 2020-07-06... -
Page 21: Delivery, Interdepartmental Transport, Assembly And Commissioning
Delivery, interdepartmental transport, assembly and commissioning Notes on transport, installation, commissioning Improper transport, installation and commissioning is liable to accidents and can cause damage or malfunctions to the machine for which we do not assume any liability or guarantee. Transport the scope of delivery secured against shifting or tilting with a sufficiently dimen- sioned industrial truck or a crane to the installation site. -
Page 22: Unpacking The Machine
Unpacking the machine INFORMATION The drilling milling machine is delivered pre-assembled. Transport the drilling milling machine in its packing crate near its final installation location with a lift truck before unpacking it. If the packaging shows signs of having possibly been damaged during transport, take the appropriate precautions to prevent the machine being damaged when unpacking. -
Page 23: Assembly
Make sure that the attached load does not cause damage to components or paint. 3.4.3 Assembly WARNING! Danger of crushing and overturning. The installation of the drilling milling machine must be performed by at least 2 persons. 3.4.4 Installation Check that the drilling milling machine foundation is horizontal with a spirit level. -
Page 24: Lubrication
Lubrication With the first lubrication and greasing your new machine, oil in the gearbox is filled. Once these operations have been carried out, the machine can be started up. The oil tank of the gearbox must be filled to half way up the sight glass. -
Page 25: Checks
conductor (N) is connected to a phase. This might have the following results: The motor is getting hot very rapidly. Increased motor noises. The motor has no power. The guarantee will become null and void if the machine is connected incorrectly. ATTENTION! Check the rotary field respectively the turning direction of the motor. -
Page 26: Operation
Operation Control and indicating elements DH40 CT DH40 CTP Img.4-1: DH40 CT Item Designation Item Designation Control panel Speed switch Spindle sleeve lever Manual quill fine feed Spindle sleeve clamping lever Cross table Hand crank height adjustment DH 40CT | DH 40CTP Operation Translation of original instruction Version 1.0.2 - 2020-07-06... -
Page 27: Dh40 Ctp Spindle Sleeve Feed
4.1.1 DH40 CTP spindle sleeve feed Img.4-2: DH40 CTP Item Designation Item Designation Spindle sleeve switch Spindle sleeve feed 0.10 | 0.18 | 0.26 mm/rev Knurled screw Clamping lever Spindle sleeve clamping lever Safety The drilling milling machine must only be operated under the following conditions: ... -
Page 28: Switching Off The Machine
The marking "L" means anticlockwise rotation. Press the button "ON". The drilling milling machine switches on and turns in the preselected rotation direction. 4.3.1 Switching off the machine CAUTION! Only press the emergency stop button in a genuine emergency. You should not use the emergency-stop button to stop the machine during normal operation. -
Page 29: Switching Off The Drilling Milling Machine
INFORMATION Observe the speed table on the milling drilling head when selecting the range of speed. ATTENTION! Wait until the spindle has come to a complete halt before changing the speed with the gear selector switch. A change of the gear ratio during operation can lead to the destruction of the gearbox. Switching off the drilling milling machine ... -
Page 30: Quill Clamping Lever
Check if the clamping lever of the quill is released. Now it is possible to move the quill downward using the sleeve lever. 4.8.3 Quill clamping lever The quill is returned to its initial position by means of the spring force. Use the quill clamping lever in order to fix Fine feed the quill at a determined height. -
Page 31: Spindle Sleeve Feed With The Manually Fine Feed
Loosen the knurled screw (10) for the prevention of automatic quill feed. Drag the spindle sleeve lever (3) to right. The spindle sleeve feed moves with the preset selected feed rate (9) downwards and is switched off as soon as the preset drill depth of the scale ring (13) is attained. The spindle sleeve is then returned to its home position by the resiliency of the recuperating spring. -
Page 32: Spindle Head
4.10 Spindle head 4.10.1 Swivelling the spindle head The spindle head can be swung up to 45 ° to the right or left. Scale Release the clamping screws on both Clamping bolts sides of the spindle head. Set the desired angle using the scale. ... -
Page 33: Lifting And Lowering The Spindle Head
4.10.3 Lifting and lowering the spindle head It is possible to lift the spindle head using the spindle head crank handle. Position the spindle head at a higher position if you need a larger distance between the drilling sleeve and the drilling table. Possible adjustment 260mm. ... -
Page 34: Removing Milling Tools
permissible for milling. The cone connection is released by lateral pressure. Injuries may be caused by flying parts. The milling head is fitted with an M16 draw bar. Remove the cap. Clean the seat in the spindle / quill. ... -
Page 35: Clamping The Workpieces
The machine tap turns into the workpiece. As soon as the preset depth is attained, the spindle reverses the direction of rotation at the switch point. The machine tap turns out of the work- piece. When the sleeve is completely entered up to the switch point the rotation of the spindle is stopped. -
Page 36: Cooling
4.15 Cooling The friction generated during rotation can cause the edge of the tool to become very hot. The tool should be cooled during the drilling process. Cooling the tool with a suitable cooling lubricant ensures better working results and a longer edge life of the cutting tool. This is best realised by a separate cooling equipment. -
Page 37: Maintenance
Maintenance In this chapter you will find important information about Inspection Maintenance Repair of the drilling milling machine ATTENTION! Properly performed regular maintenance is an essential prerequisite for operational safety, failure-free operation, a long working life of the drilling milling machine and ... -
Page 38: Restarting
5.1.2 Restarting Before restarting, run a safety check. Safety check on page 14 WARNING! Before starting the drilling milling machine you must be sure that lead to any danger with respect to people, the drilling milling machine is not damaged. Inspection and maintenance The type and level of wear depends to a large extent on the individual usage and operating conditions. - Page 39 Interval Where? What? How? Use an appropriate collecting vessel with a capacity of at least 3 liters when performing the oil change. Unscrew the oil filling screw. Swivel the drilling head in order to allow the oil to drain of. Swivelling the spindle head on page 32 Oil filling screw/Aera- the first time...
- Page 40 Interval Where? What? How? Lubricate the drill column regularly with commercial oil. Lubricate the toothed rod regularly with commercial grease (e.g. friction bearing grease). Every month Lubricate all oiler cups with machine oil, do not use grease guns or the like.
-
Page 41: Repair
If the repairs are carried out by qualified technical personnel, they must follow the indications given in these operating instructions. Optimum Maschinen Germany GmbH accepts no liability nor does it guarantee against damage and operating malfunctions resulting from failure to observe these operating instructions. -
Page 42: Determining The Cutting Speed And The Speed
Determining the cutting speed and the speed Table cutting speeds / infeed Material table Recommended infeed f in mm/revolution Recommended Material to be processed cutting speed Drill bit diameter d in mm Vc in m/min 2...3 >3...6 >6...12 >12...25 >25...50 Unalloyed construction steels 30 - 35 0.05... - Page 43 Drill bit Ø Speed n in rpm in mm 1062 1274 1415 1769 2123 2477 2831 3539 4246 5662 7077 1146 1274 1592 1911 2229 2548 3185 3822 5096 6369 1042 1158 1448 1737 2027 2316 2895 3474 4632 5790 1062 1327 1592...
-
Page 44: Examples To Calculatory Determine The Required Speed For Your Drilling Machine
Drill bit Ø Speed n in rpm in mm 39,0 40,0 41,0 42,0 43,0 44,0 45,0 46,0 47,0 48,0 49,0 50,0 Examples to calculatory determine the required speed for your drilling machine The necessary speed is depending on the diameter of the drill bit, on the material which is being machined as well as on the cutting material of the drill bit. -
Page 45: Spindelkopf - Drilling Head - Dh40 Ct
Spindelkopf - Drilling head - DH40 CT Abb.6-1: Spindelkopf - Drilling head - DH40 CT DH 40CT | DH 40CTP DE | EN Version 1.0.2 - 2020-07-06 Originalbetriebsanleitung... -
Page 46: Ersatzteilliste Spindelkopf - Spare Part List Drilling Head - Dh40 Ct
6.4.1 Ersatzteilliste Spindelkopf - Spare part list drilling head - DH40 CT DH 40 CT - Spindelkopf - drilling head Menge Grösse Artikelnummer Bezeichnung Designation Qty. Size Item no. Gehäuse Housing Abdeckung Cover 0303434011 Sicherungsring Retaining ring 042SR62I Sicherungsring Retaining ring 042SR35I Flansch Flange... - Page 47 Schraube Screw M6x12 Welle Shaft 0303434020 Zahnrad Gear 0303434081 Zahnrad Gear 0303434078 Zahnrad Gear 0303434058 Zahnrad Gear 0303434041 Zahnrad Gear 0303434030 Passfeder Fitting key 5x50 042P5550 Passfeder Fitting key 6x18 042P6618 Passfeder Fitting key 6x18 042P6618 Pinole Spindle sleeve 0303434002 Pinole konplett Sleeve komplett 0303434002CPL...
- Page 48 Griffschraube Screw 0303434048 Feder Compression spring 03034340103 Skala Graduated plate 0303434052 Hebel Handle rod 03338430227 Handrad Handle wheel 0303434049 Handhebel Handle rod 0303434053 Schraube Screw M8x25 Schraube Screw Scheibe Washer Schraube Screw Schraube Screw M6x12 Schraube Screw M5x12 Stift 3x12 Passfeder Fitting key 8x20...
-
Page 49: Spindelkopf - Drilling Head - Dh40 Ctp
Spindelkopf - Drilling head - DH40 CTP Abb.6-2: Spindelkopf - Drilling head - DH40 CTP DH 40CT | DH 40CTP DE | EN Version 1.0.2 - 2020-07-06 Originalbetriebsanleitung... -
Page 50: Ersatzteilliste Spindelkopf - Spare Part List Drilling Head - Dh40 Ctp
6.5.1 Ersatzteilliste Spindelkopf - Spare part list drilling head - DH40 CTP DH 40 CTP - Spindelkopf - drilling head Menge Grösse Artikelnummer Bezeichnung Designation Qty. Size Item no. Kopfgehäuse Head body 20010B 03034351021 Kopfabdeckung Head body cover 20011B 03034351022 Sicherungsring Retaining ring 03034351023... - Page 51 schraube Screw M6x8 III Welle III shaft 20107B 030343510244 Zahnrad Gear 20109-B 030343510245 Zahnrad Gear 20110-2-B 030343510246 Zahnrad Gear 20112-B 030343510247 Zahnrad Gear 20113-B 030343510248 Zahnrad Gear 20115-B 030343510249 Passfeder 5x50 030343510250 Passfeder 6x18 030343510251 Passfeder 6x75 030343510252 Pinole Spindle sleeve 20019 030343510253 Spindel...
- Page 52 Sicherungsring Retaining ring 0303435102112 Schraube Screw M6x16 Hebelstange Lever rod 20204-3B 0303435102114 Öldichtung Oil seal 12x22x8 0303435102115 Lange Hebelwelle Long lever shaft 20216B 0303435102116 Hebelhalterung Lever bracket 20204-1B 0303435102117 Hebel Lever 20022-2B 0303435102118 Lager Bearing 6201 0303435102119 Sicherungsring Retaining ring 0303435102120 Unterlegscheibe Washer...
-
Page 53: Pinolenvorschub - Spindle Sleeve Feed - Dh40 Ctp
Pinolenvorschub - Spindle sleeve feed - DH40 CTP DH 40CT | DH 40CTP DE | EN Version 1.0.2 - 2020-07-06 Originalbetriebsanleitung... -
Page 54: Ersatzteilliste Pinolenvorschub - Spare Part List Spindle Sleeve Feed - Dh40 Ctp
6.6.1 Ersatzteilliste Pinolenvorschub - Spare part list spindle sleeve feed - DH40 CTP DH 40CTP - Pinolenvorschub - Spindle sleeve feed Menge Grösse Artikelnummer Bezeichnung Designation Qty. Size Item no. Vorschubkasten Feed box 20102 03034351011 verzahnte Welle Pinion shaft 20234 03034351012 Spindelhub-Zifferblatt Spindle stroke dial... - Page 55 Platte Plate 20303 030343510143 Stift 20206 030343510144 Begrenzungsschraube Limited screw 20204 030343510145 Schneckenwelle Worm shaft 20233 030343510146 Buchse Bush 20306 030343510147 Passfeder 030343510148 Zahnrad Gear 20228 030343510149 Zahnrad Gear 20229 030343510150 Zahnrad Gear 20230 030343510151 Buchse Bush 20106 030343510152 Abdeckung Schneckenrad Worm cover 20227 030343510153...
-
Page 56: Bohrfutterschutz - Drilling Chuck Protection
Bohrfutterschutz - Drilling chuck protection Abb.6-3: Bohrfutterschutz - Drilling chuck protection DE | EN DH 40CT | DH 40CTP Originalbetriebsanleitung Version 1.0.2 - 2020-07-06... -
Page 57: Schaltbox - Switch Box
6.7.1 Schaltbox - Switch box 1S7.1 1S7.2 Abb.6-4: Schaltbox - Switch box DH 40CT | DH 40CTP DE | EN Version 1.0.2 - 2020-07-06 Originalbetriebsanleitung... -
Page 58: Säule Und Bohrtisch - Column And Drilling Table
6.7.2 Säule und Bohrtisch - Column and drilling table Abb.6-5: Säule und Bohrtisch - Column and drilling table DE | EN DH 40CT | DH 40CTP Originalbetriebsanleitung Version 1.0.2 - 2020-07-06... -
Page 59: Teileliste Säule Und Bohrtisch - Parts List Column, Column And Drilling Table
6.7.3 Teileliste Säule und Bohrtisch - Parts list column, column and drilling table DH40CT | DH40CTP - Bohrtisch - drilling table Menge Grösse Artikelnummer Bezeichnung Designation Qty. Size Item no. Maschinenfuss Base 03034350201 Säule Column 03034350202 Tischhalter Lifting table 03034350203 Schlitten Slip saddle KT210... - Page 60 Schraube Screw M10x20 Schraube Screw M10x20 Schraube Screw M10x40 Handhebel Handle 03034350246 Einstellbolzen Adjust bolt 03034350247 Scheibe Washer Bolzen Bolt M16x190 Sechskantmutter Halter Bracket 03034350251 Schneckenwelle Worm shaft 03034350252 Welle Small shaft 03034350253 Zahnrad Helical gear 03034350254 Scheibe Washer Kurbel Crank 03034350256 Sicherungsring...
-
Page 61: Schaltplan - Wiring Diagram
Schaltplan - Wiring diagram Abb.6-6: Schaltplan - Wiring diagram- DH 40CT | DH 40CTP DE | EN Version 1.0.2 - 2020-07-06 Originalbetriebsanleitung... -
Page 62: Teileliste Elektrik - Parts List Electrical Components
6.8.1 Teileliste Elektrik - Parts list electrical components Teileliste Elektrik - Parts list electrical components Menge Grösse Artikelnummer Bezeichnung Designation Qty. Size Item no. Schalter Bohrfutterschutz Drill cover switch 1B7.1 Endschalter oben Top limit switch 1B7.2 Endschalter unten Down limit switch Schutzschalter Safety switch Sicherung... - Page 63 Viskosität Schmierstoffe Viskosity Kennzeich- Lubricant nung nach Viscosité ISO VG DIN 51502 Lubrifiant DIN 51519 mm²/s (cSt) Aral Degol BG BP Energol SPARTAN Klüberoil Mobilgear Shell Omala VG 680 CLP 680 Meropa 680 GR-XP 680 EP 680 GEM 1-680 Aral Degol BG BP Energol SPARTAN Klüberoil...
- Page 64 Spezialfette, ALTEMP wasserabweisend Mobilux EP Q NB 50 Special greases, water Energrease Aral Aralub Klüberpaste resistant PR 9143 Mobil Grea- ME 31-52 serex 47 Graisses spéciales, déperlant Wälzlagerfett Shell Alva- K 3 K-20 CENTO- Multifak Pre- Bearing grease Aralub HL 3 Energrease BEACON 3 Mobilux 3...
-
Page 65: Malfunctions
Malfunctions Cause/ Malfunction Solution possible effects Noise during work. • Spindle runs dry. • Grease spindle • Tool blunt or incorrectly clamped. • Use new tool and check tension (fixed setting of the bit, drill chuck and taper mandril) Bit „burnt“ •... - Page 66 Cause/ Malfunction Solution possible effects Rattle the spindle if the • Excessive slack in bearing. • Readjust the bearing slack or replace workpiece surface is rough. the bearing. • Spindle moves up and down • Readjust bearing clearance (fixed • Adjustment strip loose bearing)? •...
-
Page 67: Appendix
Appendix Copyright This document is protected by copyright. All derived rights are reserved, especially those of translation, re-printing, use of figures, broadcast, reproduction by photo-mechanical or similar means and recording in data processing systems, either partial or total. Subject to technical changes without notice. Terminology/Glossary Term Explanation... -
Page 68: Liability Claims/Warranty
Example: not stackable - do not stack further pack- ing case on top of the first one. Consult Optimum Maschinen Germany GmbH if the machine and accessories are stored for more than three months or are stored under different environmental conditions than those spec- ified here. -
Page 69: Decommissioning
8.5.1 Decommissioning CAUTION Used devices need to be decommissioned in a professional way in order to avoid later misuses and endangerment of the environment or persons. Unplug the power cord. Cut the connection cable. Remove all operating materials from the used device which are harmful to the envi- ronment. -
Page 70: Disposal Of Lubricants And Coolants
Modified settings Any experiences with the milling machine which might be important for other users Recurring malfunctions Optimum Maschinen Germany GmbH Dr.-Robert-Pfleger-Str. 26 D-96103 Hallstadt Fax +49 (0) 951 - 96 96555 - -888 email: info@optimum-maschinen.de DH 40CT | DH 40CTP... - Page 71 EC Declaration of Conformity according to Machinery Directive 2006/42/EC Annex II 1.A The manufacturer / Optimum Maschinen Germany GmbH Dr.-Robert-Pfleger-Str. 26 Distributor: D96103 Hallstadt hereby declares that the following product Product designation: Drilling milling machine Type designation: DH40CT | DH40CTP...
- Page 72 Index Storage and packaging .........22 Accessories ............22 Accident report ............. 16 Table cutting speeds ..........42 Technical specification ..........18 Emissions ............19 Classification of hazards ........7 Spindle seat .............18 Control and indicating elements ......26 Tool Customer service ..........41 Removing ............33 Customer service technician ........
Need help?
Do you have a question about the OPTidrill DH 40CT and is the answer not in the manual?
Questions and answers