Table of Contents
Advertisement
Quick Links
Advertisement
Table of Contents

Related Manuals for laerdal AED Trainer 3


Summary of Contents for laerdal AED Trainer 3
- Page 1 AED Trainer 3 www.laerdal.com...
- Page 3 Directions for Use (English) 取扱説明書 (日本語) (Japanese) 使用说明 ( 中文 Visit www.laerdal.com for more language versions of these Directions For Use.
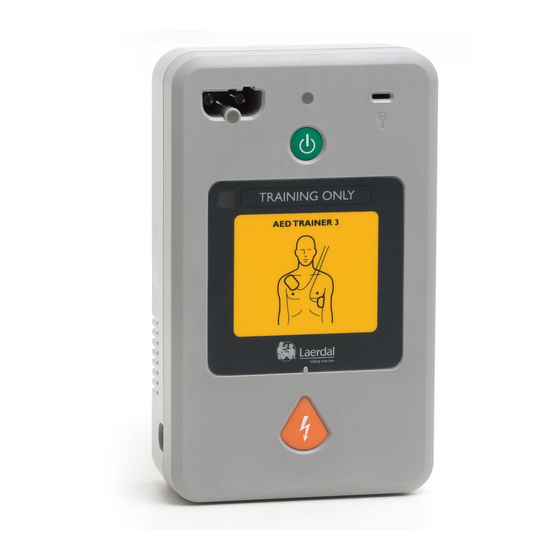
- Page 4 Trainer 3 is turned on; flashes when device is receiving operating system, all voice commands, and device commands from the remote control; stays off when configuration. The Operating System Card must be the device is not in use. installed in the AED Trainer 3 to use the device.
-
Page 5: Table Of Contents
Contents INTRODUCTION Description and Intended use Features HOW SUPPLIED Standard Package Contents SETTING UP THE AED TRAINER 3 Checking the Operating System Card Installing the Batteries Selecting a Language Changing the Configuration Connecting the Training Pads Accessing the Training Infant/Child Key... -
Page 6: Description And Intended Use
Note: Before using the HeartStart FR3 Defibrillator, the responder should have completed an appropriate responder training program, which may include the use of the AED Trainer 3. Having completed such a course, the responder should demonstrate a proficiency in assessing the patient for lack of responsiveness and absence of breathing, cardiopulmonary resuscitation (CPR), and knowledge of applicable medical protocols and procedures. -
Page 7: How Supplied
ITEMS INCLUDED How supplied STANDARD PACKAGE CONTENTS The AED Trainer 3 is shipped with the following items as standard: • one AED Trainer 3 TRAINING TRAINING • one Carry Case • one Training Infant/Child Key pre-installed on tether in Philips Training Pads III... -
Page 8: Setting Up The Aed Trainer 3
Setting up the AED Trainer 3 To set up the AED Trainer 3 for operation, you will need to ensure that the Operating System Card is properly installed, install the batteries, select a different language if you do not wish to use US English, and connect the training pads. -
Page 9: Selecting A Language
SETUP SELECTING A LANGUAGE The default language of the AED Trainer 3 is US English. To set up the AED Trainer 3 for another language, follow the steps below. Press and hold both the green On/Off button and the orange Shock button for about six seconds. The AED Trainer 3 announces the default language “US English”. -
Page 10: Changing The Configuration
CHANGING THE CONFIGURATION The AED Trainer 3 is shipped with a configuration replicating the default factory settings of the FR3 AED. If you want to change the AED Trainer 3 configuration to match local protocols or for other training purposes, follow the steps below: Squeeze the latch on the battery compartment lid to release the lid. -
Page 11: Connecting The Training Pads
Plug the interconnect cable’s yellow connector into the pads connector socket on the front of the AED Trainer 3. Be sure the connector clicks into place. Place the AED Trainer 3 with the pre-connected pads in the carry case. The case is designed to store the AED Trainer 3 with the pads pre-connected. - Page 12 Plug the pads connector into the pads connector socket on the front of the AED Trainer 3. Be sure the connector clicks into place. Place the AED Trainer 3 with the pre-connected pads in the carry case.The case is designed to store the AED Trainer 3 with the pads preconnected.
-
Page 13: Accessing The Training Infant/Child Key
Infant/Child Key Port on the AED Trainer 3. Note: Do not leave the Training Infant/Child Key in the AED Trainer 3 for storage. Install the Training Infant/Child Key in the AED Trainer 3 only when teaching defibrillation of infants or children under 8 years old or 55 lbs (25 kg). -
Page 14: Using The Aed Trainer 3
USER INSTRUCTIONS Using the AED Trainer 3 PREPARING TO USE THE AED TRAINER 3 Before turning on the AED Trainer 3, follow the steps below: Check that the pads are pre-connected as described, see section: Connecting the training pads. If no training... - Page 15 8 years old or 55 lbs (25 kg).* * The training Infant/Child Key should be kept with the AED Trainer 3, but not connected until you are ready to use the AED Trainer 3 in a pediatric scenario.
-
Page 16: Selecting A Training Scenario
RUNNING A TRAINING SCENARIO To run a training scenario, press the On/Off button to turn on the AED Trainer 3, and following the AED Trainer 3’s voice instructions to simulate use of the FR3 AED in an emergency. For troubleshooting assistance, see section troubleshooting tips. -
Page 17: Appendices
Appendices PARAMETER SETTINGS TRAINING SCENARIOS REMOTE CONTROL TROUBLESHOOTING TIPS SPECIFICATIONS REGULATORY INFORMATION GLOSSARY OF SYMBOLS... -
Page 18: Parameter Settings
SET PARAMETERS PARAMETER SETTINGS The following parameter settings are available in the AED Trainer 3. Default settings are shown in boldface. Parameter Settings Description loud Volume Sets the AED Trainer 3 speaker volume. , medium, soft Shock Series Sets the number of shocks in a series that... - Page 19 , 2, 3, 4, 5, 6, 7,8 Trainer 3 is turned on. LINK Pads attachment Slide Scale: Lower to Higher Determines the required placement accuracy tolerance of training pads on a Laerdal LINK manikin. Lower tolerance equates to a more accurate pad placement requirement.
-
Page 20: Training Scenarios
Non-shockable rhythm detected by AED Trainer 3 Pads problem detected by AED Trainer 3 CPR First protocol initiated by AED Trainer 3 The following training scenarios are available for use with the AED Trainer 3: Scenario Symbol Description • Shockable rhythm •... - Page 21 TRAINING SCENARIOS Scenario Symbol Description • Non-shockable rhythm throughout Non-shockable rhythm • Shockable rhythm • Two shocks needed for conversion • Non-shockable rhythm Two shocks for conversion • Shockable rhythm • CPR First • Shockable rhythm CPR first, one shock for conversion •...
-
Page 22: Remote Control
Pause/Resume. Press Pause to freeze all activity in the AED Trainer 3. (The AED Trainer 3’s On/ Off light will flash at a slow rate when the AED Trainer 3 is paused.) Press Resume to continue the activity from the point at which it was paused. -
Page 23: Troubleshooting Tips
TROUBLESHOOTING TROUBLESHOOTING TIPS The following table provides troubleshooting tips for using the AED Trainer 3 If you need additional assistance, please contact your local laerdal representative or go to www.laerdal.com/aedt3 Issue Possible Cause Suggested Action AED Trainer 3 does not work •... -
Page 24: Specifications
SPECIFICATIONS SPECIFICATIONS AED Trainer 3 Specification Size 218 mm x 133 mm x 57 mm (8.6” x 5.2” x 2.2” ) Weight (with batteries) 600 g (1.3 lb) Battery type and quantity 4 AA size alkaline batteries (LR6) Battery capacity >... -
Page 25: Regulatory Information
REGULATORY INFORMATION REGULATORY INFORMATION The product is in compliance with the essential requirements of Directive 2014/30/EU on electromagnetic compatibility through compliance with: • EN 61000-6-3 Electromagnetic Compatibility (EMC) - Part 6-3: generic Standards - Emission standard for residential, commercial and lightindustrial environments •... - Page 26 AEDトレーナ3のユーザーインターフェイス A. トレーニングパッ ドコネクタポート G. 小児用キーポート — トレーニング — トレーニング用小児用キー パッ ドのコネクタプラグの差し込み口。 の差し込み口。 キーを差し込むと、 AEDトレーナ3 は 小児モードで動作し、 8歳未満または体 B. パッ ドコネクタLED — 電源を入れると点滅して、 ポー 重25kg未満の小児に対する除細動のシミ ュレー トの位置を示します。 パッドコネクタのプラグが正し シ ョ ンを行います。 く接続されると、 差し込まれたコネクタのプラグによ H. 電源ON/OFFボタン (緑) ってLEDが覆われるため、 点滅が止まります。 — AEDトレーナ3の電源を 入れると、...
- Page 27 キッ トの内容 はじめに 概要と使用目的 特長 同梱されている内容 標準パッケージの内容 AEDトレーナ3のセッ トアップ オペレーティ ングシステムカードの確認 バッテリの装着 言語の選択 設定の変更 トレーニングパッ ドの接続 トレーニング用小児用キーの使用 AEDトレーナ3の使用 トレーナーの使用準備 トレーニングシナリオの選択 トレーニングシナリオの実行 付録 パラメータの設定 トレーニングシナリオ リモコン トラブルシューティ ング 仕様 関連規格/規制について 記号の定義...
- Page 28 はじめに はじめに 概要と使用目的 AEDトレーナ3は、 ハートスタートFR3自動体外式除細動器 (以下FR3) および他のAEDの緊急時の使用に備えて、 使用 方法を トレーニングできるよう設計されています。 AED 3を、 推奨マネキンと併用することで、 実際と同様のト トレーナ レーニングを提供することができます。 これは、 突然心停止状態の傷病者へのシ ョ ックの適用や、 CPRを含む適切な 処置に関するリアルなトレーニングを実現します。 3には8種類のトレーニングシナリオがあり、 実際の突然心停止 (SCA) の症状のシミュレーションを行 トレーナ い、 緊急時のFR3の使用に対する理解を深めることができます。 シナリオは、 国際的に認められたプロトコルに沿っ て開発されたトレーニングプログラムに対応しています。 3の工場出荷時の初期設定は、 ERC (European Resuscitation Council) およびAHA (American Heart トレーナ...
- Page 29 • ハートスタート トレーニングパッ ドⅢ接続 ケーブル (リユーザブル) ×1 オペレーティ ング トレーニングパッ ドⅢ接続 システムカード ケーブル (リユーザブル) • ハートスタート トレーニングパッ ドⅢ (リユーザブル) ×1セッ ト 取扱説明書 (印刷物、 英語および日本語) ×1 • • クイックスタートガイド (多言語) ×1 • 「トレーニング専用」 ステッカー (多言語) ×1 単三アルカリ電池×4 ( 図には含まれていません) • 最新版の予備部品とアクセサリについては、 www.laerdal.com/jp/ をご覧ください キャリングケース...
- Page 30 セッ トアップ AEDトレーナ3のセッ トアップ AEDトレーナ3の動作をセッ トアップするには、 オペレーティ ングシステムカードが適切に挿入されていることを確 認し、 バッテリを装着し、 U.S. English ( 米国英語) 以外の言語を使用する場合は言語を選択し、 トレーニングパッ ドを 接続する必要があります。 これらの各タスクについて、 以下で説明します。 オペレーティ ングシステム ・ カードの確認 AEDトレーナ3オペレーテ ィ ングシステムカードには、 AEDトレーナ3のオペレーテ ィ ングシステムが含まれています。 AEDトレーナ3は、 オペレーテ ィ ングシステムカード があらかじめ挿入された状態で出荷されます。 オペレーティ ングシステムカードの取り外し、 再挿入、 交換は、 以下の手順に従っ て行います。...
- Page 31 セッ トアップ 言語の選択 AEDトレーナ3の初期設定の言語は、 U.S.English ( 米国英語) です。 AEDトレーナ3を別の言語に設定するには、 以下 の手順に従います。 緑の電源ON/OFFボタンとオレンジのショ ックボタンの両方を約6秒間押し続けます。 AEDトレーナ3から初期 設定の言語 「US English」 のアナウンスが流れます。 両方のボタンを離します。 オレンジのショ ックボタンを押したまま、 使用可能な言語をスクロールします。 AEDトレーナ3が新しい言語を 順にアナウンスします。 希望する言語がアナウンスされたら、 緑の電源ON/OFFボタンを押してAEDトレーナ3の電源をオフにし、 選択 言語を保存します。 次回にAEDトレーナ3の電源をオンにしたときは、 この言語が使用されます。 * 下図に従って、 選択言語に該当する 「トレーニング専用」 ステッカーを貼ります。 * AEDトレーナ 3は、 電源ON/OFFボタンまたはショ ックボタンのどちらを押しても、 電源をオンにできます。...
- Page 32 セッ トアップ 設定の変更 AEDトレーナ3の出荷時設定は、 FR3の工場初期設定を再現しています。 施設のプロトコルや他のトレーニング目 的でAEDトレーナ3の設定を変更する場合は、 以下の手順に従います。 バ ッテリスロッ トの蓋に付いているラッチを押して、 蓋を取り外します。 取り外した蓋は側に置きます。 オ ペレーティ ングシステムカードをバッテリスロッ ト上部のスロッ トから取り外します。 オ ペレーティ ングシステムカードをコンピュータのカードスロッ トに挿入します。 スロッ トがない場合は、 標準 のカードリーダーに挿入し、 カードリーダーをコンピュータに接続します。 AEDトレーナ3の設定プログラムを開き、 設定する際に使用する言語を選択して ください。 「 開く」 をクリ ックし、 オペレーティ ングシステムカードが挿入されたドライブを指定します。 「システム」 をクリ ックしてから 「設定」 をクリ ックし、 「 Config.Dat」 ファイルを開い て、...
- Page 33 セッ トアップ トレーニングパッ ドの接続 AEDトレーナ3では、 ハートスタート トレーニングパッ ドⅢまたはトレーニングパッ ド使用できます。 ハートスタート トレーニングパッ ドIII AEDトレーナ3へのハートスタート トレーニングパッ ドⅢの接続は、 以下の手順に従って行います。 ハートスタート トレーニングパッ ドⅢを台紙に付けたまま保管用の袋から取り出します。 接続ケーブルを保管用の袋から取り出します。 パッ ドケーブルを接続ケーブルに接続します。 接続ケーブルの黄のコネクタをAEDトレーナ3前面のパッ ドコネクタポートに差し込みます。 カチッと音がする までコネクタをしっかりと差し込みます。 パッ ドがプリコネク トされたAEDトレーナ3をキャリングケースに入れます。 ケースは、 パッ ドがプリコネク トさ れた状態でAEDトレーナ3を収納できるよう設計されています。 ハートスタート トレーニングパッ ドⅢは最大100回まで使用できます。 性能を確実に持続させるため、 パッ ドを高熱 や直射日光の当たる環境に置かないでください。...
- Page 34 セッ トアップ レールダル リンク ト レーニングパッ ド AEDトレーナ3へのレールダル リンク ト レーニングパッ ド接続は、 以下の手順に従っ て行います。 レールダル リンク ト レーニングパッ ドを台紙に付けたまま保管用の袋から取り出します。 パッ ドのコネクタをAEDトレーナ3前面のパッ ドコネクタポートに差し込みます。 カチッと音がするまでコネクタ をしっかりと差し込みます。 パッ ドがプリコネク トされたAEDトレーナ3をキャリングケースに入れます。 ケースは、 パッ ドがプリコネク トさ れた状態でAEDトレーナ3を収納できるよう設計されています。...
- Page 35 セッ トアップ トレーニング用小児用キーの使用 トレーニング用小児用キーは、 AEDトレーナ3キャリングケースに固定紐で取り付けられた状態で出荷されます。 トレーニング用小児用キーを使用するには、 ケースの蓋のスロッ トから取り出し、 固定紐を伸ばしてAED トレーナ 3の小児用キーポートにキーを差し込みます。 注 記: トレー ニング用 小 児 用 キ ー をA E Dトレー ナ 3 に 取り付 け たまま 保 管しな いでくだ さい 。 トレーニング用小児用キーは、 8歳未満または体重25kg未満の小児の除細動のトレーニングを行う場合の みAEDトレーナ3に取り付けます。...
- Page 36 使用手順 AEDトレーナ3の使用 AEDトレーナ3の使用準備 AEDトレーナ3の電源をオンにする前に、 以下の手順を行いま す。 説明に従って、 パッ ドがプリコネク トされていることを確 認します。 「 トレーニングパッ ドの接続」 の項を参照してく ださい。 AEDトレーナ3の電源を入れたときにトレーニン グパッドが接続されていなければ、 パッドを傷病者の胸 に直接装着し、 ランプが点滅しているソケッ トに、 パッド のコネクタを接続するよう求める音声メッセージが流れ ます。 ハートスタート トレーニングパッドIIIを使用する場合は、 下図のように付属のトレーニングマネキン用外部アダプ タを トレーニングマネキンに装着します。 図のようにパッ ドをアダプタの上におきます。...
- Page 37 使用手順 レールダル リンク ト レーニングパッ ドを使用している場合は、 Laerdal AED レサシアン、 またはAED リ トルアンなど、 レールダル リンク テク ノロジー を備えたLaerdal マネキンを使用して ください。 ( レールダル リンク テク ノロジー によ って、 マネキン上のパッ ドの正しい配置が示されます) 。 小児の除細動のトレーニングを行う場合は、 トレーニング用小児用キーを本書の表紙裏面の図に示されたポ ートに挿入します。 小児モードは、 8歳未満または体重25 kg未満の小児への除細動のトレーニングを目的とし ています。 * * トレーニング用小児用キーはAEDトレーナ3と共に保管しておく必要がありますが、 小児用のシナリオでAEDトレーナ3を使用 する準備ができるまで接続しないでください。...
- Page 38 使用手順 トレーニングシナリオの選択 AEDトレーナ3を使用する準備ができたら、 以下の手順を行います。 緑色のオン/オフボタンを約 6 秒間押し続けて ください。 AEDトレーナ3 では、 オレンジ色のショ ックボタ ンを押してトレーニングシナリオを選択するように指示するメッセージが表示されます。 指示に従って、 オレンジのショ ックボタンを押します。 AEDトレーナ3によ って現在のトレーニングシナリオ の番号が通知されます。 別のシナリオを選択するには、 オレンジのショ ックボタンを押したまま8種類のシナリオを順にスクロール します。 AEDトレーナ3によ って現在のシナリオ番号が順に通知されます。 各シナリオの詳細については、 「 付録」 の項を参照して ください。 希望するシナリオに達したら、 電源ON/OFFボタンを押してAEDトレーナ3の電源をオフにし、 選択シナリ オをオペレーティ ングシステムカードに保存します。 次回AEDトレーナ3の電源をオンにしたときに、 選択 したシナリオがアクティ ブになります。 注記 : 使用しない状態が10分間続く と、 AEDトレーナ3は自動的にオフになります。 トレーニングシナリオの実行...
- Page 39 付録 パラメータの設定 トレーニングシナリオ リモコン トラブルシューティ ング 仕様 関連規格/規制について 記号の定義...
- Page 40 パラメータの設定 パラメータの設定 AEDトレーナ3では、 次のパラメータの設定が可能です。 初期設定は太字で示しています。 パラメータ 設定値 説明 大 音量 、 中、 小 AEDトレーナ3のスピーカーの音量を設定しま す。 ショ ックシリーズ 、 2、 3、 4 基本となるCPRプロトコルが自動的に開始され るまでの間に実行される、 シリーズ内のショ ック 回数を設定します。 ショ ックシリーズ 、 2.0、 無制限 実行されたショ ックを現在の連続するショ ックと 間隔 (分) してカウントするかどうかを判断する時間を設 定します。 このパラメータは、 ショ ックシリーズが 2回以上に設定されている場合に限り適用され...
- Page 41 パラメータの設定 パラメータ 設定値 説明 成人のCPR優先タイマー 現在は機能しないパラメータ。 (分) 小児のCPR優先タイマー 現在は機能しないパラメータ。 (分) 現在は機能しないパラメータ。 CPRタイプ トレーニングシナリオ 、 2、 3、 4、 5、 6、 7 AEDトレーナ3の電源をオンにした時点で使用 されるトレーニングシナリオを設定します。 レールダル リンク ト レー スケールを 「小さい」 から 「 レールダル リンク マネキンへのトレーニングパ ニングパッ ドの装着許容 大きい」 へスライド ッ ドの装着について、 必要な確度を指定します。 誤差 許容誤差が小さいほど、 より正確にパッ ド を装着する必要があります。...
- Page 42 トレーニング ・ シナリオ トレーニングシナリオ 以下で定義されている記号は、 トレーニングシナリオの定義を表します。 記号 シナリオの説明 AEDトレーナ3によ ってショ ックが必要な調律が検出される。 AEDトレーナ3によ ってショ ックが不要な調律が検出される。 AEDトレーナ3によ ってパッ ドの問題が検出される。 AEDトレーナ3によ って 「CPR優先」 プロトコルが開始される。 AEDトレーナ3では、 次のトレーニングシナリオを使用できます。 トレー 記号 説明 ニング シナリオ • ショ ックが必要な調律 • 1回のショ ックを実施 • ショ ック不要な調律 1回のショ ックが必要 • ショ ック不要な調律 •...
- Page 43 トレーニング ・ シナリオ トレー 記号 説明 ニング シナリオ • ショ ックが必要な調律 • 1回のショ ックを実施 • ショ ック不要な調律 除細動後の再除細動 • 3分後再度ショ ックが必要な調律 • 細動を停止するのに1回のショ ックが必要 • ショ ック不要な調律 • 終始ショ ック不要な調律 ショ ック不要な調律 • ショ ックが必要な調律 • 2回のショ ックを実施 • ショ ック不要な調律 2回のショ...
- Page 44 リモコン リモコン リモコンのボタンの機能について以下に説明します。 ボタン 機能 シナリオの選択。 8つの標準シナリオの1つを押して選択します。 ( AEDトレーナ3によ って選択され たシナリオが開始されます。 ) 一時中断/再開。 「 一時中断」 を押すと、 AEDトレーナ3のすべての動作が中断されます (AEDトレーナ 3の中断中は、 AEDトレーナ3のON/OFFランプがゆっ く りと点滅します) 。 中断した時点から動作を 再開させるには 「再開」 を押します。 ショ ックが必要な調律。 このボタンを押すと、 ショ ックが必要な調律をシミュレートします。 ( この機 能は実行中のシナリオより優先されます) 。 ショ ック不要な調律。 このボタンを押すと、 ショ ック不要な調律をシミュレートします。 (この機能は実行中のシナリオより優先されます)...
- Page 45 トラブルシューテ ィ ング トラブルシューティ ング 3を使用する場合のトラブルシューティングを下表に示します。 さらにサポートが必要な場合は、 レ トレーナ ールダルヘルプデスクにお問い合わせください。 または、 www.laerdal.comを参照して ください。 問題 原因 対処法 3が動作せず、 電 オペレーティングシス オペレーティングシステムカードを挿入 トレーナ • • 源をオンにするとビープ音 テムカードが挿入され して ください。 が鳴る。 ていない。 不 適 切 なカードが挿 正規のオペレーティングシステムカード • • 入されている。 を挿入して ください。 オ ペ レ ー テ ィ ン グ...
- Page 46 仕様 仕様 仕様 AEDトレーナ3 寸法 218 mm x 133 mm x 57 mm 質量 (電池を含む) 600 g 電池のタイプと数量 単三アルカリ電池 (LR6) x 4 電池の容量 > 10時間 環境仕様 動作温度 : 10ºC~35ºC 保管温度 : 0ºC~40ºC 相対湿度 : 0~90% (結露なし) 材料 筺体 : アクリロニトリル ・ ブタジエン ・ スチレン (ABS) コン...
- Page 47 関連規格/規制情報 関連規格/規制について 本製品は、 以下に準拠することにより、 電磁両立性に関するCouncil Directive 2014/30/EU の必須要件に準拠 しています。 • EN 61000-6-3 Electromagnetic Compatibility (EMC) - Part 6-3: generic Standards - Emission standard for residential, commercial and lightindustrial environments • EN 61000-6-1 Electromagnetic Compatibility (EMC) - Part 6-1: Generic standards - Immunity for residential, commercial and light-industrial environments 本製品は、...
- Page 49 AED 训练器 3 用户界面 A. 练习电极片接头插座 G. 婴儿/儿童钥匙插孔 — 练习 — 练习用婴儿/儿童钥匙 电极片接头插头的插口。 插口。 插入钥匙后, AED 训练器 3 进入 “婴儿/儿 童模式” 模式, 对婴儿或 8 岁以下或 25 公斤 (55 B. 电极片接头液晶显示灯 — 闪烁, 以便在设备 磅) 以下儿童进行模拟除颤。 打开时指示插座位置。 插入的电极片接头插头会 H. 绿色 “打开/关闭” 按钮 挡住液晶显示灯,...
- Page 50 目录 简介 说明与设计用途 功能 供应方式 标准包装内容 设定 AED 训练器 3 检查操作系统卡 安装电池 选择语言 更改配置 连接练习电极片 取用练习用婴儿/儿童用钥匙 使用 AED 训练器 3 准备使用训练器 选择培训病例 运行培训病例 附录 参数设置 培训病例 遥控 故障排除提示 规格 法规信息 符号术语表...
- Page 51 简介 简介 说明与设计用途 AED 训练器 3 设计用于救护人员使用 HeartStart FR3 自动体外除颤器 (AED) 及其他 AED 前的准备工作。 通过 配合适当的模拟人, AED 训练器 3 可针对如何为心脏骤停病人采取正确的治疗措施提供实效练习, 包括电击发 送和 CPR。 AED 训练器 3 提供八种培训病例, 可模拟实际心脏骤停 (SCA) 的不同阶段, 帮助救护人员熟悉急救时 HeartStart FR3 AED 的用法。 这些病例兼容国际公认救护人员计划所开发的练习计划。 AED 训练器 3 出货时配有工厂默认设置, 符合 ERC (欧洲复苏委员会) 和 AHA (美国心脏协会) 2010 指南中的规 定。...
- Page 52 绳上 一个外部模拟人适配器 • 一张预装AED训练器3操作系统和配置程序的系统卡 练习用婴儿/儿童钥匙 • 一根可重复使用的 HeartStart 练习电极片 III 互联线 • 一套可重复使用的 HeartStart 练习电极片 III 可重复使用的练习电 操作系统卡 • 极片 III 互联线 一份英文版和日文版的使用说明印本 • 一份多语言版本快速启动指南 • 一套多语言版本 “仅用于培训” 贴纸 • 4 颗 AA 碱性电池 (未显示) • 如需最新版本的备件和配件, 请访问 www.laerdal.com/cn/ 便携包...
- Page 53 设置 设定 AED 训练器 3 要设定 AED 训练器 3 用于操作, 您需确保已正确装入操作系统卡, 然后安装电池, 如果您不想使用美国英语, 请 选择其他语言, 最后连接练习电极片。 下面是针对这些任务的具体说明。 检查操作系统卡 AED 训练器 3 操作系统卡中包含针对 AED 训练器 3 的操作系统。 AED 训练器 3 附带有预装的操作系统卡。 如需取出、 重装或更换操作系统卡, 请按照以下步骤操作: 按下电池盒盖上的锁闩使锁闩松开。 拉起盖子并放在一旁。 检查操作系统卡是否装入背舱顶部的插槽中。 如未装入, 则按图示方向装 入操作系统卡。 安装电池 AED 训练器...
- Page 54 设置 选择语言 AED 训练器 3 的默认语言为美国英语。 要将 AED 训练器 3 设为其他语言, 请按照以下步骤操作。 请同时按住绿色的 “打开/关闭” 按钮和橙色的 “电击” 按钮约六秒钟。 AED 训练器 3 将读出默认语言 “U.S. English” ( 美国英语) 。 松开这两个按钮。 按住橙色的 “电击” 按钮, 滚动查看每种可用语言。 AED 训练器 3 会读出每种新语言。 当 读 出 您 需 要 的 语 言 时, 请 按 下 绿 色 的 “ 打 开 / 关 闭 ” 按 钮 关 闭 A E D 训 练 器 3 并 存 储 所 选 语 言 。 AED 训练器...
- Page 55 设置 更改配置 AED 训练器 3 附带的配置复制了 FR3 AED 的出厂默认设置。 如果您想更改 AED 训练器 3 的配置以符合当地协 议要求或用于其他练习用途, 请按照以下步骤操作: 按下电池盒盖上的锁闩使锁闩松开。 拉起盖子并放在一旁。 从背舱上方的卡槽中取出操作系统卡。 将操作系统卡插入计算机的卡槽中, 或者如果没有卡槽, 请将此卡插入标准读卡器中然后再将读卡器与计 算机相连。 打开 AED 训练器 3 配置程序并根据需要调节参数设置。 有关可用设置的详细信息, 请参阅 “选择培训病例” 一节。 单击 “打开” , 然后转至操作系统卡驱动器。 先后单击 “System” , “ Config” , 然后打开 “Config.Dat” 文件以将现有的训练器 3 安装程序加载到程 序中。...
- Page 56 设置 连接练习电极片 AED 训练器 3 既可配合 HeartStart 练习电极片 III 使用也可配合 Laerdal LINK Technology 练习电极片使用。 HEARTSTART 练习电极片 III 要将 HeartStart 练习电极片 III 连接到 AED 训练器 3, 请按照以下步骤操作。 从存放包中取出 HeartStart 练习电极片 III, 不要从背衬上撕下电极片。 从存放包中取出互连线。 将电极片电缆与互连线相连。 将互联线的黄色接头插入 AED 训练器 3 前面的电极片接头插座。 确保接头卡入到位。 将配有预先连接电极片的 AED 训练器 3 放入便携包中。 此便携包专用于存放配有预先连接电极片的 AED 训练器...
- Page 57 设置 LAERDAL LINK TECHNOLOGY 练习电极片 要将 Laerdal LINK Technology 练习电极片连接到 AED 训练器 3, 请按照以下步骤操作。 从存放包中取出 Laerdal LINK Technology 练习电极片, 不要从背衬上撕下电极片。 将电极片插头插入 AED 训练器 3 前面的电极片接头插座。 确保接头卡入到位。 将配有预先连接电极片的 AED 训练器 3 放入便携包中。 此便携包专用于存放配有预先连接电极片的 AED 训练器 3。...
- Page 58 设置 取用练习用婴儿/儿童钥匙 练习用婴儿/儿童钥匙位于 AED 训练器 3 便携包中预先配备的钥匙绳上。 如需取用练习用婴儿/儿童钥匙, 请先从便携包盖的钥匙格中取出钥匙, 然后展开钥匙绳将钥匙插入 AED 训练 器 3 上的婴儿/儿童钥匙插孔中。 注意: 请勿将练习用婴儿/儿童钥匙滞留在 AED 训练器 3 中。 只有在教授婴儿或 8 岁以下或 55 磅 ( 25 公斤) 以下儿童的除颤操作时才可将练习用婴儿/儿童钥匙插入 AED 训练器 3 中。...
- Page 59 用户指南 使用 AED 训练器 3 准备使用 AED 训练器 3 打开 AED 训练器 3 之前, 请按照以下步骤操作: 检 查 是 否 按 照 所 述 要 求 预 先 连 接 好 电 极 片, 请 参 阅 “ 连 接 练 习 电 极 片 ” 一 节 。 如 果 在 打 开...
- Page 60 用户指南 如果使用 Laerdal LINK Technology 练习电极片, 请使用采用 Laerdal LINK Technology 的 Laerdal 模拟人, 如 Laerdal AED Resusci Anne 或 AED Little Anne。 ( Laerdal LINK Technology 可指明模拟人上的正确电 极片位置。 ) 如果是在进行婴儿/儿童除颤练习, 请将练习用婴儿/儿童钥匙插入本手册封面内页示意图中所标示的插孔 中。 “ 婴儿/儿童” 模式用于对婴儿或 8 岁以下或 55 磅 (25 公斤) 以下的儿童进行除颤练习。 *...
- Page 61 用户指南 选择一个培训病例 当您准备好使用 AED 训练器 3 时, 请按照以下步骤操作: 按住绿色的 “打开/关闭” 按钮大约 6 秒。 AED 训练器 3 将指导你按下橙色的 “电击” 按钮以选择练习病 例。 根据指示按下橙色的 “电击” 按钮。 AED 训练器 3 将读出目前的培训病例编号。 如需选择其他病例, 请按住橙色的 “电击” 按钮依次滚动查看八个病例中的每个病例。 每滚动到一个病 例, AED 训练器 3 就会读出相应的病例编号。 有关各个病例的详细描述, 请参阅 “附录” 一节。 当滚动到您所需的病例时,...
- Page 62 附录 参数设置 培训病例 遥控 故障排除提示 规格 法规信息 符号术语表...
- Page 63 训练器 3 遥控。 模拟人液晶显示灯 打开、 关闭 启用 (打开) 或停用 (关闭) 模拟人胸部皮肤上用 来表示正确电极片位置的电极片液晶显示灯自 动亮灯功能。 当选择关闭时, 液晶显示灯只会在 使用遥控时亮起 (请注意, 只有在使用 Laerdal LINK 电极片和 Laerdal Link 模拟人时, 此功能 才可用。 ) 成人基本 1.0、 1.5、 2.0、 2.5、 3.0 设定成人基本 CPR 的 CPR 程序长度。 CPR 持续时间 (分钟)...
- Page 64 持续时间 (分钟) 先执行婴儿/儿童 CPR 的 目前无适用参数 持续时间 (分钟) CPR 类型 目前无适用参数 病例 1、 2、 3、 4、 5、 6、 7、 8 设定在打开 AED 训练器 3 时 要使用的培训病例。 LINK 电极片贴放 滑标: “ 较低” 至 确定练习电极片在 Laerdal LINK 模拟人上的 容差 “较高” 定位精度。 较低容差表示更精确的电极片放置要求。...
- Page 65 培训病例 培训病例 以下定义的符号用于表示培训病例的重要信息。 符号 病例说明 AED 训练器 3 检测到可电击心律 AED 训练器 3 检测到不可电击心律 AED 训练器 3 检测到电极片问题 AED 训练器 3 启动 “先执行 CPR” 程序 以下培训病例均可用于 AED 训练器 3: 病例 符号 说明 • 可电击心律 • 需要执行一次电击方可变换 一次电击方可变换 • 不可电击心律 • 不可电击心律 •...
- Page 66 培训病例 病例 符号 说明 • 始终为不可电击心律 不可电击心律 • 可电击心律 • 需要执行两次电击方可变换 • 不可电击心律 两次电击方可变换 • 可电击心律 • 先执行 CPR • 可电击心律 先执行 CPR, 一次电击方可变换 • 需要执行一次电击方可变换 • 不可电击心律 • 始终为可电击心律 可电击心律...
- Page 67 运动伪影。 按下此按钮可以模拟运动伪影干扰心率分析的情况。 ( 此功能会中断分析, AED 训 练器 3 会发出语音提示, 要求受训人员停止所有活动。 ) 模拟人电极片液晶显示灯。 按下此按钮可使模拟人胸部指示电极片位置的液晶显示灯亮起。 (只有在使用 Laerdal LINK 电极片和 Laerdal LINK 模拟人时, 此功能才可用。 ) 错误情况。 按下此按钮可以模拟 AED 训练器 3 中的 AED 错误情况。 ( AED 训练器 3 关闭并且 每 10 秒钟发出一次尖鸣声。 ) 注意: 如需清除错误情况并打开 AED 训练器 3 供后续使用, 请按下绿色的 “打开/关闭”...
- Page 68 故障排除 故障排除提示 下表介绍了使用 AED 训练器 3 时需要注意的故障排除提示。 如需获得更多帮助, 请联系您当地的 Laerdal 代表 或访问 www.laerdal.com/aedt3 。 问题 可能的原因 建议措施 AED 训练器 3 不工作, 未安装操作系统卡。 安装操作系统卡。 • • 打开时发出蜂鸣信号。 装入的卡不正确。 安装原始操作系统卡。 • • 操作系统卡中的文件 获取备用操作系统卡。 • • 损坏或缺少文件。 AED 训练器 3 在电极 已连接了 HeartStart 如需使用...
- Page 69 规格 规格 AED 训练器 3 规格 尺寸 218 毫米 x 133 毫米 x 57 毫米 (8.6 英寸 x 5.2 英寸 x 2.2 英寸) 重量 (含电池) 600 克 (1.3 磅) 电池类型和数量 4 颗 AA 碱性电池 (LR6) 电池容量 10 小时以上 环境规格 工作温度: 10-35 º C (50-95 º F) 存放温度:...
- Page 70 法规信息 法规信息 本产品遵守以下规定, 因而符合指令 2014/30/EU 关于电磁兼容性的基本要求: EN 61000-6-3 电磁兼容性 (EMC) - 第 6-3 部分: 通用标准 - 住宅区、 商业区及轻工业环境的辐射标准 • EN 61000-6-1 电磁兼容性 (EMC) - 第 6-1 部分: 通用标准 - 住宅区、 商业区及轻工业环境的抗干扰性 • 本产品符合 FCC 第 15 部分无线电射频设备, 子部分 B - 无意辐射体 (2004 年 5 月) 。 本设备符合 FCC 规则第 15 部分的要求。...
- Page 72 Reference to Global warranty: For information on Laerdal’s Global Warranty, please refer to the website www.laerdal.com. Technical Assistance For Technical Assistance please contact your local Laerdal Technical Service Centre. グローバルワランティについて 当社のグローバルワランティの詳細については、 当社Webサイ ト (www.laerdal.com) を参照 して ください。 テクニカルサポート テクニカルサポートについては、 レールダル...
- Page 74 © 2019 Laerdal Medical AS. All rights reserved. Manufactured in China for Laerdal Medical AS P.O. Box 377, Tanke Svilandsgate 30, 4002 Stavanger, Norway T: (+47) 51 51 17 00 Printed in China www.laerdal.com...
Need help?
Do you have a question about the AED Trainer 3 and is the answer not in the manual?
Questions and answers