Advertisement
Table of Contents
WARNING
• All electrical work must be done in
accordance with local codes, ordi-
nances, or National Electrical Code
as applicable. FOR SAFETY, THIS
PRODUCT MUST BE GROUNDED.
If you are unfamiliar with methods of
installing electrical wiring, secure the
services of a qualified electrician.
• Turn off power and lock out service
panel before installing, wiring, or ser-
vicing this product.
• To prevent serious injury from elec-
trical shock or damage to electrical
components - DO NOT WIRE HOT!
• Use with copper wire only.
• Warranty void if miswired.
INSTALLATION
1. Turn off power and lock out service
panel before wiring the control.
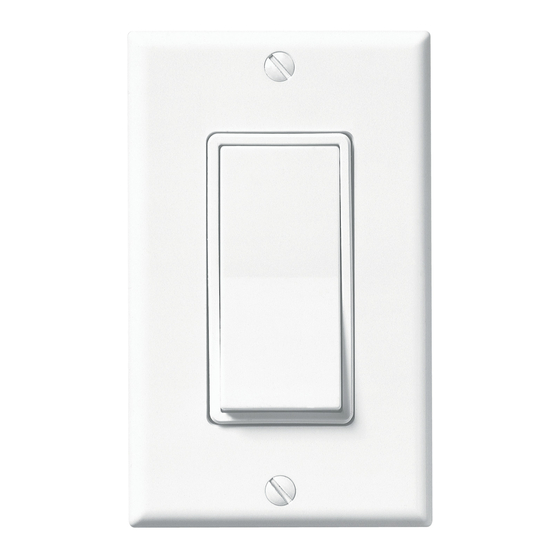
ROCKER SWITCH
2. Install at least a 2¾" deep switch box
3. Connect cables to switch box and
4. Make electrical connections follow-
5. Tuck wires into switch box and fas-
6. Fasten the switch plate to the con-
for 14 AWG wire or at least a 3½"
deep switch box for 12 AWG wire.
appliance (load) using appropriate
connectors. Provide 6" leads inside
box and appliance and strip ends
5/8". (Use strip gauge on back of
switch.)
ing diagram on back. Make sure both
the control and the appliance are
properly grounded. For side-wiring:
Loop wires clockwise, ¾ turn around
terminal screws and tighten securely.
For push-in wiring: Insert straight
ends of wires into appropriate push-
in wiring holes. Do no insert wires into
release slots.
ten the control to box using attached
screws.
trol using the short screws from the
parts bag.
Advertisement
Table of Contents

Subscribe to Our Youtube Channel
Related Manuals for NuTone 69W


Summary of Contents for NuTone 69W
- Page 1 ROCKER SWITCH 2. Install at least a 2¾” deep switch box WARNING for 14 AWG wire or at least a 3½” • All electrical work must be done in deep switch box for 12 AWG wire. accordance with local codes, ordi- 3.
- Page 2 To qualify for warranty service, you must (a) notify Broan-NuTone LLC at the address stated below or telephone: 1-800- 637-1453, (b) give the model number and part identification and (c) describe the nature of any defect in the product or part.
Need help?
Do you have a question about the 69W and is the answer not in the manual?
Questions and answers