Advertisement
Available languages
Available languages
Quick Links
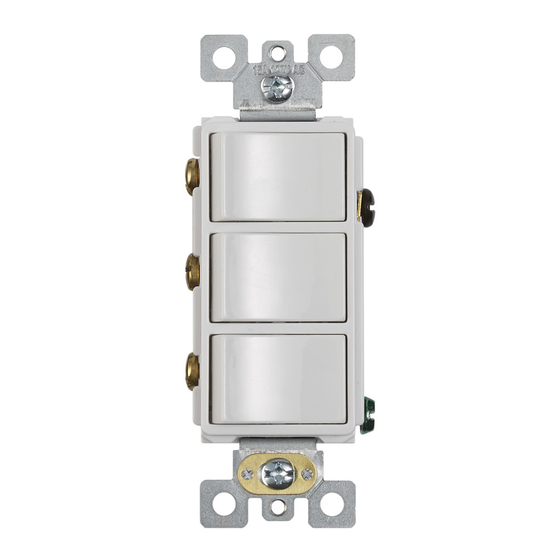
MODEL P2RW - 2 ROCKER SWITCH
MODEL P3RW - 3 ROCKER SWITCH
Control 2 or 3 devices independently
SAFETY WARNINGS
ALL ELECTRICAL WORK MUST BE DONE IN
ACCORDANCE WITH LOCAL CODES, ORDINANCES,
OR NATIONAL ELECTRICAL CODE AS APPLICABLE.
FOR SAFETY, THIS PRODUCT MUST BE INSTALLED IN
A GROUNDED SWITCH BOX. IF YOU ARE UNFAMILIAR
WITH METHODS OF INSTALLING ELECTRICAL
WIRING, SECURE THE SERVICES OF A QUALIFIED
ELECTRICIAN.
Turn off power before installing or wiring this product
and test that the power is off.
Use this rocker switch only with copper wire. Do not
use aluminum wire with this device.
To prevent serious injury from electrical shock or
damage to electrical components – DO NOT WIRE HOT!
Turn off power breaker to this switch.
Total load for the multi-rocker switch is rated at 15
amps, @ 120 VAC.
Do not exceed maximum electrical ratings.
Warranty is void if miswired.
INSTALLATION STEPS
1. To avoid fire or electrical shock, turn OFF power at
circuit breaker or fuse. Test that the power is OFF
before working.
2. MOUNT THE SWITCH BOX
USING A ROCKER SWITCH TO ACTIVATE A RANGE
HOOD
FIG. I
* 2- SPEED
HOODS
CUT BLACK
JUMPER WIRE
HERE!
** INTERMEDIATE
HOODS
Install a 2 1/2 inch deep single-gang switch box or a
2 inch deep double-gang switch box.
3. CONNECT WIRING
General instructions for all configurations:
Make sure both the switch box and the appliance are
properly grounded.
Make sure ground wire is securely fastened to rocker
switch's ground screw. Tighten ground screw 14 to
16-in. lbs. torque.
Remove insulation, approx. 5/8 inch. Use proper
wire nut sizes for number and size of wires.
For screw terminals: Use #12 or #14-AWG solid
copper wire only. Tighten screw terminals 14 to 16
inch lbs. torque.
For 3-rocker units: Strip wires to length of strip
gauge on the back of the switch. Connect wires per
the FIGURE #3 wiring diagram.
For 2 rocker units: Connect wires per either the
FIGURE #1 wiring diagram (two single pole switches
on the same circuit) or the FIGURE #2 wiring diagram
(two single pole switches on separate circuits). With
either method, each single pole switch controls an
independent function.
NOTE: For separate feed (FIGURE #2) operation
only: The break-off tab located between the black
screws should be removed before wiring. Using a
standard slotted screwdriver, move the screwdriver
up and down in the vertical direction until the tab
breaks off.
4. MOUNT ROCKER SWITCH IN SWITCH BOX
Tuck wires into switch box and fasten the rocker
switch to box using attached screws.
5. ATTACH SWITCH PLATE
Fasten a switch plate (not included) to the rocker
switch
1. When using a 2-Rocker Switch to turn a range hood ON & OFF from another location with 120 VAC POWER
CABLE ENTERING SWITCH BOX:
Remove the range hood's wiring cover. If the hood has a BLACK JUMPER WIRE, it must be cut and the end
stripped as shown. (FIG. I)
Use UL approved clamps to secure all cables to hood and box. Make wiring connections following appropriate
diagram. Use proper wire nut sizes for number and size of wires. Replace range hood wiring cover.
OPTION 1
POWER INTO SWITCH
2-ROCKER
SWITCH
CUT BLACK
JUMPER
WIRE HERE!
RED
GROUND
BLACK
BLACK
WHITE
120 VAC
LINE IN
Figure #1
2 ROCKER SWITCH
S I N G L E - G A N G
S W I T C H B O X
1 2 0 V A C
L I N E I N
B L A C K
B R E A K - O F F
T A B I N T A C T
G R O U N D
W H I T E
Figure #2
2 ROCKER SWITCH
S I N G L E - G A N G
S W I T C H B O X
1 2 0 V A C
L I N E 1 I N
B R E A K - O F F
T A B R E M O V E D
1 2 0 V A C
L I N E 2 I N
G R O U N D
W H I T E
Figure #3
3 ROCKER SWITCH
DOU BL E - GA NG SW ITCH BOX
( with s in g le d ev ic e a d a p te r p la te )
12 0 VAC
L IN E IN
GROUND
W HITE
For more information on compatibility with Broan
and NuTone fans, refer to the wall control selection
guide on Broan-NuTone.com, Broan.ca or NuTone.ca.
REF. FIG 1
* 2- SPEED
HOODS
BLUE
WHITE
TO
HOOD
WHITE
FROM SWITCH
REF. FIG 1
** INTERMEDIATE
HOODS
BLACK
WHITE
A P P L I A N C E
R E D
L O A D
1
B L A C K
L O A D
2
W H I T E
A P P L I A N C E
R E D
L O A D
1
B L A C K
L O A D
2
W H I T E
APPLIANC E
R ED
LOAD
1
BL AC K
LOAD
2
W HIT E
BL AC K
LOAD
3
W HITE
BLACK
RED
BLACK
GRN
BOX
BLUE
BLACK
RED
BLACK
GRN
FROM SWITCH
BOX
1101840B
Advertisement

Subscribe to Our Youtube Channel
Related Manuals for NuTone P2RW


Summary of Contents for NuTone P2RW
- Page 1 For more information on compatibility with Broan 2. MOUNT THE SWITCH BOX Fasten a switch plate (not included) to the rocker and NuTone fans, refer to the wall control selection switch guide on Broan-NuTone.com, Broan.ca or NuTone.ca. USING A ROCKER SWITCH TO ACTIVATE A RANGE 1.
- Page 2 For more information on compatibility with Broan CODE REQUIRES BOTH ‡ In the United States - Broan.com 800-637-1453 or and NuTone range hoods, refer to the range hood ENDS OF THIS WIRE'S INSU- NuTone.com 888-336-6151. In Canada - Broan.ca or compatibility list on Broan-NuTone.com, Broan.ca LATION TO BE COLORED.
- Page 3 UTILISER UN MARQUEUR PERMANENT Pour plus de renseignements sur la compatibilité Aux États-Unis - Broan.com 800-637-1453 ou NuTone.com avec les hottes Broan et NuTone, consulter la liste des 888-336-6151 hottes compatibles sur Broan-NuTone.com, Broan.ca Au Canada - Broan.ca ou NuTone.ca 877-896-1119 ou NuTone.ca.
- Page 4 LOS CÓDIGOS EXIGEN QUE LOS EXTREMOS Si desea consultar la declaración de garantía, repuestos de con los ventiladores Broan y NuTone, consulte el guía de DE LA FUNDA DE ESTE CABLE SEAN servicio, apoyo técnico o para registrar su producto, visite selección del control mural en Broan-NuTone.com, Broan.
Need help?
Do you have a question about the P2RW and is the answer not in the manual?
Questions and answers