Table of Contents
Advertisement
Advertisement
Table of Contents

Related Manuals for E Instruments BTU900


Summary of Contents for E Instruments BTU900
- Page 1 BTU900 BTU900 Portable Combustion Gas Analyzers...
-
Page 3: Table Of Contents
TABLE OF CONTENTS TABLE OF CONTENTS INTRODUCTION General Description of the Combustion Analyzer General features of the Combustion Gas Analyzer BTU900 Main configurations TECHNICAL SPECIFICATIONS Technical Specifications Overview of Flue Gas Analyzer Components Measurement and Accuracy Ranges USING THE COMBUSTION FLUE GAS ANALYZER... - Page 4 TABLE OF CONTENTS TABLE OF CONTENTS TABLE OF CONTENTS TABLE OF CONTENTS SENSORS Sensor Arrangement Sensor types and relevant positioning Gas sensor life Gas sensor life table Expandability to 3 sensors MAINTENANCE Routine maintenance Preventive maintenance Cleaning the sample probe Maintaining the water trap / filter unit Replacing the particulate filter Replacing the gas sensors...
-
Page 5: Introduction
The memory can store 300 complete analyses and the data downloaded onto a PC by means of dedicated SW and a mini-USB serial communication cable. It is also interesting to note that “BTU900” has just one “Li-Ion” rechargeable battery pack used for powering the instrument and the printer; it also has a luminous and large (42 x 60mm) LCD display boasting excellent readability thanks to its backlighting and also to the zoom function. -
Page 6: Btu900 Main Configurations
1.3 BTU900 Main configurations BTU900 - HE BTU900 - Oil BTU900 - NOx BTU900 - HE-NOx SENSOR CO (Low H SENSOR NO SENSOR Optional Optional BLUETOO TH CALIBRATION CERTIFICATE INSTRUCTION MANUAL FLUE SAMPLING PROBE 300mm (12”) + 10’ Dual Hose... -
Page 7: Technical Specifications
TECHNICAL SPECIFICATIONS 2.1 Technical Specifications Autozero: Manual autozero cycle (without probe inserted in the stack). Self-diagnosis: All the functions and internal functions are checked and anomalies signalled. Type of Fuels/Oils: 7 predefined by the factory and 16 that can be programmed by the user. Power: Li-Ion battery pack with internal protection circuit. -
Page 8: Overview Of Flue Gas Analyzer Components
2.2 Overview of Flue Gas Analyzer Components B B B B O O O O M M M M P P P P A A A A E E E E D D D D F F F F C C C C L L L L N N N N G G G G... - Page 9 E Instruments does, however, certify measurement accuracy only when a calibration certificate has been issued by its own laboratory or by an authorized laboratory.
- Page 10 in Fig. 2.2). This probe is used to measure the combustion air temperature, within a range of -10° C to +100° C, when boiler efficiency is to be calculated precisely. Pressure sensor The instrument features an internal piezoresistive sensor to measure the stack draft (negative pressure) and other parameters if required (gas network pressure, pressure drop across filters etc.).
-
Page 11: Measurement And Accuracy Ranges
Probe for measuring the ionization current With this special probe it is possible to measure the ionization current of a boiler and check its value depending on the boiler’s technical features. Calibration certificate The instrument is calibrated by comparing to National Calibration Standards provided by a Metrology Lab., certified periodically by internationally recognized laboratories. -
Page 12: Using The Combustion Flue Gas Analyzer
100% charge cycle by connecting the instrument to the power pack for 3 hours. If the problem persists, replace the battery pack with a E Instruments original or contact the SERVICE CENTER to carry out the necessary repairs. - Page 13 ATTENTION THE POWER SUPPLY/BATTERY CHARGER IS A SWITCHING TYPE ONE. THE APPLICABLE INPUT VOLTAGE RANGES BETWEEN 90Vac AND 264Vac. INPUT FREQUENCY: 50-60Hz. THE LOW VOLTAGE OUTPUT IS 12 VOLT WI TH AN OUTPUT CURRENT GREATER THAN 1.5A. LOW VOLTAGE SUPPLY CONNECTOR: DC PLUG 2.1x5.5x9 mm. WITH CENTRAL POSITIVE AND OUTER BARREL GROUND.
-
Page 14: Operation
OPERATION 4.1 Working principle The gas sample is taken in through the sample probe, by a diaphragm suction pump inside the instrument. The measuring probe has a sliding cone that allows the probe to be inserted in holes with a diameter of 11 mm to 16 mm and to adjust the immersion depth: the sampling point must be roughly in the center of the flue pipe/ stack. -
Page 15: Connecting The Smart Incoming Air Temperature Probe
ATTENTION KEEP THE CONDENSATE TRAP IN THE VERTICAL POSITION DURING THE ANALYSIS; A WRONG POSITIONING MAY CAUSE CONDENSATE TO LEAK INTO IN THE INSTRUMENT AND DAMAGE SENSORS. AFTER EACH ANALYSIS, CHECK FOR ANY PRESENCE OF WATER IN THE CONDENSATE COLLECTION BOWL AND REMOVE IT, IF ANY. PUT THE PROBE BACK IN THE CASE ONLY AFTER YOU HAVE REMOVED CONDENSATE FROM THE TUBE AND THE EXPANSION TANK (SEE CHAP TER 'MAINTENANCE'). -
Page 16: Keypad Overview
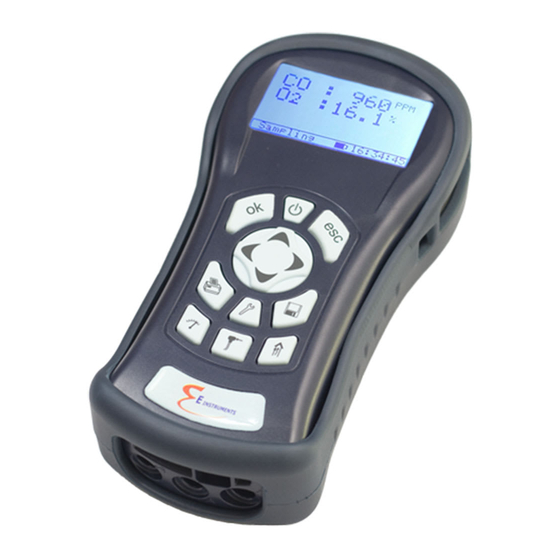
4.7 Keypad overview On / Off Cancel / Exit Confirm Zoom OUT Select / Modify Zoom IN Mem ory Menu Print Menu Draft Menu Measurements Menu Analysis Menu Configure / Info Menu WARNING: to turn-on / off the instrument it is necessary to press and hold the On/Off button for at least 2 seconds. -
Page 17: Info Menu
4.8 Info Menu This menu provides information regarding instrument status: Battery capacity: Shows the status of the internal battery. The battery charge status is shown graphically and in text as a percentage between 0 and 100%, together with the battery voltage. Configuration of sensors: It allows to check which sensors are installed on the instrument, and in which position they are installed. -
Page 18: Flow Chart - Info Menu
4.8.1 Flow Chart - Info Menu Activ ates the Info Menu. To return to the previous screen, press CONFIG/INFO ►Analysis config. Instrument config. Information CONFIG/INFO Analysis config. Instrument config. ►Information INFORMATION BATTERY STATUS ►Battery status Bat: 91 ٪ The battery symbol filling up means that battery charging is Sensors Config. - Page 19 Battery status Memories Sensors Config. Calibration Sensors diagnostic Gas Path Check ►Memories diagnostic ▼ INFORMATION INFO SERVICE ▲ Sensors Config. E Instruments Sensors diagnostic Tel.(215)750-1212 Gas Path Check Fax.(215)750-1399 Memories diagnostic ►Info Service SN:000001 Ver:1.00 ▼ PN:000000 INFORMATION EXTERNAL PROBE ▲...
-
Page 20: Analysis Configuration Menu
4.9 Analysis configuration menu Through this menu the user can configure the available parameters for a proper combustion analysis. Fuel: Lets the user select the type of fuel to be used during analysis. This data can be changed either from this menu or during the analysis itself. - Page 21 three names may be stored. The name of the selected operator will be printed on the analysis report. Report header setup: This allows the Company or Owner’s name to be entered in four lines with 24 characters each, together with other details (e.g.
-
Page 22: Flow Chart - Analysis Configuration Menu
4.9.1 Flow Chart - Analysis configuration menu Activ ates the Configuration/Information Menu. All selected data can be modif ied by pressing cursor keys To cancel changes and return to the prev ious menu press CONFIG/INFO ►Analysis config. Instrument config. Information CONFIGURATION FUEL FUEL PARAMETERS... - Page 23 FUEL FUEL PARAMETERS ▲ Diesel 0.0277 Wood/Pellets 8% 0.0073 Coal 13.80 % Bio-Fuel 5% 46180 kJ/kg ►L.P.G. 50110 kJ/kg ▼ FUEL FUEL PARAMETERS ▲ Wood/Pellets 8% 0.0277 Coal 0.0073 Bio-Fuel 5% 14.00 % L.P.G. 45800 kJ/kg ►Butane 49620 kJ/kg ▼ FUEL FUEL PARAMETERS ▲...
- Page 24 CONFIGURATION REFERENCE REFERENCE REFERENCE REFERENCE Fuel ►CO 1 1 1 1 ..0 0 0 0 % % % % Measurement units NO,NOx NO,NOx NO,NOx 0 0 0 0 ..0 0 0 0 % % % % NO,NOx ►O...
- Page 25 Mo d ify the v al ue of th e hi gh li ght ed CONFIGURATION ALARMS ALARMS f ig ur e with keys ▲ Reference ►Number Number Automatic analysis Measure Measure Select alarm number (1÷5) with the Condensation Active Active maximum maximum...
- Page 26 E Instruments_ ►1: Alarms Autozero/Pump ▲ Operator ◄ 9:;<=>?!“#$٪& ’)~* ► ►Report header setup ▼ REPORT HEADER TEXT EDITING Philadelphia, PA_ 1:E Instruments ►2: ▲ ◄ 9:;<=>?!“#$٪& ’)~* ► ▼ REPORT HEADER TEXT EDITING 1:E Instruments T(215)750-1212_ 2:Philadelphia, PA ►3:T(215)750-1212 ▲...
-
Page 27: Instrument Configuration Menu
4.10 Instrument configuration menu This menu is used to configure the instrument’s reference parameters described below: Bluetooth (optional): Through this sub menu the user can turn on and off the instrument Bluetooth wireless communication with a PC or PDA. WHEN THE INSTRUMENT BLUETOO TH INTERFACE IS TURNED ON, THE BATTERY LIFE IS REDUCED DOWN TO 10 HOURS. -
Page 28: Flow Chart - Instrument Configuration Menu
4.10.1 Flow Chart - Instrument configuration menu Activ ates the Configuration/Information Menu. All selected data can be modif ied by pressing cursor keys To cancel changes and return to the prev ious menu press CONFIG/INFO ►Analysis config. Instrument config. Information CONFIG/INFO Analysis config. - Page 29 INFORMATION MICROMANOMETER MICROMANOMETER MICROMANOMETER Bluetooth ►Inlet Inlet Inlet Calibration Dispaly contrast Time/Date ► Micromanòmeter ▼ CONFIGURATION BUZZER BUZZER BUZZER Calibration ►Buzzer Buzzer Buzzer Dispaly contrast Time/Date Micromanòmeter ►Buzzer ▼ CONFIGURATION LANGUAGE LANGUAGE ▲ Dispaly contrast Italiano Italiano Time/Date ►English English Micromanòmeter Français Français...
-
Page 30: Memory Menu
4.11 Memory Menu This menu is used to display individual and average values of the analysis data stored in the internal memory. Analysis data can be ordered either by memory position or by storage date; draft and smoke values can also be recalled. -
Page 31: Flow Chart - Memory Menu
4.11.1 Flow Chart - Memory Menu Activ ates the Memory Menu. This menu is used to display and print the indiv idual and av erage v alues of the analysis data stored in memory. Analysis data can be ordered either by memory position or by storage date; draft, smoke and ambient CO (NO) v alues can also be recalled. - Page 32 RECALL MEMORY MEAS. CONDITIONS 1:19/12/10 15.30 Natural gas 2:19/12/10 16.00 Altitude 0 m 3:19/12/10 16.30 R.H. air 50% Average analysis Mario Rossi ►Meas. Conditions ▼ RECALL MEMORY RECALL DRAFT 2:19/12/10 16.00 3:19/12/10 16.30 -0.12hPa Average analysis Meas. Conditions T external: 20°C ►Draft ▼...
-
Page 33: Print Menu
4.12 Print Menu This menu is used to access the following print and check configurations: Print report: Shows the details of the selected ticket type and allows to start printing. Print set: Copies: Allows to set the number of printed copies and layout of the ticket Model: The ticket layout selection is only valid for combustion analysis and can be chosen among Complete, Partial and Total. -
Page 34: Flow Chart - Print Menu
4.12.1 Flow Chart - Print Menu Enables the Print Menu. Allows to print the combustion analysis data on a paper ticket which reports the measurement v alues. The printed v alues are those shown on the display when the menu is enabled. This menu can be used f or combustion analysis, even when recalled f rom the memory, for draft, smoke and ambient gas results. - Page 35 PRINT PRINTER TYPE PRINTER TYPE PRINTER TYPE PRINTER TYPE Print report ►Type HP82240B Type HP82240B Type HP82240B Type HP82240B Print setup Mode slow ►Mode slow Mode Mode slow fast Print test ►Printer type PRINTER TYPE PRINTER TYPE PRINTER TYPE ►Type HP82240B Type HP82240B...
-
Page 36: Analysis Menu
4.13 Analysis Menu Through this key the analysis results are displayed. Moreover the operator is allowed, once this key is further depressed, to display and possibly modify the analysis parameters before proceeding with the measurements. Measured v alues are: Oxygen percentage in the Flue. CO concentration in the Flue, with low sensitivity to H2 (8,000 ppm full range, 1 ppm resolution). -
Page 37: Flow Chart - Analysis Menu (Zoom)
4.13.2 Flow Chart - Analysis Menu (zoom) 4.2 ٪ 4.2٪ Eff 83.4٪ O O O O 4.2٪ 2 2 2 2 9.3٪ Loss16.6٪ 9.3٪ 146p Xair 1.25 Xair 1.25 9.3٪ 2 2 2 2 Tf 190.1C 190.1C 15.4C 15.4C Xair Xair Xair 1.25 Xair... - Page 38 By pressing the Analysis key once more, and starting from any of the above screens, the user may proceed as follows: Activ ates the Analysis Menu. ANALYSIS SETUP SELECT MEMORY ►Mem.: ►Mem.:001 Fuel.: Natural gas Date:--/--/-- Select the memory wherein to store the acquired data. Oper.: John Smith Time:--.--...
-
Page 39: Draft Menu
4.14 Draft Menu The DRAFT menu gives access to the stack draft measurement. The user to input the external air temperature as required by the standard. Afterwards the measurement screen is reached: here the user can acquire the value displayed in order to add it to the running analysis measurements or, alternatively, print the relevant ticket through the ‘PRINT’... -
Page 40: Readings Menu
4.15 Measurements Menu This menu is used to access the following readings: Smoke: It is possible to enter the data for up to three (3) separate Smoke test measurements taken by means of an optional device (SMOKE PUMP); see the relevant instructions. The method consists in taking a certain quantity of combustion gas from the middle of the flue behind the surfaces of the exchangers at the end of the boiler, and make it pass through a special filter paper. -
Page 41: Flow Chart - Readings Menu
4.15.1 Flow Chart - Readings Menu Activ ates the Smoke Menu. MEASUREMENTS SMOKE PRINT In the Smoke menu the user can input the smoke v alue. The values entered with the arrow keys ►Smoke ►Measure 1: 2 ►Print report Ambient CO,NO Measure 2: - Print setup can be associated with the ongoing analysis... -
Page 42: Flow Chart - Configure Analysis Menu
4.16 Flow Chart - Configure Analysis Menu When depressed for at least 2 seconds, turns the instrument on. Adjusts the display contrast. BTU900 SN:00001 Ver:1.00 AUTOZERO STARTED WARNING Insert the gas probe in the chimney automatically, after 10 seconds. MEMORY... -
Page 43: Flue Gas Analysis
4.17 FLUE GAS ANALYSIS To perform complete flue gas analysis, follow the instructions below. ATTENTION SOME IMPORTANT WARNINGS CONSIDER DURING COMBUSTION ANALYSIS ARE LISTED BELOW: FOR A CORRECT ANALYSIS NO AIR SHOULD FLOW INTO THE PROBE FROM OUTSIDE DUE TO A BAD TIGHTENING OF THE CONE OR A LEAK IN THE PIPELINE. -
Page 44: End Of Analysis
Fuel: the user will be asked to define the type of fuel used by the plant. Operator: this is where the name of the test operator can be entered. Mode: by entering this submenu, the user can determine the analysis mode - manual or automatic. If automatic mode is chosen, the reading duration of each and every test must be set, besides the printing mode - manual or automatic. -
Page 45: Flow Chart - Flue Gas Analysis
4.17.5 Flow Chart - Flue Gas Analysis When depressed for at least 2 seconds, turns the instrument on. Adjusts the display contrast. BTU900 SN:00001 Ver:1.00 AUTOZERO STARTED WARNING Insert the gas probe in the chimney automatically, after 10 seconds. MEMORY RECALL MEMORY ►Mem.:... - Page 46 How to proceed in manual mode (standard sequence). MEMORY SAVE ANALYSIS 4.2٪ Eff 83.4٪ 9.3٪ Loss16.6٪ ►Save analysis Memory 001/1 146p Xair 1.25 Display average Draft SAVE test 1. Tf 190.1C Select memory Smoke 15.4C Recall memory CO,NO amb ∆T 74.7C Delete single ▼...
- Page 47 How to proceed in manual mode (quick sequence). SAVE ANALYSIS 4.2٪ Eff 83.4٪ 9.3٪ Loss16.6٪ Memory 001/1 146p Xair 1.25 Draft Tf 190.1C Smoke 15.4C CO,NO amb SAVE test 1. ∆T 74.7C SAVE QUIT ►RefO ▼ SAVE ANALYSIS 4.2٪ Eff 83.4٪ 9.3٪...
- Page 48 How to proceed in automatic mode. 4.2٪ Eff 83.4٪ 9.3٪ Loss16.6٪ 146p Xair 1.25 Tf 190.1C 15.4C ∆T 74.7C ►RefO ▼ 4.2٪ Eff 83.4٪ 9.3٪ Loss16.6٪ 146p Xair 1.25 Tf 190.1C 15.4C ∆T 74.7C ►RefO 001/1:120 ▼ Automatic, when the def ined time elapses. 4.2٪...
-
Page 49: Measuring The Differential Pressure (Optional Kit)
4.18 Measuring the Differential Pressure (OPTIONAL HOSE KIT) (Part # AACKP01) The instrument is fitted with an internal temperature-compensated piezoresistive transducer to measure positive and negative pressures. This sensor, which is mounted on the instrument, is of the differential type. If the special KIT is purchased, the sensor can be used to measure the differential pressure thanks to the positive and negative pressure connectors. -
Page 50: Sensors
Sensor characteristics diminish as the reagents are consumed and when these have been used up completely the sensor must be replaced. The sensors must be recalibrated on a regular basis to assure measuring accuracy: recalibration can only be performed by a qualified E Instruments Service Center. Chart 5.4 illustrates the characteristics inherent to each sensor. -
Page 51: Expandability To 3 Sensors
5.5 Expandability to 3 sensors In the BTU900 instrument range, one expandable version is available: BTU900 - HE : 2 sensors, expandable to 3 sensors. BTU900 - Oil POSITION POSITION POSITION The upgrading of the number of sensors can be easily done by the user by performing the following directions: - The expandable instrument is arranged in a way to accept one sensor in positions S3. -
Page 52: Maintenance
• Do not exceed sensor overload thresholds. • When the analysis is over disconnect the sample probe and let BTU900 draw fresh air for a few minutes, or at least until the displayed parameters return to their original values. •... -
Page 53: Replacing The Particulate Filter
6.5 Replacing the particulate filter If the particulate filter appears black, especially on the inner surface (see adjacent example), it has to be replaced immediately. In this way gas flow is not obstructed. Blackened particulate filter 6.6 Replacing the gas sensors The gas sensors of the instrument shall be periodically replaced (see the following table) with new or recalibrated sensors. - Page 54 Locate the sensor to be replaced; here is an example of a connected sensor to be replaced. Electrical connection Disconnect the sensor to be replaced; here is an example of a disconnected sensor to be replaced. K8000 000 00EJ 02 065 0A0 17 051 2...
- Page 55 The sensor is bayonet-connected to its socket; rotate it counter-clockwise to remove it. Here is an example of a rotated sensor. ATTENTION While rotating the sensor, take care not to exert any pressure onto the printed circuit abov e: apply pressure only onto the plastic body.
- Page 56 Rotate the sensor clockwise until you hear a click (See point 4). ATTENTION While rotating the sensor, take care not to apply any pressure onto the printed circuit abov e: apply pressure onto the plastic body only. Reconnect the sensor (See point 3). Close the back door of the sensor compartment again, and tighten screws again (See point 1).
-
Page 57: On-Site Recalibration
- Hose with Tee fitting to connect the cylinder to the flow meter and to the instrument 6.7.1 Flow Chart - On-site recalibration When depressed for at least 2 seconds, turns the instrument on. ATTENTION Make sure autozero is execute in clean air. BTU900 SN:00001 Ver:1.00 AUTOZERO STARTED WARNING... - Page 58 CONFIGURATION PASSWORD PASSWORD ▲ Operator Enter the recalibration menu password Report header setup 0 0 0 0 1 1 1 1 Micromanometer 1111. Language ►Calibration CALIBRATION CO CALIBRATION Installed sensors which can be recalibrated are shown, and Action calibrate can be chosen for recalibration. ►CO ►Applied 100.0...
- Page 59 • Apply the gas to the instrument and regulate the cylinder output pressure so that the flow meter shows a minimum flow (0,5 l/m) this ensures that the instrument is getting exactly the gas needed by its internal pump. • The instrument measures the concentration of the applied gas;...
-
Page 60: Replacing The Battery Pack
6.8 Replacing the battery pack Follow these instructions to replace the battery pack: Undo the screw on the battery Remove the battery pack. compartment cover and remove it . Remove the battery pack connector, and replace the pack with a new one following the reverse procedure described above. -
Page 61: Troubleshooting
7.0 TROUBLESHOOTING 7.1 Troubleshooting guide SYMPTOM PROBABLE CAUSES AND REMEDIES The instrument does not work at all. When the On/Off a. Keep the On/Off key depressed for at least 2 pushbutton is pressed the instrument does not come seconds. b. The battery is low; connect the battery charger to the instrument. - Page 62 Troubleshooting guide SYMPTOM PROBABLE CAUSES AND REMEDIES The rear lighting of the display is not on. The backlighting LED’s are faulty. Contact the nearest service center to replace the display. The batteries last less than 9 hours. a. Battery capacity is limited by low temperatures. To achieve a longer battery life it is recommended to store the instrument at higher temperatures.
-
Page 63: Spare Parts And Technical Assistance
AAC TA03A: Particulate/water filter assembly with steel pipe and connector AAC UA02: Adapter cable USB-A / mini USB-B. AA RC04: Paper roll for printer, h=58 mm, diam.= 44 mm 8.3 Service Center E Instruments International 172 Middletown Blvd. Suite B201 Langhorne, PA 19047 Tel.: (215) 750-1212 Fax.: (215) 750-1399...
Need help?
Do you have a question about the BTU900 and is the answer not in the manual?
Questions and answers