Table of Contents
Advertisement
Quick Links
Advertisement
Table of Contents

Related Manuals for uAvionix Vektor


Summary of Contents for uAvionix Vektor
- Page 1 User and Installation Guide Page 1 | 26 UAV-1001101-001...
- Page 2 retained.
-
Page 3: Revision History
1 Revision History Revision Date Comments 1/10/17 Initial release 5/29/18 Squitter Map Instructions 4/4/2019 Input power requirements Page 3 | 26 UAV-1001101-001... -
Page 4: Warnings / Disclaimers
Received traffic information is to be used as an aid to situational awareness and is merely supplemental and advisory in nature. uAvionix is not liable for damages arising from the use or misuse of this product. This equipment is classified by the United States Department of Commerce's Bureau of Industry and Security (BIS) as Export Control Classification Number (ECCN) 7A994. -
Page 5: Limited Warranty
For the duration of the warranty period, uAvionix, at its sole option, will repair or replace any product which fails under normal use. Such repairs or replacement will be made at no charge to the customer for parts or labor, provided that the customer shall be responsible for any transportation cost. -
Page 6: Table Of Contents
4 Contents Revision History ................... 3 Warnings / Disclaimers ................ 4 Limited Warranty .................. 5 Introduction ..................7 Features ....................7 Mechanical Specification ............... 8 Installation ................... 9 Magnetic Mounting ................ 9 Fixed / Penetration Mounting ............10 Connection to the Vehicle Electrical System ....... 12 Configuration .................. -
Page 7: Introduction
The Vektor provides improved visibility by controllers of the position of vehicles at airfields equipped with multilateration, ADS-B and primary radar systems by more accurately providing the position of the vehicle and the identification/call sign on the controller’s surface display. -
Page 8: Mechanical Specification
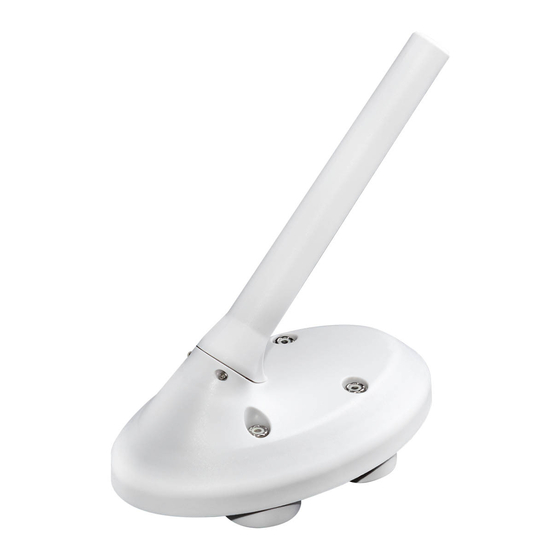
6.1 Mechanical Specification Vektor consists of an electronics unit and an antenna assembly. Vektor can be permanently mounted or temporarily magnetically mounted. Page 8 | 26 UAV-1001101-001... -
Page 9: Installation
7 Installation 7.1 Magnetic Mounting The Vektor comes with strong rare earth magnetic mounts designed specifically to hold the unit in place at speeds up to 165 kmh (100 mph). This ensures that the transponder may remain installed during normal airfield operations or when the vehicle is operating on public motorways. -
Page 10: Fixed / Penetration Mounting
Contact your specific vehicle manufacturer/dealer for recommendations designed for your make and model. - Page 11 Lower the unit to the roof evenly ensuring that an even seal is made between the Vektor unit and the roof of the car with silicone between them. Tighten the enclosed bolts and washers from the underside of the vehicle roof to a force of 15 Nm.
-
Page 12: Connection To The Vehicle Electrical System
Vektor shall be connected to the vehicle electrical installation via the supplied wiring harness. Wiring harness is comprised a single 3 meter, solid copper, 2 lead, 16 gauge cables with each Vektor. Use a 1 Amp circuit breaker for power supply protection to the Vektor. - Page 13 Please note that some vehicles only provide power to the cigarette lighter adaptor when the vehicles master electrical system is switched to “ON” by the ignition key. Other vehicles provide power to the cigarette lighter regardless of the position of the ignition key. It is important to know what type of system your vehicles is equipped with to understand when the transponder will be powered and broadcasting.
-
Page 14: Configuration
8 Configuration Configuration of the Vektor is simple with the uAvionix Echo App for iOS or Android. 8.1 Install Install the uAvionix Echo App from either the Apple App store or Google Play. Page 14 | 26 UAV-1001101-001... -
Page 15: Connect
Join your mobile device to the wireless network named Ping-XXXX using the procedure for your device. If required, the WPA passphrase is uavionix. The process for iOS is shown below. Go to Settings > Wi-Fi, and verify Wi-Fi is turned on. -
Page 16: Program
8.3 Program Launch the uAvionix Echo application and complete the fields as required for your device/vehicle. Selected Device Type: Choose Vektor. Control: This setting controls device transmit functions. The selections available will depend on the device type selected. TX enabled: Transmit ADS-B message enabled, receive is also enabled. - Page 17 The Monitor tab allows the installer to check the operation of the internal GPS system. Note that the Altitude, Pressure reading will always be zero. Page 17 | 26 UAV-1001101-001...
-
Page 18: Squitter Maps
A squitter map is a KML file containing both transmit inclusion and exclusions zones. Vektor will transmit when the device is located in an inclusion zone and cease operation when it is outside the inclusion zone or when it is located inside an exclusion zone. -
Page 19: Uploading A Squitter Map
9.1 Uploading a Squitter Map 1. Copy the desired KML file to your mobile device. Since the mobile device will be connected to Vektor during this process, the KML file cannot be stored in the cloud and must be stored on the mobile device. -
Page 20: Clearing A Squitter Map
7. Browse to the desired squitter map and select it. 8. Tap Update Geofence. 9. A confirmation message should appear. After upload a full system test should be performed to verify Vektor is functioning correctly with the squitter map. 9.2 Clearing a Squitter Map 1. -
Page 21: Normal Operation
10 Normal Operation Vektor is compatible with IOS, Android and PC based GDL 90 compatible Electronic Flight Bag (EFB) applications. Vektor must be connected to the device as described in section 8.2. Configure the EFB application as necessary to access the device. In most applications, Vektor will be automatically detected. -
Page 22: Technical Parameters
11 Technical Parameters 11.1 Extended Squitter Messages Vektor operates in two transmitting modes: Stationary and Moving. Vehicle Stationary (the vehicle is stationary – position was changed by no more than 10m for a period of 30s). Schedule (ms) Cumulative DF18 Extended Squitter Message... - Page 23 Vehicle Moving Schedule (ms) Cumulative DF18 Extended Squitter Message in a 5 sec Period Seconds 0.4s SURFACE POSITION 0.5s AIRCRAFT EMERGENCY STATUS 0.8s SURFACE POSITION 1.0s AIRCRAFT IDENTIFICATION 1.3s SURFACE POSITION 1.5s AIRCRAFT EMERGENCY STATUS 1.9s SURFACE POSITION 2.0s AIRCRAFT OPERATION STATUS 2.2s SURFACE POSITION 2.5s...
-
Page 24: Technical Parameters
Serviceability Firmware upgradable over the WiFi interface. Use a 1 Amp circuit breaker for power supply protection to the Vektor. Power to be provided by the vehicle battery. The CE Declaration of Conformity was issued for this product. The product is marked with the CE marking. -
Page 25: Warranty Conditions
In the winter season, it is necessary to remove thicker snow and ice layers from the Vektor transmitter surface. In longer time periods, minimally once a year, it is necessary to check the condition, placing and connection of the power cable. -
Page 26: Environmental Qualification Forms
13 Environmental Qualification Forms Nomenclature Vektor Part No UAV-10007831-001 Manufacturer uAvionix Inc Address 300 Pine Needle Lane Bigfork, MT 59911 Conditions DO-160G Description of Conducted Tests Section Temperature and Altitude Equipment tested to Category B2 Low temperature ground 4.5.1 -55°C...
Need help?
Do you have a question about the Vektor and is the answer not in the manual?
Questions and answers