
Related Manuals for Renkforce VisualTable RF-4730964


Summary of Contents for Renkforce VisualTable RF-4730964
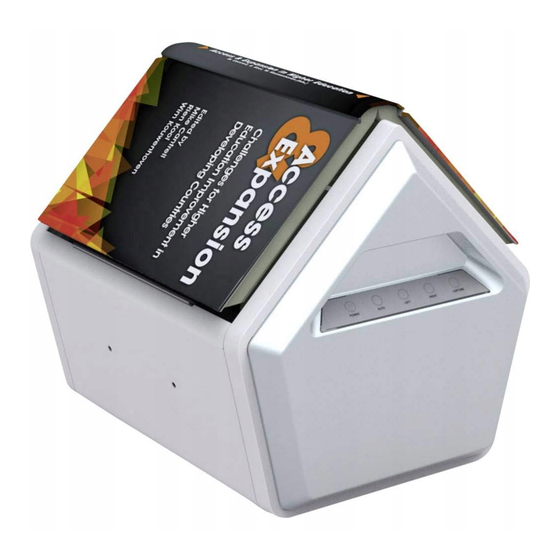
- Page 1 Smart Book Scanner VisualTable The specifications and information herein are subject to change without notice.
-
Page 2: Table Of Contents
- Contents - I_Introduction ‥‥‥‥‥‥‥‥‥‥‥‥‥‥‥‥‥‥‥‥‥‥‥‥‥‥ 3 ‥‥‥‥‥‥‥‥‥‥‥‥‥‥‥‥‥‥‥‥‥ 3 1. Components ‥‥‥‥‥‥‥‥‥‥‥‥‥‥‥ 4 2. A quick look at the hardware ‥‥‥‥‥‥‥‥‥‥‥‥‥‥‥‥‥ 5 3. Key features & functions II_Installation ‥‥‥‥‥‥‥‥‥‥‥‥‥‥‥‥‥‥‥‥‥‥‥‥‥‥ 6 1. The installation process ‥‥‥‥‥‥‥‥‥‥‥‥‥‥‥‥ 6 2. Installing the software ‥‥‥‥‥‥‥‥‥‥‥‥‥‥‥‥‥ 7 3. -
Page 3: I_Introduction
I_Introduction I_Introduction 1. Components - Main Body - Common components Power adapter Power cable USB cable Installation CD (CD: Included full manual CD cover: OCR license serial number) Quick Start Guide / Installation Guide... -
Page 4: A Quick Look At The Hardware
I_Introduction 2. A quick look at the hardware 1) Front <Direction of the Book complying with the initial setting> POWER: Power on & off AUTO: Capture the both pages alternately and save the captured pages on your PC. In the event of successive scanning of the book, use the software menu panel “Main menu panel”. (Refer to III. -
Page 5: Key Features & Functions
I_Introduction The VisualTable scanner works on a USB 2.0 port only. Please make sure your computer supports USB 2.0. If the VisualTable scanner is connected to a USB 3.0 port it may not work properly. 3. Key features and functions ʌ... -
Page 6: Ii_Installation
II_Installation II_Installation 1. The installation process Insert the VisualTable set-up CD, install and get verified necessary programs in order following to the instructions in this User Guide The VisualTable is UVC (Universal Video Class) compatible which installs its driver automatically when connecting VisualTable to your PC’s USB port. -
Page 7: Installing The Software
II_Installation 2. Installing the software Insert the VisualTable Set-up CD to your computer CD-ROM. If your computer does not meet the system specifications that VisualTable requires, there may be difficulties using VisualTable. Since OCR license can be registered only one time, you should check whether the projected image appears before registering the OCR license (Checking the projected image: Refer to III. - Page 8 II_Installation 2) Installing & Verifying OCR (Optical Character Reader) Since OCR license can be registered only one time, you should check whether the projected image appears before registering the OCR license (Checking the projected image: Refer to III. 1. “1) Connect VisualTable and run VisualTable program”.and “2) Custom Setting: Camera options”). In the event of your negligence of the above instruction, supplier has no responsibility for the related OCR issue.
- Page 9 II_Installation ⑦ Click "Finish" to complete the Microsoft ⑧ Click "Next" to install Sentinel License Visual C++ installation. Manager. ⑨ Check "I accept the terms in this license ⑩ Click "Next." agreement." and click "Next." ⑪ Click "Next." ⑫ Click “Next.” - 9 -...
- Page 10 II_Installation ⑬ Click “Next.” ⑭ Click “Install.” ⑮ Please wait while the installation Click "Finish" to complete the Sentinel continues. License Manager installation. Click "Finish" to complete the OCR Enter the OCR serial number on the Certification Program. case cover of Set-up CD.
-
Page 11: Installing The Hardware
II_Installation 3. Installing the hardware 1) After installing the VisualTable driver and related program, connect the USB cable of the VisualTable to a USB port at the rear of your PC. Note: The VisualTable book scanner can only work in USB 2.0. Check whether your Note PC supports USB 2.0 2) To use the VisualTable, there is no need for any additional drivers. -
Page 12: Installation Precautions
II_Installation 4. Installation Precautions VisualTable runs on Microsoft Windows XP(32 bit), Windows Vista, and Windows 7 and above (32 bit & 64 bit). The following Compatible specifications are required: Microsoft .NET FrameWork 3.5 or above, USB 2.0 or above and an external memory card (not internal memory) Note: Due to the high resolution camera of the VisualTable there may be no image appearing on some computer models. -
Page 13: Iii_Operating Visualtable
III_Operating VisualTable III_Operating VisualTable 1. Getting started 1) Connect VisualTable and run VisualTable program. VisualTable ① Turn on your PC power, and check whether the USB cable, power cable and power adapter of the VisualTable are all properly connected to your PC. After you have reconnected the USB cable wait 30 seconds and start the program afterwards. - Page 14 III_Operating VisualTable Choose the right driver in the “Video Device” selection window. - Windows 7 and above: Choose “TAMTUS-CAM500.” - Windows XP: Choose “USB 2.0 Camera Device.” Once you see “2592x1944” in the “Camera Resolution” selection window the setting is complete. Click the “OK”...
- Page 15 III_Operating VisualTable 5) Writing on images ① Writing Start - Click the pen button, and you can write and draw on the current viewing image. - The functions not available on the writing mode become disabled. - A click on the pen button again enables you to drag the mouse and use it as a move tool for the current viewing image.
-
Page 16: Operating The Hardware
III_Operating VisualTable 2. Operating the hardware Both the hardware and the software program menu can be used for image capture. In the event of successive scanning of the book, use the software menu panel “Main menu panel”. (Refer to III. “5. Creating an eBook”... -
Page 17: Custom Settings
III_Operating VisualTable 3. Custom settings Click on the Custom Setting icon on the top right of the menu panel to enter the configuration mode Click the Camera Setting, Program Setting, or OCR Setting tap respectively on the left side menu to enable each of the corresponding functions. - Page 18 III_Operating VisualTable Sharpness: to adjust the clarity of an image. The farther it goes to right, the sharper it becomes rougher. Gamma: to adjust the gamma value in order to control the degree of the boundary of an image. The farther it goes to right, the higher contrast range it has. White balance: to adjust the value for grayness.
- Page 19 III_Operating VisualTable Custom Setting> Program options 2) Program setting: Click Program option. Path for Captured: to select a folder where captured images are saved Path for OCR: to select a folder where OCR-formatted documents are saved Image Edit Program: to select an Image Edit program; otherwise, Windows’ Mspaint.exe has been set at default.
- Page 20 III_Operating VisualTable Custom Setting > OCR options 3) OCR setting OCR Option: to select a targeted language for OCR converting characters on documents. In the event of converting a document written only in English, selecting “English” will improve the recognition rate. Translation Language Selection: to select a language after translation.
-
Page 21: Using The Program Tools
III_Operating VisualTable 4. Using the program tools To show the left side of a book Left view To show the right side of a book Right view To show images of the book on the screen in real time. A click on the Real-time image view button displays Freeze-screen. - Page 22 III_Operating VisualTable Area selection To drag a specific area with a mouse to make selection Save To save the selected area into an image To copy the selected image onto the clipboard or on other Copy application programs running on the Windows environment. To cut the selected area for use in a teaching material To move, adjust the size of, rotate, or delete the cut image To double click on the cut image to fix and write on...
- Page 23 III_Operating VisualTable Application To execute an application program linked to VisualTable. program e-Book To scan books and create e-Books TTS is not provided. To use cloud service drive (e.g. google drive). The registered site will pop up by click of “U” button. drive To edit the currently viewing page in an Image Edit program.
-
Page 24: Creating Ebook
III_Operating VisualTable 5. Creating eBook The VisualTable scanner enables user to scan texts or reference books conveniently and produce eBooks in the PDF file format. Main menu panel: Go to the Creating eBook program. 1) Browse Creating eBook program Delete All <... - Page 25 III_Operating VisualTable Saved image lineup window To display the list of scanned images To delete the saved image File name: the folder name + sequential number To get the folder of saved images and check them To delete all the files in the folder. In the event of sharing VisualTable, make Delete All sure to back up all the necessary scanned images for successive scanning in the next time before other users delete all the images by “Delete All”...
- Page 26 III_Operating VisualTable To convert saved images and create eBook in a text type PDF file. - Text type PDF file: Possible to copy and paste in a general pdf Creating software (Image type PDF file: Not possible to copy) eBook - Maximum pages possible to be converted into one PDF file: 300 pages.
- Page 27 III_Operating VisualTable 2) Scan order for the Creating eBook program ① Click on ‘Save Folder’ and assign the path of a folder where images for eBook are saved ② Click on ‘View Right Side’ and on , giving the book an area (in green dotted line) ③...
-
Page 28: Iv_Troubleshooting & Precautions
V_Troubleshooting & Precautions IV_Troubleshooting & Precautions 1. Troubleshooting If you have problems while using Visual Table or installing the driver and program, see below for the checklist and troubleshooting guide: 1) What to do if the picture screen does not appear after you connect the USB cable to your PC. -
Page 29: V_Precautions To Take Before Reformatting Pc
V_Troubleshooting & Precautions V_Precautions to take before reformatting PC Only one validation attempt is allowed per license of OCR. If you need to reformat your PC, please refer to following instructions to back up the license information of your OCR. In the event of your negligence of this instruction, supplier has no responsibility for the related OCR issue.
Need help?
Do you have a question about the VisualTable RF-4730964 and is the answer not in the manual?
Questions and answers