Table of Contents
Advertisement
Available languages
Available languages
Quick Links
Advertisement
Table of Contents

Related Manuals for Proline PLI136G-E


Summary of Contents for Proline PLI136G-E
-
Page 2: Table Of Contents
Inhoud VOOR U HET TOESTEL BEGINT TE GEBRUIKEN ..........2 Veiligheidsinformatie ......................2 INBOUWEN IN DE KEUKENKAST ..............4 Deur omkeren ........................7 De koelkast de eerste maal inschakelen ............... 7 HET GEBRUIK VAN HET APPARAAT ..............8 Thermostaatinstelling ....................... 8 ETENSWAREN BEWAREN IN HET APPARAAT .......... -
Page 3: Voor U Het Toestel Begint Te Gebruiken
DEEL 1 VOOR U HET TOESTEL BEGINT TE GEBRUIKEN Veiligheidsinformatie • Controleer dat de spanning vermeld op het naamplaatj e links in de koelkast overeenstemt met die van uw lokale toevoerspanning. • Als u niet de correcte spanning gebruikt, wordt de garantie NIETIG verklaard en dit kan uw apparaat beschadigen. - Page 4 • Dit apparaat is niet bestemd voor gebruik door personen (inclusief kinderen) met verminderde fysieke, zintuiglijke of mentale mogelijkheden, of personen met een gebrek aan ervaring en kennis, tenzij zij onder toezicht staan van of instructies hebben ontvangen met betrekking tot het gebruik van het apparaat door een persoon die instaat voor hun veiligheid.
-
Page 5: Inbouwen In De Keukenkast
DEEL 2 INSTALLATIE INBOUWEN IN DE KEUKENKAST Afbeelding A ! Voor de installatie moet u de instructies zorgvuldig lezen. ! Installeer de koelkast enkel in stabiele keukenkasten. ! Indien noodzakelijk moet u de deur omkeren in overeenstemming met de instructies. 1. - Page 6 Afbeelding B Afbeelding C Figure.C Afbeelding E Afbeelding D NL - 5 -...
- Page 7 Afbeelding G Afbeelding F Afbeelding H NL - 6 -...
-
Page 8: Deur Omkeren
Deur omkeren (14) 1. Open de deur van het apparaat (16) 2. Schroef de pin van het deurscharnier los en schroef ze stevig vast aan de tegenovergestelde zijn en test om te zien of ze veilig bevestigd is. (18) 3. Herhaal dit met de onderste pin . -
Page 9: Het Gebruik Van Het Apparaat
DEEL 2 HET GEBRUIK VAN HET APPARAAT Thermostaatinstelling • De thermostaat regelt de interne temperatuur van de koelkast automatisch bij. Wanneer u aan de knop draait van 1 tot 5 kunt u de temperatuur verlagen. • De "0" positie geeft aan dat de thermostaat gesloten is en het apparaat zal niet afkoelen. -
Page 10: Schoonmaken En Onderhoud
DEEL 4 SCHOONMAKEN EN ONDERHOUD • Verwijder de stekker uit het stopcontact voor u het schoonmaakt. • Giet nooit water over het apparaat. • De koelkast moet regelmatig worden schoongemaakt met een oplossing van natriumbicarbonaat en lauw water. • Maak de accessoires afzonderlijk schoon met zeep en water. Plaats ze niet in de vaatwasmachine. -
Page 11: Voor U De Dienst Na Verkoop Belt
DEEL 5 VOOR U DE DIENST NA VERKOOP BELT Als de koelkast niet correct werkt, kan het een klein probleem zijn. Controleer het volgende. Het apparaat werkt niet, Controleer of; • Er een stroompanne is, • De stekker correct is aangebracht of loszit, •... -
Page 12: Onderdelen Van Het Apparaat En De Compartimenten
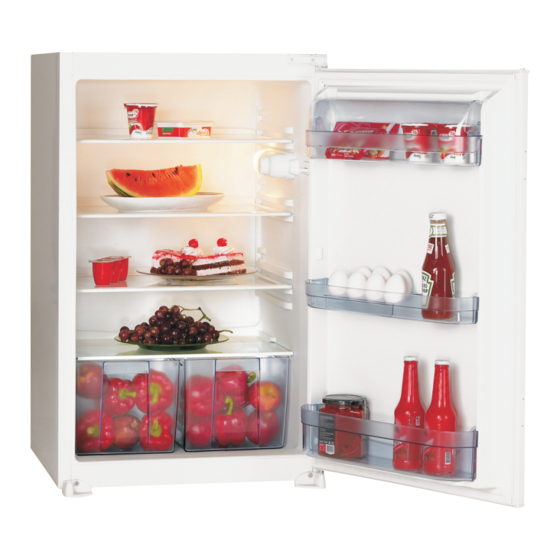
DE ONDERDELEN VAN HET DEEL 6 APPARAAT EN DE COMPARTIMENTEN 1-) KOELKASTLADE 6-) MIDDENLADE 2-) GLAZEN LADE 7- EIHOUDER 3-) GROENTELADE 8-) BOTERLADE 4-) LINKSE & RECHTSE VOET 9-) BOTERLADE DEKSEL 5-) FLESLADE 10-) THERMOSTAATVAK NL - 11 -... -
Page 13: Specificaties
DEEL 7 SPECIFICATIES Merk Apparaattype Ingebouwde provisiekast Geen Sterkwalificatie Frequentie (Hz) 50 Hz. Lichtstroom (Watt) 136l Netto koelkastvolume 220 - 240V Nominale spanning (V) Klimaatklasse + Omgevingsonde N / Tussen 16 - 32 28,5 Brutogewicht (kg) 0,416 Energieverbruik (kWh/24u) Energieverbruik (kWh/jaar) Nominale stroom (A) 0,56 R600a / 26g... - Page 15 Index BEFORE USING THE APPLIANCE ..............14 Safety information ......................14 BUILDING INTO THE KITCHEN CABINET ............16 Door reversing ......................... 19 Switching On the refrigerator for the first time .............. 19 HOW TO OPERATE THE APPLIANCE .............. 20 Thermostat Setting ......................20 FOOD STORAGE IN THE APPLIANCE .............
- Page 16 PART 1. BEFORE USING THE APPLIANCE Safety information • Check that the voltage marked on the rating plate located inside the refrigerator on the left matches that of your local supply. • Failure to use the correct voltage will render the guarantee VOID and may cause damage to the appliance.
- Page 17 REFRIGERANT The refrigerating gas contained in the circuit of this appliance is Isobutene (R600a); it causes a low level of pollution but is inflammable. CAUTION: Extreme caution must be used when moving the appliance. It is very heavy. WARNINGS: • Do not damage the refrigerant circuit. •...
- Page 18 PART 2. INSTALLATION BUILDING INTO THE KITCHEN CABINET Figure A ! Before installation, read the instructions carefully. ! Fit the refrigerator in stable kitchen units only. ! If necessary, reverse the door according to instructions. 1. See fig.A for the necessary attachment components. 2.
- Page 19 Figure B Figure C Figure.C Figure E Figure D UK - 17 -...
- Page 20 Figure F Figure G Figure H UK - 18 -...
- Page 21 Door reversing (14) 1. Open appliance door (16) 2. Unscrew door hinge pin and screw it to opposite side firmly and take to safe. (18) 3. Repeate with the lower pin . (fig.K.b) (17) 4. Fit blanking plugs to opposite side. (fig.K.c) (14) (18) (16)
- Page 22 PART 2. HOW TO OPERATE THE APPLIANCE Thermostat Setting • The thermostat automatically regulates the internal temperature of the refrigerator. By rotating the knob from position 1 to 5, colder temperatures can be obtained. • The “ 0 “ position shows thermostat is closed and no cooling is available.
- Page 23 PART 4. CLEANING AND MAINTENANCE • Disconnect the appliance from the mains supply before cleaning. • Do not pour water over the appliance. • The refrigerator should be cleaned periodically using a solution of bicarbonate of soda and lukewarm water. •...
- Page 24 PART 5. BEFORE CALLING YOUR AFTER SALES SERVICE If your refrigerator is not working properly, it may be a minor problem, check the following. The appliance does not operate, Check if; • There is a power failure, • The mains plug is not properly plugged in, or is loose •...
- Page 25 PARTS OF THE APPLIANCE AND PART 6. THE COMPARTMENTS 1-) REFRIGERATOR SHELF 6-) MIDDLE SHELF 2-) GLASS SHELF 7- EGG HOLDER 3-) CRISPER DRAWER 8-) BUTTER SHELF 4-) LEFT&RIGHT FEET 9-) BUTTER SHELF COVER 5-) BOTTLE SHELF 10-) THERMOSTAT BOX UK - 23 -...
- Page 26 PART 7. SPECIFICATIONS Brand Built-in Larder Appliance type None Star rating 50 Hz. Frequency ( Hz ) Light Power (Watts) 136l Net Refrigerator Volume 220 - 240V Rated Voltage ( V ) Climate Class +Ambient Range N / Between 16 - 32 28,5 Gross Weight (Kg) 0,416...
- Page 27 Waste electrical and electronic products must not be disposet of with household waste. Please refer to the retailer from whom you purchased this item for disposal instructions. Dutch: “Elektronische afvalstoffen dienen niet weggegooid te worden met het huisafval. Breng dit materiaal terug naar uw electro-speciaalzaak voor een veilige verwerking, of indien dit niet mogelijk is, naar het inname punt in uw gemeente.
Need help?
Do you have a question about the PLI136G-E and is the answer not in the manual?
Questions and answers