
Subscribe to Our Youtube Channel
Related Manuals for Proline PLI135-F-2F-LED2


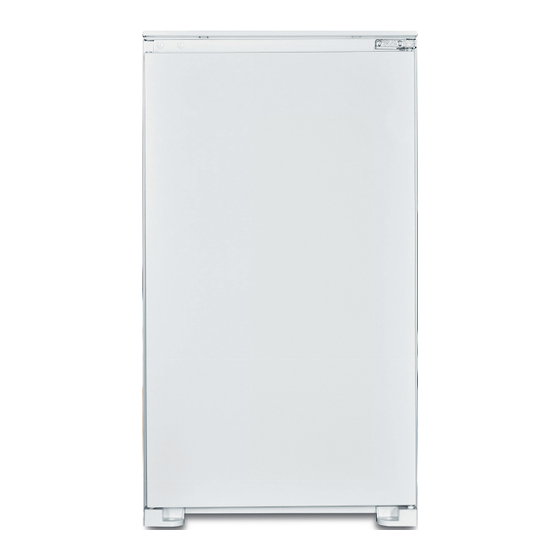
Summary of Contents for Proline PLI135-F-2F-LED2
- Page 1 MANUEL PROLINE PLI135-F-2F-LED2 NOTICE D’UTILISATION Tous nos Tutos vidéo Darty.com Tous nos magasins Communauté SAV Darty...
- Page 2 PLI135-F-2F-LED2 IB.indd 1 PLI135-F-2F-LED2 IB.indd 1 3/11/2023 4:51 PM 3/11/2023 4:51 PM...
- Page 3 PLI135-F-2F-LED2 IB.indd 2 PLI135-F-2F-LED2 IB.indd 2 3/11/2023 4:51 PM 3/11/2023 4:51 PM...
-
Page 4: Table Of Contents
TEMPÉRATURE AMBIANTE............18 UTILISATION DE VOTRE RÉFRIGÉRATEUR........18 DÉGIVRAGE...................22 NETTOYAGE ET ENTRETIEN............23 GUIDE DE DÉPANNAGE..............25 FICHE D’INFORMATION SUR LE PRODUIT.........27 SERVICE DE RÉPARATION ET PIÈCES DE RECHANGE..30 MISE AU REBUT................31 PLI135-F-2F-LED2 IB.indd 1 PLI135-F-2F-LED2 IB.indd 1 3/11/2023 4:51 PM 3/11/2023 4:51 PM... -
Page 5: Mises En Garde Importantes
• Cet appareil ne doit pas être exposé à la pluie. • MISE EN GARDE : Maintenir dégagées les ouvertures de ventilation dans l’enceinte de l’appareil ou dans la structure d’encastrement. PLI135-F-2F-LED2 IB.indd 2 PLI135-F-2F-LED2 IB.indd 2 3/11/2023 4:51 PM 3/11/2023 4:51 PM... - Page 6 • MISE EN GARDE : Pour éviter tout risque dû à l’instabilité de l’appareil, celui-ci doit être fixé conformément aux instructions. • En ce qui concerne les informations détaillées sur la méthode PLI135-F-2F-LED2 IB.indd 3 PLI135-F-2F-LED2 IB.indd 3 3/11/2023 4:51 PM...
- Page 7 - Les compartiments «une, deux et trois étoiles» ne conviennent pas pour la congélation des denrées alimentaires fraîches. - Si l’appareil de réfrigération demeure vide de manière prolongée, le mettre hors tension, en effectuer le dégivrage, PLI135-F-2F-LED2 IB.indd 4 PLI135-F-2F-LED2 IB.indd 4 3/11/2023 4:51 PM 3/11/2023 4:51 PM...
- Page 8 à haut niveau de compatibilité environnementale, qui est néanmoins inflammable. Pendant le transport et l’installation de l’appareil, assurez- vous qu’aucun des composants du circuit frigorifique ne soit endommagé. PLI135-F-2F-LED2 IB.indd 5 PLI135-F-2F-LED2 IB.indd 5 3/11/2023 4:51 PM 3/11/2023 4:51 PM...
- Page 9 Le réfrigérant et les gaz doivent être éliminés de manière professionnelle. Assurez-vous que la tubulure du circuit frigorifique n’est pas endommagée avant une mise au rebut appropriée. PLI135-F-2F-LED2 IB.indd 6 PLI135-F-2F-LED2 IB.indd 6 3/11/2023 4:51 PM 3/11/2023 4:51 PM...
-
Page 10: Description Du Produit
DESCRIPTION DU PRODUIT 1. Lampe et bouton de réglage du thermostat 2. Claye es en verre 3. Couvercle du bac à légumes 4. Bac à légumes 5. Étagères de porte PLI135-F-2F-LED2 IB.indd 7 PLI135-F-2F-LED2 IB.indd 7 3/11/2023 4:51 PM 3/11/2023 4:51 PM... - Page 11 Le bac : fruits frais, legumes, salades… Balconnets de porte de réfrigérateur (2°C ~ 8°C) : Section supérieure : oeufs, beurre, fromage… Section centrale / inférieure : Boissons, canettes, bouteilles… PLI135-F-2F-LED2 IB.indd 8 PLI135-F-2F-LED2 IB.indd 8 3/11/2023 4:51 PM 3/11/2023 4:51 PM...
-
Page 12: Inversion Du Côté D'ouverture De La Porte
2. Soulevez la porte pour la démonter du réfrigérateur, puis placez-la sur une surface rembourrée pour éviter de la rayer. 3. Dévissez les deux vis de fixation de la charnière inférieure du réfrigérateur. PLI135-F-2F-LED2 IB.indd 9 PLI135-F-2F-LED2 IB.indd 9 3/11/2023 4:51 PM... - Page 13 • Avant de terminer de visser les vis, vérifiez que la porte est alignée horizontalement et verticalement de sorte que les joints assurent l’étanchéité sur tous les côtés. PLI135-F-2F-LED2 IB.indd 10 PLI135-F-2F-LED2 IB.indd 10 3/11/2023 4:51 PM 3/11/2023 4:51 PM...
-
Page 14: Avant D'installer L'appareil
électrique. Cet appareil doit être relié à la terre. Le fabricant n’est pas responsable des dommages se produisant à cause de l’utilisation de l’appareil sans mise à la terre. PLI135-F-2F-LED2 IB.indd 11 PLI135-F-2F-LED2 IB.indd 11 3/11/2023 4:51 PM... -
Page 15: Installation
Il est recommandé de confier l’installation à l’agent de service agréé ou à une personne de qualification similaire. Pour que l’appareil fonctionne correctement, les conditions d’installation suivantes doivent être respectées. PLI135-F-2F-LED2 IB.indd 12 PLI135-F-2F-LED2 IB.indd 12 3/11/2023 4:51 PM 3/11/2023 4:51 PM... - Page 16 Pour un fonctionnement efficace de l’appareil, une ventilation appropriée doit être assurée autour de l’appareil. 1. Soulevez l’appareil et glissez-le dans le meuble. Assurez-vous que la prise de courant est accessible après l’installation de l’appareil. PLI135-F-2F-LED2 IB.indd 13 PLI135-F-2F-LED2 IB.indd 13 3/11/2023 4:51 PM 3/11/2023 4:51 PM...
- Page 17 2. Ajustez l’appareil dans le meuble. Pour un alignement correct, veillez à ce que la distance entre l’appareil et le bord avant du meuble soit de 44 mm. PLI135-F-2F-LED2 IB.indd 14 PLI135-F-2F-LED2 IB.indd 14 3/11/2023 4:51 PM 3/11/2023 4:51 PM...
- Page 18 Placez le guide fourni sur le côté de la porte de l’appareil. 5. Insérez le curseur fourni dans la fente du guide. Assemblez la porte de l’appareil et la porte du meuble. PLI135-F-2F-LED2 IB.indd 15 PLI135-F-2F-LED2 IB.indd 15 3/11/2023 4:52 PM 3/11/2023 4:52 PM...
- Page 19 6. Fixez le curseur sur la porte du meuble avec les vis fournies. Fixez le couvercle du curseur fourni sur le curseur jusqu’à ce qu’il s’enclenche en place. PLI135-F-2F-LED2 IB.indd 16 PLI135-F-2F-LED2 IB.indd 16 3/11/2023 4:52 PM 3/11/2023 4:52 PM...
- Page 20 Effectuez une dernière vérification pour vous assurer que : • Toutes les vis sont serrées. • Le joint en caoutchouc est solidement fixé au meuble. • La porte de l’appareil s’ouvre et se ferme correctement. PLI135-F-2F-LED2 IB.indd 17 PLI135-F-2F-LED2 IB.indd 17 3/11/2023 4:52 PM 3/11/2023 4:52 PM...
-
Page 21: Température Ambiante
Il est recommandé de décongeler les aliments à l’intérieur du réfrigérateur. • Ne placez pas d’aliments chauds à l’intérieur de l’appareil. Assurez-vous qu’ils ont refroidi à température ambiante avant de les placer dans l’appareil. PLI135-F-2F-LED2 IB.indd 18 PLI135-F-2F-LED2 IB.indd 18 3/11/2023 4:52 PM 3/11/2023 4:52 PM... - Page 22 La température et la durée de fonctionnement sont impactées par l’emplacement du réfrigérateur, la fréquence d’ouverture de la porte et la température de la pièce où se trouve le réfrigérateur. PLI135-F-2F-LED2 IB.indd 19 PLI135-F-2F-LED2 IB.indd 19 3/11/2023 4:52 PM 3/11/2023 4:52 PM...
- Page 23 Ouvrez l’appareil aussi brièvement que possible. • Dégivrez régulièrement le réfrigérateur pour enlever la couche de givre. • Veillez à ce que la porte de l’appareil soit toujours correctement fermée. PLI135-F-2F-LED2 IB.indd 20 PLI135-F-2F-LED2 IB.indd 20 3/11/2023 4:52 PM 3/11/2023 4:52 PM...
-
Page 24: Dégivrage
Veillez à ce que le trou de drainage au dos du réfrigérateur ne soit pas bouché. PLI135-F-2F-LED2 IB.indd 21 PLI135-F-2F-LED2 IB.indd 21 3/11/2023 4:52 PM... -
Page 25: Nettoyage Et Entretien
éponge propre ou un chiffon doux et un detergent doux dans de l’eau tiède. • N’utilisez pas de cires de nettoyage, de détergents concentrés, d’agents de blanchiment ou des nettoyants contenant du pétrole, sur les pièces en plastique du réfrigérateur. PLI135-F-2F-LED2 IB.indd 22 PLI135-F-2F-LED2 IB.indd 22 3/11/2023 4:52 PM 3/11/2023 4:52 PM... - Page 26 La lampe LED dans le compartiment du réfrigérateur ne peut pas être remplacée par l’utilisateur. Si la lampe LED cesse de fonctionner, contactez le centre de reparation agréé local. PLI135-F-2F-LED2 IB.indd 23 PLI135-F-2F-LED2 IB.indd 23 3/11/2023 4:52 PM 3/11/2023 4:52 PM...
-
Page 27: Guide De Dépannage
• Assurez-vous que le joint de la porte reste scellé. • Une grande quantité d’aliments tièdes ou chauds a peut-être été stockée récemment. Attendez que le réfrigérateur ait atteint sa température de consigne. PLI135-F-2F-LED2 IB.indd 24 PLI135-F-2F-LED2 IB.indd 24 3/11/2023 4:52 PM 3/11/2023 4:52 PM... - Page 28 Vous devrez peut-être dégager l’appareil du mur pour vérifier le bac et le bec. PLI135-F-2F-LED2 IB.indd 25 PLI135-F-2F-LED2 IB.indd 25 3/11/2023 4:52 PM 3/11/2023 4:52 PM...
-
Page 29: Fiche D'information Sur Le Produit
RÈGLEMENT DÉLÉGUÉ (UE) 2019/2016 DE LA COMMISSION en ce qui concerne l’étiquetage énergétique des appareils de réfrigération Nom du fournisseur ou marque commerciale: Etablissements Darty & fils © | Proline Adresse du fournisseur: 9 Rue des Bateaux-Lavoirs, 94200 Ivry-sur-Seine, France Référence du modèle: PLI135-F-2F-LED2... - Page 30 Pour accéder aux informations sur le modèle stockées dans la base de données des produits : Cliquer sur le lien https://eprel.ec.europa.eu/screen/product/refrigeratingappliances2019/1782553 Cet appareil de réfrigération ne convient pas pour la congélation de denrées alimentaire. PLI135-F-2F-LED2 IB.indd 27 PLI135-F-2F-LED2 IB.indd 27 3/11/2023 4:52 PM 3/11/2023 4:52 PM...
- Page 31 Gaz isolant Cyclopentane Courant nominal 0,45A Classe de protection contre les chocs électriques Classe I Entrée de puissance nominale Puissance maximale de la lampe 1,5W Poids net 26kg PLI135-F-2F-LED2 IB.indd 28 PLI135-F-2F-LED2 IB.indd 28 3/11/2023 4:52 PM 3/11/2023 4:52 PM...
-
Page 32: Service De Réparation Et Pièces De Rechange
24 heures / 24 7 jours / 7 9 Rue des Bateaux-Lavoirs, 94200 Ivry-sur-Seine, France www.vandenborre.be 02 334 00 00 8h – 18h Lundi à Samedi Slesbroekstraat 101 1600 Sint-Pieters-Leeuw Belgium PLI135-F-2F-LED2 IB.indd 29 PLI135-F-2F-LED2 IB.indd 29 3/11/2023 4:52 PM 3/11/2023 4:52 PM... -
Page 33: Mise Au Rebut
Veuillez nous excuser pour la gêne occasionnée. Etablissements Darty & fils ©, 9 Rue des Bateaux-Lavoirs, 94200 Ivry-sur-Seine, France 8/11/2023 PLI135-F-2F-LED2 IB.indd 30 PLI135-F-2F-LED2 IB.indd 30 3/11/2023 4:52 PM 3/11/2023 4:52 PM... - Page 34 à ne pas l’utiliser dans un autre réfrigérateur (en effet, la zone la plus froide n’est pas identique), ou pour toute autre utilisation. INDICATEUR DE TEMPERATURE : ZONE LA PLUS FROIDE DE VOTRE REFRIGERATEUR. PLI135-F-2F-LED2 IB.indd 31 PLI135-F-2F-LED2 IB.indd 31 3/11/2023 4:52 PM 3/11/2023 4:52 PM...
- Page 35 Après chargement ou ouverture de la porte, il est possible que l’indicateur devienne blanc au bout de quelques instants. Température trop élevée, Réglage correct réglez le thermostat PLI135-F-2F-LED2 IB.indd 32 PLI135-F-2F-LED2 IB.indd 32 3/11/2023 4:52 PM 3/11/2023 4:52 PM...
- Page 36 BELANGRIJKE VEILIGHEIDSINSTRUCTIES........35 PRODUCTOVERZICHT..............39 DRAAIRICHTING VAN DE DEUR WIJZIGEN......41 VOOR INSTALLATIE VAN HET APPARAAT.........43 INSTALLATIE..................44 OMGEVINGSTEMPERATUUR............50 UW KOELKAST.................50 ONTDOOIEN...................53 REINIGING EN ONDERHOUD............54 PROBLEEMOPLOSSING.............56 PRODUCTINFORMATIEBLAD..........58 DIENST VOOR HERSTELLINGEN EN RESERVEONDERDELEN..61 RECYCLAGE................62 PLI135-F-2F-LED2 IB.indd 33 PLI135-F-2F-LED2 IB.indd 33 3/11/2023 4:52 PM 3/11/2023 4:52 PM...
-
Page 37: Belangrijke Veiligheidsinstructies
• WAARSCHUWING: Gebruik geen mechanische apparaten of andere middelen om het ontdooiproces te versnellen, dan deze PLI135-F-2F-LED2 IB.indd 34 PLI135-F-2F-LED2 IB.indd 34 3/11/2023 4:52 PM 3/11/2023 4:52 PM... - Page 38 • Voor instructies over de bevestigingsmethode en de juiste afmetingen, raadpleeg de sectie “INSTALLATIE”. • De stekker moet na het installeren van het apparaat eenvoudig PLI135-F-2F-LED2 IB.indd 35 PLI135-F-2F-LED2 IB.indd 35 3/11/2023 4:52 PM 3/11/2023 4:52 PM...
- Page 39 • Houd al het verpakkingsmateriaal uit de buurt van kinderen omdat er verstikkingsrisico bestaat. • De stekker moet eenvoudig bereikbaar zijn wanneer de koel-/ vriescombinatie zich op zijn plaats bevindt. PLI135-F-2F-LED2 IB.indd 36 PLI135-F-2F-LED2 IB.indd 36 3/11/2023 4:52 PM 3/11/2023 4:52 PM...
- Page 40 Koelmiddel en gassen mogen alleen door een deskundige worden verwijderd. Controleer of de buizen van het koelcircuit niet beschadigd zijn voordat u het product op een juiste manier afdankt. PLI135-F-2F-LED2 IB.indd 37 PLI135-F-2F-LED2 IB.indd 37 3/11/2023 4:52 PM 3/11/2023 4:52 PM...
-
Page 41: Productoverzicht
PRODUCTOVERZICHT 1. Temperatuurregelaar met gloeilampgedeelte 2. Glazen schappen 3. Deksel van groentebak 4. Groentebak 5. Deurschappen PLI135-F-2F-LED2 IB.indd 38 PLI135-F-2F-LED2 IB.indd 38 3/11/2023 4:52 PM 3/11/2023 4:52 PM... - Page 42 Onderste gedeelte: vlees, vleesproducten, delicatessen… Groentelade: vers fruit, groente, salades… Deurvakken van de koelkast (2°C ~ 8°C): Bovenste gedeelte: eieren, boter, kaas… Middelste / Onderste drankjes, blikjes, flessen… gedeelte: PLI135-F-2F-LED2 IB.indd 39 PLI135-F-2F-LED2 IB.indd 39 3/11/2023 4:52 PM 3/11/2023 4:52 PM...
-
Page 43: Draairichting Van De Deur Wijzigen
2. Til de deur op om deze van de koelkast af te halen en plaats het op een zacht oppervlak om krassen te vermijden. 3. Verwijder de twee schroeven die de onderste scharnier op de koelkast vasthouden. PLI135-F-2F-LED2 IB.indd 40 PLI135-F-2F-LED2 IB.indd 40 3/11/2023 4:52 PM 3/11/2023 4:52 PM... - Page 44 • Zorg dat de deur zowel horizontaal als verticaal is uitgelijnd zodat de afdichtingen op alle zijden gesloten zijn voordat u de schroeven volledig vastdraait. PLI135-F-2F-LED2 IB.indd 41 PLI135-F-2F-LED2 IB.indd 41 3/11/2023 4:52 PM 3/11/2023 4:52 PM...
-
Page 45: Voor Installatie Van Het Apparaat
Het apparaat moet geaard zijn. De fabrikant is niet verantwoordelijk voor schade die ontstaat door het gebruik zonder aarding. PLI135-F-2F-LED2 IB.indd 42 PLI135-F-2F-LED2 IB.indd 42 3/11/2023 4:52 PM 3/11/2023 4:52 PM... -
Page 46: Installatie
Het wordt aanbevolen om de installatie te laten uitvoeren door een erkende serviceagent of een soortgelijk gekwalificeerd persoon. Houd rekening met de volgende installatievoorwaarden voor een juiste werking van het apparaat. PLI135-F-2F-LED2 IB.indd 43 PLI135-F-2F-LED2 IB.indd 43 3/11/2023 4:52 PM 3/11/2023 4:52 PM... - Page 47 1. Til het apparaat op en schuif het in de kast. Zorg ervoor dat de netstekker toegankelijk is na de installatie van het apparaat. PLI135-F-2F-LED2 IB.indd 44 PLI135-F-2F-LED2 IB.indd 44 3/11/2023 4:52 PM 3/11/2023 4:52 PM...
- Page 48 2. Pas het apparaat in de kast aan. Voor een juiste uitlijning, zorg dat de afstand tussen het apparaat en de voorkant van de kast 44 mm is. PLI135-F-2F-LED2 IB.indd 45 PLI135-F-2F-LED2 IB.indd 45 3/11/2023 4:52 PM 3/11/2023 4:52 PM...
- Page 49 Breng de meegeleverde geleider aan de zijkant van de apparaatdeur aan. 5. Breng de meegeleverde schuif in de gleuf van de geleider aan. Zet de apparaatdeur en de kastdeur in elkaar. PLI135-F-2F-LED2 IB.indd 46 PLI135-F-2F-LED2 IB.indd 46 3/11/2023 4:52 PM 3/11/2023 4:52 PM...
- Page 50 6. Maak de schuif vast aan de kastdeur met behulp van de meegeleverde schroeven. Maak de meegeleverde beschermkap vast aan de schuif totdat deze op zijn plaats klikt. PLI135-F-2F-LED2 IB.indd 47 PLI135-F-2F-LED2 IB.indd 47 3/11/2023 4:52 PM 3/11/2023 4:52 PM...
- Page 51 Voer een laatste controle uit om er zeker van te zijn dat: • Alle schroeven zijn vastgedraaid. • De rubberen afdichting stevig aan de kast is vastgemaakt. • De apparaatdeur juist opent en sluit. PLI135-F-2F-LED2 IB.indd 48 PLI135-F-2F-LED2 IB.indd 48 3/11/2023 4:52 PM 3/11/2023 4:52 PM...
-
Page 52: Omgevingstemperatuur
Tips voor het invriezen • Vlees (alle soorten): geschikt verpakken en in de koelkast plaatsen. Bewaar het vlees maximaal 1 à 2 dagen. PLI135-F-2F-LED2 IB.indd 49 PLI135-F-2F-LED2 IB.indd 49 3/11/2023 4:52 PM 3/11/2023 4:52 PM... - Page 53 2 uur op de koudste stand in voordat u levensmiddelen inbrengt en stel vervolgens op de medium stand in. Werkingsgeluiden Normale geluiden • De motoren lopen. • Koelmiddel stroomt door de buizen. PLI135-F-2F-LED2 IB.indd 50 PLI135-F-2F-LED2 IB.indd 50 3/11/2023 4:52 PM 3/11/2023 4:52 PM...
- Page 54 Open de deur zo weinig mogelijk. • Open het apparaat zo kort mogelijk. • Ontdooi de koelkast regelmatig om de ijslaag te verwijderen. • Zorg dat de deur altijd juist gesloten is. PLI135-F-2F-LED2 IB.indd 51 PLI135-F-2F-LED2 IB.indd 51 3/11/2023 4:52 PM 3/11/2023 4:52 PM...
-
Page 55: Ontdooien
Het dooiwater wordt automatisch naar de afvoeropening geleid en komt in een schaal boven de compressor aan de achterkant van het apparaat terecht waar het vervolgens verdampt. Zorg dat de afvoeropening in de koelkast nooit verstopt raakt. PLI135-F-2F-LED2 IB.indd 52 PLI135-F-2F-LED2 IB.indd 52 3/11/2023 4:52 PM 3/11/2023 4:52 PM... -
Page 56: Reiniging En Onderhoud
Gebruik geen reinigingswas, geconcentreerde reinigingsmiddelen, bleekmiddel of reinigingsmiddelen op basis van petroleum voor de plastic onderdelen van de koelkast. 7. Droog alle oppervlakken grondig af en steek vervolgens de stekker weer in PLI135-F-2F-LED2 IB.indd 53 PLI135-F-2F-LED2 IB.indd 53 3/11/2023 4:52 PM 3/11/2023 4:52 PM... - Page 57 De led-lampen in het apparaat kunnen niet door de gebruiker worden vervangen. Als de led-lampen niet meer werken, neem contact op met een erkende reparateur in uw buurt. PLI135-F-2F-LED2 IB.indd 54 PLI135-F-2F-LED2 IB.indd 54 3/11/2023 4:52 PM 3/11/2023 4:52 PM...
-
Page 58: Probleemoplossing
• Controleer of de deurpakking het apparaat goed afdicht. • Een grote hoeveelheid warm of heet voedsel werd recent in de diepvries geplaatst. Wacht totdat de koelkast de ingestelde temperatuur heeft bereikt. PLI135-F-2F-LED2 IB.indd 55 PLI135-F-2F-LED2 IB.indd 55 3/11/2023 4:52 PM 3/11/2023 4:52 PM... - Page 59 Mogelijk moet u het apparaat van de muur trekken om de pan en de tuit te controleren. PLI135-F-2F-LED2 IB.indd 56 PLI135-F-2F-LED2 IB.indd 56 3/11/2023 4:52 PM 3/11/2023 4:52 PM...
-
Page 60: Productinformatieblad
PRODUCTINFORMATIEBLAD GEDELEGEERDE VERORDENING (EU) 2019/2016 VAN DE COMMISSIE met betrekking tot de energie-etikettering van koelapparaten Naam van de leverancier of het handelsmerk: Etablissements Darty & fils © | Proline Adres van de leverancier: 9 Rue des Bateaux-Lavoirs, 94200 Ivry-sur-Seine, France... - Page 61 Over hoe de informatie over een model kan worden gevonden in de productendatabank : Klik de link https://eprel.ec.europa.eu/screen/product/refrigeratingappliances2019/1782553 Dit koelapparaat is niet geschikt voor het invriezen van levensmiddelen. PLI135-F-2F-LED2 IB.indd 58 PLI135-F-2F-LED2 IB.indd 58 3/11/2023 4:52 PM 3/11/2023 4:52 PM...
- Page 62 Nominale spanning en frequentie 220-240V~ 50Hz Koelmiddel/hoeveelheid R600a / 18g Isolatie-blaasgas Cyclopentaan Nominale stroom 0,45A Beschermingsklasse tegen elektrische schokken Klasse I Ingangsvermogen Maximum lampvermogen 1,5W Nettogewicht 26kg PLI135-F-2F-LED2 IB.indd 59 PLI135-F-2F-LED2 IB.indd 59 3/11/2023 4:52 PM 3/11/2023 4:52 PM...
-
Page 63: Dienst Voor Herstellingen En Reserveonderdelen
24 uur 7 dagen per week 9 Rue des Bateaux-Lavoirs, 94200 Ivry-sur-Seine, France www.vandenborre.be 02 334 00 00 8u – 18u Ma naar Zat Slesbroekstraat 101 1600 Sint-Pieters-Leeuw Belgium PLI135-F-2F-LED2 IB.indd 60 PLI135-F-2F-LED2 IB.indd 60 3/11/2023 4:52 PM 3/11/2023 4:52 PM... -
Page 64: Recyclage
We verontschuldigen ons voor enig ongemak veroorzaakt door kleine inconsistenties in deze gebruikershandleiding, die kunnen ontstaan door productverbetering of – ontwikkeling. Etablissements Darty & fils ©, 9 Rue des Bateaux-Lavoirs, 94200 Ivry-sur-Seine, France 8/11/2023 PLI135-F-2F-LED2 IB.indd 61 PLI135-F-2F-LED2 IB.indd 61 3/11/2023 4:52 PM 3/11/2023 4:52 PM... - Page 65 OPGELET : Deze indicator is alleen geschikt voor gebruik met deze koelkast, gebruik het niet voor een andere koelkast (de koudste zone kan namelijk verschillend zijn) of voor een ander doeleinde. TEMPERATUURINDICATOR : KOUDSTE ZONE VAN UW KOELKAST. PLI135-F-2F-LED2 IB.indd 62 PLI135-F-2F-LED2 IB.indd 62 3/11/2023 4:52 PM 3/11/2023 4:52 PM...
- Page 66 Na het inbrengen van levensmiddelen of het openen van de deur, is het mogelijk dat de indicator enige tijd wit is. Te hoge temperatuur, regel Juiste instelling de thermostaat PLI135-F-2F-LED2 IB.indd 63 PLI135-F-2F-LED2 IB.indd 63 3/11/2023 4:52 PM 3/11/2023 4:52 PM...
- Page 67 PRODUCT OVERVIEW...............70 DOOR CONVERSION................72 BEFORE INSTALLING THE APPLIANCE........74 INSTALLATION.................75 AMBIENT TEMPERATUE..............81 USING YOUR REFRIGERATOR............81 DEFROSTING...................85 CLEANING AND MAINTENANCE..........86 TROUBLESHOOTING................87 PRODUCT INFORMATION SHEET..........89 REPAIR AND SPARE PARTS SERVICE........92 DISPOSAL................93 PLI135-F-2F-LED2 IB.indd 64 PLI135-F-2F-LED2 IB.indd 64 3/11/2023 4:52 PM 3/11/2023 4:52 PM...
-
Page 68: Important Safety Instructions
• WARNING: Do not damage the refrigerant circuit. • WARNING: Do not use electrical appliances inside the food PLI135-F-2F-LED2 IB.indd 65 PLI135-F-2F-LED2 IB.indd 65 3/11/2023 4:52 PM 3/11/2023 4:52 PM... - Page 69 • The plug must be remained easily accessible after installation of the appliance. • Warning; Risk of fire / flammable materials • WARNING: When positioning the appliance, ensure the supply cord is not trapped or damaged. PLI135-F-2F-LED2 IB.indd 66 PLI135-F-2F-LED2 IB.indd 66 3/11/2023 4:52 PM 3/11/2023 4:52 PM...
- Page 70 • Never unplug the refrigerator by pulling the cord. Grip the plug firmly and pull it out. • Place the refrigerator in a dry place – avoid areas of high moisture PLI135-F-2F-LED2 IB.indd 67 PLI135-F-2F-LED2 IB.indd 67 3/11/2023 4:52 PM...
- Page 71 • WARNING — Refrigerators and freezers contain refrigerant and gases in the insulation. Refrigerant and gases must be disposed of professionally. Ensure that tubing of the refrigerant circuit is not damage prior to proper disposal. PLI135-F-2F-LED2 IB.indd 68 PLI135-F-2F-LED2 IB.indd 68 3/11/2023 4:52 PM 3/11/2023 4:52 PM...
-
Page 72: Product Overview
PRODUCT OVERVIEW 1. Temperature control knob with light assembly 2. Glass shelves 3. Vegetable container cover 4. Vegetable container 5. Door shelves PLI135-F-2F-LED2 IB.indd 69 PLI135-F-2F-LED2 IB.indd 69 3/11/2023 4:52 PM 3/11/2023 4:52 PM... - Page 73 … Container: fresh fruit, vegetables, salads… Refrigerator door shelves (2°C ~ 8°C): Top section: eggs, butter, cheese… Middle / Bottom section: beverages, cans, bottles… PLI135-F-2F-LED2 IB.indd 70 PLI135-F-2F-LED2 IB.indd 70 3/11/2023 4:52 PM 3/11/2023 4:52 PM...
-
Page 74: Door Conversion
2. Lift the door off the fridge and then place it on a padded surface to avoid scratching. 3. Remove the two screws that fix the bottom hinge to the fridge. PLI135-F-2F-LED2 IB.indd 71 PLI135-F-2F-LED2 IB.indd 71 3/11/2023 4:52 PM... - Page 75 8. Fix this hinge to the top of the fridge by tightening the screws. • Ensure that the door is aligned horizontally and vertically so that the seals are closed on all sides before finally tightening the screws. PLI135-F-2F-LED2 IB.indd 72 PLI135-F-2F-LED2 IB.indd 72 3/11/2023 4:53 PM 3/11/2023 4:53 PM...
-
Page 76: Before Installing The Appliance
The appliance must be grounded. The manufacturer is not responsible for damages that may occur as a result of usage without grounding. PLI135-F-2F-LED2 IB.indd 73 PLI135-F-2F-LED2 IB.indd 73 3/11/2023 4:53 PM 3/11/2023 4:53 PM... -
Page 77: Installation
It is recommended that installation may be performed by the authorised service agent or a similarly qualified person. In order for the appliance to function properly, the following installation conditions must be observed. PLI135-F-2F-LED2 IB.indd 74 PLI135-F-2F-LED2 IB.indd 74 3/11/2023 4:53 PM 3/11/2023 4:53 PM... - Page 78 There must be appropriate air ventilation around the appliance in order to achieve an efficient operation. 1. Raise the appliance and slide into the cabinet. Make sure that the mains plug is accessible after the installation of the appliance. PLI135-F-2F-LED2 IB.indd 75 PLI135-F-2F-LED2 IB.indd 75 3/11/2023 4:53 PM 3/11/2023 4:53 PM...
- Page 79 Make sure that the clearance between the appliance and cabinet is 4 mm. 2. Adjust the appliance in the cabinet. For a correct alignment make sure that the distance between the appliance and the cabinet front-edge is of 44 mm. PLI135-F-2F-LED2 IB.indd 76 PLI135-F-2F-LED2 IB.indd 76 3/11/2023 4:53 PM 3/11/2023 4:53 PM...
- Page 80 Place the supplied guide on the side of the appliance door. 5. Insert the supplied slider into the slot of the guide. together appliance door and the cabinet door. PLI135-F-2F-LED2 IB.indd 77 PLI135-F-2F-LED2 IB.indd 77 3/11/2023 4:53 PM 3/11/2023 4:53 PM...
- Page 81 6. Fix the slider on the cabinet door with the supplied screws. Attach the supplied slider cover onto the slider until it clicks into place. PLI135-F-2F-LED2 IB.indd 78 PLI135-F-2F-LED2 IB.indd 78 3/11/2023 4:53 PM 3/11/2023 4:53 PM...
- Page 82 Do a final check to make sure that : • All screws are tightened. • The rubber seal is attached tightly to the cabinet. • The appliance door opens and closes correctly. PLI135-F-2F-LED2 IB.indd 79 PLI135-F-2F-LED2 IB.indd 79 3/11/2023 4:53 PM 3/11/2023 4:53 PM...
-
Page 83: Ambient Temperatue
Meat (all types): wrap in a suitable packaging and place it in the refrigerator. Store meat for at most • 1-2 days. • Fruit and vegetables: clean thoroughly (eliminate the soil) and place them PLI135-F-2F-LED2 IB.indd 80 PLI135-F-2F-LED2 IB.indd 80 3/11/2023 4:53 PM 3/11/2023 4:53 PM... - Page 84 2 hours before introducing food to be stored, and then readjust to the middle setting. Operating noises Normal noises • Motors are running. • Refrigerant is flowing through the tubing. PLI135-F-2F-LED2 IB.indd 81 PLI135-F-2F-LED2 IB.indd 81 3/11/2023 4:53 PM 3/11/2023 4:53 PM...
- Page 85 • Open the appliance as briefly as possible. • Regularly defrost the refrigerator to remove the layer of frost. • Ensure that the door is always closed properly.. PLI135-F-2F-LED2 IB.indd 82 PLI135-F-2F-LED2 IB.indd 82 3/11/2023 4:53 PM 3/11/2023 4:53 PM...
-
Page 86: Defrosting
Make sure the drain port on the fridge compartment at the rear of the appliance is kept clear. PLI135-F-2F-LED2 IB.indd 83 PLI135-F-2F-LED2 IB.indd 83 3/11/2023 4:53 PM 3/11/2023 4:53 PM... -
Page 87: Cleaning And Maintenance
8. Put the food back in the appliance. The LED light in the fridge compartment cannot be replaced by the user. If the LED light stops working, please contact the local authorised service agent. PLI135-F-2F-LED2 IB.indd 84 PLI135-F-2F-LED2 IB.indd 84 3/11/2023 4:53 PM... -
Page 88: Troubleshooting
• Ensure that the door gasket does not seal properly. • A large amount of warm or hot food might have been stored recently. Wait until the refrigerator has reached its set temperature. PLI135-F-2F-LED2 IB.indd 85 PLI135-F-2F-LED2 IB.indd 85 3/11/2023 4:53 PM 3/11/2023 4:53 PM... - Page 89 You may need to pull the appliance away from the wall to check the pan and spout. PLI135-F-2F-LED2 IB.indd 86 PLI135-F-2F-LED2 IB.indd 86 3/11/2023 4:53 PM 3/11/2023 4:53 PM...
-
Page 90: Product Information Sheet
PRODUCT INFORMATION SHEET COMMISSION DELEGATED REGULATION (EU) 2019/2016 with regard to energy labelling of refrigerating appliances Supplier’s name or trade mark: Etablissements Darty & fils © | Proline Supplier’s address: 9 Rue des Bateaux-Lavoirs, 94200 Ivry-sur-Seine, France Model identifier: PLI135-F-2F-LED2... - Page 91 16 °C to 43 °C’ . To find the model information in the product database: Click the link https://eprel.ec.europa.eu/screen/product/refrigeratingappliances2019/1782553 This refrigerating appliance is not suitable for freezing foodstuffs. PLI135-F-2F-LED2 IB.indd 88 PLI135-F-2F-LED2 IB.indd 88 3/11/2023 4:53 PM 3/11/2023 4:53 PM...
- Page 92 220-240V~ 50Hz Refrigerant/Amount R600a / 18g Insulation blowing gas Cyclopentane Rated current 0,45A Electric shock protection class Class I Rated power input Maximum lamp power 1,5W Net weight PLI135-F-2F-LED2 IB.indd 89 PLI135-F-2F-LED2 IB.indd 89 3/11/2023 4:53 PM 3/11/2023 4:53 PM...
-
Page 93: Repair And Spare Parts Service
7 Days a week 9 Rue des Bateaux-Lavoirs, 94200 Ivry-sur-Seine, France www.vandenborre.be 02 334 00 00 8 AM – 6 PM Mon to Sat Slesbroekstraat 101 1600 Sint-Pieters-Leeuw Belgium PLI135-F-2F-LED2 IB.indd 90 PLI135-F-2F-LED2 IB.indd 90 3/11/2023 4:53 PM 3/11/2023 4:53 PM... -
Page 94: Disposal
We apologise for any inconvenience caused by minor inconsistencies in these instructions, which may occur as a result of product improvement and development. Etablissements Darty & fils ©, 9 Rue des Bateaux-Lavoirs, 94200 Ivry-sur-Seine, France 8/11/2023 PLI135-F-2F-LED2 IB.indd 91 PLI135-F-2F-LED2 IB.indd 91 3/11/2023 4:53 PM 3/11/2023 4:53 PM... - Page 95 (as the coldest area will not be the same) or for any other purpose. TEMPERATURE INDICATOR : THE COLDEST PART OF YOUR REFRIGERATOR PLI135-F-2F-LED2 IB.indd 92 PLI135-F-2F-LED2 IB.indd 92 3/11/2023 4:53 PM 3/11/2023 4:53 PM...
- Page 96 After loading the refrigerator or opening the door, the indicator may turn white for a few seconds. devienne blanc au bout de quelques instants. Temperature too high, Correct setting adjust the thermostat PLI135-F-2F-LED2 IB.indd 93 PLI135-F-2F-LED2 IB.indd 93 3/11/2023 4:53 PM 3/11/2023 4:53 PM...
- Page 97 PLI135-F-2F-LED2 IB.indd 94 PLI135-F-2F-LED2 IB.indd 94 3/11/2023 4:53 PM 3/11/2023 4:53 PM...
- Page 98 PLI135-F-2F-LED2 IB.indd 95 PLI135-F-2F-LED2 IB.indd 95 3/11/2023 4:53 PM 3/11/2023 4:53 PM...
- Page 99 PLI135-F-2F-LED2 IB.indd 96 PLI135-F-2F-LED2 IB.indd 96 3/11/2023 4:53 PM 3/11/2023 4:53 PM...
Need help?
Do you have a question about the PLI135-F-2F-LED2 and is the answer not in the manual?
Questions and answers