Table of Contents
Advertisement
Available languages
Available languages
Quick Links
QR100M
2
MANUALE DI INSTALLAZIONE, USO E MANUTENZIONE
I
16
INSTALLATION, USE AND MAINTENANCE MANUAL
GB
Sede operativa/Warehouse-Offices: via Mario Calderara 39/41, 25018 Montichiari (Bs) - Sede legale/Registered office: via Corsica 10, 25125 Brescia
C.F. e P.IVA/VAT 03369930981 - REA BS-528635 - Tel: +39 030 674681 - Fax: +39 030 6872149 - www.aerauliqa.it - www.aerauliqa.com - info@aerauliqa.it
Aerauliqa S.r.l. si riserva il diritto di modificare/apportare migliorie ai prodotti e/o alle istruzioni di questo manuale in qualsiasi momento e senza preavviso.
Aerauliqa S.r.l. reserves the right to modify/make improvements to products and/or this instruction manual at any time and without prior notice.
1
Advertisement
Table of Contents

Related Manuals for aerauliqa QR100M


Summary of Contents for aerauliqa QR100M
- Page 1 Sede operativa/Warehouse-Offices: via Mario Calderara 39/41, 25018 Montichiari (Bs) - Sede legale/Registered office: via Corsica 10, 25125 Brescia C.F. e P.IVA/VAT 03369930981 - REA BS-528635 - Tel: +39 030 674681 - Fax: +39 030 6872149 - www.aerauliqa.it - www.aerauliqa.com - info@aerauliqa.it Aerauliqa S.r.l.
-
Page 2: Table Of Contents
QR100M Unità di ventilazione decentralizzata con recupero di calore Leggere questo manuale attentamente prima di utilizzare il prodotto e conservarlo in un posto sicuro così da poterlo consultare all’occorrenza. Il prodotto è costruito a regola d’arte e nel rispetto delle normative vigenti in materia di apparecchiature elettriche e deve essere installato da personale tecnicamente qualificato. -
Page 3: Avvertenze E Precauzioni
• In caso di riparazione utilizzare solo ricambi originali. 3 INFORMAZIONI DI PRODOTTO 3.1 Generale Questo documento è il Manuale di installazione dell’unità di ventilazione decentralizzata con recupero di calore QR100M. Esso include informazioni di base e raccomandazioni relative all’installazione, alla messa in servizio e alle operazioni di manutenzione per assicurarne il funzionamento corretto. Per ottenere il funzionamento corretto e sicuro del prodotto, leggere questo manuale con attenzione, utilizzare l’unità seguendo le linee guida di seguito elencate e attenersi a tutte le prescrizioni di sicurezza. -
Page 4: Dimensioni E Peso
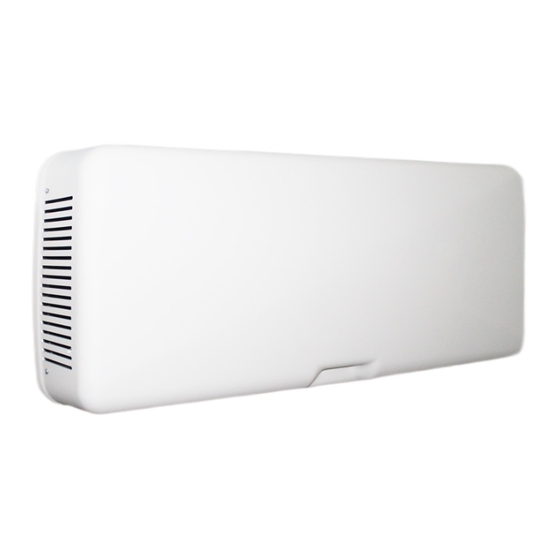
3.2 Dimensioni (mm) e Peso Fig. 3.a Peso Kg 12,5 3.3 Connessioni Fig. 3.b Connessioni Ingresso aria dall’esterno Espulsione aria verso l’esterno Aria fornita all’interno Aria estratta dall’interno Scarico condensa invernale Scarico condensa estivo 3.4 Spazio richiesto Assicurarsi che attorno all’unità vi sia spazio sufficiente per lo svolgimento delle attività di manutenzione (rimozione del pannello frontale per l’accessibilità... -
Page 5: Trasporto E Immagazzinaggio
4 TRASPORTO E STOCCAGGIO ATTENZIONE Assicurarsi che le avvertenze e le precauzioni indicate nel Capitolo 2 sia attentamente lette, comprese e rispettate! Il prodotto è fornito in una scatola di cartone. Il prodotto deve essere immagazzinato e trasportato in modo che sia sempre protetto da danni fisici che possono danneggiare il pannello frontale, la carcassa, ecc... - Page 6 Livella a bolla d’aria Fig. 5.g Fig. 5.h H=min. 60mm Fig. 5.i Fig. 5.j 5.a Preparare la superficie sulla quale l’unità deve essere montata. Assicurarsi che essa sia piana, livellata e che sia costruita in modo da poter sostenere il peso dell’unità. Effettuare l’installazione conformemente a quanto richiesto dalle norme e regolamenti locali in vigore.
-
Page 7: Collegamenti Elettrici
L’installazione e la manutenzione dell’unità e del sistema di ventilazione completo deve essere eseguito da un installatore autorizzato e in conformità alle leggi e ai regolamenti vigenti. L’unità necessità della messa a terra. I collegamenti interni del QR100M sono eseguiti durante l’assemblaggio in fabbrica. Le immagini successive mostrano gli schemi elettrici. SWITCH FOR FREE... - Page 8 Dip switch Operation Velocità singola Due velocità Funzionamento a velocità variabile tramite controllo esterno manuale CTRL-M Funzionamento a velocità variabile tramite sistema domotico esterno (BMS) o potenziometro ballast 3 velocità con CTRL-S 1 2 3 Fig. 5.r CTRL-M Fig. 5.s CTRL-S (accessorio su richiesta) (accessorio su richiesta)
-
Page 9: Messa In Servizio
6 MESSA IN SERVIZIO 6.1 Settaggio velocità dei ventilatori La velocità dei ventilatori può essere regolata durante l‘installazione in base al tasso di ventilazione richiesta. La figura 6.a indica la curva di prestazione alle diverse regolazioni del segnale 0-10V fornito ai motori. L’assorbimento indicato si riferisce ai 2 motori. La tabella 6.b dà un’indicazione dell’efficienza del pacco scambiatore e della condensa prodotta in diverse condizioni climatiche, per aiutare la decisione, demandata al progettista o all’installatore dell’impianto, di collegare uno o entrambi gli scarichi condensa. -
Page 10: Prima Di Avviare Il Sistema
6.2 Prima di avviare il sistema Ad installazione ultimata, prima di avviare l’unità verificate che: • I filtri siano correttamente inseriti. • L’unità sia installata conformemente a quanto indicato in questo manuale. • I collegamenti elettrici dell’unità sia stati eseguiti correttamente. • L’ingresso dell’aria esterna sia posizionato ad una distanza sufficiente da fonti di inquinamento (estrattori fumi di cottura, sistemi di aspirazione centralizzata o similare). • L’unità sia stata configurata e messa in servizio correttamente. 7 FUNZIONAMENTO ATTENZIONE Assicurarsi che le avvertenze e le precauzioni indicate nel Capitolo 2 sia attentamente lette, comprese e rispettate! 7.1 Funzionamento a velocità... -
Page 11: Manutenzione Ordinaria E Straordinaria
8 MANUTENZIONE ORDINARIA E STRAORDINARIA ATTENZIONE Assicurarsi che le avvertenze e le precauzioni indicate nel Capitolo 2 sia attentamente lette, comprese e rispettate! La manutenzione ordinaria può essere eseguita dall’utente. La manutenzione straordinaria deve essere eseguita unicamente da un installatore autorizzato e in conformità alle norme e regolamenti locali in vigore. -
Page 12: Manutenzione Ordinaria
8.3 Manutenzione ordinaria ATTENZIONE Assicurarsi che l’interruttore generale dell’impianto sia spento prima di qualsiasi operazione di installazione, manutenzione ordinaria o straordinaria o collegamento elettrico! •Tenere la superficie dell’unità pulita dalla polvere. •Pulire i filtri ogni 3 mesi con un aspirapolvere e sostituire i filtri ogni anno. Ciò può variare da caso in caso a seconda delle condizioni ambientali interne ed esterne. (Fig. 8.b-c-d-e-f). Fig. 8.b Fig. 8.c Fig. 8.d Fig. 8.e Fig. -
Page 13: Manutenzione Straordinaria
8.4 Manutenzione straordinaria ATTENZIONE Assicurarsi che l’interruttore generale dell’impianto sia spento prima di qualsiasi operazione di installazione, manutenzione ordinaria o straordinaria o collegamento elettrico! ATTENZIONE L’installazione e la manutenzione dell’unità e del sistema di ventilazione completo deve essere eseguito da un installatore autorizzato e in conformità... -
Page 14: Risoluzione Guasti
Fig. 8.o Fig. 8.p Fig. 8.q Fig. 8.r 8.5 Risoluzione guasti I ventilatori non si attivano 1. Verificare che l’unità sia sotto tensione. 2. Verificare che tutti i collegamenti funzionino correttamente (collegamenti nella scatola collegamenti elettrici e al gruppo dei ventilatori in immissione ed estrazione). -
Page 15: Smaltimento E Riciclaggio
9 SMALTIMENTO E RICICLAGGIO Informativa sullo smaltimento delle unità a fine vita. Questo prodotto è conforme alle Direttiva EU 2002/96/EC. Il simbolo del cassonetto barrato riportato sull’apparecchiatura indica che il prodotto alla fine della propria vita utile deve essere raccolto separatamente dagli altri rifiuti. L’utente dovrà, pertanto, conferire l’apparecchiatura giunta a fine vita agli idonei centri di raccolta differenziata dei rifiuti elettronici ed elettrotecnici, oppure riconsegnarla al rivenditore al momento dell’acquisto di una nuova apparecchiatura di tipo equivalente. - Page 16 QR100M Heat Recovery Ventilation Unit Read this manual carefully before using the product and keep it in a safe place for reference as necessary. This product was constructed up to standard and in compliance with regulations relating to electrical equipment and must be installed by technically qualified personnel.
- Page 17 • Use original spare parts only for repairs. 3 PRODUCT INFORMATION 3.1 General This is the Installation Manual of QR100M decentralised heat recovery ventilation unit. This manual consists of basic information and recommendations concerning installation, commissioning, use and service operations to ensure a proper fail-free operation of the unit. The key to proper, safe and smooth operation of the unit is to read this manual thoroughly, use the unit according to given guidelines and follow all safety requirements.
- Page 18 3.2 Dimensions (mm) and Weight Fig. 3.a Weight Kg 12,5 3.3 Connections Fig. 3.b Connections Intake air from outiside Exhaust air to outside Supply air to inside Extract air from inside Winter condensation drainage Summer condensation drainage 3.4 Space required Make sure that enough space is left around the unit to allow easy maintenance (removal of the front cover for access to filters and terminal box).
- Page 19 4 TRANSPORT AND STORAGE WARNING Make sure that specific warnings and cautions in Chapter 2 “Precautions” are carefully read, understood and applied! The appliance is delivered in one carton box. The appliance should be stored and transported in such a way that it is protected against physical damage that can harm spigots, casing etc. It should be covered so that dust, rain and snow cannot enter and damage the unit and its components.
- Page 20 Spirit level Fig. 5.g Fig. 5.h H=min. 60mm Fig. 5.i Fig. 5.j 5.a Prepare the surface where the unit is to be mounted. Make sure that the surface is flat, leveled and that it supports the weight of the unit. Perform the installation in accordance with local rules and regulations. 5.b Use the supplied template to mark the right positions of the air intake and exhaust holes, of the fixing screws of the mounting bracket, of the hole for the electrical cable and of the condensation drains. Make sure that the template is at spirit level. 5.c Drill the holes in the external wall.
- Page 21 The installation and service of the unit and complete ventilation system must be performed by an authorized installer and in accordance with local rules and regulations. The unit must be earthed. The QR100M is wired internally from factory. Figures below show the wiring diagrams. SWITCH FOR FREE...
- Page 22 Dip switch Operation Single speed Two speed Variable speed with CTRL-M remote manual controller Variable speed through external domotic (BMS) system or ballast potentiometer Three speed with CTRL-S 1 2 3 Fig. 5.r CTRL-M Fig. 5.s CTRL-S (accessory on request) (accessory on request)
- Page 23 6 COMMISSIONING 6.1 Setting Fan speed The speed of the unit can be adjusted during installation according to required ventilation rate. Figure 6.a below shows performance curve at different settings of the 0-10V signal to the motors. Consumption refers to the 2 motors.
- Page 24 6.2 Before Starting the System When the installation is finished, check that: • Filters are mounted correctly. • The unit is installed in accordance with the instructions. • The unit is correctly wired. • Outdoor air intake is positioned with sufficient distance to pollution sources (kitchen ventilator exhaust, central vacuum system exhaust or similar). • The unit is correctly set and commissioned. 7 OPERATION WARNING Make sure that specific warnings and cautions in Chapter 2 “Precautions” are carefully read, understood and applied! 7.1 Single speed operation The unit runs at the speed set by turning the integral trimmer “V1”...
- Page 25 8 MAINTENANCE AND SERVICE WARNING Make sure that specific warnings and cautions in Chapter 2 “Precautions” are carefully read, understood and applied! Maintenance can be carried out by the user. Service must be performed only by an authorized installer and in accordance with local rules and regulations. Questions regarding installation, use, maintenance and service of the unit should be answered by your installer or place of purchase! 8.1 Components list...
- Page 26 8.3 Maintenance WARNING Make sure that the mains supply to the unit is disconnected before performing any installation, service, maintenance or electrical work! • Keep the unit surface free from dust. • Clean the filters every three months with a vacuum cleaner and replace the filters every year. This may differ per situation depending on internal and external environmental conditions (Fig.
- Page 27 8.4 Service WARNING Make sure that the mains supply to the unit is disconnected before performing any installation, service, maintenance or electrical work! WARNING The installation and service of the unit and complete ventilation system must be performed by an authorized installer and in accordance with local rules and regulations.
- Page 28 Fig. 8.p Fig. 8.o Fig. 8.q Fig. 8.r 8.5 Trouble shooting Fans do not start 1. Check that main supply gets to the unit. 2. Check that all connections are working (all connections in terminal box and fast couplings of supply and extract air fans). 3.
- Page 29 9 DISPOSAL AND RECYCLING Information on disposal of units at the end of life. This product complies with EU Directive 2002/96/EC. The symbol of the crossed-out dustbin indicates that this product must be collected separately from other waste at the end of its life. The user must, therefore, dispose of the product in question at suitable electronic and electro-technical waste disposal collection centres, or else send the product back to the retailer when purchasing a new, equivalent type device.
-
Page 30: Fiche Tecnica Erp
10. Direttiva ErP - Regolamenti 1253/2014 - 1254/2014 ErP Directive - Regulations 1253/2014 - 1254/2014 a) Marchio - Mark AERAULIQA b) Modello - Model QR100M c) Classe SEC - SEC class c1) SEC climi caldi - SEC warm climates kWh/m -13,3... - Page 31 NOTE...
- Page 32 Tel: +39 030 674681 - Fax: +39 030 6872149 - www.aerauliqa.com - info@aerauliqa.it Aerauliqa srl si riserva il diritto di modificare/apportare migliorie ai prodotti e/o alle istruzioni di questo manuale in qualsiasi momento e senza preavviso. Aerauliqa srl reserves the right to modify/make improvements to products and/or this instruction manual at any time and without prior notice.
Need help?
Do you have a question about the QR100M and is the answer not in the manual?
Questions and answers