Advertisement
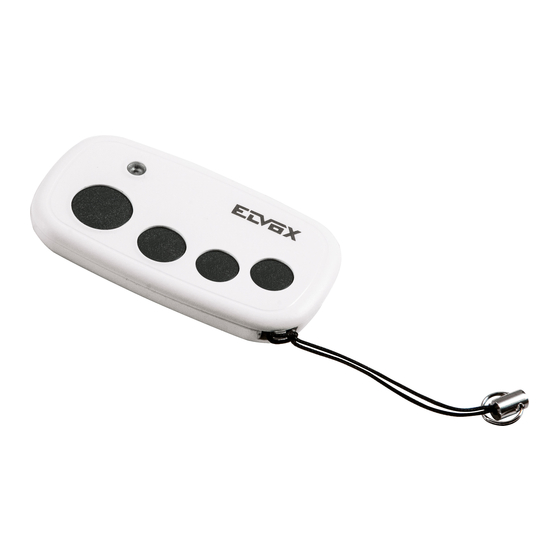
ETFN2, ETFN4
Memorizzazione radiocomando: vede-
re il manuale di istruzioni della centrale di
comando.
Copia del tasto del radiocomando:
• Premere e tenere premuti i tasti T1 e T2
(il led lampeggia lentamente) del nuovo
radiocomando.
• Appena il led lampeggia velocemente
rilasciare T1 e T2.
• Premere il tasto sul quale si vuole clonare
il comando (il led rimane acceso fisso).
• Avvicinare il radiocomando da copiare alla
parte posteriore del nuovo radiocomando
e premere il tasto che si desidera copiare.
Se il tasto è stato riconosciuto e copiato il
led lampeggia 3 volte a conferma dell'av-
venuta operazione.
Nota: il radiocomando esce automatica-
mente dalla procedura di copia se non
viene effettuata nessuna operazione per
10 s.
Impostazione del tipo di ricevente su cui
sarà memorizzato il radiocomando:
Il radiocomando è programmato per fun-
zionare su centrali di comando e riceventi
Storing the radio control: see operating
manual of the control unit.
Copying the remote control key:
• Press and hold down keys T1 and T2 (the
LED flashes slowly) on the new remote
control.
• As soon as the LED flashes quickly, relea-
se T1 and T2.
• Press the key on which you wish to clone
the control (the LED remains perma-nently
lit).
• Bring the remote control you want to copy
closer to the back of the new remote con-
trol and press the key you wish to copy. If
the key has been recognised and copied,
the LED flashes 3 times to confirm the
operation was successful.
N.B.: the remote control automatically quits
the copying procedure if no operation is
carried out for 10 s.
49401306A0 00 1809
Elvox della serie .W e .T, ma può essere
impostato per funzionare su centrali della
serie RS.
Per cambiare il tipo di centrale o ricevente
su cui sarà memorizzato, eseguire la pro-
cedura sotto descritta:
• Premere e tenere premuti i tasti T1 e T2 (il
led lampeggia lentamente).
• Dopo 3 s il led lampeggia velocemente,
continuare a tenere premuti T1 e T2.
• Dopo 10 s il led torna a lampeggiare len-
tamente, rilasciare T1 e T2.
• Premendo T1 il radiocomando cicla tra:
1. impostazione per funzionamento su
centrali della serie RS (1 lampeggio
veloce del led)
2. impostazione per funzionamento su
centrali della serie .W e .T (2 lampeggi
veloci del led).
• Attendere 5 s perchè il radiocomando
esca dalla procedura salvando l'imposta-
zione selezionata.
Nota: a prescindere dalla centrale su cui
sarà memorizzato il radiocomando, la
copia del tasto copiato da un altro radio-
comando seleziona già l'impostazione
corretta del radiocomando.
Setting the type of receiver on which the
remote control is to be stored:
The remote control is programmed to oper-
ate on control panels and Elvox receivers
from series .W and .T, but it can be set to ope-
rate on control panels from the RS series.
To change the type of control panel or
receiver on which it will be stored, perform
the procedure set out below:
• Press and hold down keys T1 and T2 (the
LED flashes slowly).
• After 3 s the LED flashes quickly, continue
holding down T1 and T2.
• After 10 s the LED returns to flashing
slowly, release T1 and T2.
• Press T1, the remote control will run a
cycle between:
1. setting to operate on control panels
from the RS series (1 quick LED flash)
2. setting to operate on control panels
from series .W and .T (2 quick LED
flashes).
• Wait 5 s for the remote control to quit the
procedure and save the setting made.
T1
T2
T3
T4
IT
Caratteristiche tecniche
Batteria
Potenza max
Frequenza operativa
Classe dispositivo
Codifica
Modulazione
N. canali
Portata indicativa
Dimensioni
Sostituzione della batteria
Per sostituire la batteria togliere la vite di
fissaggio ed aprire il coperchio. Rimuovere
la batteria e sostituirla rispettando la polari-
tà (vedere le figure).
N.B.: irrespective of the control panel
on which the remote control is stored,
the copy of the key copied from another
remote control already selects the cor-
rect remote control setting.
Technical features
Battery
Max power
Operational frequency
Device class
Encoding
Modulation
Channel #
Approximate range
Dimensions
Battery replacement
To replace the battery, remove the fixing
screw and open the cover. Remove the
battery and replace it obeying the polarity
(see figure).
EN
3 V, CR 2032
1 mW (0 dBm)
433,92 MHz ±0,1 MHz
1
Codice fisso Elvox
OOK
2 (ETFN2), 4 (ETFN4)
100/120 m
34 x 60 x 9,5 mm
3 V, CR 2032
1 mW (0 dBm)
433.92 MHz ±0.1 MHz
1
Fixed Elvox code
OOK
2 (ETFN2), 4 (ETFN4)
100/120 m
34 x 60 x 9,5 mm
Viale Vicenza, 14
36063 Marostica VI - Italy
www.vimar.com
Advertisement
Table of Contents

Subscribe to Our Youtube Channel
Summary of Contents for Vimar Elvox ETFN2
- Page 1 Remove the • Wait 5 s for the remote control to quit the battery and replace it obeying the polarity procedure and save the setting made. (see figure). Viale Vicenza, 14 36063 Marostica VI - Italy www.vimar.com 49401306A0 00 1809...
- Page 2 El mando a distancia está programado para a distancia también se selecciona la Viale Vicenza, 14 36063 Marostica VI - Italy www.vimar.com 49401306A0 00 1809...
- Page 3 • Περιμένετε 5 δευτ. ώστε να τερματιστεί η και αντικαταστήστε την τηρώντας την Ρύθμιση τύπου δέκτη στον οποίο θα διαδικασία για το τηλεχειριστήριο και να πολικότητα (βλ. εικόνα). αποθηκευτεί το τηλεχειριστήριο: αποθηκευτεί η επιλεγμένη ρύθμιση. Viale Vicenza, 14 36063 Marostica VI - Italy www.vimar.com 49401306A0 00 1809...
- Page 4 Conformidad a las normas Συμμόρφωση με τα πρότυπα Vimar SpA declares that the radio equipment Vimar SpA declara que el equipo radio es Η Vimar SpA δηλώνει ότι η συσκευή complies with Directive 2014/53/EU. The full conforme a la directiva 2014/53/UE. El ραδιοσυχνοτ-ήτων...


Need help?
Do you have a question about the Elvox ETFN2 and is the answer not in the manual?
Questions and answers