
Related Manuals for Dynex DX-MLET21


Summary of Contents for Dynex DX-MLET21
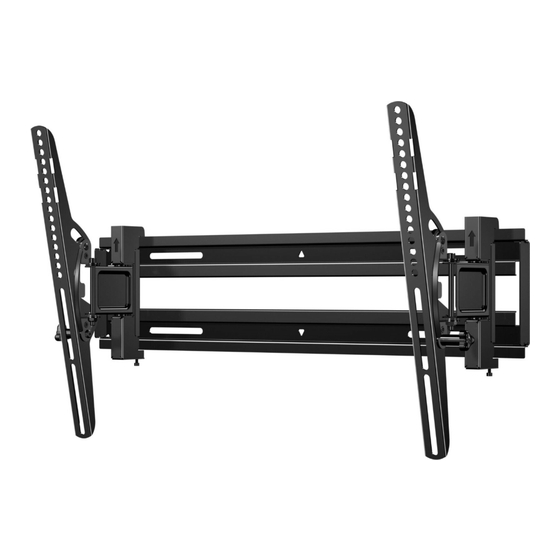
- Page 1 Large Extended Tilt Mount DX-MLET21 INSTALLATION GUIDE Before using your new product, please read these instructions to prevent any damage.
-
Page 2: Table Of Contents
• Improper installation may cause property damage or personal injury. If you do not understand these directions, or have doubts about the safety of the installation, contact Customer Service or call a qualified contractor. Dynex is not responsible for damage or injury caused by incorrect installation or use. -
Page 3: Dimensions
DX-MLET21 Dimensions 16.5 in. 16.50 in. (41.9 cm) (419.1mm) Tools needed You need the following tools to install your new TV wall mount: Edge-to-edge Measuring stud finder Pencil Phillips tape screwdriver Drill Level Tape 1/2” (13 mm) Hammer Socket wrench 7/32 in. -
Page 4: Package Contents
Large Extended Tilt Mount Package contents Parts Make sure that you have all the parts and hardware necessary to assemble your new TV wall mount: Wall Plate (1) TV Brackets (2) Wall Plate Template (1) TV Hardware Bag HARDWARE QTY. HARDWARE QTY. -
Page 5: Installation Instructions
DX-MLET21 Installation instructions STEP 1 - Determine whether your TV has a flat back or an irregular or obstructed back 1 Carefully place your TV screen face-down on a cushioned, clean surface to protect the screen from damages and scratches. -
Page 6: Step 2 - Select Screws, Washers, And Spacers
Large Extended Tilt Mount STEP 2 - Select screws, washers, and spacers 1 Select the hardware for your TV (screws, washers, and spacers). A limited number of TVs come with mounting hardware included. (If there are screws that came with your TV, they are almost always in the holes on the back of your TV.) If you don't know the correct length of the mounting screws your TV requires, test various sizes by hand-threading the screws. -
Page 7: Step 3 - Attach The Mounting Hardware To A Tv
DX-MLET21 STEP 3 - Attach the mounting hardware to a TV You’ll need Spacers Screws Washers M4 x 12 mm M4 x 35 mm M4 (4) Phillips screwdriver M6/M8 (4) M6 x 35 mm M6 x 20 mm M6 x 12 mm... - Page 8 Large Extended Tilt Mount 2 Install washers (M4 or M6/M8), spacers (if needed, see STEP 1 - Determine whether your TV has a flat back or an irregular or obstructed back on page 5), and screws (M4, M6, or M8) into the holes in the back of your TV. CAUTION: To avoid potential personal injuries and equipment damage, DO NOT use power tools for the following step.
-
Page 9: Step 4 - Determine The Wall-Mount Location
DX-MLET21 STEP 4 - Determine the wall-mount location You’ll need Measuring tape Pencil Notes: • For more detailed information on determining where to drill your holes, visit our online height-finder at: http://mf1.bestbuy.selectionassistant.com/index.php/heightfinder • Your TV should be high enough so your eyes are level with the middle of the screen. This is normally 40 to 60 in. (101 to 152 cm) from the ground. -
Page 10: Step 5 - Option 1: Install On A Wood Stud Wall
Large Extended Tilt Mount STEP 5 - Option 1: Install on a wood stud wall You’ll need 7/32 in. wood Level Edge-to edge drill bit stud finder Drill Wall plate Wall plate template Pencil Lag bolt lag bolt Tape washer 1/2 in. - Page 11 DX-MLET21 3 Drill four pilot holes through the template to a depth of 2-3/4 in. (70 mm) using a 7/32 in. (5.5 mm) diameter drill bit, then remove the template. Important: Make sure that you drill into the center of the studs.
-
Page 12: Step 5 - Option 2: Install On A Solid Concrete Or Concrete Block Wall
Large Extended Tilt Mount STEP 5 - Option 2: Install on a solid concrete or concrete block wall You’ll need (Note: Concrete wall installation kit not included) Level 3/8 in. masonry drill Socket wrench Drill Wall plate Pencil Wall plate template 5/16 x 2-3/4 in. - Page 13 DX-MLET21 Note: After mounting, your TV will shift 2.28 in. (58 mm) to the right when the TV mount is extended. You can fine tune the wall plate and TV mount to compensate. 3 Insert the concrete wall anchors into the pilot holes and use a hammer to make sure that the anchors are flush with the concrete surface.
-
Page 14: Step 5 - Option 3: Install On A Steel Stud Wall
Large Extended Tilt Mount STEP 5 - Option 3: Install on a steel stud wall You’ll need (Note: Steel stud installation kit not included) Level 1/2 in. masonry drill Socket wrench Drill Wall plate Pencil Wall plate template Tape Edge-to edge Hammer 1/4-20 Snap Toggle BB (4) 1/4-20 x 1-3/4 in screw (4) - Page 15 DX-MLET21 2 Drill four pilot holes through the template to a depth of 1 in. (25 mm) using a 1/2 in. (13 mm) diameter masonry drill bit, then remove the template. 1 in. (25 mm) 1/2 in. (13 mm) Note: After mounting, your TV will shift 2.28 in. (58 mm) to the right when the TV mount is extended. You can fine tune the wall plate and TV mount to compensate.
- Page 16 Large Extended Tilt Mount 5 Align the wall plate on the wall mount with the anchor caps, insert the 1/4-20 x 1-3/4 in. screws through the 1/4 in. washers, then through the holes in the wall plate. Make sure that the wall plate is level. Tighten the screws with a Phillips screwdriver only until they are firm against the wall plate.
-
Page 17: Step 6 - Securing Your Tv To The Wall Plate
DX-MLET21 STEP 6 - Securing your TV to the wall plate You’ll need 10 x 32 x 1 1/4” Locking screw (2) Phillips screwdriver CAUTION: The TV brackets contain potential pinch points. Keep your fingers away from pinch points when retracting or extending your TV. - Page 18 Large Extended Tilt Mount 4 Rest the bottom of the TV/bracket assembly against the wall plate, then install the locking screws in the bottom of the TV brackets to secure the TV to the wall plate. Important: Before extending or retracting your TV on the wall plate, make sure that both locking screws are properly installed. Wall plate Locking screw Note: After mounting, your TV will shift 2.28 in.
-
Page 19: Managing Cables
DX-MLET21 Managing cables Move your TV as needed in order to attach the cables to the connection points on the back of the TV, then adjust the TV as needed. Cables Adjusting the position of your TV CAUTION: The TV brackets contain potential pinch points. Keep your fingers away from pinch points when retracting or extending your TV. -
Page 20: Adjusting The Lateral Position
Large Extended Tilt Mount Adjusting the lateral position 1 Before adjusting the lateral position of your TV on the wall, remove the TV from the wall plate (see Removing your TV from the wall plate on page21. 2 Determine where on the wall plate you want your TV. 3 Rehang the TV on the wall plate following the directions in STEP 6 - Securing your TV to the wall plate on page 17. -
Page 21: Removing Your Tv From The Wall Plate
DX-MLET21 Removing your TV from the wall plate 1 Extend the TV mount fully. 2 Remove all cables and connections. 3 Loosen the locking screws. Locking screw www.dynexproducts.com... - Page 22 Large Extended Tilt Mount 4 Pull out the bottom of the TV, then lift it off the wall plate. www.dynexproducts.com...
-
Page 23: 90-Day Limited Warranty
During the Warranty Period, if the original manufacture of the material or workmanship of the Product is determined to be defective by an authorized Dynex repair center or store personnel, Dynex will (at its sole option): (1) repair the Product with new or rebuilt parts; or (2) replace the Product at no charge with new or rebuilt comparable products or parts. - Page 24 Legrand Part Number: 6907-302048 For product inquiries, please contact us with the information below: 1-800-305-2204 www.dynexproducts.com DYNEX is a trademark of Best Buy and its affiliated companies. Distributed by Best Buy Purchasing, LLC 7601 Penn Ave South, Richfield, MN 55423 U.S.A. V2 ENGLISH ©2020 Best Buy.
Need help?
Do you have a question about the DX-MLET21 and is the answer not in the manual?
Questions and answers