
Subscribe to Our Youtube Channel
Related Manuals for FLIR Extech 380941


Summary of Contents for FLIR Extech 380941
- Page 1 User Guide AC/DC Mini Clamp Meter Model 380941 GlobalTestSupply www. .com Find Quality Products Online at: sales@GlobalTestSupply.com...
-
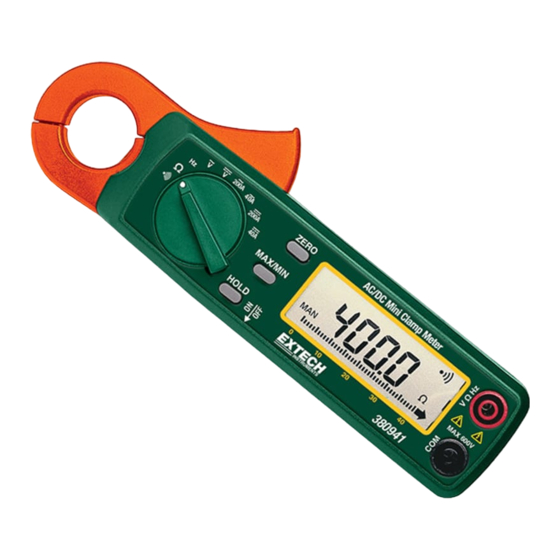
Page 2: Front Panel Description
Introduction Congratulations on your purchase of Extech’s DC/AC Clamp Meter. This professional meter, with proper care, will provide years of safe reliable service. Front Panel Description 1. Current sense jaw 6. One-touch DCA zero key 2. Measurement Trigger 7. LCD Display 3. -
Page 3: Operation
Operation AC Current Measurements WARNING: To avoid electric shock, disconnect the test leads from the meter before making current measurements. Set the Function switch to the 40 or 200A AC range. Press the jaw trigger and clamp around, fully enclosing a single conductor. Do not allow a gap between the two halves of the jaw. -
Page 4: Additional Features
Frequency Measurements Ensure that at least 0.1A AC is detectable with an ACA measurement before measuring Frequency. Set the Function switch to the Hz position. Insert the test leads to the meter as follows: Red lead to “V,Hz,Ω” terminal; Black lead to the COM input. -
Page 5: Specifications
Specifications General Specifications Display 3-3/4 (4000 count) Digit LCD with 40 segment bargraph Functions ACA, DCA, ACV, DCV, Resistance, Frequency, Continuity Polarity “-“ indicates negative polarity Current sensor Hall effect sensor type Overload indication Left blinking digit DCA zero adjust One touch zero key Display rate 2 readings/second (20 readings/second for bargraph) -
Page 6: Maintenance
Maintenance Battery Replacement When the low battery symbol appears on the LCD the batteries must be replaced. Turn the meter off and remove the rear battery compartment screw. Remove the battery compartment cover and replace the two 1.5V AA cells. Replace the compartment cover and secure the screw.
Need help?
Do you have a question about the Extech 380941 and is the answer not in the manual?
Questions and answers