Mitel MiVoice 6920 User Manual
For mivoice business
Hide thumbs
Also See for MiVoice 6920:
- Quick start manual ,
- User manual (214 pages) ,
- Quick reference manual (21 pages)

Subscribe to Our Youtube Channel
Related Manuals for Mitel MiVoice 6920


Summary of Contents for Mitel MiVoice 6920
- Page 1 Mitel MiVoice 6920 IP Phone RELEASE 1.5.2 USER GUIDE FOR MIVOICE BUSINESS 58015114 REV01 April 30, 2020...
- Page 2 ). The information is subject to change without notice and should not be construed in any way as a commit- ment by Mitel or any of its affiliates or subsidiaries. Mitel and its affiliates and subsidiaries assume no responsibility for any errors or omissions in this document.
- Page 3 Software in object form solely with the Equipment for which the Software was intended. This Product may integrate programs, licensed to Mitel by third party Suppliers, for distribution under the terms of this agreement.
-
Page 4: Table Of Contents
Contents Welcome ........1 About this guide ....... . 1 What’s New . - Page 5 Audio Path ......23 Headset ....... .25 Display .
- Page 6 Mitel M695 Programmable Key Module (PKM) ... . . 102 Mitel Wireless LAN Adapter ......103 Analog, DHSG/EHS, and USB headsets .
-
Page 7: Welcome
The 6920 IP phone is compatible with the MiVoice Business phone system. About this guide This guide explains how to use the basic features of your new Mitel MiVoice 6920 IP phone. Not all features listed are available by default. Your System Administrator has the ability to customize many features on this phone. -
Page 8: Supporting Documentation
Six programmable, multi-function, self-labeling keys allowing up to 18 functions and four intuitive • state-sensitive softkeys Installation and setup Please refer to the Mitel MiVoice 6920 IP Phone Installation Guide included with your phone for basic installation and physical setup information. Tips for your comfort and safety Don’t cradle the handset Prolonged use of the handset can lead to neck, shoulder, or back discomfort, especially if you cradle the handset between your ear and shoulder. -
Page 9: Protect Your Hearing
IPS FOR YOUR COMFORT AND SAFETY Protect your hearing Your Mitel MiVoice 6920 IP phone has a control for adjusting the volume of the handset, headset, and speakerphone. Because continuous exposure to loud sounds can contribute to hearing loss, keep the volume at a moderate level. -
Page 10: Phone Keys
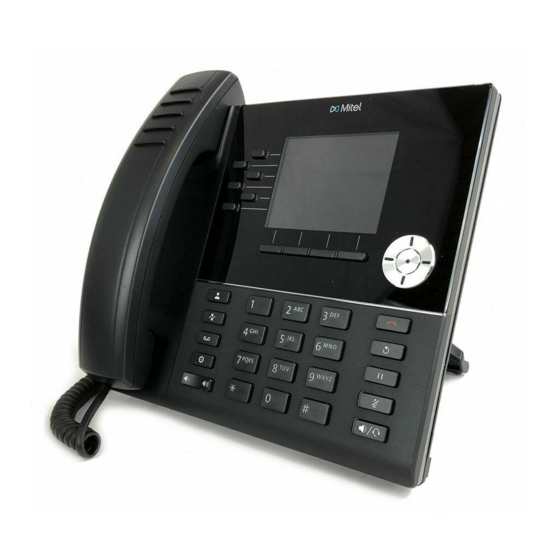
HONE KEYS EY PANEL Phone keys Key panel The following sections describe the various Mitel MiVoice 6920 IP phone key functions and how they can help you make and manage your calls and caller information. Goodbye Key LCD Screen Hold Key... -
Page 11: Key Description
Softkeys Programmable Keys Voicemail Key Key description The following table describes the keys on the Mitel MiVoice 6920 IP phone: Description Contacts key - Displays a list of your contacts. For more information, see “Contacts”. Call History key - Displays a list of your missed, outgoing, and answered calls. -
Page 12: Dialpad Keys
Dialpad keys The Mitel MiVoice 6920 IP phone has a dialpad with digits from 0 through 9, a * key, and a # key. Keys 2 through 9 contain the letters of the alphabet. These dialpad keys can be used to dial a phone number to make a call (see calls”) and to press keys requested by an Interactive Voice Response (IVR) - Page 13 HONE KEYS IALPAD KEYS Dialpad Key Description Dials 0 Dials 1 2 ABC Dials 2 When entering text, this key enters A with one press, B with two presses, and C with three presses. 3 DEF Dials 3 When entering text, this key enters D with one press, E with two presses, and F with three presses.
- Page 14 HONE KEYS IALPAD KEYS When entering characters in the various Settings menus or in different applications (for example, when adding a contact to your Contacts application), advanced characters can be entered using the dialpad keys. The following tables identifies the characters that you can use and the order in which they are accessible. Uppercase Characters Lowercase Characters 1 .
-
Page 15: Getting Started
ETTING STARTED OVERVIEW Getting started The Mitel MiVoice 6920 IP phone must be set up and be configured by the System Administrator prior to its first use. UI overview Home screen When the phone has successfully booted up and connected to the network, the phone displays the Home screen. - Page 16 ETTING STARTED OVERVIEW The following table identifies and describes the phone and network status indicators on the Home screen. Icon Description Network Connected - The Network Connected icon displays on the Home screen when the phone is connected to the MiVoice Business call server.
-
Page 17: Programmable Keys, State-Sensitive Softkeys, And Line Keys
ETTING STARTED OVERVIEW Icon Description Missed Calls - The Missed Calls icon displays on the Home screen only when incoming calls have not been received. The number in the red badge indicates how many calls were missed. To access a list of your missed calls, press the (Call History) key. -
Page 18: Call Screen
ETTING STARTED OVERVIEW your System Administrator for details on what features are available to be programmed through the MiVoice Business call server. The state-sensitive softkeys change depending on the state of the phone and are used to perform different functions when the phone is an idle, connected, outgoing, or busy state. The Prime Line key is a visual indication of the status of your prime line. -
Page 19: Ui Navigation
ETTING STARTED OVERVIEW Additionally, if the call is on the Prime Line key, the Prime Line key changes to reflect the status of the line as per the following table. Icon Description (Blinking) Indicates the prime line is ringing due to an incoming call. - Page 20 ETTING STARTED OVERVIEW There are four directional keys (up, down, left, and right) on the navigation cluster that can be used to navigate through the various applications and settings menus. The center key acts as a Select button that is used to set options and perform actions such as dialing out from the Contacts or Call History applications.
-
Page 21: Customizing Your Phone
USTOMIZING YOUR PHONE Customizing your phone You can customize your phone and view your phone status by pressing the (Settings) key, opening the Settings menu. This menu provides a single location to access all your phone settings. The following phone settings can be configured through the Settings menu: Icon Option Status... -
Page 22: Using The Settings Menu
USTOMIZING YOUR PHONE SING THE ETTINGS MENU Icon Option Display Restart NOTE The Advanced options are Administrator-level functions only, and are not accessible by the user. These options should only be set up and changed by your System Administrator. The Log Issue softkey is used to generate a log file that can help Administrators debug issues. You should only press this softkey when requested by your System Administrator. -
Page 23: Status
USTOMIZING YOUR PHONE TATUS Status The Status settings in the Settings menu allows you to view your phone’s: Network General Info: • General information regarding your phone’s network settings such as IP address, subnet mask, gate- way, MAC address, call server IP addresses, TFTP server IP address and port, IPA IP address, and DNS values. - Page 24 USTOMIZING YOUR PHONE TATUS Network DHCP Info – Network Static QoS –...
-
Page 25: Language
– To view more information on the selected status item, press the right navigation key and press the down navigation key to scroll through the information. Language The Mitel MiVoice 6920 IP phone supports the following languages: English • French •... -
Page 26: Call Forward
Press the Save softkey to save your changes. Call Forward Call Forward on the Mitel MiVoice 6920 IP phone allows incoming calls to be forwarded to another desti- nation. You can enable your calls to be forwarded: When your phone is busy (individual settings for internal and external incoming calls). - Page 27 USTOMIZING YOUR PHONE ORWARD When you are not answering the phone (individual settings for internal and incoming calls). • All the time. • You can enable different call forward modes independently. For example, you can set different phone numbers for Always, Busy Internal, Busy External, No Answer Internal, and No Answer External, and then turn them on/off individually.
-
Page 28: Audio
If both Call Forward Always and DND are enabled, then the DND icon is displayed on the Screen Saver. Audio The Audio setting on the Mitel MiVoice 6920 IP phone allows you to personalize ring tones, select the initial audio path used when pressing the (Speaker/Headset) key, and enable or disable DHSG... -
Page 29: Ring Tones
UDIO Ring Tones There are a total of 20 (10 modern and 10 classic) distinct ring tones available for selection on the Mitel MiVoice 6920 IP phone. Two different ring tones can be configured for incoming calls from internal numbers and external numbers. - Page 30 USTOMIZING YOUR PHONE UDIO Audio path Description Speaker The default setting. When using the handset, pressing the (Speaker/Headset) key on the phone switches to the speakerphone. Pressing the (Speaker/Headset) key again switches to the headset (if connected). When using the speakerphone or headset, lift the handset to switch to the handset.
-
Page 31: Headset
USTOMIZING YOUR PHONE UDIO Headset The Headset setting allows you to enable DHSG/USB Wireless mode when a DHSG/EHS or a USB Wire- less headset is connected to the phone. To enable/disable DHSG headset mode: (Settings) key to enter the Settings menu. Press the Navigate to the Audio >... -
Page 32: Display
The Display setting allows you to set the following on your phone: Brightness Settings: • The Brightness Level setting on the Mitel MiVoice 6920 IP phone allows you to set the amount of light that illuminates the LCD display. Screen Saver Settings: •... -
Page 33: Voice Services
Press the Save softkeyto save your changes. Voice Services The Mitel MiVoice 6920 IP phone can be configured to provide remote workers access to the same rich communications capabilities as in-office workers using Voice Services. During the initial boot-up of the IP phone, at 95% a Voice Services screen auto prompts the user to select an appropriate service. - Page 34 USTOMIZING YOUR PHONE OICE ERVICES For MiCloud Connect, enter user DID and Password. • For MiVoice Border Gateway, enter the IP address of the server providing the teleworker configuration • details in the IP Address field using the dialpad keys. : The Backspace softkey can be used to delete the last digit/character entered and the dot (".") NOTE softkey can be used to enter a dot where applicable.
-
Page 35: Manual Upgrade
By factory default, the 6900 Series IP Phones have the MiNet firmware pre-installed. You can upgrade the default firmware to the latest release of MiNet. You can also enable interoperability with Mitel’s SIP-based solutions by upgrading the 6900 Series IP Phones to the SIP firmware. -
Page 36: Diagnostics
USTOMIZING YOUR PHONE IAGNOSTICS In the Server field, enter the domain name or the IP address of the server. In the Port field, enter the server port that is used for downloading firmware. In the Path field, enter the name of the folder(s) where the firmware you want to install is stored. screenshot displays the fields for TFTP and similarly, you may select any of the protocols and update required fields. -
Page 37: Audio Diagnostics
: Press the Stop softkey at any time to stop capturing the audio diagnostic logs. NOTE To save the audio diagnostic logs to your PC using the Mitel Web UI: Open your web browser and enter the phone’s IP address or host name into the address bar. - Page 38 Click on the Download Audio Log Files link beside Get Log Files. Save the file to the desired location on your computer. : For more information on Mitel Web UI features, see the Mitel MiVoice 6900 Series IP Phones NOTE...
-
Page 39: Ping
IAGNOSTICS Ping The Ping sub-menu allows you to ping a host name or IP address directly from the Mitel MiVoice 6920 IP phone. This tool can be used to verify whether or not network connections between the Mitel MiVoice 6920 IP phone and other network endpoints are intact. - Page 40 : Press the Stop softkey at any time to stop capturing the TCP DUMP logs. NOTE To save the TCP network packet logs to your PC using the Mitel Web UI: Open your web browser and enter the phone’s IP address or host name into the address bar.
-
Page 41: Dhcp Trace
Click on the Download Log Files link beside Get Log Files. Save the file to the desired location on your computer. : For more information on Mitel Web UI features, see the Mitel MiVoice 6900 Series IP Phones NOTE Administrator Guide. - Page 42 USTOMIZING YOUR PHONE IAGNOSTICS The following parameters and associated values are displayed: mac_addr: • The MAC address of the IP phone. ip addr: • The IP address of the IP phone. netmask: • The IP address range local to the IP phone. gateway: •...
-
Page 43: Wi-Fi
USTOMIZING YOUR PHONE Wi-Fi The Wi-Fi option in the Settings menu of Mitel MiVoice 6900 Series IP phones allows you to connect the phone to a Wi-Fi network. The following describes the three Wi-Fi connectivity states along with the corresponding icons displayed on the status bar: No network - The WLAN adapter is not configured or the connected SSID is down. -
Page 44: Connecting To A Wi-Fi Network
USTOMIZING YOUR PHONE Connecting to a Wi-Fi network To connect the phone to a Wi-Fi network, perform the following steps: (Settings) key on the phone to enter the Settings menu and tap the Wi-Fi icon. Press the Ensure that a WLAN adapter connected to the phone. The phone displays an error if it is not connected to a WLAN adapter. - Page 45 USTOMIZING YOUR PHONE To set up a WLAN adapter, see the Mitel WLAN Adapter Administration Guide or contact your system administrator. If a WLAN adapter is connected to the phone, two sets of Wi-Fi menu items are displayed: Saved Network: Displays the Wi-Fi network currently connected to the phone.
- Page 46 Select Yes to save your settings and to reboot the WLAN adapter and the phone. The phone is successfully connected to the network. The connected SSID (Mitel Secure) is listed under Saved Network. If the password you entered is incorrect, a Connection failed alert appears. To reenter the password,...
-
Page 47: Restart
USTOMIZING YOUR PHONE ESTART : If the password that you entered is incorrect, the phone normally displays the option to retry. NOTE In some cases, an incorrect password is accepted by the WLAN adapter but on reboot the Wi-Fi app auto pops up if phones fails on DHCP due to misconfiguration. You must enter the correct pass- word again for the SSID. -
Page 48: Configuring And Using Programmable Keys
If Mitel M695 Programmable Key Modules (PKMs) are attached to the phone, you can configure up to an additional 28 keys on each PKM. The Mitel MiVoice 6920 IP phone allows up to three PKMs on each phone. For more information about PKMs, see “Mitel M695 Programmable Key Module... -
Page 49: Led Indicator
LED I ONFIGURING AND USING PROGRAMMABLE KEYS NDICATOR LED Indicator If a programmable key or a M695 PKM key is configured as a line key, the LED beside the key indicates the line status. The LED turns ON (solid red) when the line is active, turns OFF when the line is idle, and blinks (blinking red) when the line is ringing. -
Page 50: Other Features
ONFIGURING AND USING PROGRAMMABLE KEYS THER EATURES Other Features Phone Lock By programming a Phone Lock key you can lock your phone to prevent the phone from being used or configured. Phone Lock prevents access to all the features on the phone, with the following exceptions: Unlocking the set via a user PIN. -
Page 51: Call Forward Always
ONFIGURING AND USING PROGRAMMABLE KEYS THER EATURES To unlock the phone: Press the Phone Lock key again. At the "Enter PIN:" prompt, enter your pin number and press the Enter softkey. Call Forward Always Programming a Call Forward Always key allows you to quickly enable and disable call forwarding for all calls on your phone even if you have other call forward modes enabled through your Call Forward settings menu. - Page 52 ONFIGURING AND USING PROGRAMMABLE KEYS THER EATURES With Call Forward Always highlighted, press the Save softkey. To enable Call Forward Always: Press the key that you have programmed with Call Forward Always functionality. When Call (Call Forward Always) icon is displayed in the status bar. Forward Always is enabled, a If a number is already programmed, press Activate to enable forwarding to the current number If a number has not been programmed, enter a new destination number and then press...
-
Page 53: Do Not Disturb
ONFIGURING AND USING PROGRAMMABLE KEYS THER EATURES To disable Call Forward Always: Press the key that you have programmed with Call Forward Always functionality.When Call Forward Always is disabled, a (Call Forward Always) icon is removed from the status bar. Press the Deactivate softkey. -
Page 54: Account Codes
ONFIGURING AND USING PROGRAMMABLE KEYS THER EATURES With Do Not Disturb highlighted, press the Save softkey. To enable Do Not Disturb: Press the key that you have programmed with Do Not Disturb functionality. (DND) icon is displayed in the status bar and the Do Not Disturb key When DND is enabled, a turns red. - Page 55 ONFIGURING AND USING PROGRAMMABLE KEYS THER EATURES your call server. This allows System Administrators the ability to quickly identify groups of calls, which can then be used by different departments for organizational and reporting purposes. The following are the two types of account codes that you can add to a call: Account Code Non Verified: •...
- Page 56 ONFIGURING AND USING PROGRAMMABLE KEYS THER EATURES To assign a non-verified account code during a call: While on an active call, press the key that you have programmed with Account Code Non Verified functionality. Enter the digits (up to 12) for the account code using the dialpad keys. Press the # (hash) key.
-
Page 57: Making Calls
AKING CALLS IALING A NUMBER Making calls This section describes ways to make calls on your Mitel MiVoice 6920 IP phone, using your handset, speakerphone or headset. Dialing a number First, take the phone off-hook by: Lifting the handset for handset operation, or •... -
Page 58: Redialing A Number
AKING CALLS EDIALING A NUMBER To request a callback when the call you initiated is busy or has not answered: Press the Call Me Back softkey. Hang up. When the party is available, your phone starts ringing, and the display shows the callback ringing indi- cator. -
Page 59: Receiving Calls
ECEIVING CALLS NSWERING AN INCOMING CALL Receiving calls When a call is ringing at your extension, the callers name, number, and avatar (if applicable) display on the Call screen. Additionally, the Prime Line key icon flashes indicating the incoming call. If the incoming number matches with a contact stored in the Personal, Mobile or Corporate folder in the Contacts application, then the contact name is displayed. -
Page 60: Manually Forwarding An Incoming Call
ECEIVING CALLS ANUALLY FORWARDING AN INCOMING CALL Manually forwarding an incoming call If call forwarding numbers have been defined for the Always or No Answer states, press the Forward Call softkey to manually forward an incoming call to the defined number. A common way of using this feature is to configure call forwarding to forward calls to your voicemail service. -
Page 61: Handling Calls
ANDLING CALLS LACING A CALL ON HOLD Handling calls When you are connected to a call, you can use hard keys on the phone perform various action such as placing a call on hold or muting the microphone. Softkeys can also be used to perform actions such as transferring calls or creating multi-party conference calls. -
Page 62: Transferring A Call
NOTE nect to the call. Transferring a call There are two types of call transfers that can be performed on the Mitel MiVoice 6920 IP phone: Unattended Transfer: • An unattended transfer is when you transfer a call directly to another extension without consulting with the person receiving the call. -
Page 63: Creating A Multi-Party Conference Call
Press the Transfer softkey or hang up the handset to complete an unattended call transfer Wait for an answer, consult, and then press the Transfer softkey or hang up the handset to complete an attended transfer. Creating a multi-party conference call The Mitel MiVoice 6920 IP phone supports multiples parties in a conference call. - Page 64 ANDLING CALLS REATING A MULTI PARTY CONFERENCE CALL To create a multi-party conference call: Ensure you are on active call with one of the parties with whom you wish to create a conference. Press the Add User softkey. The active call is placed on hold. Enter the conference target’s number.
-
Page 65: Ending A Conference And Transferring Remaining Parties
Add Held softkey and press the applicable Line key with the held call. Ending a conference and transferring remaining parties The Mitel MiVoice 6920 IP phone allows a host to easily leave a conference call without disrupting the connection of the other remaining parties. -
Page 66: Ending Calls
ANDLING CALLS NDING CALLS If you are the host of a conference call and want to leave the conference, press the Leave Callsoftkey on the phone. Your phone leaves the conference call but the remaining parties are still connected together. Ending calls To end a call, you first need to connect or reconnect to the call if not already connected (e.g. -
Page 67: Managing Calls
ANAGING CALLS ONTACTS Managing calls The Mitel MiVoice 6920 IP phone has several features that make it easier to manage calls. Three of the main call management features include the Contacts application, the Call History application, and Voicemail. Contacts The Contacts application is your personal phone book and directory, conveniently stored within your phone. - Page 68 ANAGING CALLS ONTACTS To access and navigate the Contacts application: Press the (Contacts) key. You can view the list of contacts on the right for each respective contact folder by pressing the up and down navigation keys. : If any of the folders are empty, a "Directory empty" message displays on screen. NOTE Press the right navigation key to move to the contact selection column.
-
Page 69: Performing A Search
ANAGING CALLS ONTACTS Press the up and down navigation keys to scroll through the list of numbers. Press the (Goodbye) key, or Close softkey to exit. Performing a search Search functionality is applied to your Personal contact folder and your Corporate contact folder if your corporate directory is configured to be cached. -
Page 70: Dialing From The Contacts Application
ANAGING CALLS ONTACTS Using the dialpad keys enter in the first letters of the contact’s name and (if required) press the Search softkey. When matches are found, navigate to the contact entry and perform your desired action. Dialing from the Contacts application Dialing can be performed by manually navigating to the contact, selecting a phone number (if the contact has more than one) and then by picking up the handset, or by pressing the Dial softkey, Select button (Speaker/Headset) key. -
Page 71: Personal Folder Features
ANAGING CALLS ONTACTS (Optional) If the contact has multiple phone numbers defined, press the right navigation key to navi- gate to the contact card and use the up and down navigation keys to select the phone number you wish to call. Press the Dial softkey, Select button or (Speaker/Headset) key for speaker or headset oper- ation... - Page 72 ANAGING CALLS ONTACTS Press the right navigation key to move to the First Name input field and enter the first name of the personal contact using the dialpad keys. (Optional) Press the down navigation key to move the Last Name input field and enter the last name of the personal contact using the dialpad keys.
- Page 73 ANAGING CALLS ONTACTS With Number highlighted, press the right navigation key to move to the number type tab. Use the left and right navigation keys to switch the type of number to either Work, Home, or Mobile.
-
Page 74: Editing An Existing Contact In Your Personal Folder
ANAGING CALLS ONTACTS Press the down navigation key to move to the number input field and enter the number of the personal contact using the dialpad keys. (Optional) Press the down navigation key to move to the second number type tabfield and repeat steps 8 and 9 to enter a secondary number. -
Page 75: Deleting All Contacts From The Personal Folder
ANAGING CALLS ONTACTS Use the navigation keys to navigate through the various tabs and fields and edit any information using the dialpad keys. Press the Save softkey to save your changes. Deleting all contacts from the Personal folder Press the (Contacts) key. -
Page 76: Deleting A Contact From The Personal Folder
ANAGING CALLS ONTACTS Press the Yes softkey to delete all contacts from your Personal folder. : Press the No softkey to cancel the delete process. NOTE Deleting a contact from the Personal folder To delete contacts from your Personal folder: Press the (Contacts) key. -
Page 77: Corporate Folder Features
ANAGING CALLS ONTACTS Press the Yes softkey to delete the selected contact from your Personal folder. : Press the No softkey to cancel the delete process. NOTE Corporate folder features The Corporate folder contains the contacts that are available through your corporate LDAP directory. NOTE Access to corporate directories must be set up by your System Administrator. -
Page 78: Performing A Search On A Non-Cached Corporate Contact Folder
ANAGING CALLS ONTACTS MiVoice Business System Contacts, where if the MiVoice Business System is configured with MiNET Phone Object Message Name, then the respective MiVoice Business System name is displayed. If there is no match, then the number returned by the MiVoice Business system is displayed. : See “Performing a search”... -
Page 79: Copying A Corporate Contact To The Personal Folder
ANAGING CALLS ONTACTS Using the dialpad keys, enter all or the first few letters of the contact's last name in the search field. Alternately, you can enter all or the first few letters of the contact's last name followed by a space and all or the first few letters of the contact's first name and then press the Search softkey. -
Page 80: Call History
ANAGING CALLS ISTORY Use the navigation keys to highlight the corporate contact you want to copy to your Personal folder. Press the right navigation key to view the corporate contact’s contact card. Press the Add Contact softkey. A copy confirmation message is displayed. Call History The Call History application is a stored log of all your calls. - Page 81 ANAGING CALLS ISTORY The following table identifies and describes the various icons displayed in the Call History application: Icon Description Indicates an incoming call that was not answered (missed). Indicates an outgoing call (outgoing) Indicates an incoming call that was answered (received).
- Page 82 ANAGING CALLS ISTORY To access and use the Call History application: (Call History) key. Press the You can view the list of call entries on the right for each respective type of call by pressing the up and down navigation keys. Press the right navigation key to move to the call entry column.
-
Page 83: Deleting Entries From The Call History Application
ANAGING CALLS ISTORY Press the (Goodbye) key, or Close softkey to exit. Deleting entries from the Call History application You can delete all entries in the Call History application regardless of call type, all entries within a call type folder, or individual entries. To delete all entries from the Call History application: Press the (Call History) key. - Page 84 ANAGING CALLS ISTORY To delete all entries from a call type folder: (Call History) key. Press the Use the navigation keys to highlight the applicable call type folder. Press the Delete softkey. A delete all confirmation message appears on screen. Press the Delete softkey again to delete all entries in the selected call type folder.
-
Page 85: Copying Entries To The Personal Folder In The Contacts Application
ANAGING CALLS ISTORY Press the Delete softkey. A delete confirmation message appears on screen. Press the Delete softkey again to delete the individual call entry. : Press the Cancel softkey to cancel the delete process. NOTE Copying entries to the Personal folder in the Contacts application To copy a Call History entry to the Personal folder in the Contacts application: Press the (Call History) key. -
Page 86: Missed Calls Indicator
ISTORY Press the Add Contact softkey. A copy confirmation message is displayed. Missed calls indicator The Mitel MiVoice 6920 IP phone has a missed calls icon located on the status bar that indicates the number of calls that went unanswered. - Page 87 ANAGING CALLS ISTORY As the number of unanswered calls increment, the information associated with the calls are stored in the Call History application under the Missed call folder. When the user accesses the Missed call folder, the missed call indicator on the Home screen is removed. : Missed calls are also indicated on the screensaver.
-
Page 88: Voicemail
: Voicemail functionality must be configured by your System Administrator. NOTE When voicemail functionality is enabled, the MWI LED on the Mitel MiVoice 6920 flashes red and (Voicemail) icon displays on the status bar indicating that voicemail messages are available. -
Page 89: Visual Voicemail
ANAGING CALLS ISUAL VOICEMAIL Visual voicemail : Visual voicemail functionality must be configured by your System Administrator. NOTE Visual voicemail allows you to visually interact with your voicemail. Visual voicemail displays an accurate count of your voicemail messages on the status bar and the screen saver. The count on the screen saver is a total of missed calls and voicemail messages. -
Page 90: Enable Voicemail Application
ANAGING CALLS ISUAL VOICEMAIL Enable voicemail application To enable voicemail application: Press the (Settings) key on the phone to enter the Settings menu. Navigate to Voicemail using the left navigation key and then press the Select softkey. Press the Select button to select the key opens Voicemail App checkbox. -
Page 91: Log Into Your Voicemail
ANAGING CALLS ISUAL VOICEMAIL Press the Save softkey. : For security reasons, the password can be enabled only from the user login screen. NOTE Log into your voicemail To log into your voicemail: Press the (Voicemail) key. In the Passcode field, enter the passcode. (Optional) Press the down navigation key and press the Select button to select the Remember passcode checkbox. -
Page 92: Log Out Of Your Voicemail
ANAGING CALLS ISUAL VOICEMAIL Log out of your voicemail To log out of your voicemail: Press the Logout softkey. : After five minutes of inactivity, you are automatically logged out of your mailbox and NOTE the Voicemail application closes. When you close the Voicemail application, you are not automatically logged out of your mailbox. -
Page 93: Dial A Voicemail
ANAGING CALLS ISUAL VOICEMAIL Press the right navigation key and then use the up and down navigations keys to choose the voicemail message you want to play. Press the Select button to play the voicemail. NOTE If your voicemail system is on EMEM, then use Replay, Backward, Forward, and Cancel softkeys to •... -
Page 94: Delete A Voicemail
ANAGING CALLS ISUAL VOICEMAIL Press the right navigation key and then use the up and down navigations keys to choose the voicemail you want to dial. Press the Dial softkey to dial the number. Delete a voicemail To delete a voicemail: Log into your voicemail. -
Page 95: Save A Voicemail
ANAGING CALLS ISUAL VOICEMAIL Press the right navigation key and then use the up and down navigations keys to choose the voicemail message you want to delete. Press the Delete softkey. A delete confirmation message appears on screen. Press the Delete softkey to delete the voicemail. Save a voicemail Visual voicemail automatically saves played voicemail messages in the All folder. - Page 96 ANAGING CALLS ISUAL VOICEMAIL All - Displays all voicemail messages. – New - Displays new voicemail messages. – Recorded - Displays recorded voicemail messages. – Press the right navigation key and then use the up and down navigations keys to choose the voicemail message you want to send.
- Page 97 ANAGING CALLS ISUAL VOICEMAIL Press the Send softkey to send the voicemail to the number. A confirmation message appears on screen.
-
Page 98: Additional Features
DDITIONAL FEATURES Additional features The following features are available using feature keys only if your System Administrator has defined a programmable key or softkey with the respective functionality on your phone. When configured on a programmable key, icons are displayed beside the label indicating type of function- ality. - Page 99 DDITIONAL FEATURES Feature Description Icons Type Call Fwd Always Call Fwd Always is Toggle ON/OFF used to redirect all incoming calls to an alternate number. Call Fwd Busy Call Fwd Busy is used Toggle ON/OFF to redirect both incoming internal and external calls to an alternate number when your phone is busy.
- Page 100 DDITIONAL FEATURES Feature Description Icons Type Call Park and Call Park Call Park allows you to Toggle ON/OFF - Retrieve place a call in a special hold state. You, or someone else, can then retrieve the call from another extension in the system by pressing the Call Park - Retrieve key.
- Page 101 DDITIONAL FEATURES Feature Description Icons Type Emergency Call The Emergency Call Toggle ON/OFF Notification key allows you receive emergency call notifications. Pressing the key allows you to view the caller's directory number, special instructions that are programmed for the DN in the Comments field of the CESID Assignment form, and the date and...
- Page 102 DDITIONAL FEATURES Feature Description Icons Type Group Presence Group Presence allows Toggle ON/OFF members of call groups (Hunt, ACD, Ring, Personal Ring, and Multi-device User) to make themselves absent or present in a group. Only members who are present in a group are offered calls to that group.
- Page 103 DDITIONAL FEATURES Feature Description Icons Type Make Busy The Make Busy feature Toggle ON/OFF ensures an ACD extension does not receive ACD calls when the agent is unavailable. The ACD extension remains in the Make Busy state until an agent deactivates it.
- Page 104 DDITIONAL FEATURES Feature Description Icons Type Multicall Multicall Groups let Line States Non-Toggle multiple telephones share the same extension number. Incoming calls ring all of the idle stations, and the stations stop ringing when one member answers the call. A Multicall group allows more than one group member to use the line at the same...
- Page 105 DDITIONAL FEATURES Feature Description Icons Type Paging Paging lets you Toggle ON/OFF connect to loudspeaker or paging equipment to make an announcement. You can access individual paging zones or all paging zones simultaneously. A one-way connection is established for "All Zones"...
- Page 106 DDITIONAL FEATURES Feature Description Icons Type Privacy Release Privacy Release allows Toggle ON/OFF members of a Key System Group to disable automatic call privacy protection to allow another member of the group to join the call. When a new member enters the call the original members receive a conference tone and the privacy...
- Page 107 DDITIONAL FEATURES Feature Description Icons Type Specific Group Alert A Specific Group Alert Non-Toggle key normally appears only on an ACD supervisor's telephone. Each Specific Group Alert key allows the supervisor to obtain queue status information for a specific agent skill group.
-
Page 108: Accessory Support
Accessory support Mitel M695 Programmable Key Module (PKM) Up to three Mitel M695 PKMs can be attached to the right of the Mitel MiVoice 6920 IP phone providing you with 84 additional programmable keys (28 keys per PKM). The Mitel M695 PKM features a 4.3” 480x272 pixel color backlit LCD display that provides a unified graph- ical user experience with the Mitel MiVoice 6920 IP phone. -
Page 109: Mitel Wireless Lan Adapter
Dual band IEEE 802.11a/b/g/n support: • The Mitel Wireless LAN Adapter is designed to communicate in the 2.4 GHz and 5 GHz bands. Radio interference in the commonly used 2.4 GHz band can be avoided by utilizing 5 GHz. Gigabit Ethernet support: •... -
Page 110: Analog, Dhsg/Ehs, And Usb Headsets
NALOG HEADSETS Simple to setup and use: • The Mitel Wireless LAN Adapter is easy to set up using the enclosed network setup cable. No special drivers or software are required. Enterprise security: • The Mitel Wireless LAN Adapter supports the following security functions: WEP (64 Bit/128 Bit) –... -
Page 111: Mitel S720 Bluetooth Speakerphone
NOTE Mitel S720 Bluetooth Speakerphone The Mitel MiVoice 6920 IP phone provides support for the optional Mitel S720 Bluetooth Speakerphone through a Bluetooth dongle. Plug the Bluetooth dongle in to the USB port of the 6920 IP phone. Once connected, you can receive calls on the Mitel S720 Bluetooth Speakerphone. The Mitel S720 Bluetooth Speakerphone can be placed (on its base or upright using a table stand) on your work desk or in a small-to-medium conference room. -
Page 112: Hardware Features
S720 B CCESSORY SUPPORT ITEL LUETOOTH PEAKERPHONE Hardware features Icon Button Description Power On/Off Turns of or off. Answer Call Answers a call. End Call Ends or rejects a call. Hold (8 seconds) to turn on or off voice guidance. Battery Status Shows the battery status. - Page 113 NOTE To connect the Mitel S720 Bluetooth Speakerphone with the Mitel MiVoice 6920 IP phone, power on the speakerphone and pair it with the Bluetooth dongle plugged into the USB port of the IP phone. When the S720 speakerphone is successfully connected, a headphone connected icon displayed in the status bar on the Home screen.
-
Page 114: Limited Warranty
(1) year period from the date of original purchase (“Warranty Period”). If there is a defect or malfunction, Mitel shall, at its option, and as the exclu- sive remedy, either repair or replace the product at no charge, if returned within the Warranty Period. If replacement parts are used in making repairs, these parts may be refurbished, or may contain refurbished materials. -
Page 115: After Warranty Service
After warranty service Mitel offers ongoing repair and support for this product. This service provides repair or replacement of your Mitel product, at Mitel's option, for a fixed charge. You are responsible for all shipping charges. For further information and shipping instructions: In North America, contact our service information number: 1-800-574-1611.
Need help?
Do you have a question about the MiVoice 6920 and is the answer not in the manual?
Questions and answers