
Related Manuals for Clarke CWM20


Summary of Contents for Clarke CWM20
- Page 1 PARTS WASHER MODEL NO: CWM20 PART NO: 7630925 ASSEMBLY & MAINTENANCE INSTRUCTIONS ORIGINAL INSTRUCTIONS GC1120 - Rev 4...
-
Page 2: Specifications And Features
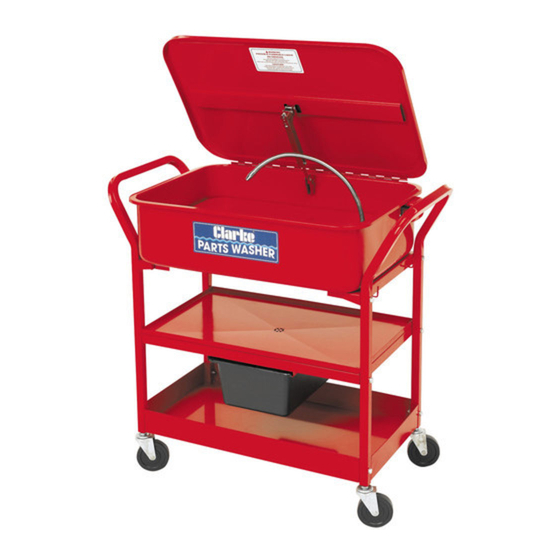
INTRODUCTION Thank you for selecting this CLARKE Parts Washer. The CWM20 is ideal for garage/workshop use when cleaning smaller automotive and machinery components. Before using the product, be sure to read these instructions thoroughly. In doing so you will ensure the safety of yourself and of others around you, and you can look forward to the product giving you long and satisfactory service. -
Page 3: Safety Precautions
Any damage should be properly repaired or the part replaced. If in doubt, DO NOT use. Consult your local CLARKE dealer. 6. ALWAYS disconnect the washer from the power supply before carrying out any maintenance. -
Page 4: Electrical Connections
ELECTRICAL CONNECTIONS WARNING! READ THESE ELECTRICAL SAFETY INSTRUCTIONS THOROUGHLY BEFORE CONNECTING THE PRODUCT TO THE MAINS SUPPLY. Before switching the product on, make sure that the voltage of your electricity supply is the same as that indicated on the rating plate. This product is designed to operate on 230VAC 50Hz. - Page 5 ASSEMBLY 1. Choose a firm, flat and level surface to site the parts washer on, in a well ventilated area and away from any naked flames. 2. Loosely bolt the supporting brackets to the side bars. • Do not tighten at this stage. 3.
- Page 6 6. Fit the castors to the side bars. 7. Fit the drain valve as shown. 8. Slide the oil tank into position. 9. Rest the part tray into position. Parts & Service: 020 8988 7400 / E-mail: Parts@clarkeinternational.com or Service@clarkeinternational.com...
-
Page 7: Operation
OPERATION 1. Open the tank lid and fill the tank with a nonflammable degreaser or cleaning agent, such as Clarke’s degreaser, to just below the level of the parts shelf. DO NOT fill with flammable solvents such as paraffin, thinners, etc. -
Page 8: Environmental Protection
ENVIRONMENTAL PROTECTION One of the most damaging sources of environmental pollution is oil products. Never throw away used oil with domestic refuse or flush it down a sink or drain. Collect any oil in a leak proof container & take it to your waste disposal site. Through purchase of this product, the customer is taking on the obligation to deal with the WEEE in accordance with the WEEE regulations in relation to the treatment, recycling, recovery &... -
Page 9: Cleaning And Maintenance
CLEANING AND MAINTENANCE DRAINING THE TANK 1. Open the drain valve on the underside of the tank. • The liquid will drain onto the draining tray below and into the oil tank for disposal. Make sure that the oil tank does not over fill. -
Page 10: Parts Diagram
PARTS DIAGRAM Parts & Service: 020 8988 7400 / E-mail: Parts@clarkeinternational.com or Service@clarkeinternational.com... -
Page 11: Parts List
Spring washer On/Off switch CONSUMABLES This parts washer is suitable for use with Clarke water-based parts washer fluid; Concentrated; P/No: 3051063 (5 Litre) P/No: 3051065 (25 Litre) - or Ready to Use; P/No: 3051064 (5 Ltr) P/No: 3051066 (30 Ltr) These products are non-flammable and bio-degradable.
Need help?
Do you have a question about the CWM20 and is the answer not in the manual?
Questions and answers