
Related Manuals for Clarke CWM20


Summary of Contents for Clarke CWM20
- Page 1 MOBILE PARTS WASHER MOBILE PARTS WASHER MODEL No: CWM20 Part No: 7630925 OPERATING & MAINTENANCE INSTRUCTIONS GC0418...
-
Page 2: Guarantee
INTRODUCTION Thank you for purchasing this CLARKE mobile parts washer. Before use, please read this instruction manual thoroughly and follow all directions carefully. By doing so you will ensure the safety of both yourself and others around you, and at the same time you can look forward to long and trouble free service from your mobile parts washer. -
Page 3: Table Of Contents
FEATURES • Accepts all common degreasing fluids. • Fusible link automatically closes lid in case of fire. • Built in replaceable filter. • Easy maintenance solvent pump, (230V AC). CONTENTS Guarantee .............. 2 Specifications ............2 Features ..............3 Contents ..............3 Safety precautions .......... -
Page 4: Safety Precautions
Any damage should be properly repaired or the part replaced. If in doubt, DO NOT use the machine. Consult your local CLARKE dealer. ALWAYS disconnect the mobile parts washer from the power supply before carrying out any maintenance or cleaning of the mobile parts washer. -
Page 5: Electrical Connections
ELECTRICAL CONNECTIONS Connect the mains lead to a standard 230 Volt (50Hz) electrical supply through an approved plug or a suitable fused isolator switch. For your own safety, we recommend that this unit is fitted with a Residual Current Device (RCD). -
Page 6: Assembly
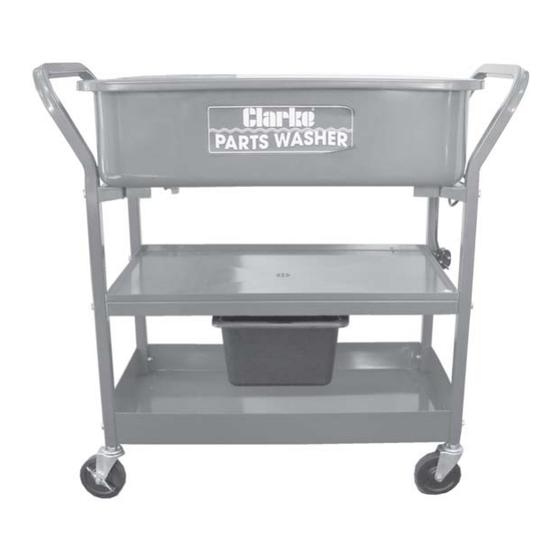
ASSEMBLY Bolt Bolt Supporting board Castor Fit the two castors to each of the side Fit a supporting board to each of the posts. side posts and secure using 2 M8x40mm hex bolts, 4 flat washers and 2 hex nuts. Bolt Tray Place the tray into position and fix in... - Page 7 ASSEMBLY Draining Tray Position the draining tray as shown above and fix in place using 4 M8x40mm hex bolts, 8 flat washers and 4 hex nuts. Oil Tank Slide the oil tank into position as shown above.
-
Page 8: Operation
OPERATION Open the tank lid and fill the tank with a nonflammable degreaser or cleaning agent, such as Clarke’s degreaser, to just below the level of the parts shelf. DO NOT fill with flammable solvents such as paraffin, thinners, etc. -
Page 9: Cleaning And Maintenance
CLEANING AND MAINTENANCE Draining the tank Open the drain valve on the underside of the tank . • The liquid will drain onto the draining tray below and into the oil tank for disposal. Make sure that the oil tank does not over fill. -
Page 10: Parts Diagram
PARTS DIAGRAM... -
Page 11: Parts List
ON/OFF Switch HTCWM20020 PARTS & SERVICE TEL: 020 8988 7400 e-mail as follows: PARTS: Parts@clarkeinternational.com SERVICE: Service@clarkeinternational.com IMPORTANT: The use of parts other than CLARKE replacement parts may result in safety hazards, decreased tool performance and may invalidate your warranty.
Need help?
Do you have a question about the CWM20 and is the answer not in the manual?
Questions and answers