Sharp MX-B200 Operation Manual
Digital multifunctional system
Hide thumbs
Also See for MX-B200:
- Start manual (40 pages) ,
- Start manual (33 pages) ,
- Operation manual (91 pages)
Table of Contents
Advertisement
MODEL
MX-B200
DIGITAL MULTIFUNCTIONAL
SYSTEM
OPERATION GUIDE
Page
CONTENTS ..........................2
INTRODUCTION ..................3
LOADING PAPER ................9
SOFTWARE .......................14
COPIER FUNCTIONS ........25
PRINTER FUNCTIONS ......35
SCANNER FUNCTIONS ....49
SPECIAL FUNCTIONS ......61
MAINTENANCE .................66
UNIT ...................................71
OPTIONAL EQUIPMENT.... 87
Advertisement
Table of Contents

Subscribe to Our Youtube Channel
Related Manuals for Sharp MX-B200


Summary of Contents for Sharp MX-B200
-
Page 1: Table Of Contents
MODEL MX-B200 DIGITAL MULTIFUNCTIONAL SYSTEM OPERATION GUIDE Page CONTENTS ...2 INTRODUCTION ...3 LOADING PAPER ...9 INSTALLING THE SOFTWARE ...14 COPIER FUNCTIONS ...25 PRINTER FUNCTIONS ...35 SCANNER FUNCTIONS ...49 SPECIAL FUNCTIONS ...61 MAINTENANCE ...66 TROUBLESHOOTING THE UNIT ...71 OPTIONAL EQUIPMENT... 87... -
Page 2: Contents
INTRODUCTION CONVENTIONS USED IN THIS MANUAL ... 3 PART NAMES ... 4 OPERATION PANEL ... 5 INDICATORS ON THE OPERATION PANEL... 6 POWER ON ... 7 LOADING PAPER PAPER ... 9 LOADING THE PAPER TRAY... 10 BYPASS FEED (including special paper)... -
Page 3: Introduction
This chapter provides basic information for using the unit. CONVENTIONS USED IN THIS MANUAL • The explanations in this manual assume that a single pass feeder and lower paper tray are installed on the machine. For some functions and procedures, the explanations assume that devices other than the above are installed. -
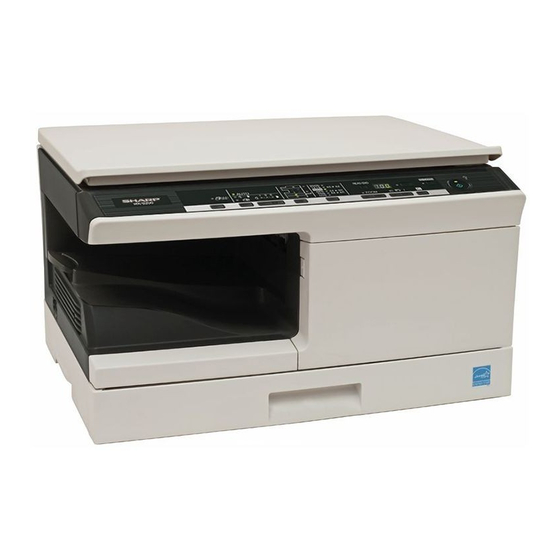
Page 4: Part Names
PART NAMES SPF (Peripheral device) Original guides Peep hole Exit area Document feeder tray Original cover Toner cartridge SPF scanning area Document glass Operation panel Front cover Paper tray 1 Paper tray 2 Multi-bypass tray Side cover Side cover open button Document feeder cover Bypass tray paper guides... -
Page 5: Operation Panel
OPERATION PANEL Sort key and indicators Use to select sort mode. Exposure mode selector key and indicators Use to sequentially select the exposure modes: AUTO, MANUAL or PHOTO. Selected mode is shown by a lit indicator. (p.28) Light and dark keys and indicators Use to adjust the MANUAL or PHOTO exposure level. -
Page 6: Indicators On The Operation Panel
ZOOM keys and indicator Use to select any reduction or enlargement copy ratio from 25% to 400% in 1% increments. (When the SPF is being used, the zoom copy ratio range is 50% to 200%.) (p.30) Copy quantity keys • Use to select the desired copy quantity (1 to 99). -
Page 7: Power On
POWER ON Turn the power switch on the left side of the unit to the "ON" position. The start ( indicator will light up and other indicators which show the initial settings of the operation panel will also light up to indicate the ready condition. For the initial settings, see "Initial settings of operation panel"... - Page 8 Initial settings of operation panel When the unit power is on, the operation panel will revert to the initial settings when the time set with the "Auto clear time" setting (p.63) elapses after a job is finished, or when the clear key is pressed twice. The initial settings of the operation panel are shown below.
-
Page 9: Loading Paper
Follow the steps below to load paper into the tray. PAPER For best results, use only paper recommended by SHARP. Type of paper Type of media feeding Paper tray Standard paper Multi-bypass Standard paper and tray thick paper Special media... -
Page 10: Loading The Paper Tray
LOADING THE PAPER TRAY Raise the handle of the paper tray and pull the paper tray out until it stops. Adjust the paper guides on the paper tray to the copy paper width and length. Squeeze the lever of paper guide the guide to match with the width of the paper. - Page 11 Gently push the paper tray back into the unit. • Be sure that paper is free of rips, dust, wrinkles, and curled or bent edges. • Make sure all the paper in the stack is the same size and type. •...
-
Page 12: Bypass Feed (Including Special Paper)
BYPASS FEED (including special paper) The multi-bypass tray can be used to feed standard paper, transparency film, labels, envelopes, and other special purpose paper. Paper measuring from A6 to A4 and in the weight range of 56 g/m weighing from 105 g/m to 128 g/m •... - Page 13 Set the paper guides to the paper width. Insert the paper (print face down) all the way into the multi-bypass tray. • Paper must be fed narrow side into the feed slot. • Special papers such as transparency film, labels, and envelopes must be fed one sheet at a time through the multi-bypass tray.
-
Page 14: Installing The Software
INSTALLING THE SOFTWARE This chapter explains how to install and configure the software that is required for the printer and scanner functions of the machine. SOFTWARE The Software CD-ROM that accompanies the machine contains the following software: MFP driver Printer driver The printer driver enables you to use the printer function of the machine. -
Page 15: Hardware And Software Requirements
HARDWARE AND SOFTWARE REQUIREMENTS Check the following hardware and software requirements in order to install the software. Computer type IBM PC/AT or compatible computer equipped with a USB2.0* Windows 2000 Professional* Operating system* Windows Vista, Windows 7 Other hardware An environment on which any of the operating systems requirements listed above can fully operate *1 The machine's USB 2.0 port will transfer data at the speed specified by the USB 2.0... -
Page 16: Installing The Software
INSTALLING THE SOFTWARE The USB cable must not be connected to the machine. Make sure that the cable is not connected before proceeding. If the cable is connected, a Plug and Play window will appear. If this happens, click the "Cancel" button to close the window and disconnect the cable. - Page 17 Click the "MFP Driver" button. Click the "Display Readme" button to show information on packages that are selected. Select "Connected to this computer" and click the "Next" button. Follow the on-screen instructions. • If you are using Windows Vista/7 and a security warning window appears, be sure to click "Install this driver software anyway".
- Page 18 Installing the Utility Software Click the "Button Manager" or the "Sharpdesk" button. Click the "Display Readme" button to show information on packages that are selected. Follow the on-screen instructions. * In Windows 2000, The "Sharpdesk" button does not appear. When installing is finished, click the "Close" button. •...
- Page 19 Follow the instructions in the plug and play window to install the driver. When the "Found New Hardware Wizard" appears, select "Install the software automatically (Recommended)", click the "Next" button, and follow the on-screen instructions. • If you are using Windows Vista/7 and a security warning window appears, be sure to click "Install this driver software anyway".
-
Page 20: Using The Machine As A Shared Printer
Using the machine as a shared printer If the machine will be used as a shared printer on a network, follow these steps to install the printer driver in the client computer. To configure the appropriate settings in the print server, see the operation manual or help file of your operating system. - Page 21 Select the printer name (configured as a shared printer). Select the printer name (configured as a shared printer on a print server) from the list. In Windows 2000/XP, you can also click the "Add Network Port" button displayed below the list and select the printer to be shared by browsing the network in the window that appears.
-
Page 22: Configuring The Printer Driver
CONFIGURING THE PRINTER DRIVER After installing the MFP driver, you must configure the printer driver settings appropriately for the size of paper loaded in each. Click the "Start" button, click "Control Panel", and then click "Printer". • In Windows 7, click the "start" button and then click "Devices and Printers". -
Page 23: Setting Up Button Manager
"Printers and Other Hardware", and then click "Scanners and Cameras". Click the "SHARP MX-xxxx" icon and select "Properties". • In Windows 7, right-click the "SHARP MX-xxxx" icon and select "Scan properties". • In Windows XP, select "Properties" from the "File" menu. - Page 24 Repeat Steps 5 through 7 to link Button Manager to "SC2:" through "SC6:". Select "SC2:" from the "Scanner events" pull-down menu. Select "Sharp Button Manager Y" in "Send to this application" and click the "Apply" button. Do the same for each ScanMenu through "SC6:".
-
Page 25: Copier Functions
COPIER FUNCTIONS This chapter explains basic and other copying functions. The unit is equipped with a one-page memory buffer. This memory allows the unit to scan an original once only and make up to 99 copies. This feature improves workflow, reduces operation noise from the copier, and provides higher reliability by reducing wear and tear on the scanning mechanism. -
Page 26: Original Placement
• If you start a print job while a copy job is in progress, the print job will begin when the copy job is completed. • The scanning function cannot be used while a copy job is in progress. About interrupt copying If you press the start ( ) key to begin a copy job while a print job using the paper tray or multi-bypass tray is in progress, the copy job will begin automatically after the... -
Page 27: Setting A Large Original
Setting a large original The original cover can be removed to allow copying of bulky objects. Simply lift the original cover straight To reattach the original cover, reverse the above procedure. Using the SPF (Peripheral device) The SPF is designed to hold up to 50 originals measuring from A5 to A4 and weighting from 56 g/m to 90 g/m •... -
Page 28: Set The Copy Quantity
SET THE COPY QUANTITY Set the number of copies using the two copy quantity ( from the document glass or copying from SPF. • Press the clear key to clear an entry if a mistake is made. • A single copy can be made with the initial setting, i.e., when "0" is displayed. -
Page 29: Automatic Exposure Adjustment
Automatic exposure adjustment This automatic exposure level will remain in effect until you change it again by this procedure. The automatic exposure level can be adjusted to suit your copying needs. This level is set for copying from the document glass and copying from the SPF respectively. When adjusting the automatic exposure level for copying from the SPF, place an original in the document feeder tray and make sure that the SPF indicator lights up. -
Page 30: Reduction/Enlargement/Zoom
REDUCTION/ENLARGEMENT/ZOOM Three preset reduction ratios and two enlargement ratios can be selected. The zoom function enables copy ratio selection from 25% to 400% in 1% increments. (When the SPF is being used, the zoom copy ratio range is 50% to 200%.) Set the original and check the paper size. -
Page 31: Sort Copy
SORT COPY Copies of multiple original pages can be sorted into sets. The number of pages that can be scanned varies depending on the original type (photo, text, etc.) and the amount of memory allocated to the printer. The amount of memory allocated to the printer can be changed with "Memory for printer"... - Page 32 Using the SPF (Peripheral device) Place the originals. (p.27) Sort mode is normally the default output mode, and thus the SPF and Sort indicators light up. • If "Sort auto select" has been set to "2: OFF" in the user programs, follow the steps below to select sort mode.
- Page 33 If the memory becomes full • If the memory becomes full while scanning the originals, "FUL" will appear in the display, and the machine will stop copying. • To copy the originals that have been scanned up to that point, press the start ( key.
-
Page 34: Id Card Copy
ID CARD COPY You can copy the front and reverse sides of ID card onto a page through this function. The ID card print image is shown as follows. Originals Front Back • ID card copy feature cannot be used in combination with sort function. •... -
Page 35: Printer Functions
PRINTER FUNCTIONS This chapter explains how to use the printer functions. The procedure for loading paper is the same as for loading copy paper. See "LOADING PAPER" (p.9). • If copying is being performed when printing is started, copying will continue. - Page 36 Make sure that "SHARP MX-xxxx" is selected as the printer. If you need to change any print settings, click the "Preferences" button to open the printer driver setup screen. Windows 2000 does not have the "Preferences" button in this dialog box.
-
Page 37: Opening The Printer Driver From The "Start" Button
"Control Panel", select "Printers and Other Hardware", and then select "Printers and Faxes". Click the "SHARP MX-xxxx" printer driver icon. In Windows 7, right-click the icon of the printer driver of the machine. Select "Properties" from the "Organize" menu. -
Page 38: Printer Driver Setting Screen
PRINTER DRIVER SETTING SCREEN Some restrictions exist on the combinations of settings that can be selected in the printer driver setup screen. When a restriction is in effect, an information icon ( will appear next to the setting. Click the icon to view an explanation of the restriction. The settings and the image of the machine will vary depending on the model. -
Page 39: Setting Advanced Print Functions
SETTING ADVANCED PRINT FUNCTIONS This section explains major advanced print functions. The explanations assume that the paper size and other basic settings have already been selected. For the basic procedure for printing and the steps for opening the printer driver, see "BASIC PRINTING" (p.35). Printing multiple pages on one page (N-Up Printing) This function can be used to reduce the print image and print multiple pages on a single sheet of paper. -
Page 40: Fitting The Printed Image To The Paper (Fit To Paper Size)
Click the "Main" tab in the printer driver setup screen. Select the number of pages per sheet. If you wish to print borderlines, check the "Border" box. Select the order of the pages. Fitting the printed image to the paper (Fit To Paper Size) The printer driver can adjust the size of the printed image to match the size of the paper loaded in the machine. - Page 41 Select the actual size of paper to be used for printing (B5). The size of the printed image will be automatically adjusted to match the paper loaded in the machine. Rotating the print image 180 degrees (Rotate 180 degrees) The feature rotates the image 180 degrees so that it can be printed correctly on paper that can only be loaded in one orientation (such as envelopes).
-
Page 42: Enlarging/Reducing The Print Image (Zoom)
Enlarging/reducing the print image (Zoom) This function is used to enlarge or reduce the image to a selected percentage. This allows you to enlarge a small image or add margins to the paper by slightly reducing an image. The "Zoom" setting is not available when "N-Up Printing" is selected. Click the "Paper"... -
Page 43: Printing Faint Text And Lines In Black (Text To Black/Vector To Black)
Printing faint text and lines in black (Text To Black/Vector To Black) When printing a colour image, colour text and lines that are faint can be printed in black. (Raster data such as bitmap images cannot be adjusted.) This allows you to bring out colour text and lines that are faint and difficult to see. -
Page 44: Adjusting The Brightness And Contrast Of The Image (Image Adjustment)
Adjusting the brightness and contrast of the image (Image Adjustment) The brightness and contrast can be adjusted in the print settings when printing a photo or other image. These settings can be used for simple corrections when you do not have image editing software installed on your computer. Click the "Advanced"... -
Page 45: Adding A Watermark To Printed Pages (Watermark)
Adding a watermark to printed pages (Watermark) Faint shadow-like text can be added to the background of the printed image as a watermark. The size, density, and angle of the watermark text can be adjusted. The text can be selected from a pre-stored list, or entered to create an original watermark. -
Page 46: Saving Frequently Used Print Settings
SAVING FREQUENTLY USED PRINT SETTINGS Settings configured on each of the tabs at the time of printing can be saved as user settings. Saving frequently used settings or complex colour settings under an assigned name makes it easy to select those settings the next time you need to use them. -
Page 47: Outline Of The Print Status Window
OUTLINE OF THE PRINT STATUS WINDOW When printing begins, the Print Status Window automatically opens. The Print Status Window is a utility that monitors the machine and shows the name of the document being printed and any error messages that occur. Status window Provides information on the current status of the printer. -
Page 48: Printer Driver Features
PRINTER DRIVER FEATURES Setting Copies Collate N-Up Printing Order Main Border Image Orientation Paper Size Zoom settings Paper Paper Source [Custom] Width Length Size Text To Black Vector To Black Advanced [Image Adjustment] Brightness Contrast Watermark Text Watermarks Size Angle On First Page Only On/Off Configuration ROPM Main, Paper,... -
Page 49: Scanner Functions
SCANNER FUNCTIONS This chapter explains how to use the scanner functions. SCANNING OVERVIEW The flow chart shown below provides an overview of scanning. Scanning from the machine* Place the original in the scanning position For more information, refer to "SCANNING USING THE KEYS ON THE MACHINE" (p.50). Change the machine to scanner mode and select the scan menu. -
Page 50: Scanning Using The Keys On The Machine
SCANNING USING THE KEYS ON THE MACHINE When scanning is performed by this method, the application that has been set in Button Manager will automatically start and the scanned image will be pasted into the application. For the steps to allocate applications using the Button Manager or other settings, see "Button Manager settings"... - Page 51 Press the start ( Scanning will start and the scanned data will be transferred to the application. • If the following screen appears, select Button Manager and click "OK". Button Manager starts and the application associated with Button Manager starts. If you want only Button Manager to start in this case, set up Button Manager for use in Windows as explained in "SETTING UP...
-
Page 52: Button Manager Settings
If the Button Manager icon does not appear on the task bar, click the "Start" button, select "All Programs" ("Programs" in Windows 2000), select "Sharp Button Manager Y", and then click "Button Manager" to start Button Manager. Click the tab of the scan menu that you want to set up. -
Page 53: Outline Of Button Manager
Outline of Button Manager Button Manager is a software utility that allows you to use the scanner function at the machine. Button Manager allows you to configure six sets of scanning settings as a scan menu on the machine. To view Help for a setting, click the window and then click the setting. -
Page 54: Scanning From Your Computer
Scanning is not possible during a copy job. Scanning from a TWAIN-compliant application The SHARP scanner driver is compatible with the TWAIN standard, allowing it to be used with a variety of TWAIN-compliant applications. Place the original(s) that you wish to scan on the document glass/SPF. - Page 55 In the "Scanning Source" menu, select the location where you placed the original in Step 1. If you placed a one-sided original in the SPF, select "SPF". Click the "Preview" button. The preview image will appear. • If the angle of the image is not correct, reset the original, and click the "Preview"...
- Page 56 Scanner driver settings The scanner driver setup screen consists of the "Set-up screen", which lets you select scan settings, and the "Preview screen", which shows the scanned image. For details on the scan settings, click the "Help" button in the preview screen to display Help. Set-up screen "Scanning Source"...
- Page 57 Preview screen Preview screen Click the "Preview" button in the Set-up screen to display the scanned image. You can specify the scanning area by dragging the mouse inside the window. The inside of the frame that is created when you drag the mouse will be the scanning area.
-
Page 58: Scanning From A Wia-Compliant Application (Windows Xp/Vista/7)
Scanning from a WIA-compliant application (Windows XP/Vista/7) If you are using Windows XP/Vista/7, you can use the WIA driver to scan from WIA- compliant applications. Place the original that you wish to scan on the document glass/ SPF. For the procedure for placing the original, see "ORIGINAL PLACEMENT" (p.26). -
Page 59: Scanning From The "Scanner And Camera Wizard" (Windows Xp)
Click the "start" button, click "Control Panel", click "Printers and Other Hardware", and then click "Scanners and Cameras". Click the "SHARP MX-xxxx" icon and then click "Get pictures" in "Imaging Tasks". The "Scanner and Camera Wizard" will appear. Click the "Next" button. - Page 60 When scanning ends, the following screen will appear. Select the next task that you wish to perform, and then click the "Next" button. If you are ready to end the session, click "Nothing. I'm finished working with these pictures". Click the "Finish" button. The "Scanner and Camera Wizard"...
-
Page 61: Special Functions
SPECIAL FUNCTIONS This chapter describes the special functions of this unit. Use these functions as needed. DESCRIPTION OF SPECIAL FUNCTIONS Toner save mode Reduces toner consumption by approximately 10%. Power save modes The unit has two power save modes of operation: preheat mode and auto power shut-off mode. -
Page 62: Toner Save Mode
Check original cover/SPF open function When enabled, this function may help prevent wasteful use of toner that occurs when the original cover/SPF is not completely closed. If the start ( ) key is pressed when the original cover/SPF is not completely closed, "... -
Page 63: User Programs
USER PROGRAMS The user programs allow the parameters of certain functions to be set, changed, or cancelled as desired. Setting the user programs Press and hold down the light ( seconds until all the alarm indicators ( " " appears in the display. Use the left copy quantity ( number (For the user program numbers, see the following table.). -
Page 64: Displaying Total Number Of Copies
Program Mode Copy effective paper width setting function (Bypass tray) Copy effective paper width setting function (Tray 1) Copy effective paper width setting function (Tray 2) (Only operates when a lower paper tray is installed.) Selection of copy start state (Polygon rotation on/off) Fusing temperature setting when the... -
Page 65: Checking The Toner Level
CHECKING THE TONER LEVEL The toner level is indicated by a 6-level display. Use it as a guideline for replacing the toner cartridge. Hold down the light ( ) blink. The display will show "- -". Hold down the Copy ratio display (%) key for more than 5 seconds. -
Page 66: Maintenance
This chapter describes how to replace the toner cartridge and how to clean the unit. Be sure to use only genuine SHARP parts and supplies. TONER CARTRIDGE REPLACEMENT When the toner cartridge replacement required ( of the toner cartridge will be needed soon. Obtain a new cartridge. When the toner cartridge replacement required ( replaced before copying can be resumed. - Page 67 Gently pull the toner cartridge out while pressing the lock release button. • After removing the toner cartridge, do not shake it or tap on it. Doing so may cause toner to leak from the cartridge. Put the old cartridge immediately in the bag contained in the box of the new cartridge.
- Page 68 Close the front cover and then the side cover by pressing the round projections near the side cover open button. The indicator will go out and the start ( ) indicator will light When closing the covers, be sure to close the front cover securely and then close the side cover.
-
Page 69: Cleaning The Unit
CLEANING THE UNIT Proper care is essential in order to get clean, sharp copies. Be sure to take a few minutes to regularly clean the unit. Do not spray flammable cleaner gas. Gas from the spray may come in contact with the internal electrical components or high-temperature parts of the fusing unit, creating a risk of fire or electrical shock. -
Page 70: Transfer Charger
Transfer charger If copies start becoming streaky or blotchy, the transfer charger may be dirty. Clean the charger using the following procedure. Turn the power switch off. (p.8) Ensure that the multi-bypass tray is open and then open the side cover while pressing the side cover open button. Take the charger cleaner out by holding the tab. -
Page 71: Troubleshooting The Unit
TROUBLESHOOTING THE UNIT This chapter describes misfeed removal and troubleshooting. For problems with the printer function or the scanner function, see the Help file for the printer/scanner driver. MACHINE/COPYING PROBLEMS If any problem occurs, check the list below before contacting your authorised service representative. - Page 72 Problem Possible cause Is the paper too heavy? The fusing temperature is not appropriate. Images rub off the copy easily. Paper damp? Printing is not The fusing temperature is uniform not appropriate. between the edges of the paper and the centre.
-
Page 73: Printing And Scanning Problems
1 Click the "Start" button, click "Control Panel", and The machine does not print. 2 If the "SHARP MX-xxxx" printer driver icon is The tray size settings are not the same on the machine and in the printer driver. → Make sure that the same tray paper size is set on the machine and in the printer driver. - Page 74 Problem Simultaneous use of two or more application software programs. Printing is slow. → Start printing after quitting all unused application software programs. The paper is loaded so that printing takes place on the rear side of the paper. The printed image →...
- Page 75 Problem Any one of the See "STATUS INDICATORS" to check the meaning of alarm indicators the alarm indicator, and take appropriate action. is lit or blinking. The document glass or the underside of the document cover/SPF is dirty. → Clean regularly. Original smudged or blotchy.
- Page 76 Problem If scanning is not possible, shut down your computer, turn off the machine's power switch, and unplug the machine's power cord. Next, start your computer, restore power to the machine, and try scanning again. If scanning is still not possible, check the following items.
-
Page 77: Problems During Setup Of The Software
Manager". (For information on "Device Manager", see Help in Windows.) If the model name of the machine appears in "Other devices" in "Device Manager", delete it, restart your computer, and install the MFP driver again. Other devices SHARP MX-xxxx Page – – –... -
Page 78: Removing The Software
Click "Uninstall a program". • In Windows XP, click "Add or Remove Programs". • In Windows 2000, double-click the "Add/Remove Programs" icon. Select "SHARP AL-xxxx, MX-xxxx Series MFP Driver", Sharpdesk, and Button Manager from the list, and remove them. For more information, refer to your operating manual or to the help files for... -
Page 79: Status Indicators
When the following indicators light up or blink on the operation panel or the following alphanumeric codes appear in the display, solve the problem immediately referring to both the table below and the relevant page. Be sure to use only genuine SHARP parts and supplies. Indication Developer... -
Page 80: Misfeed Removal
Indication While pressing the start ) key, "64" is displayed. MISFEED REMOVAL When the misfeed ( ) indicator blinks or stop because of a misfeed. When the SPF misfeeds an original sheet, the unit will stop and the SPF misfeed ( will remain off. -
Page 81: A: Misfeed In The Paper Feed Area
A: Misfeed in the paper feed area Gently remove the misfed paper from the paper feed area as shown in the illustration. When the misfeed ( blinks, and the misfed paper is not seen from the paper feed area, pull out the paper tray and remove the misfed paper. If the paper cannot be removed, proceed to "B: Misfeed in the fusing area". -
Page 82: B: Misfeed In The Fusing Area
B: Misfeed in the fusing area Lower the fusing unit release lever. Gently remove the misfed paper from under the fusing unit as shown in the illustration. If the paper cannot be removed, proceed to "C: Misfeed in the transport area". -
Page 83: C: Misfeed In The Transport Area
C: Misfeed in the transport area Lower the fusing unit release lever. See "B: Misfeed in the fusing area" (p.82). Open the front cover. To open the front cover, see "INSTALLING THE TONER CARTRIDGE" in the Start Guide. Rotate the roller rotating knob in the direction of the arrow and gently remove the misfed paper from the... - Page 84 E: Misfeed in the SPF (Peripheral device) An original misfeed may occur at one of three locations: if the misfed original is seen from the document feeder tray, (A) in the document feeder tray; if the misfed original is not seen from the document feeder tray, (B) in the exit area or (C) under the document feeder cover.
-
Page 85: If A Paper Misfeed Occurs In The Main Unit While Using The Spf (Peripheral Device)
IF A PAPER MISFEED OCCURS IN THE MAIN UNIT WHILE USING THE SPF (Peripheral device) If a paper misfeed occurs in the main unit paper path when making copies with original(s) through the SPF, the SPF will automatically stop scanning. Manually remove the misfed paper(s) in the main unit. -
Page 86: Developer Required
AN AUTHORISED SHARP SERVICE TECHNICIAN. Contact your authorised service representative as soon as possible. MAINTENANCE REQUIRED When maintenance ( ) indicator lights up, service by an authorised SHARP service technician is required. Contact your authorised service representative as soon as possible. -
Page 87: Optional Equipment
A number of options are available for the machine which allows you to configure a system to meet your particular needs. The options include the following. • Be sure to use only genuine SHARP parts and supplies. • Some options may not be available in some countries and regions. -
Page 88: Interface Cable
Interface cable Please purchase the appropriate cable for your computer. USB interface cable USB cable that supports USB 2.0. - Page 89 If the product is used for business purposes and you want to discard it: Please contact your SHARP dealer who will inform you about the take-back of the product. You might be charged for the costs arising from take-back and recycling.
- Page 90 SHARP ELECTRONICS (Europe) GmbH Sonninstraße 3, D-20097 Hamburg...
- Page 91 OPERATION GUIDE...
Need help?
Do you have a question about the MX-B200 and is the answer not in the manual?
Questions and answers